Goodman Control Board Troubleshooting
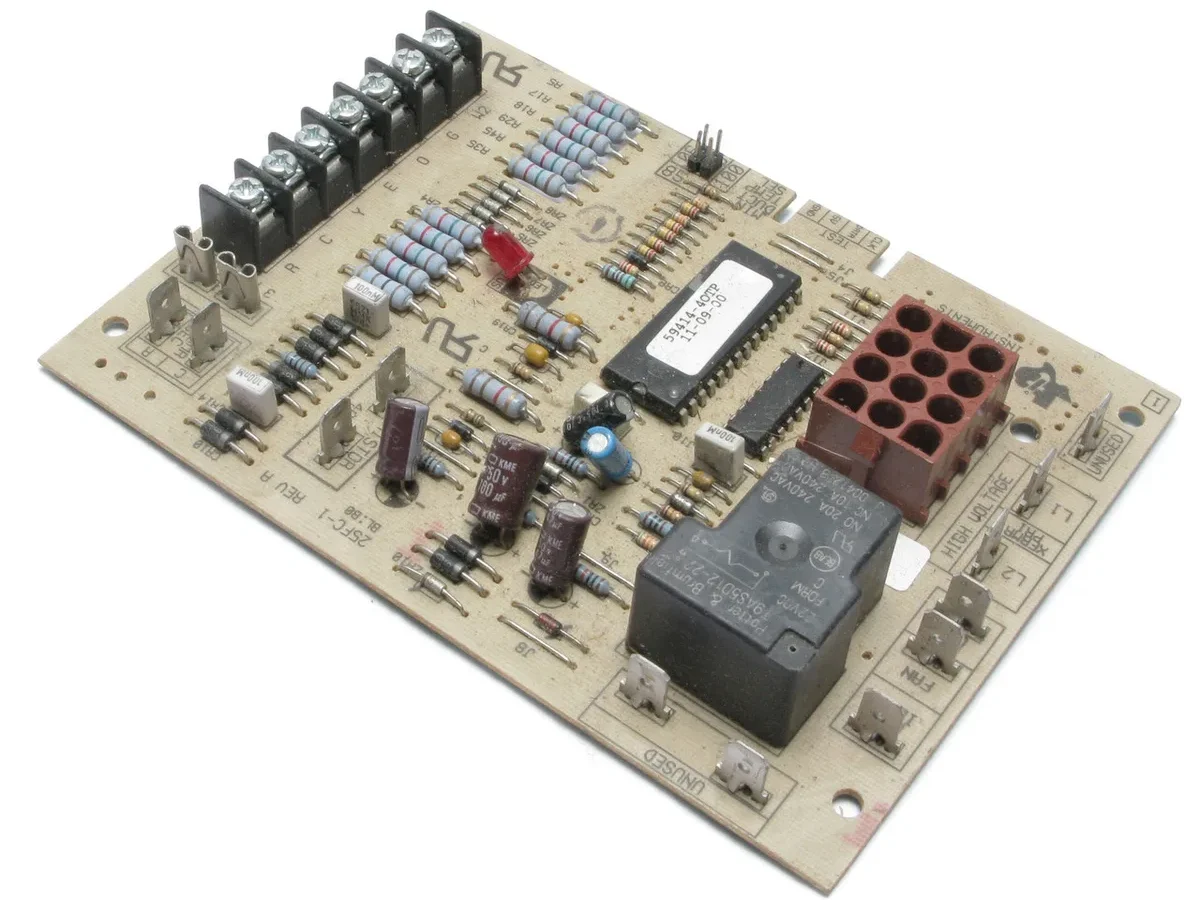
Your Goodman furnace just quit in the middle of a cold snap. You pop the access panel and see a small circuit board staring back at you with a blinking light. The natural move is to assume the board is dead and start shopping for a replacement.
But here's the thing about Goodman control board troubleshooting: the board is usually the messenger, not the culprit.
Manufacturer service data suggests that 60 to 70 percent of reported control board failures trace back to an external part like a bad transformer, a blown fuse, or a tripped safety switch. The board shuts the system down on purpose when something else goes wrong. Learn to read its signals, and you can save yourself a 150-dollar part you probably never needed.
Quick Answer
Goodman control board troubleshooting starts with the LED blink codes. Count the flashes. One flash equals an open limit switch.
Two flashes equal ignition failure. Three flashes equal a pressure switch problem. Check the fuse first, then the transformer at the R and C terminals.
The board is rarely the problem.
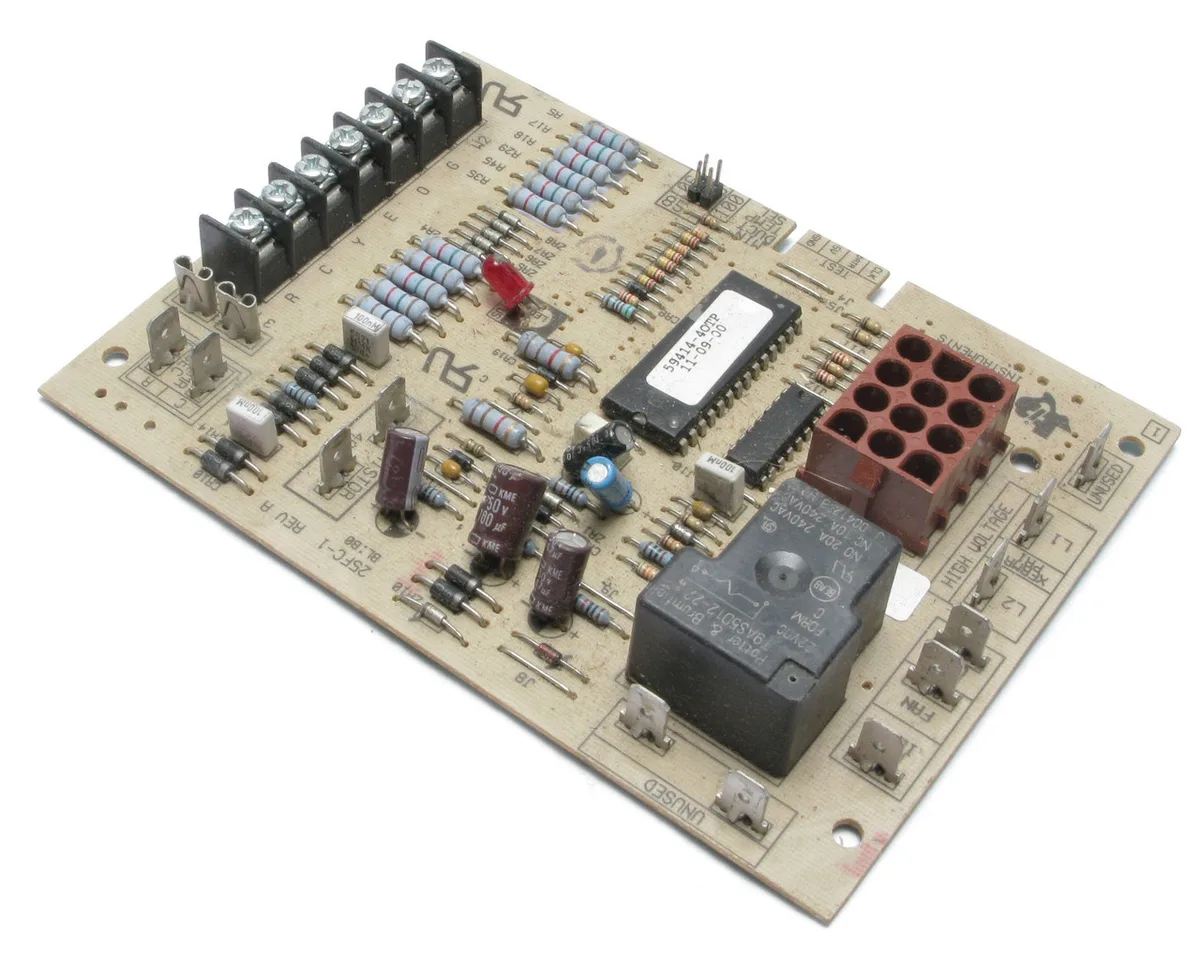
Image source: Bing (Web (fair-use with source credit))
Why Accuracy Matters When Troubleshooting a Goodman Control Board
Getting this wrong costs you real money. It also costs you time, and on a freezing night, time is the difference between a 20-minute fix and an emergency call that runs 300 dollars before parts. The control board sits at the center of every safety device, motor relay, and ignition sequence.
When you misdiagnose it, you end up chasing parts that were never broken.
The domino effect of a bad diagnosis
Say you swap in a new board because yours looks dead. You spend 100 to 180 dollars on the part, spend an hour moving wires, and fire the system back up. The exact same symptom appears.
Now you have a used board that cannot be returned, a furnace that still will not run, and no better idea what is wrong.
The actual fault was a shorted wire or a weak transformer all along. The original board detected that fault and shut down. That is its job.
The replacement board will do the exact same thing until you fix the root cause.
Why the board gets blamed unfairly
The control board is the most visible component in the system. It sits in the blower compartment with an ominous blinking light. It is also one of the most expensive single parts a homeowner might replace.
Visible and pricey is a recipe for lazy diagnosing.
Aggregate service reports from HVAC technicians tell the same story. Pressure switch failures, limit switch trips, and transformer issues are collectively several times more common than actual board failure in Goodman equipment. The board is a tattletale.
It tells you when something is wrong. You just have to figure out what that something is.
What the control board actually does
The Goodman board runs the whole sequence of operation. When the thermostat calls for heat, the board energizes the draft inducer motor. It waits for the pressure switch to confirm the vent is clear.
It opens the gas valve and powers the ignitor. It watches the flame sensor. Then it turns on the blower after a warm-up delay.
Every step depends on a signal coming back to the board. If any signal is missing, the board locks out and flashes a code. That is not a component failure.
That is the board protecting your home from a dangerous condition. Understanding that one concept clears up half of all confusion.
The 3 Most Common Control Board Problems (And What They Actually Mean)
Three symptoms show up again and again in service calls. Each one looks like a board failure at first glance. Each one has a different root cause that is usually repairable without touching the board.
Problem one: No power, no lights, completely dead
The board is dark. No LED, no click, nothing. Most homeowners assume the board is fried.
In reality, the transformer that steps 120-volt house current down to 24-volt control power has failed, or the fuse on the board is blown.
Check the fuse first. Pull it out of the board and look at the metal strip inside. If it is broken or blackened, replace it with the exact same rating.
The Goodman board typically uses a 3-amp or 5-amp automotive blade fuse. Never install a higher rating. That is how you turn a cheap fix into a fire.
If the new fuse blows immediately, you have a short somewhere in the low-voltage wiring. Look for rubbed-through thermostat wire touching metal, a shorted solenoid in the gas valve, or a bad contactor coil. Disconnect the low-voltage wires one at a time until the fuse stops blowing.
The last wire you pulled is the problem circuit.
If the fuse is good but the board is still dark, test the transformer. Set your multimeter to AC voltage and touch the probes to the R and C terminals on the board. You should read 24 to 28 volts.
Zero volts means the transformer is bad, and that is a 15-to-30-dollar part instead of a 150-dollar board.
Problem two: Board clicks but no ignition
You hear relays clicking. The draft inducer spins up. But the burner never lights, and after a few attempts the board locks out.
The board is doing its job. It is sending power where it needs to go.
Check the ignitor first. A hot surface ignitor should show 40 to 120 ohms of resistance on a multimeter. Infinite resistance means it is open and needs replacement.
If the ignitor glows but no flame appears, the gas valve is not opening. That could be a wiring issue, a dead valve solenoid, or an empty propane tank.
The sneaky one is the flame sensor. The board sends a tiny microamp current through the flame to confirm ignition. If the sensor is coated in soot or cracked, that current cannot flow.
The board sees no flame, shuts the gas valve off, and retries until lockout. The burner lights, then goes out, then tries again. Pull the flame sensor, clean it with fine emery cloth, and try again before replacing anything.
Problem three: System short cycles or runs then stops
The furnace fires up, runs for a few minutes, and shuts down. Then it starts again later. This pattern almost always points to a safety device interrupting the sequence.
The board is responding to a limit switch that is open or a pressure switch that will not close.
The high limit switch trips when the furnace overheats. That usually means a dirty filter, a closed supply vent, or a slow blower motor. Check the filter first because it is the cheapest and most common cause.
If the filter is clean, check the blower wheel for debris and confirm the motor is spinning at full speed.
The pressure switch trips when the draft inducer cannot pull enough negative pressure. That points to a blocked vent pipe, a failed inducer motor, or a cracked heat exchanger. A cracked heat exchanger is a genuine safety hazard because it can leak carbon monoxide into your living space.
If you suspect that, stop diagnosing and call a professional.
Reading the LED Blink Codes Like a Pro
Goodman uses a standardized blink code system across most of its control boards. The LED is usually red or green and sits directly on the board. Count the flashes, note the pause, and count again.
The pattern repeats until you fix the issue or reset the board.
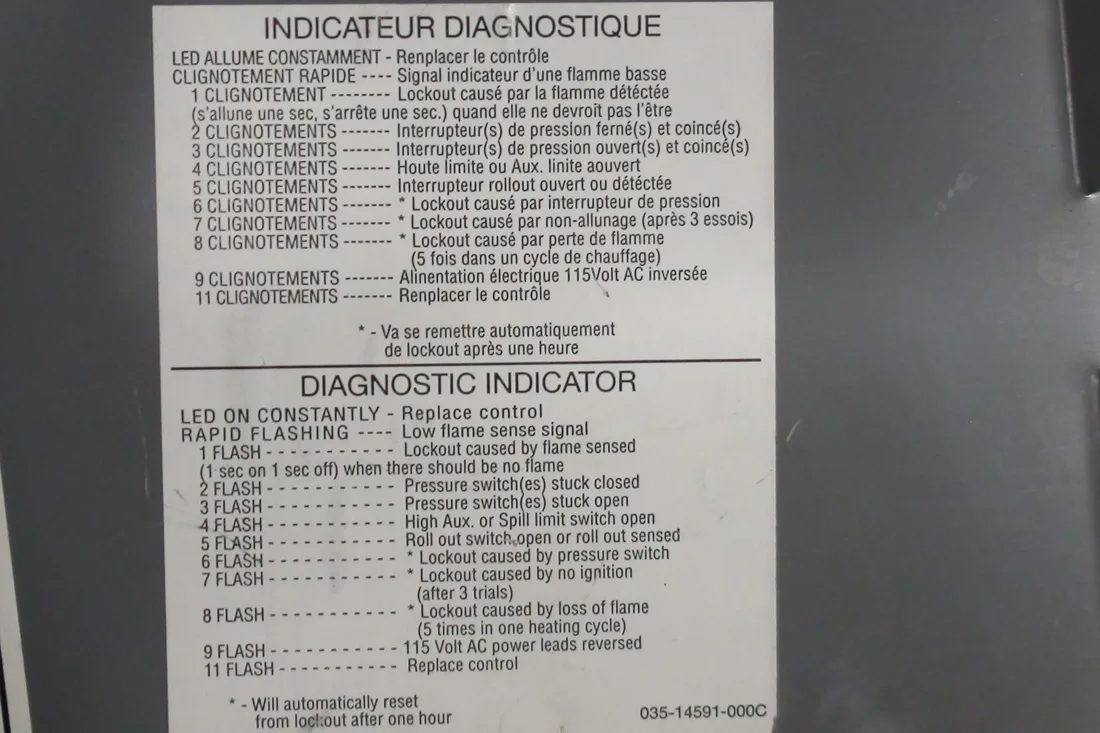
Image source: Bing (Web (fair-use with source credit))
Standard Goodman blink code reference
| Blinks | Meaning | Most Likely Fix |
|---|---|---|
| 1 | Limit switch open | Check filter, blower, closed vents |
| 2 | Ignition failure | Check ignitor, gas valve, gas supply |
| 3 | Pressure switch stuck open | Check vent pipe, inducer motor, condensate drain |
| 4 | Rollout switch open | Check heat exchanger, burner flame |
| 5 | Slow continuous flash | Normal operation, standby or call for heat |
| Rapid flash | Reversed polarity or bad ground | Verify line voltage wiring |
What the blink code does not tell you
The blink code identifies which safety device interrupted the sequence. It does not tell you why it interrupted. That is the part that takes actual diagnosis.
Take a three-blink code as an example. It means the pressure switch is open. But is it open because the vent pipe is blocked, because the inducer motor is weak, because the rubber hose is cracked, or because the switch itself failed?
You have to test each link in the chain.
Start by inspecting the hose from the pressure switch to the vent collector box. Cracks or kinks prevent the switch from sensing pressure. Then test the inducer motor.
It should spin freely and sound smooth. A noisy or slow inducer will not pull enough vacuum. Finally, test the pressure switch itself for continuity and apply suction to the hose port.
The switch should click closed.
Sometimes the code points one direction while the real problem sits elsewhere. A single flash for an open limit can be caused by undersized ductwork that does not move enough air. The limit is doing its job.
The fix is duct modification, not a new switch. A two-blink code can happen because the flame sensor is dirty even though the ignitor and gas valve work perfectly. The board sees no flame signal and assumes ignition failed.
Clean the sensor before you replace anything else.
Step-by-Step: How to Diagnose a Goodman Control Board Safely
This process assumes you have basic tools and a multimeter. If you are not comfortable around live electrical equipment, stop here and call an HVAC professional. There is no shame in that.
A 240-volt shock will ruin your day, and a wrong diagnosis costs more than a service call.
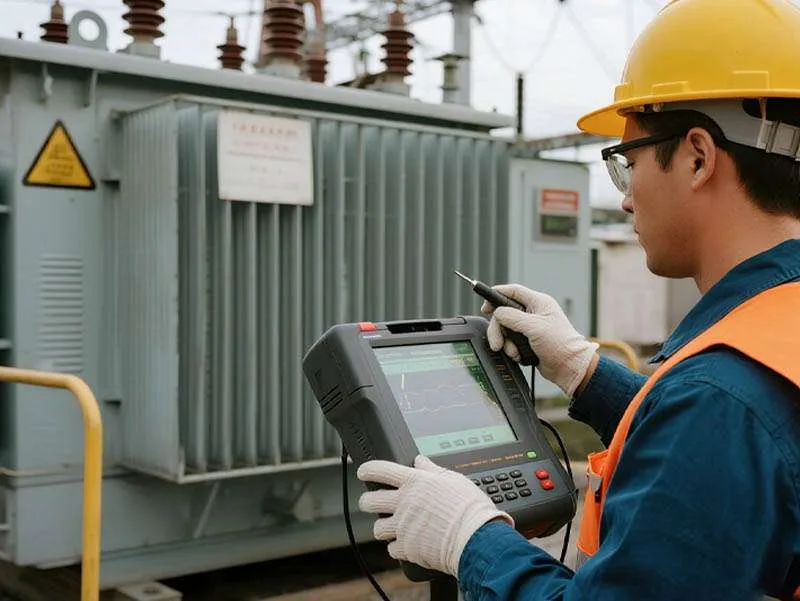
Image source: Bing (Web (fair-use with source credit))
Tools you need
- Multimeter with AC voltage and continuity modes
- 1/4-inch and 5/16-inch nut drivers
- Needle-nose pliers
- Automotive blade fuse puller
- Spare 3-amp and 5-amp fuses
- Fine emery cloth
- Smartphone for taking wiring photos
Step one: Kill the power
Turn off the disconnect switch at the unit. Flip the breaker at the main panel. Verify power is off by testing the line voltage terminals with your multimeter.
Do not skip this step. The board runs on 24 volts, but the relays and blower connections carry 120 or 240 volts.
Step two: Open the blower compartment
Remove the panel screws and set the door aside. Take a photo of the wiring with your phone before you touch anything. This saves you when a wire slips off and suddenly nothing looks familiar.
The control board is usually mounted on the blower deck or the side wall of the cabinet.
Step three: Inspect everything visually
Look at the board closely. Check for burn marks, swollen capacitors, cracked solder joints, or corrosion on the terminal strips. Obvious physical damage means the board is likely bad.
Then pull the fuse and inspect it. A blown fuse is the most common cause of a dead board.
Step four: Test the transformer
Restore power at the breaker. Keep the panel safety switch pressed in. Set your multimeter to AC voltage.
Touch the black probe to the C terminal and the red probe to the R terminal on the board. You should see 24 to 28 volts AC. If you see zero, the transformer is bad or the primary side is not receiving power.
If the voltage reads below 22 volts, the transformer is weak. Low voltage makes relays chatter and causes the board to behave erratically. Replace the transformer before you blame the board.
Step five: Read the blink code
Turn the thermostat to call for heat. Watch the LED and count the blinks. Write the pattern down.
Let it repeat so you can confirm your count. Then reference the table above to find which circuit needs investigation.
Step six: Test the safety circuit
If the code points to a limit or pressure switch, locate the switch and disconnect one wire. Set your multimeter to continuity. A cold limit switch should show a closed circuit.
If it reads open, the switch is tripped or failed. A pressure switch should show open contacts when the inducer is off and closed contacts when the inducer is running. If it stays open with the inducer running, you have a vent blockage or a weak inducer motor.
Step seven: Test the ignition circuit
If the code indicates ignition failure, watch the sequence. The inducer starts, then the ignitor should glow within 15 to 30 seconds. No glow means the ignitor is bad.
Disconnect it and check resistance. A reading above 120 ohms or infinite resistance means replacement time.
If the ignitor glows but no flame appears, the gas valve is not opening. Check for 24 volts at the gas valve terminals during the ignition trial. Voltage present but no fire means a bad valve.
No voltage means the board is not sending power, and the board itself becomes the suspect.
Step eight: Isolate the board
If every external component tests good and the board still will not run its sequence, the board is likely the problem. Disconnect everything except power and ground. A healthy board should still power up and show a steady slow blink or a lit LED.
If it stays dark, the board is dead and replacement is justified.
The 5 Mistakes That Cost Homeowners a New Board (When It Wasn't Needed)
These errors show up in service calls daily. They waste time, waste money, and occasionally create new damage. Skip all five and you will get to the real fix faster.
Mistake one: Replacing the board without checking the fuse
The board is completely dead, and the homeowner assumes the worst. They order a replacement, install it, and the new board is dead too. The fuse was blown the whole time.
A thirty-cent fuse cost them a week of waiting and a hundred and fifty dollars.
Check the fuse every time. If it blows again immediately, fix the short before installing anything new.
Mistake two: Ignoring the transformer
Low voltage makes the board behave like it is failing. Relays chatter. The LED flashes random codes.
The system starts and stops unpredictably. A weak transformer produces symptoms that look exactly like a dying board.
Always test the voltage at R and C while the system is under load. Anything below 22 volts means the transformer is the problem.
Mistake three: Replacing the board for a three-blink code
A three-blink code means the pressure switch is open. The board is telling you that the vent is blocked or the inducer is not pulling enough vacuum. Swapping the board does nothing to fix a bird nest in the vent pipe or a dying inducer motor.
Trace the actual cause before you order parts. Check the vent termination, clear the condensate drain, and verify the inducer is spinning properly.
Mistake four: Using the wrong replacement board
Goodman uses multiple control board models. The PCBBF136, PCBBF130, and B18099-37 are common, but they are not always interchangeable. The PCBBF130 uses a different connector layout than the PCBBF136.
Forcing the wrong board can damage the system and even create a fire hazard.
Always verify the model number printed on your existing board before ordering. It is usually located near the center or along one edge.
Mistake five: Not resetting the board after diagnosis
Goodman boards lock out after three failed ignition attempts. Once locked out, the board refuses to try again until you reset it. Many homeowners assume the board is dead when it is simply locked out.
Turn the thermostat off and back on. If that does not work, kill power to the system for 30 seconds, then restore it. The board resets and runs the sequence again.
A power cycle is always worth trying before you buy anything.
When to Replace vs. Repair the Board (Plus Real Costs)
The decision comes down to a simple question. Is the board actually dead, or is it responding to a fault elsewhere? Most of the time, it is the latter.
But boards do fail, especially after power surges or in systems older than a decade.
Repair path
Repairs make sense when the issue is external. A blown fuse, a weak transformer, a dirty flame sensor, or a tripped limit switch all fall into this category. Total cost for parts is usually under 50 dollars.
The repair takes under an hour if you are handy.
Repair path also includes fixing the underlying fault before it damages a fresh board. A grounded thermostat wire or a failing inducer motor will burn out a new board just as fast as the old one.
Replace path
Replacement makes sense when the board shows physical damage or when you have tested every external component and confirmed they are good. Burn marks, swollen capacitors, or a board that stays dark with good power and a good fuse all point to a failed board.
A replacement OEM Goodman board runs between 80 and 180 dollars as of 2026, depending on the model. Third-party universal boards cost 50 to 100 dollars but may require wiring changes and do not always match the original sequence of operation. OEM is the safer bet for reliability.
| Scenario | Cost Range | Best Option |
|---|---|---|
| Blown fuse | 3 to 10 dollars | Replace fuse, find the short |
| Bad transformer | 15 to 30 dollars | Replace transformer |
| Dirty flame sensor | 0 dollars | Clean with emery cloth |
| Failed ignitor | 30 to 60 dollars | Replace ignitor |
| Failed control board | 80 to 180 dollars | Replace with OEM board |
| Incorrect board installed | 50 to 180 dollars | Verify model number first |
When to call a pro
Some situations are not DIY projects. If the heat exchanger is cracked, the vent pipe is improperly sized, or the system is still under warranty, call a licensed technician. A DIY fix here can void coverage or create a carbon monoxide hazard.
Professional diagnosis runs 80 to 150 dollars for the visit, and that is cheap insurance when lives are on the line.
Goodman Control Board Compatibility: Which Model Do You Need?
Ordering the wrong board is one of the most expensive beginner mistakes. Goodman brands its boards with specific part numbers, and those numbers matter. The good news is that the model number is printed directly on the board, so you never have to guess.
Common Goodman control board models
| Part Number | Typical Application | Notes |
|---|---|---|
| PCBBF136 | Furnace with PSC blower | Most common, uses 3-amp fuse |
| PCBBF130 | Older furnace models | Different connector layout |
| B18099-37 | Air handler and heat pump | May have different time delays |
| B18099-06 | Older air handlers | Verify wiring before installing |
Finding your board model
Turn off the power and open the blower compartment. Look for a white sticker or printed label on the board itself. It will list the part number plus a revision letter.
Write that full number down, because a board from a manufacturing revision can differ from the original.
If the label is missing or burned, check the wiring diagram attached to the inside of the access panel. It often lists the correct board part number for that unit. You can also cross-reference your furnace or air handler serial number with Goodman's official documentation online.
Universal boards and why to be careful
Universal replacement boards are designed to work across multiple brands. They come with adjustable dip switches that let you change timing, blower speed, and ignition sequences. They are cheaper and more flexible.
They are also easier to misconfigure, and a wrong setting can cause the system to short cycle or overheat.
Manufacturer documentation for Goodman systems specifies particular time delays and safety sequences. You can reference the official Goodman site for your board model when verifying compatibility. If you are not confident with dip switch settings, stick with an OEM board that matches your original part number.
Safety First: What You Must Know Before Touching Anything
Working on HVAC equipment carries real risks. The board runs on low voltage, but the relays and blower connections carry line voltage that can kill you. Treat every wire as live until you prove otherwise with a multimeter.
The non-negotiable rules
- Kill the power at the disconnect and the breaker before opening the panel
- Verify zero voltage with your multimeter before touching bare terminals
- Never replace a fuse with a higher amp rating
- Never bypass a limit switch or pressure switch to make the system run
- Never work on a gas furnace if you smell gas in the area
- Call a pro if you cannot identify the cause of repeated lockouts
The code requirement
The National Electrical Code requires a service disconnect within sight of the unit. The National Fire Protection Association publishes the NEC standards that govern this installation requirement. That disconnect is your best safety tool.
Make sure it is accessible and labeled before you start any work.
Why originality matters
Use only the fuse rating printed on the control board. A larger fuse lets the board pull more current than the circuit traces can handle, which can melt components or start an electrical fire. Ohm's law is not a suggestion.
The board was designed with specific tolerances, and those tolerances exist for your safety.
If your board fails repeatedly despite following the correct sequence, stop. Repeated failures point to an intermittent short or a failing component that is hard to catch with a single test. That kind of troubleshooting may require tools and experience you do not have.
A professional with a multimeter, a wiring diagram from the manufacturer, and an understanding of the sequence of operation can isolate the problem in under an hour.
Frequently Asked Questions
Why does my Goodman control board keep blowing fuses?
A fuse blows because too much current is flowing through the low-voltage circuit. Check for grounded thermostat wire, a shorted gas valve solenoid, or a failing contactor coil. Disconnect each low-voltage wire one at a time and replace the fuse between tests.
The circuit that blows the fuse is the problem.
How do I reset my Goodman control board?
Turn the thermostat to off and kill power at the breaker for 30 seconds. Restore power and set the thermostat back to heat or cool. The board should reset and run through its normal sequence.
If it locks out again, you have an unresolved fault that needs diagnosis.
What does a flashing red light on my Goodman board mean?
A flashing red light is a diagnostic code. Count the flashes and reference the chart. One flash means an open limit switch, two flashes mean ignition failure, three flashes mean a pressure switch problem, and four flashes mean a rollout switch is open.
Slow continuous flash means normal operation.
How much does it cost to replace a Goodman control board?
An OEM Goodman control board costs between 80 and 180 dollars as of 2026. Professional installation adds 100 to 250 dollars for labor, bringing the total to 180 to 430 dollars. A universal board is cheaper, but it may require wiring changes and configuration, so OEM is usually the safer choice.
Can I replace a Goodman control board myself?
Yes, if you are comfortable working around electrical equipment and have basic tools. The job takes about an hour. You will need a multimeter to verify power is off and to test the transformer and safety switches.
Take a photo of the wiring before you disconnect anything, and install only the exact model board that matches your original part number.
Why does my furnace run for a few minutes then shut off?
That usually means a limit switch is tripping because the furnace is overheating. Check the filter, confirm all supply vents are open, and inspect the blower motor for slow speed or debris. If the limit switch is not the issue, the pressure switch circuit may be failing, which requires checking the vent pipe and inducer motor.
The Bottom Line: A Practical Decision Guide
Troubleshooting a Goodman control board comes down to reading clues instead of throwing parts at the wall. The LED blink code tells you which circuit to investigate. The fuse tells you whether the low-voltage side is healthy.
The transformer tells you whether the board is getting proper power. The safety switches tell you whether the system is operating within normal limits.
Work through this exact order. Check the fuse. Test the transformer.
Read the blink code. Test the safety circuit. Test the ignition circuit.
Only then, with every external component confirmed good, suspect the board itself.
If the board is physically damaged or fails the isolation test, replace it with an OEM board that matches your original part number. If you are unsure at any step, or if the system involves a cracked heat exchanger or a gas smell, call a licensed professional.
You save money by diagnosing accurately. You save your house by respecting the safety devices. The board is just doing its job, and once you know how to read it, Goodman control board troubleshooting becomes a straightforward process instead of a guessing game.

Similar Posts