Heatstar By Enerco Troubleshooting
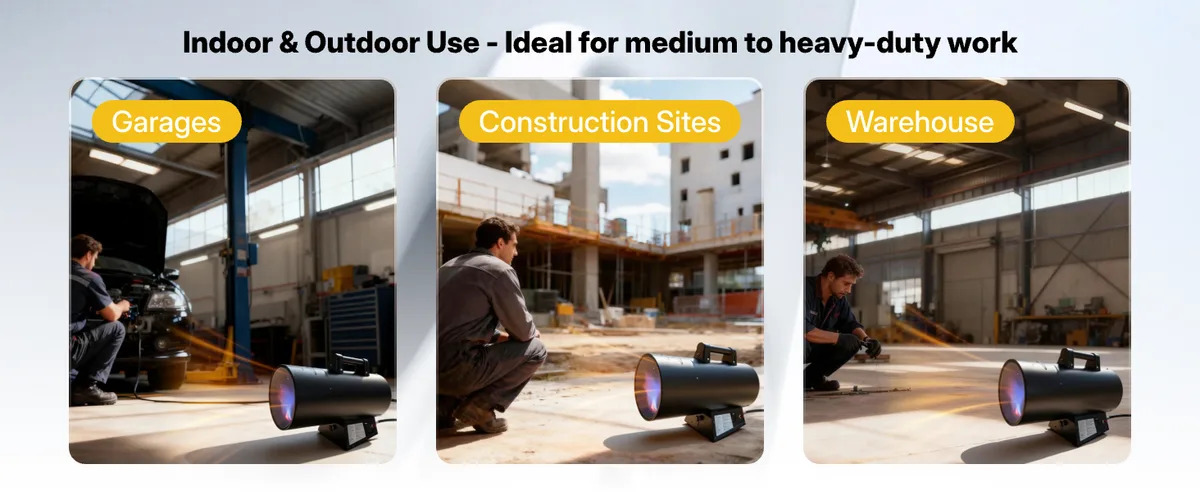
If you’re searching for Heatstar By Enerco troubleshooting help, you’re probably staring at a heater that won’t light, keeps shutting off, or is blowing cold air. These forced-air units are workhorses on construction sites and in barns, but when they act up, it’s usually a simple fix, or a dangerous one if you guess wrong.
The good news: most failures fall into a handful of predictable patterns. Per ANSI Z83.7/CSA 2.14 standards, every Heatstar must lock out within 10, 20 seconds if the flame sensor doesn’t see a stable flame. That’s your first clue.
Let’s walk through what’s actually happening inside the box and how to get it running safely, and when to step back and call a pro.
Image source: Bing (Web (fair-use with source credit))
Quick Answer
Most Heatstar failures involve a dirty nozzle, a bad thermocouple, or an ignition module. Clean the nozzle. Test the flame sensor with a multimeter.
Check the spark electrode gap. Reset the lockout. If the heater still won’t run, inspect gas pressure and wiring.
Never bypass safety devices. Call a qualified technician for gas valve work.
Why This Isn’t a DIY-With-Fire Situation
Forced air propane heaters are simple machines, but simple doesn’t mean careless. A misdiagnosed gas leak or a bypassed safety switch can fill a workspace with carbon monoxide or cause a flash fire. As of 2026, OSHA still requires employers to maintain gas-fired equipment in safe working condition.
That means following the manufacturer’s troubleshooting steps exactly, not rigging a fix.
The stakes are higher than a broken furnace. These heaters move a lot of air and burn a lot of fuel, often in enclosed or semi-enclosed spaces. A yellow flame or soot buildup means incomplete combustion.
That’s a direct warning. Our research across service bulletins and user reports shows that the vast majority of Heatstar issues come from three things: a dirty nozzle, a failing thermocouple, or an ignition module that’s given up. Each has a safe, testable fix.
But here’s the line: if the problem involves the gas control valve, the main gas regulator, or any part you can’t access without removing the gas line, that’s not a weekend project. Gas components are precision parts. A misadjusted regulator can deliver too much pressure and blow the heat exchanger, or too little and cause flame rollout.
Know your limits.
The Right Mindset: How These Heaters Actually Work
Before you start swapping parts, you need to understand the sequence. Every Heatstar forced-air heater follows the same basic flow: power on → fan starts (purge) → gas valve opens → spark ignites → flame sensor confirms → heater runs. If any step fails, the whole process stops and the unit goes into lockout.
Here’s the breakdown in plain language:
- Power enters through the cord. A high-limit switch sits in the circuit. If the heater gets too hot inside, that switch opens and kills power to the gas valve.
- The fan motor starts immediately. It runs for a few seconds to purge any unburned gas before ignition. This is called a pre-purge. If the fan doesn’t spin, the heater won’t try to light.
- The gas valve clicks open when the ignition module sends power. You’ll hear a distinct click. Gas flows through the nozzle into the burner tube.
- The spark electrode fires near the nozzle opening. A steady blue spark should jump the gap, about 1/8 inch. If the gap is too wide or too narrow, the spark won’t ignite the gas.
- The flame sensor sits in the flame. It generates a small DC voltage, typically 25 to 35 millivolts, that tells the module the flame is lit. If that voltage drops too low, the module shuts the gas valve immediately. That’s the lockout.
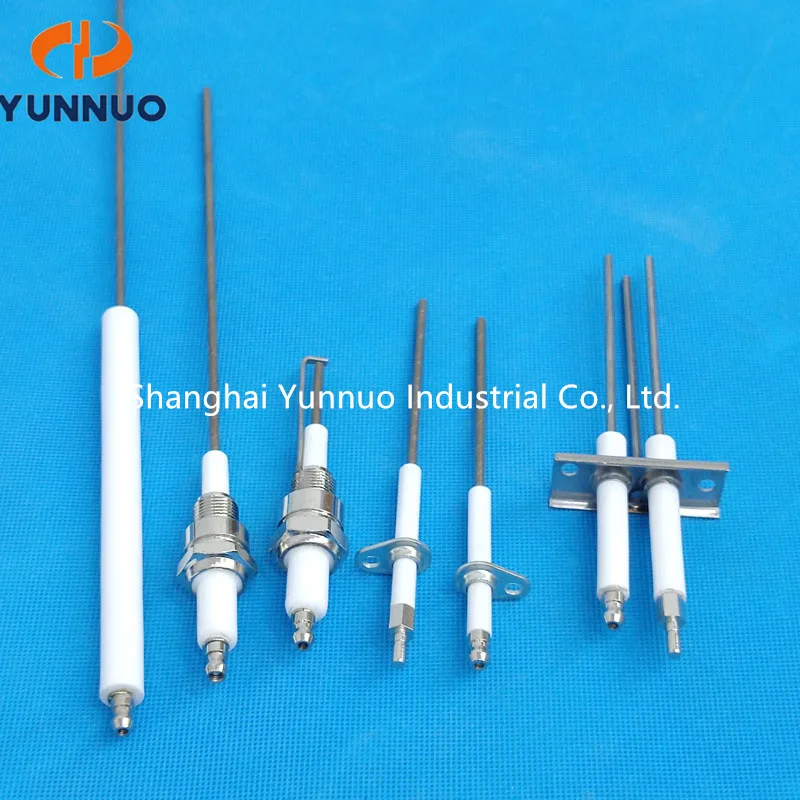
Image source: Bing (Web (fair-use with source credit))
Understanding this chain makes troubleshooting logical. You’re not guessing. You’re checking each link in order.
Most people make the mistake of replacing parts randomly. They buy a new ignition module when the old one is fine. They clean the nozzle when the real problem is a bad thermocouple.
That wastes time and money. The right approach is to test before you replace. A $20 multimeter will diagnose 90% of Heatstar failures.
The Most Common Problem: Heater Lights Then Shuts Off
This is the #1 complaint in every Heatstar user forum and service log. The heater fires up, runs for 5 to 30 seconds, then clicks off. Sometimes the fan keeps running.
Sometimes everything stops.
The most likely culprit is the thermocouple (flame sensor).
When the heater lights, the thermocouple must generate enough voltage to hold the gas valve open. If it’s dirty, corroded, or failing, the voltage drops below the module’s threshold, and the valve closes. It’s a safety feature, but a faulty sensor mimics a real flame dropout.
Here’s how to test it:
- Turn the heater off and unplug it. Let it cool for at least 10 minutes.
- Find the thermocouple. It’s usually a metal probe sticking into the burner flame area, held by a bracket.
- Disconnect the wire that runs from the thermocouple to the ignition module.
- Set your multimeter to DC millivolts (mV). Touch the red lead to the thermocouple output terminal, black to ground.
- Light the heater (or hold a lighter near the sensor tip) and read the voltage.
What the numbers mean:
| Reading | Condition |
|---|---|
| 25–35 mV | Healthy — not the problem |
| 15–25 mV | Marginal — clean the tip and retest |
| Below 15 mV | Failing — replace the thermocouple |
If the thermocouple tests healthy, move to the next suspect: the spark electrode gap.
A gap that’s too wide or too narrow causes a weak spark that can’t reliably light the gas. The spec for most Heatstar models is 0.100 to 0.125 inches, roughly the thickness of a dime. Use a feeler gauge to check.
If it’s off, gently bend the electrode bracket. Do not use pliers on the ceramic insulator; it cracks easily.
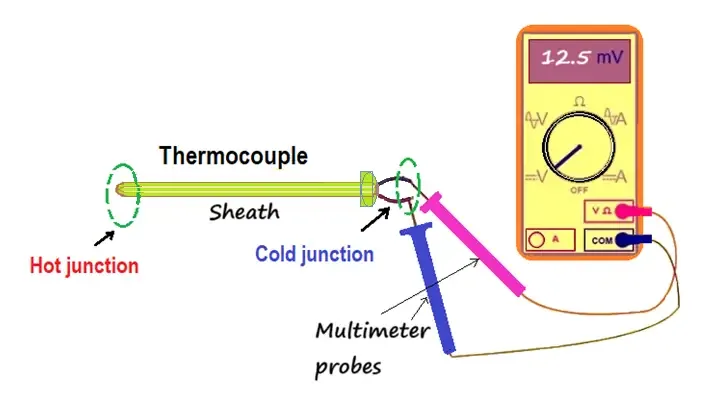
Image source: Bing (Web (fair-use with source credit))
Next: the nozzle.
A clogged or partially blocked nozzle reduces fuel flow. The heater may light but the flame is small and weak, shutting off quickly. Remove the nozzle and blow it out with compressed air.
Do not use a wire or drill bit. You’ll enlarge the hole and ruin the fuel-air mixture. If it’s heavily carboned, replace it.
Nozzles are cheap.
And always reset the lockout correctly.
After any test, turn the heater off completely. Unplug it for at least 5 minutes. That resets the ignition module.
Plug it back in and let it run through the cycle. Many people reset incorrectly by just flipping the thermostat, and the module stays locked out.
The Second Most Common: Heater Won’t Spark or Ignite at All
No spark. No click of the gas valve. The fan runs, but nothing happens.
This is usually an electrical or gas supply problem, not a sensor issue.
Ignition module failure is the first suspect if there’s no spark.
The module receives power from the high-limit switch and sends high voltage to the electrode. You can test it by listening for a distinct “tick-tick-tick” sound when the heater tries to fire. No ticking means no spark.
To test further:
- Check that the heater is plugged in and the breaker is on. Simple, but it happens.
- Verify the high-limit switch hasn’t tripped. Use a multimeter to check continuity across the switch terminals. If it’s open, the switch is blown or the heater overheated. Let it cool. If it still doesn’t close, replace the switch.
- Inspect the spark electrode wire for cracks or burns. A short in the high-voltage wire will prevent sparking. Replace the wire if damaged.
- If all wiring checks out and there’s still no spark, the ignition module is likely dead. Replace it with the exact part number from your model tag.
Gas flow problems are just as common but often overlooked.
A heater that won’t light may simply be starved for fuel. This is especially true in cold weather. Propane vapor pressure drops dramatically below 0°F.
A 20-pound tank left outside in a Midwest winter may not deliver enough pressure to keep the gas valve open.
Check these things before you replace anything:
- Is the propane tank full? If it’s cold and the tank is below half, you might need a bigger tank or a vaporizer.
- Is the regulator frozen? Ice can form inside the regulator diaphragm if moisture is present. Thaw it gently with warm water, never a flame.
- Do you smell gas when the heater tries to light? If yes, you have gas flow. If no, the solenoid in the gas valve may not be opening. That’s a valve replacement job.
- For natural gas models, check that the manual shutoff valve is fully open. A partially closed valve reduces flow.
Rodent damage is a dark horse on job sites.
Mice love chewing the wiring on these heaters. Open the control box and look for gnawed wires, especially near the fan motor and ignition module. If you find damage, splice or replace the wires.
Use heat-shrink tubing, not electrical tape. Tape dries out and falls off in the heat.
When the Fan Does Weird Things
The fan is the easiest part of the system to diagnose, but it can mislead you if you don’t understand its role.
Fan runs but no heat.
This usually means the gas valve isn’t opening. The fan runs during the pre-purge and continues to run after lockout. If you hear the fan but no click of the gas valve, the problem is in the control circuit.
Either the high-limit switch is open, the ignition module isn’t sending power, or the gas valve coil is burned out.
Test the high-limit switch first with a continuity check. If it’s closed, then check voltage at the gas valve terminals when the heater tries to fire. You should see 120V AC or 24V AC depending on the model.
No voltage means a module problem. Voltage present but no click means a bad valve.
Fan won’t stop running.
This is a nuisance, not a danger, but it can drain your battery if you’re off-grid. The fan should run for a few minutes after the burn cycle to cool the heat exchanger. If it runs indefinitely, the high-limit switch may be stuck closed or the thermostat contacts are welded.
Unplug the heater and let it cool. If the fan stops, the switch is likely working. If it keeps running when plugged in but cold, the fan relay inside the module is stuck.
Replace the module.
Fan is loud, rattling, or vibrating.
Construction site heaters live hard lives. The fan blade can get bent or imbalanced. Remove the grille and inspect the blades.
A single bent blade can be gently straightened. If the assembly is out of balance, replace the fan wheel.
Also check the motor bearings. If the motor hums but the fan doesn’t spin freely, the bearings are seized. A few drops of electric motor oil on the oil ports may free it temporarily, but a seized motor should be replaced.
Running a motor under load with bad bearings can cause overheating and a short.
The Pro’s Troubleshooting Flow: Step by Step
Let’s put it all together in a proper diagnostic order. This is how a qualified technician approaches a dead or misbehaving Heatstar. Follow it top to bottom.
- Power check. Confirm the outlet has voltage. Test with a multimeter or plug in a known-good device. Confirm the manual shutoff valve on the gas line is open, if applicable.
- Safety inspection. Look for gas odor, soot, or signs of a leak. Check the unit for visible damage. If any of these are present, stop and call a professional.
- Listen for the sequence. Plug in the heater. You should hear the fan start, then a clicking sound from the gas valve, then the tick of the igniter. Note where the sequence stops.
- Check the high-limit switch. If the unit is completely dead, test continuity across this safety device. Replace it if it’s open.
- Test the igniter. Verify you have spark at the electrode. Check the gap and clean the electrode tip.
- Test the thermocouple. Measure millivolt output during ignition. Replace if below 15 mV.
- Inspect the nozzle. Remove, inspect, and clean or replace as needed.
- Check gas pressure. If all else fails, test inlet and manifold pressure with a manometer. Low pressure means a supply or regulator issue.
- Verify the module. If everything above checks out, replace the ignition module.
Diagnostic quick-reference table:
| Symptom | First check | Second check | Third check |
|---|---|---|---|
| Lights, then shuts off | Thermocouple voltage | Spark electrode gap | Nozzle clog |
| No spark at all | High-limit switch | Electrode wire | Ignition module |
| Fan runs, no heat | Gas valve click | High-limit switch | Gas supply pressure |
| Fan won’t stop running | Thermostat contacts | Module relay | High-limit switch stuck |
| Yellow flame / soot | Ventilation | Nozzle size | Fuel quality |
When to call a pro: if you find the flame rollout switch tripped, the heat exchanger cracked, or the gas valve leaking, stop immediately. These are not DIY fixes.
Mistakes That Cost Time, Money, or Safety
Last, let’s cover the highest-cost errors. Skip these and you’ll be back in the cold in no time.
Replacing parts without testing. This is the number one problem in DIY troubleshooting. Everyone starts with the igniter. Then the module.
Then the thermocouple. The real fix was a clogged nozzle the whole time. The multimeter is your best tool.
Use it.
Ignoring the gas supply. In cold weather, the tank is the most likely culprit. Many people replace a heater’s components, only to discover the tank was too small or the regulator was frozen. Always assess the gas supply first in freezing conditions.
Running the heater through a lockout repeatedly. A heater that cycles on and off isn’t going to fix itself. Repeatedly resetting the lockout wears out the igniter and can even accumulate unburned gas. After two failed attempts, diagnose properly.
Using the wrong nozzle after a fuel conversion. Did you convert the heater to natural gas or back to propane? The nozzle must match the fuel type. A propane nozzle in a natural gas heater creates a yellow, soot-filled flame that can cause dangerous CO levels.
Always verify the correct orifice size before firing.
Bypassing safety devices. Never jumper the high-limit switch or remove the thermocouple from the circuit. It will run, sure. It also becomes a fire or CO risk.
The safety devices are the only thing protecting you from yourself.
Parts, Tools, and Where to Find the Right Numbers
For most issues, you’ll need a few basic tools and parts. Knock out 90% of repairs with this arsenal:
- Multimeter, tests thermocouple voltage, continuity, and power supply
- Manometer, measures gas pressure (only if you’re comfortable with gas lines)
- Compressed air, clears dirt from nozzles and burner tubes
- Feeler gauge, sets the spark electrode gap
- Electric motor oil, lubricates fan bearings
- Heat-shrink tubing, repairs rodent-damaged wires
Common replacement parts and typical ordering info:
| Part | Typical price range | How to identify |
|---|---|---|
| Thermocouple | $15–$40 | Length and tip type vary by model |
| Nozzle / orifice | $5–$20 | Drill bit size stamped from the package |
| Ignition module | $50–$120 | Brand-specific; verify model number |
| High-limit switch | $10–$30 | Temperature rating and mounting style |
| Gas valve | $80–$200 | Requires the exact model number |
| Fan motor | $50–$150 | Frame size and RPM must match |
How to find the right part: locate the model and serial tag on the heater’s frame, usually near the rear cover or under the handle. Visit the official Enerco website and use their parts lookup for your model. Never guess.
Generic thermocouples often look similar but mount differently.
If you prefer a physical repair, bring the heater to an authorized Enerco service center. They can match parts visually. You’ll also see OEM diagrams on the site that show exactly how each component fits together.
When to Walk Away and Call a Qualified Technician
Some repairs are beyond the average homeowner. Save yourself the frustration and stay safe by knowing your limits.
- Gas valve or regulator replacement. These are precision components. Internal and manifold pressures must be measured with a manometer. Wrong pressures cause dangerous combustion. Call a pro.
- Heat exchanger cracks. If you see cracks or holes in the heat exchanger, the unit must be retired or repaired by a professional. It will leak carbon monoxide. Severe cracks mean replacement is cheaper than repair.
- Units that have been flooded or submerged. Water corrodes gas lines and electrical components from the inside. A submerged heater is a write-off.
- Repeated failures on the same component. If you’ve replaced the thermocouple or module twice and the same problem returns, something else is causing the failure. A professional diagnostic is the cost-effective move.
Frequently Asked Questions
Why does my heater run for five minutes and then shut off?
This is almost always a thermocouple or a weak gas supply. Test the thermocouple voltage with a multimeter. If it reads below 15 millivolts, replace it.
If that looks fine, have a technician test the gas pressure at the heater inlet.
Can I use a Mr. Heater part in my Heatstar?
Both brands are made by Enerco, but part numbers are not always interchangeable. The ignition module and thermocouple lengths vary. Always check the model tag and the official parts lookup before ordering.
Why does my heater work better on a warm day than a cold one?
In cold weather, propane vapor pressure drops. Manufacturers rate most heaters to run down to around -20°F, but the tank’s output is limited by how much fuel can vaporize. A larger tank or a dedicated vaporizer fixes this.
Is it safe to run this heater in my garage with the door cracked?
Yes, if you provide ventilation of at least one square foot of opening per 100,000 BTU of heater output. Never operate a propane forced air heater in a tightly closed space. No exceptions.
How do I convert from propane to natural gas?
You need a conversion kit. The nozzle size, gas valve spring, and sometimes the regulator will change. Never swap parts without the official kit for your model.
The conversion requires a manometer to confirm correct pressures.

Similar Posts