How to Change DSLR Camera Settings
Learning how to change DSLR camera settings is the single biggest leap a photographer makes. You're facing a mode dial, command wheels, and a menu system that can feel like a maze. The underlying logic is the same across every model.
Per CIPA testing standards, the exposure triangle of aperture, shutter speed, and ISO is universal. As of 2026, even entry-level bodies share the same core controls. Let's start with the part that trips most people up.
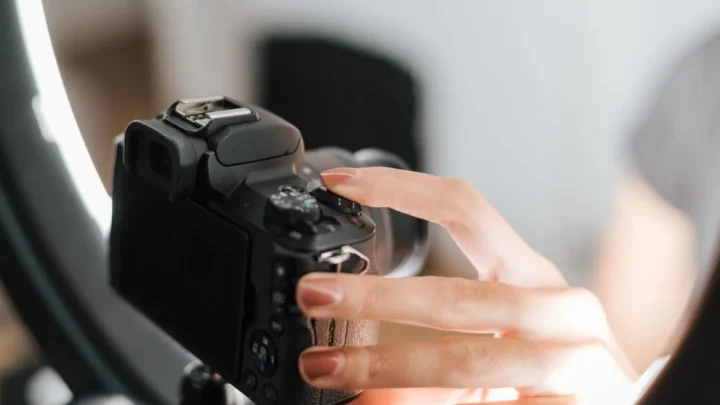
Image source: Bing (Web (fair-use with source credit))
Why Your DSLR's Button Layout Is the Real Challenge
The biggest frustration isn't understanding exposure. It's finding the right button when you need it. DSLR layouts vary between brands.
A Canon body uses a top-plate LCD and a quick control dial. A Nikon body uses a left-side dial and a sub-command dial. A Sony DSLT splits controls across the body.
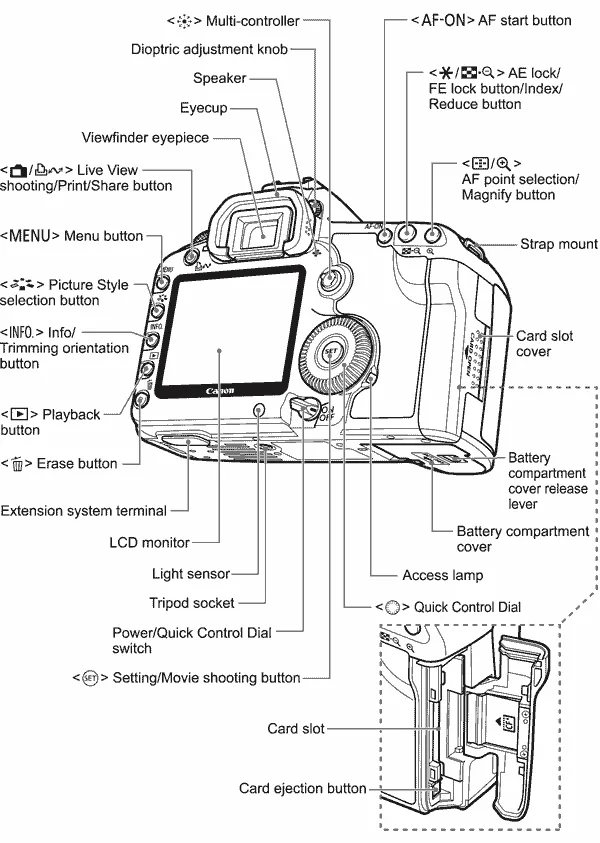
Image source: Web (Bing) / ar.inspiredpencil.com (Web image (fair-use with source credit))
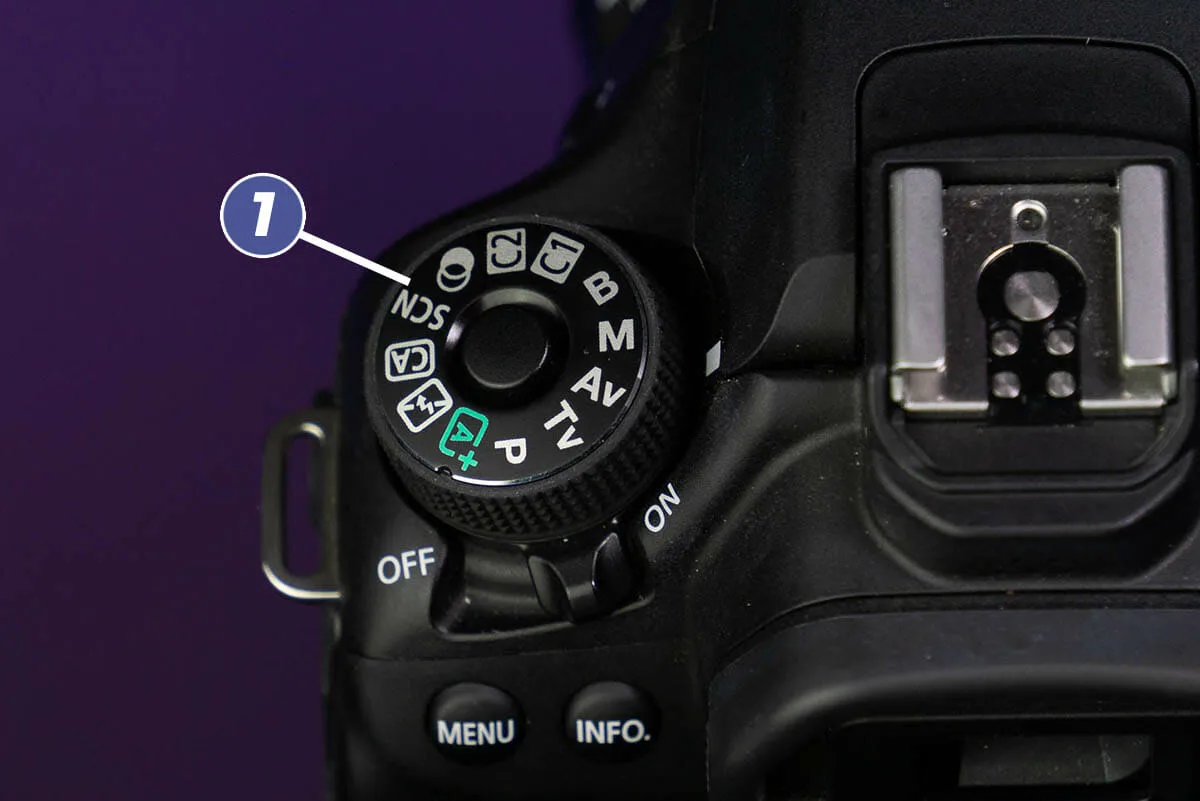
A labelled diagram shows the real-world placement. The mode dial is almost always on the top left. The main command dial sits behind the shutter button.
The ISO button is usually on top, marked with a small icon. The D-pad or joystick lives on the back right, controlling focus point selection.
Memorise the location of just four controls: mode dial, main dial, ISO button, and exposure compensation. Once you know where they sit, every other setting follows the same logic.
How to Change Your Core Settings Step by Step
This sequence assumes you're in Manual (M) mode for full control.
- Set your mode dial to M (or Av/Tv for priority modes).
- Adjust aperture with the main command dial behind the shutter. Turn right for a smaller f-number (wider aperture) and left for a larger f-number.
- Adjust shutter speed with the sub-command dial on the front or back, depending on your model.
- Change ISO by pressing the dedicated ISO button (or entering the quick menu) and rotating the main dial.
- Set white balance via the dedicated WB button or the menu. Use presets like Daylight, Cloudy, or Tungsten.
- Select AF mode using a dedicated button on the front or side and the dial. Choose Single, Continuous, or Manual.
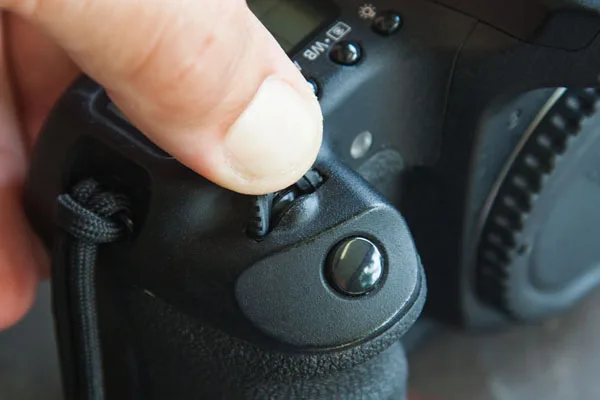
Image source: Bing (Web (fair-use with source credit))
For a dimly lit interior, open the aperture wide, slow the shutter, and raise the ISO. For fast-moving subjects, prioritise a fast shutter speed. Composing landscape scenes calls for a narrow aperture and low ISO.
Candid street photography benefits from a faster shutter and zone focusing. Fast-moving subjects like birds in flight need a high shutter speed and continuous autofocus.
The Most Common Visual Mistakes (and How to Spot Them)
Even experienced photographers make these errors. They're easy to fix once you know what to look for.
Accidentally changing settings with your nose. When using the viewfinder, your nose can press the AF button or D-pad, shifting the focus point. Check the LCD screen. If the focus point has moved to the edge, that's your nose.
Missing the exposure compensation dial. On many models, exposure compensation is a separate dial that can rotate in your bag. Your shots come out consistently too bright or too dark. Watch for the exposure scale in the viewfinder.
The wrong metering mode. Spot metering in a scene with high contrast can blow out highlights. Check the metering icon in the viewfinder. Switch to evaluative or matrix for general use.
Blown highlights from Auto ISO. In bright conditions, Auto ISO can set your ISO too high, clipping the highlights. Review the histogram after each shot. If the right side touches the edge, drop your ISO.
Quick Settings Reference for Everyday Shooting
| Scenario | Aperture | Shutter Speed | ISO | White Balance |
|---|---|---|---|---|
| Landscape (tripod) | f/8–f/11 | 1/30–1s | 100–200 | Daylight |
| Portrait (outdoors) | f/2.8–f/4 | 1/125–1/250 | 100–400 | Daylight |
| Street (daylight) | f/5.6–f/8 | 1/250–1/500 | 200–800 | Auto |
| Sports / action | f/4–f/5.6 | 1/500–1/2000 | 400–1600 | Daylight |
| Low light (indoor) | f/1.8–f/2.8 | 1/30–1/125 | 800–3200 | Tungsten |
| Night (tripod) | f/8–f/11 | 1–30s | 100–200 | Tungsten or Kelvin |
These are starting points. Adjust based on your specific light conditions and creative intent. For action sequences, a body with fast burst shooting helps.
When shooting after dark, a camera with strong high-ISO performance is worth considering.
Frequently Asked Questions
How do I reset my DSLR camera to factory settings?
Most DSLRs have a menu option under Setup or Tools labelled "Reset all settings" or "Clear settings". You can also remove the battery and memory card, then hold down the Menu button while powering on. Check your manual for the exact sequence.
Why does my DSLR keep changing settings on its own?
You're likely brushing against the control dial or exposure compensation dial with your nose or bag. Lock the dials if your model supports it. Most cameras have a "Lock" switch on the mode dial or a custom function to disable the main dial.
What's the difference between Aperture Priority and Shutter Priority?
Aperture Priority (Av/A) lets you set the aperture while the camera chooses the shutter speed. Shutter Priority (Tv/S) lets you set the shutter speed while the camera chooses the aperture. Use Aperture Priority for depth of field control.
Use Shutter Priority for motion control.
What is the exposure triangle?
The exposure triangle describes the relationship between aperture, shutter speed, and ISO. Each setting affects exposure and image quality. A wider aperture lets in more light but reduces depth of field.
A faster shutter freezes motion but requires more light. A higher ISO boosts brightness but adds noise.
How do I change the focus point on my DSLR?
Use the D-pad, joystick, or multi-selector on the back of the camera. In single-point AF mode, pressing the directional buttons moves the active focus point. Your viewfinder will show the selected point highlighted.
Press the center button to reset to the center point.

Similar Posts