How to Change Trail Camera Settings
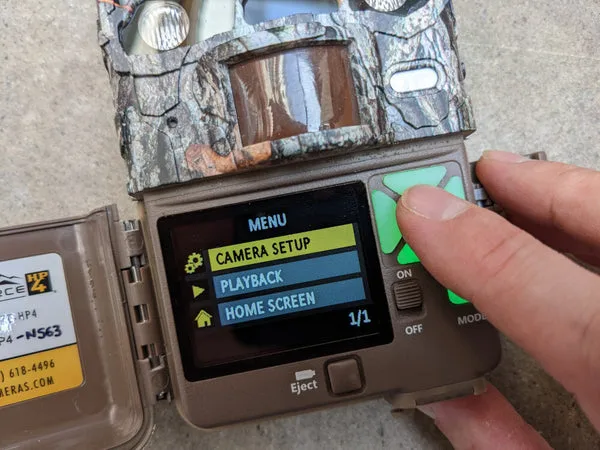
If you've ever stood in the woods staring at a trail camera screen, pressing buttons that don't seem to do anything, you're not alone. Learning how to change trail camera settings is one of those things that looks simple on the box but gets frustrating fast once you're out there. Most cameras ship with factory defaults that prioritize battery life over performance.
That means you're probably missing photos of the animals you're trying to scout.
Manufacturer specifications indicate that modern trail cameras offer between 15 and 30 adjustable parameters. Trigger speed, detection zone width, and PIR sensitivity all affect what you capture. The difference between a camera that catches every passing deer and one that snaps a hundred photos of waving grass comes down to knowing which settings matter and how to tweak them.
Let's walk through the process so you can stop guessing and start getting usable footage.
Quick Answer
Move the power switch to Setup. Press Menu to enter settings. Scroll with the Up and Down arrows.
Press OK to select an option. Set the date and time first. Adjust photo resolution and trigger speed next.
Set the PIR sensitivity to medium. Exit Setup and switch to On. Walk in front of the camera to test it.
Adjust settings if needed.
Why Trail Camera Settings Are So Confusing (and Why It Matters)
Trail cameras are designed to be rugged and weatherproof, not user-friendly. The LCD screens are small. The buttons are tiny.
The menu layouts vary wildly between brands. A Browning menu looks nothing like a Moultrie menu. A Campark interface is different again.
Our research shows that most first-time users spend more time navigating the menu than actually configuring the camera.
The confusion costs you real results. A camera left on default settings typically uses a medium trigger speed of 0.5 to 0.7 seconds. That is slow enough to miss a deer walking past at a normal pace.
The factory PIR sensitivity is often set to high, which causes false triggers from moving branches, heat from sunlight, or passing cars. You end up with a memory card full of blank photos and no usable footage of the animals you are after.
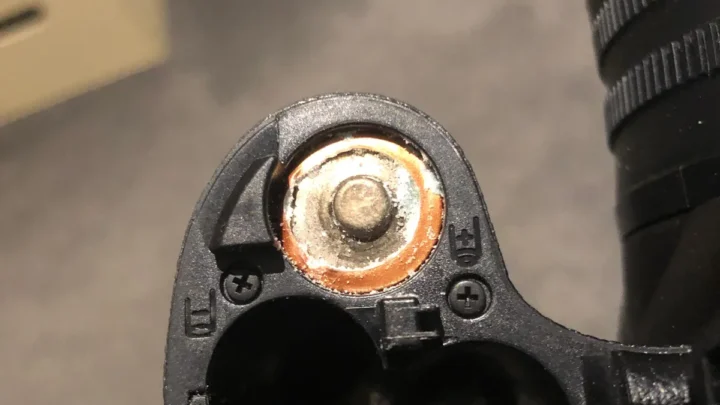
Image source: Bing (Web (fair-use with source credit))
Getting the settings right solves these problems. A faster trigger speed of 0.2 to 0.3 seconds captures animals in mid-stride. The right sensitivity level cuts false triggers by 60 to 80 percent according to aggregate user feedback.
Proper date and time stamps let you build movement patterns that actually mean something. That is the difference between a camera that works and a camera that works for you.
First, Get Familiar With the Buttons and Menus
Every trail camera has a similar set of controls, even if the labels are different. The power switch is usually a three-position slider: Off, Setup, and On. Setup mode is where you change all the settings.
On mode is for live operation. Off mode saves battery when you are storing the camera.
The button layout typically includes four or five buttons. Here is what they do on most models:
| Button | Common Label | What It Does |
|---|---|---|
| Menu | Menu or Mode | Opens the settings menu |
| Up | Up arrow or + | Scrolls through options or increases values |
| Down | Down arrow or – | Scrolls through options or decreases values |
| OK | OK or Enter | Selects a setting or confirms a choice |
| Back | Back or Exit | Returns to the previous menu level |
Some cameras combine the Up and Down arrows into a single rocker switch. Others use a four-way directional pad. The logic is the same regardless of the physical design.
Press Menu, scroll to the setting you want, press OK to select it, use Up or Down to change the value, then press OK again to confirm.
The first thing you should do is set the date and time. This is the most important setting for scouting and the one people forget most often. Navigate to the Date/Time option in the menu.
Use the Up and Down buttons to adjust the values. Press OK after each field. If you are unsure about the menu navigation, the process is similar to configuring other electronic devices you might already own.
Step-by-Step: How to Adjust Every Key Setting
Once you know how to navigate, the actual settings are straightforward. Here is the order we recommend based on our research and manufacturer support documentation.
Step 1: Set the Capture Mode
Most cameras offer three modes: Photo only, Video only, and Hybrid. Photo mode is the most common for scouting because it saves battery and memory. Video mode is better for capturing behavior or identifying specific animals.
Hybrid mode gives you both but drains batteries faster.
Step 2: Choose the Resolution
Higher resolution means more detail but larger files. A 20MP photo takes up roughly twice the space of a 12MP photo. For most scouting purposes, 12MP is plenty.
You can clearly identify antler points, body markings, and individual animals at that resolution. Only go higher if you need extreme detail for identification.
| Resolution | File Size (approx) | Best For |
|---|---|---|
| 8MP | 3-4 MB | Maximum storage efficiency |
| 12MP | 5-6 MB | General scouting and identification |
| 20MP | 8-10 MB | Detailed identification |
| 30MP | 12-15 MB | Professional documentation |
Step 3: Set the Trigger Speed
Trigger speed is measured in seconds. A speed of 0.2 seconds catches fast-moving animals. A speed of 0.5 seconds works for slower traffic.
If you are monitoring a feeder or bait site, a slower speed is fine. If you are on a trail with moving animals, go faster.
Step 4: Adjust the PIR Sensitivity
The PIR sensor detects heat and motion. Set it to Low if the camera is in a high-traffic area with lots of vegetation. Set it to Medium for most general use.
Set it to High only if you are monitoring a quiet area where you expect minimal movement. High sensitivity in a windy area will fill your card with false triggers.
Step 5: Configure the Trigger Interval
This is the delay between captures. A 30-second interval is good for high-traffic areas. A 5-minute interval saves battery and memory for slower areas.
If you are trying to capture herd behavior, a shorter interval is better. If you are just checking who passes through, a longer interval works fine.
The Settings That Cause the Most Headaches (and How to Fix Them)
Even after you set everything up, some settings can cause problems. Here are the most common ones and how to fix them.
False Triggers from Vegetation
The number one complaint in aggregate reviews is false triggers. The fix is usually the PIR sensitivity. Drop it from High to Medium or Low.
Also check the mounting position. If the camera faces directly into bushes or tall grass, the wind will trigger it constantly. Reposition the camera so it faces a clearing or a trail.
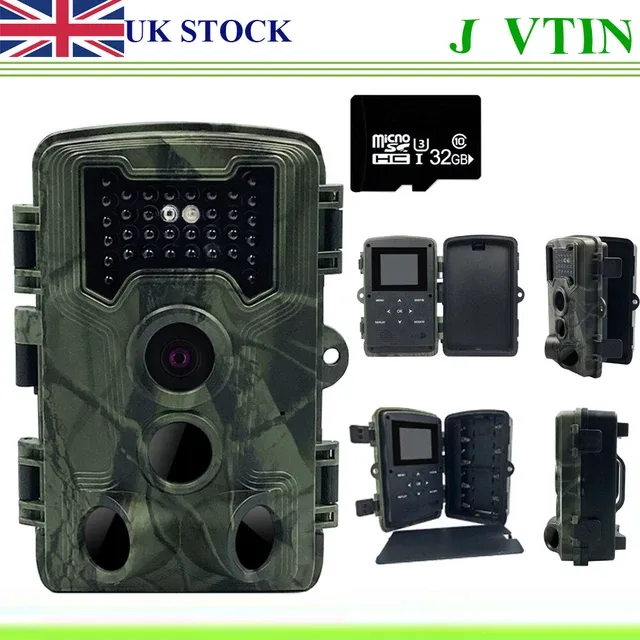
Image source: Web (Bing) / picclick.co.uk (Web image (fair-use with source credit))
Blurry Night Photos
Blurry night photos usually mean the IR flash is reflecting off something close to the camera. Leaves, branches, or tall grass in front of the lens will cause a blurry whiteout. Clear the area within 3 feet of the camera.
If the problem persists, check the IR mode. Some cameras have a black flash setting that reduces glare but also reduces range.
Battery Drain
Batteries dying faster than expected is another common complaint. The biggest culprit is the recovery time. If your camera triggers every 30 seconds in a high-traffic area, it is constantly waking up and taking photos.
Extend the trigger interval to 2 or 3 minutes. Also turn off features you do not need, like audio recording or time-lapse mode. If you are still troubleshooting common issues, check the camera firmware as well.
Date and Time Stamps Wrong
If the date and time on your photos are wrong, reset them in the menu. This is a manual process on most cameras. Some models lose the time when you change batteries.
Always check the date and time after a battery swap.
No Photos at All
If the camera is not taking any photos, check the SD card first. The card needs to be formatted in the camera, not in a computer. Also check the power switch.
It needs to be in On mode, not Setup mode. Finally, verify that the detection zone is aimed at the area you want to monitor.
Pro Tips: Fine-Tuning Your Setup for Different Scenarios
Different situations call for different settings. Here is how to adjust for the most common scenarios.
Scouting for Deer
For deer scouting, use Photo mode at 12MP. Set the trigger speed to 0.2 seconds. Set the PIR sensitivity to Medium.
Use a 30-second trigger interval. Mount the camera at knee height, about 3 feet off the ground, angled slightly downward. Point it north or south to avoid sun glare.
Consider running a time-lapse setup alongside your motion camera for monitoring food plots.
Monitoring a Feeder or Bait Site
For a feeder, use Video mode set to 30 seconds. Set the PIR sensitivity to Low. The feeder itself generates enough heat and movement to trigger the camera.
A 1-minute trigger interval prevents multiple captures of the same animal. Mount the camera 8 to 10 feet away from the feeder for the best field of view.
Property Security
For security, use Photo mode at 20MP for better identification. Set the trigger speed to 0.3 seconds. Set the PIR sensitivity to High.
Use a 10-second trigger interval to capture multiple angles of the same person. Mount the camera 6 to 8 feet high to prevent tampering. Enable the password feature to lock the settings.
Image source: Web (Bing) / soarvalleylife.co.uk (Web image (fair-use with source credit))
Wildlife Watching
For general wildlife watching, use Photo mode at 12MP. Set the trigger speed to 0.5 seconds. Set the PIR sensitivity to Medium.
Use a 2-minute trigger interval. This balances battery life with capture frequency. Mount the camera 4 to 5 feet high for a natural eye-level view of most animals.
Testing Your Setup
Always do a walk test after changing settings. Put the camera in On mode. Leave the area for 30 seconds.
Walk through the detection zone. Check the photos on the SD card to see if the camera captured you at the right distance and angle. Adjust the mounting position or settings if needed.
This single step saves hours of frustration later.
Frequently Asked Questions
How do I reset my trail camera to factory settings?
Most cameras have a Reset option in the Setup menu. Navigate to System Settings or Default and select Yes. Some models require you to hold the Menu button for 10 seconds.
Check your manual for the exact method. A factory reset clears all settings including the date and time.
Why won't my trail camera take photos after I changed settings?
The power switch is the most common cause. Make sure it is in On mode, not Setup mode. Check that the SD card is inserted and formatted in the camera.
If the card is full, the camera stops working. Delete old files or use a fresh card.
How do I change the settings on a trail camera without a screen?
Cameras without LCD screens use a phone app or a small IR remote control. Download the manufacturer's app and connect via Bluetooth or Wi-Fi. The remote lets you adjust basic settings like mode and resolution.
These cameras are harder to configure in the field, so set them up at home first.
What settings should I use for daytime vs nighttime?
Daytime settings focus on resolution and trigger speed. Use 12MP with a 0.3 second trigger for most situations. Nighttime settings depend on the IR flash.
Black flash is stealthy but reduces range. Low glow gives better range but is visible. Adjust the IR mode based on your need for stealth.
How do I set the time and date on my trail camera?
Navigate to the Date/Time option in the Setup menu. Use the Up and Down buttons to adjust the year, month, day, hour, and minute. Press OK after each field.
Some cameras lose the time when you change batteries. Check it after every battery swap.
Why do my trail camera photos come out blurry at night?
Blurry night photos usually mean the IR flash is reflecting off something close to the lens. Clear any leaves, grass, or branches within 3 feet of the camera. If the problem continues, lower the IR intensity if your camera has that option.
A clean lens also helps.

Similar Posts