How to Use a DSLR Camera
Learning how to use a DSLR camera feels overwhelming at first. You've got dials, buttons, and menu options that don't make sense. But here's the truth: the basics are simpler than you think.
Once you understand where to look and what to press, the rest clicks into place.
Per CIPA testing standards, a typical DSLR battery lasts around 800 shots per charge. That's more than enough for a full day of learning. Let's get you shooting with confidence.
Image source: Bing (Web (fair-use with source credit))
Quick Answer
Set your mode dial to P (Program). This lets the camera choose aperture and shutter speed automatically. Hold the camera with both hands.
Look through the optical viewfinder. Half-press to focus. Press fully to shoot.
Why You Need to See What You're Doing
The optical viewfinder is your main tool. It shows you exactly what the lens sees with zero lag. That's a big deal.
The LCD screen on the back has a delay. It also drains your battery fast.
Looking through the viewfinder helps you stabilize the camera. Press it against your face. Tuck your elbows in.
This gives you sharper shots, especially at slower shutter speeds.
For capturing birds in flight, you can't beat the viewfinder. It keeps you connected to the scene. No screen glare.
No blackout lag. Just you and the shot.
Before You Shoot: The Quick Setup Checklist
Here's what you need to do before you start shooting. It takes about 30 seconds.
Charge the battery and format the memory card. A full charge gives you around 800 shots per CIPA standards. Formatting the card in the camera prevents file errors.
Attach the lens properly. Line up the white dot on the lens with the dot on the camera body. Twist until you hear a click. Never force it.
Choosing the right glass matters for serious landscape work.
Set the camera strap. Loop it through the strap mounts. Put it around your neck or wrap it around your wrist. This saves your gear if you lose your grip.
Remove the lens cap. It sounds obvious. It's the most common rookie mistake.
The Core Controls (and What They Look Like)
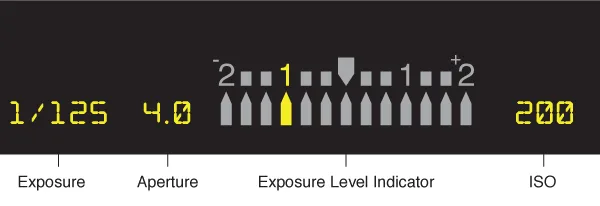
Image source: Web (Bing) / photography.tutsplus.com (Web image (fair-use with source credit))
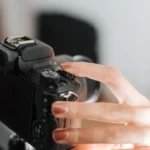
Let's look at the main controls. You don't need to memorize every button. Start with these five.
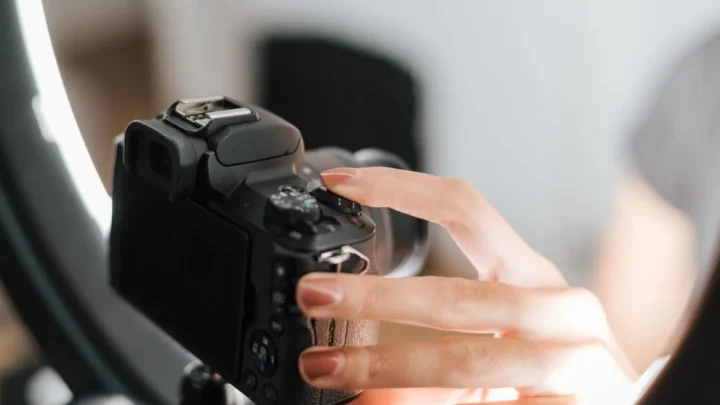
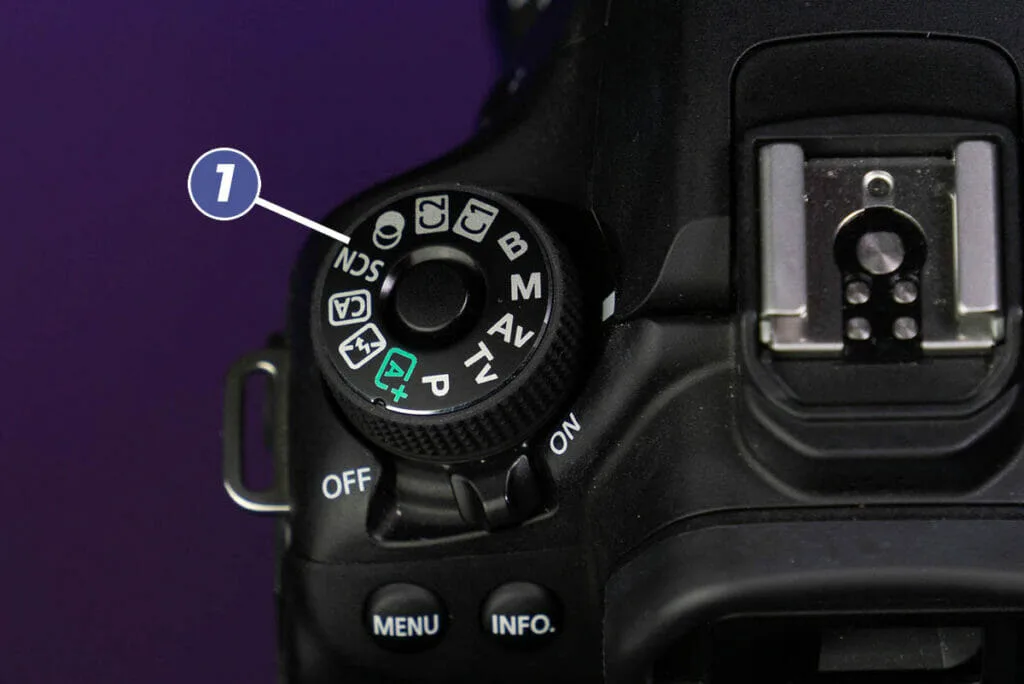
The mode dial. It's on top of the camera. The symbols mean: Auto, P (program), Av or A (aperture priority), Tv or S (shutter priority), M (manual), and B (bulb). Start with P.
The shutter button. It has two stages. Half-press to focus. Full press to take the photo.
Practice this until it feels natural.
The main dial and quick control dial. These change your settings. In Av mode, the main dial controls aperture. In Tv mode, it controls shutter speed.
The rear dial adjusts exposure compensation.
The lens controls. The zoom ring changes focal length. The focus ring lets you manual focus. The AF/MF switch toggles between autofocus and manual.
The viewfinder display. Those numbers and bars show your shutter speed, aperture, ISO, and exposure meter. The exposure meter is critical. It shows if your photo is too bright or too dark.
Aim for the center.
For shooting in dim conditions, you'll rely heavily on reading that meter. It tells you when you're pushing the limits of your gear.
Common Beginner Mistakes (and How to Spot Them)
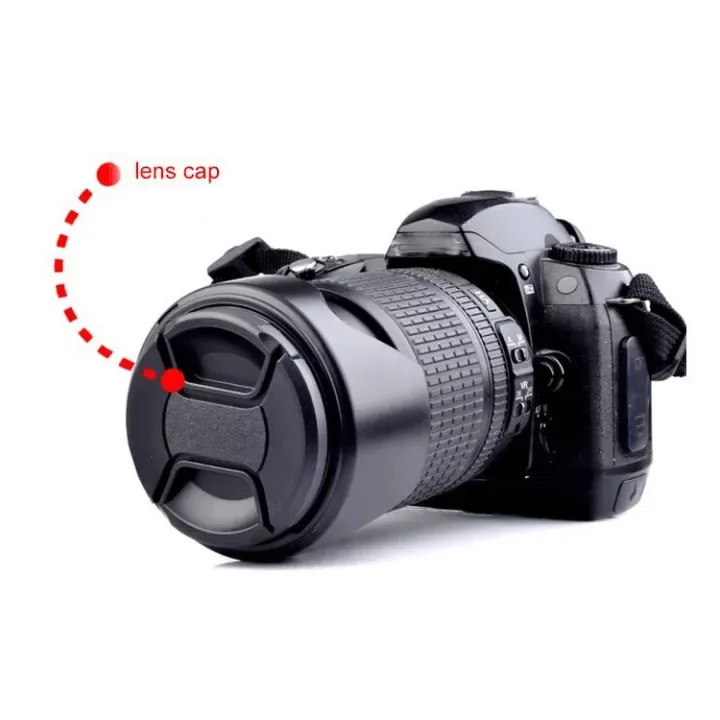
Image source: Web (Bing) / pixstore.com.bd (Web image (fair-use with source credit))
Everyone makes mistakes. Here's what to watch for.
Lens cap on. If your viewfinder is black, check the cap. It happens to everyone at least once.
Auto mode surprise. The flash pops up when the camera thinks you need light. You can't control depth of field or motion blur. Switch to P or Av for more control.
Blurry photos. The most common cause is a shutter speed that's too slow. A good rule: keep your shutter speed at least 1 over your focal length. Shooting with a 50mm lens?
Use 1/60th or faster.
Dark or blown-out photos. Check your exposure meter. If it's leaning left, you're underexposed. If it's leaning right, you're overexposed.
Adjust your aperture, shutter speed, or ISO until it centers.
Shooting in JPEG instead of RAW. JPEG compresses and discards data. RAW captures everything. If you want to edit later, shoot RAW.
You'll find this setting in the menu.
Changing lenses in the wind. Dust gets inside. It lands on the sensor. Then you spend hours cloning spots out in post.
Change lenses quickly. Point the camera body down.
For candid street scenes, you'll want to be fast and discrete. That means knowing your camera well enough to adjust settings without looking.
Frequently Asked Questions
Which mode should I start with?
Start with P (Program). It handles aperture and shutter speed automatically but lets you control ISO, white balance, and flash. Once you're comfortable, move to Av (Aperture Priority) to control depth of field.
How do I get that blurry background effect?
Use a wide aperture (low f-number like f/1.8 or f/2.8). Get close to your subject. Keep the background far away.
Use a longer focal length. These three things together create that creamy blur called bokeh.
Why are my photos noisy?
Noise comes from high ISO settings. The camera amplifies the signal, which amplifies the grain. Keep ISO as low as possible (100 or 200).
If you need more light, use a slower shutter or wider aperture instead.
Do I need to clean the sensor myself?
Only if you see dark spots in the same place across multiple photos. Use the camera's built-in sensor cleaning function first. If spots remain, use a sensor cleaning kit or take it to a professional.
Poking the sensor with a cloth can damage it.
Should I buy a new lens or a tripod first?
Buy a tripod first. It stabilizes your shots, lets you use slower shutter speeds, and opens up long exposure photography. A good tripod costs less than a decent lens.
It improves your photos more than any single lens upgrade.
If you're considering a dedicated landscape setup, a tripod is essential. You'll need it for sharp images at small apertures and slow shutter speeds.

Similar Posts