Kenwood Dishwasher Not Draining
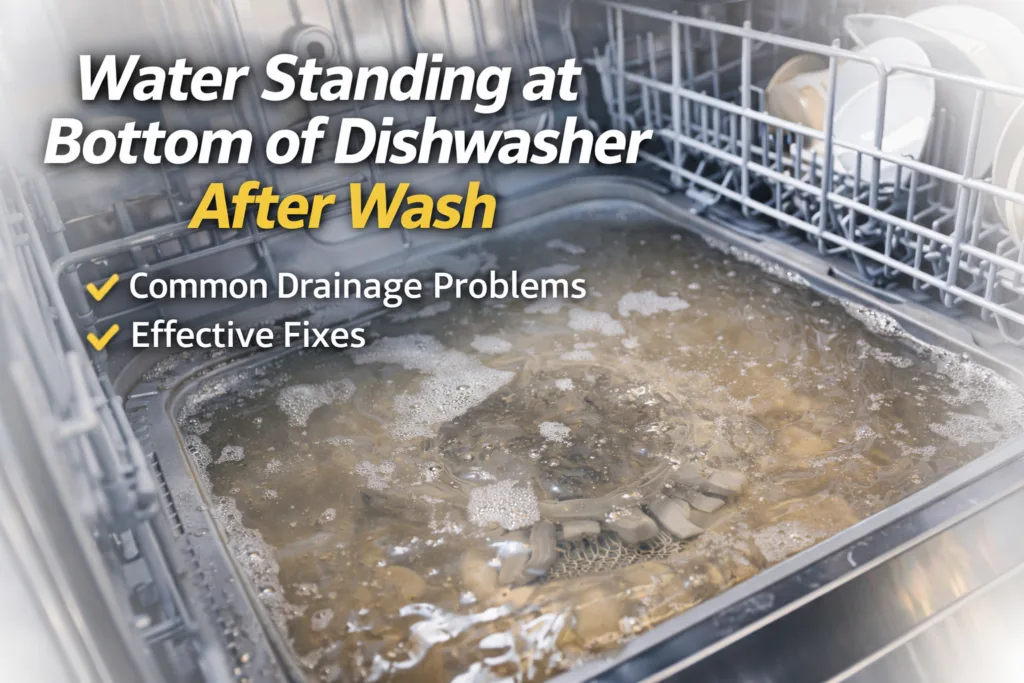
The water's still sitting in the bottom of your Kenwood dishwasher, and you've probably already tried running it again only to hear it hum or click and then stop. That standing water isn't just annoying. It's a sign that something along the drain path is blocked, broken, or not getting power.
If you're dealing with a Kenwood dishwasher not draining, the fix is usually something you can handle yourself in under an hour.
Manufacturer specifications indicate that the drain cycle on most Kenwood models runs for 2 to 5 minutes, moving about 2 gallons of water through a 1-inch drain hose. When that flow stops, the control board senses the water level hasn't dropped and either cancels the cycle or throws an error code. Let's walk through exactly what's happening and how to get that water moving again.
Quick Answer
Clean the filter first. That's the cause in roughly 80 percent of cases. Remove the bottom rack.
Twist the filter assembly counterclockwise. Rinse it under hot water. Replace it.
Run a rinse cycle. If water still sits, check the drain hose for kinks. If that's clear, test the drain pump.
Those three steps solve most Kenwood draining problems.
The Water's Still There – Let's Figure Out Why
You open the door expecting clean dishes, and instead you're met with a shallow pool of murky water sitting in the bottom. It's frustrating, and if you've already hit "Cancel" or "Drain" to no avail, you're probably wondering if this means a pricey repair or a new machine.
Here's the good news. Most Kenwood dishwasher draining problems come down to three things, and two of them you can fix right now with zero special tools. The third might require a multimeter and a replacement part, but it's still a DIY-friendly job.
The key is understanding what's actually happening when your dishwasher tries to drain. The control board sends power to the drain pump. The pump spins an impeller that pushes water up through the drain hose and out to your sink drain or garbage disposal.
Along the way, the water passes through the filter assembly, the pump housing, the check valve, and the hose itself. A blockage or failure at any single point stops the whole process.
Your job is to track down which point that is. We're going to do that in a logical order, from the most likely cause to the least. No guessing.
No replacing parts that aren't broken.
The Drain Path – How Your Kenwood Is Supposed to Work
Before you start pulling things apart, it helps to visualize the route the water travels. Think of it as a simple plumbing circuit with four main sections.
The Filter Assembly
This is the first stop. Water from the wash cycle collects at the bottom of the tub and passes through a two-stage filter system. The coarse filter catches larger food particles.
Think rice grains, seeds, and bits of food that escaped the spray arms. The fine filter underneath catches smaller particles. When either one gets clogged, water can't pass through fast enough.
The Drain Hose
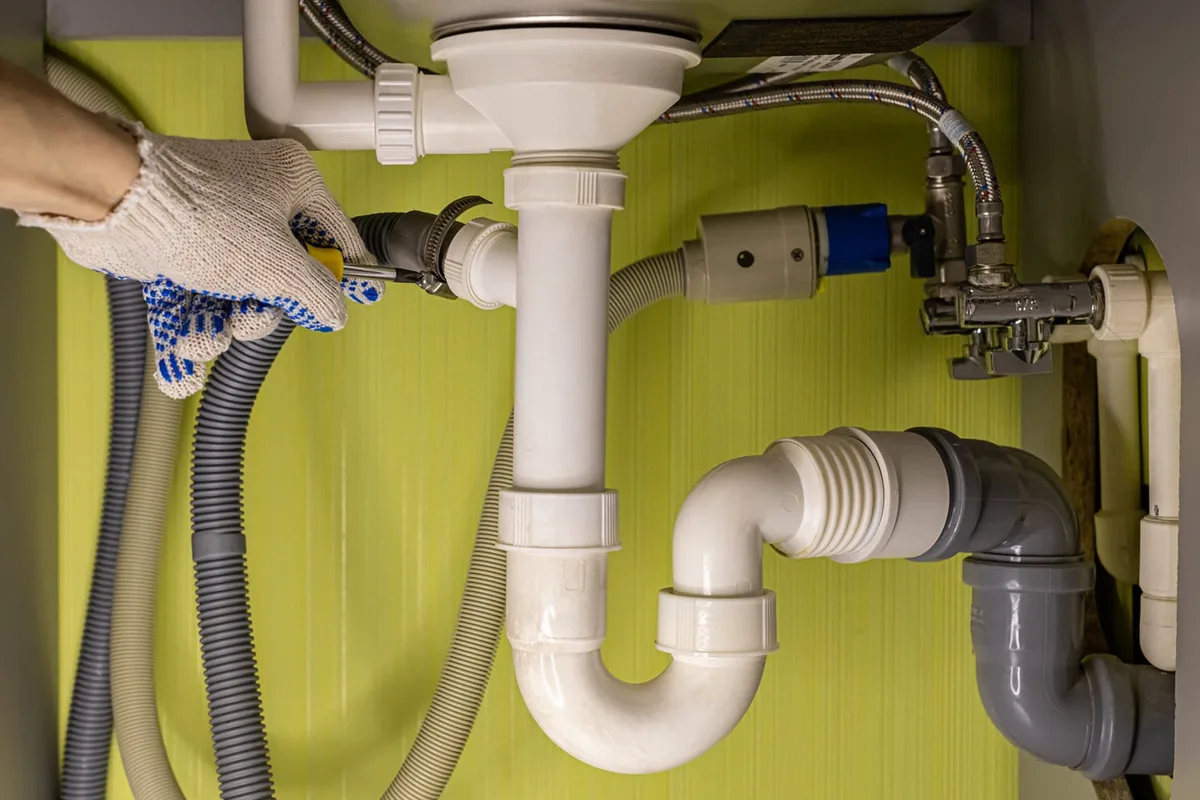
This is a corrugated plastic hose, typically 1 inch in diameter, that runs from the pump outlet up to the underside of your sink. It connects either to a port on the side of your garbage disposal or directly to the sink drainpipe through an air gap or high loop. The hose must be routed properly.
Too low and water can siphon back in. Too high and the pump has to fight gravity harder than it's designed to.
The Check Valve and Air Gap
Inside the drain pump outlet or along the hose itself, there's a small one-way flap called a check valve. It opens when the pump pushes water through and closes when the pump stops, preventing dirty water from flowing back into the dishwasher. Some installations also include an air gap, a small chrome cylinder mounted on the countertop near the sink.
It provides a physical break in the hose to prevent back-siphoning.
Every single one of these components can cause a drain failure. The trick is checking them in the right order.
The Decision Tree – Diagnose Your Kenwood Step by Step
This is where we get practical. Grab a towel, a bucket, and a screwdriver. Here's the exact sequence to follow.
Step 1: Check the Filter First
This is the single most common cause. If you haven't cleaned your filter in the last month or two, start here.
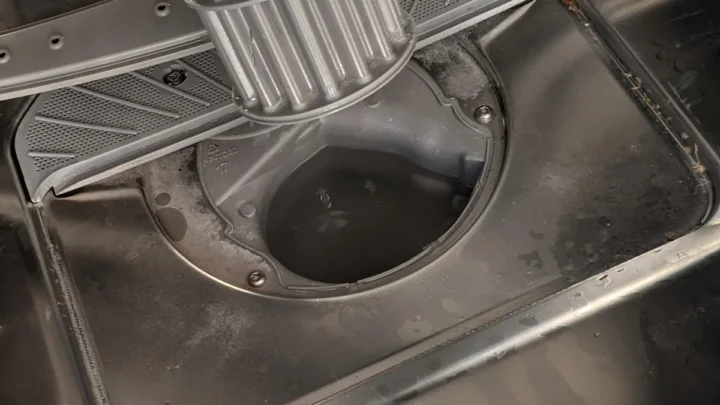
Open the dishwasher door. Remove the bottom rack so you have clear access to the floor of the unit. Look for the filter assembly.
It's a round plastic piece, usually with a handle in the center, sitting in a recess at the bottom center of the tub.
Twist it counterclockwise. It should unlock and lift straight out. You'll see two parts.
The upper coarse filter is a basket-like strainer. The lower fine filter is a flat disc with a fine mesh. Rinse both under hot running water.
Use an old toothbrush or bottle brush to scrub away any greasy film or stuck-on debris.
If you find a chunk of broken glass, a popcorn kernel, or a piece of a plastic cup lodged in the filter, that's your culprit. Remove it, rinse everything clean, and reassemble. Replace the filter by lining up the tabs, pressing it down, and twisting clockwise until it locks.
Run a short rinse cycle to see if the water clears. If it does, you're done. If not, move to Step 2.
Step 2: Inspect the Drain Hose
A kinked or crushed drain hose is the second most common issue, especially if the dishwasher was recently installed or moved.
Look under your sink. Find the dishwasher drain hose where it connects to the sink drain or garbage disposal. Trace it back toward the dishwasher.
Look for sharp bends, tight crimps, or places where the hose might be pinched between the dishwasher and the cabinet.
If you find a kink, straighten it out. You may need to reposition the dishwasher slightly to give the hose enough room. Some installers run the hose behind the dishwasher in a tight space, and it gets pinched when the unit is pushed back into the cabinet.
While you're under there, check the air gap if you have one. It's the chrome fitting on the countertop near the sink with two small openings. Remove the cap and look for food debris clogging the openings.
Clean it out with a small brush or pipe cleaner.
Step 3: Test the Drain Pump
If the filter is clean and the hose is clear, the problem is likely the pump itself. The pump can fail in a few ways.
First, listen. Start a drain cycle and put your ear near the bottom of the dishwasher door. Do you hear a humming sound?
If the pump hums but the water doesn't move, the impeller is likely jammed by a small object or broken free from the motor shaft.
If the pump is silent, it may not be getting power, or the motor windings may have failed.
To check further, you'll need to access the pump. Unplug the dishwasher first. Remove the lower access panel, usually a metal or plastic panel behind the bottom of the door held by a few screws.
The pump is mounted on the bottom of the unit near the center. You'll see a small plastic housing with wires connected to it.
Use a multimeter set to ohms. Disconnect the wires and test across the pump terminals. A good pump motor typically reads between 10 and 50 ohms.
If you get a reading of zero or infinity, the pump is dead and needs replacement.
Step 4: Check the Float Switch
The float switch is a safety sensor that detects the water level in the tub. It's a small plastic cylinder, usually in a front corner of the bottom of the tub. When the water level rises, the float rises with it and triggers a switch to tell the control board it's time to stop filling.
If the float gets stuck in the raised position by debris, the dishwasher might think it's flooded and refuse to drain. Gently lift the float and see if it moves freely. Clean around it with a damp cloth.
You can also test continuity with a multimeter. The switch should be closed when the float is down and open when the float is up.
Step 5: Reset the Control Board
Sometimes the control board gets confused. A temporary glitch can leave it stuck in a state where it thinks the drain cycle has already run.
Unplug the dishwasher for 5 to 10 minutes. This resets the board and clears any transient errors. Some models have a dedicated reset sequence.
Check your owner's manual. A common method is pressing and holding the Start and Cancel button for 10 seconds while the dishwasher is in standby.
After the reset, run a rinse cycle. If the water drains now, the problem was a logic glitch, and you're all set.
The Usual Suspects – Filter, Hose, and Pump Up Close
Let's zoom in on the three components most likely to cause your Kenwood dishwasher not draining. Understanding exactly what can go wrong with each one will help you diagnose faster and avoid replacing parts that are perfectly fine.
The Filter Assembly in Detail
The filter assembly is your first line of defense. It's designed to catch anything that might clog the pump or the drain hose. On Kenwood models, it's almost always a twist-lock design with two stages.
The coarse basket catches the big stuff. Over time, the mesh can become clogged with a greasy film that restricts water flow. This is especially common in households that cook with a lot of oil or butter.
The fine filter underneath catches smaller particles. When this gets clogged, water can't pass through fast enough, and the pump runs but can't move enough volume to empty the tub.
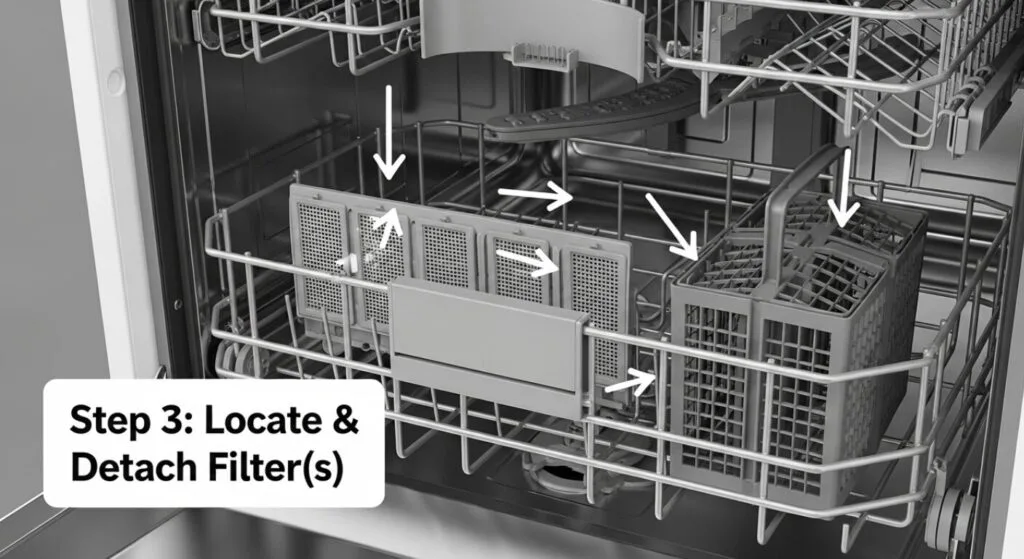
Clean both filters every 1 to 2 months. If you run heavy loads or have hard water, clean them monthly. Use hot water and a stiff brush.
If you notice a film that won't rinse off, soak the filters in a solution of warm water and a degreasing dish soap for 15 minutes.
The Drain Hose in Detail
The drain hose is a simple corrugated plastic tube, but it has a few common failure points.
Kinks are the main issue. The hose is flexible, but if it gets bent too sharply, the corrugations collapse and create a flat spot that blocks water flow. This often happens when the dishwasher is pushed back into its cavity and the hose gets pinched between the unit and the cabinet frame.
Another issue is grease buildup inside the hose. Over months or years, washing greasy dishes sends small amounts of fat down the drain. Some of it cools and solidifies inside the hose, gradually narrowing the passage.
This creates a slow drain that gets worse over time until the water stops moving entirely.
To check for a hidden clog, disconnect the hose from the sink drain. Place the loose end into a bucket. Run a drain cycle.
If water flows freely from the hose into the bucket, the clog is in the sink drain or garbage disposal, not the dishwasher itself.
The Drain Pump in Detail
The drain pump is a small electric motor with an impeller wheel. It's mounted to the bottom of the dishwasher, usually under a plastic cover.
The most common failure is a jammed impeller. A small object can get wedged between the impeller blades and the pump housing, preventing the wheel from spinning. If the pump hums but the water doesn't move, this is likely the cause.
Turn off and unplug the dishwasher. Access the pump from the bottom. Remove the pump cover.
Reach in and gently rotate the impeller by hand. If it's stuck, clear the obstruction. If it spins freely, the motor itself may have failed.
The second failure is electrical. The motor windings can burn out, especially if the pump ran dry for an extended period or if a stuck impeller caused the motor to overheat. Use a multimeter to test continuity.
If the resistance reading is outside the 10 to 50 ohm range, the pump needs replacement.
Don't Do These Things – Common Mistakes That Make It Worse
When you're staring at a pool of standing water, it's tempting to try anything to get it moving. But some common fixes do more harm than good. Here's what to avoid.
Don't Pour Chemical Drain Cleaners Down the Dishwasher
Those chemicals are caustic and can damage the rubber seals, plastic pump housing, and drain hose inside your dishwasher. Even if they clear the clog, they often leave residue that causes leaks or weakens components over time. If the clog is in the sink drain or garbage disposal side, treat that separately.
Never pour drain cleaner directly into the dishwasher tub.
Don't Force the Pump Impeller With Tools
The impeller is plastic and brittle, especially if it's been jammed for a while. Forcing it with metal tools can snap the impeller blades or crack the housing. Instead, reach in with your fingers and gently wiggle the impeller back and forth.
If it won't budge, remove the pump housing and inspect it on your workbench.
Don't Ignore the Float Switch
The float switch is easy to overlook because it's a small plastic piece tucked in a corner. But a stuck float can cause all kinds of strange behavior, including a dishwasher that refuses to drain. If you've already checked the filter and hose, make sure the float moves freely before you start shopping for a new pump.
Don't Remove the Filter and Leave It Out
Some people figure, "If the filter keeps clogging, I'll just take it out." That's a mistake. The filter protects the pump impeller from large debris. Without it, a single olive pit or piece of broken glass can jam the pump and cost you a replacement.
Run the filter through the dishwasher or scrub it by hand, but always put it back.
Don't Assume It's a Pump Without Testing
The drain pump is the most expensive and most time-consuming part to replace. It's also one of the least common failures, especially in newer machines. Jumping straight to pump replacement without checking the filter, hose, and float switch is like replacing your car's engine because the gas tank is empty.
Test the simple things first.
Kenwood Model Variations – Does the Fix Change?
Most Kenwood dishwashers share the same drain system. The filter twist-lock design, the 1-inch drain hose, and the pump location are nearly identical across the KDW-300, KDW-400, and KDW-500 series. But there are a few model-specific quirks worth knowing.
Some older Kenwood models built before 2018 have a separate check valve inside the pump outlet. Newer ones integrated it into the pump housing. If you own an older model and the pump hums but doesn't drain, the check valve flap might be stuck shut.
You can open it manually with a small screwdriver through the hose connection.
Another difference is the error code system. Late-model Kenwood dishwashers use a numeric display. Earlier models use a combination of blinking lights.
A constant red light on the "Clean" indicator often signals a drain fault.
If you're unsure which model you have, check the label on the right side of the door frame. The model number starts with "KDW" followed by three digits. That number will match the correct parts diagram.
Error Code Reference – What Your Dishwasher Is Trying to Tell You
Error codes are your dishwasher's way of saying which sensor or system it's unhappy with. Here are the most common ones for Kenwood models.
E1 or Er1. This is the drain error. It means the control board detected water in the tub after the drain cycle should have finished.
Follow the diagnostic steps we covered earlier. Filter, hose, pump.
E4. This code usually indicates a water inlet issue, not a drain problem. But sometimes a plugged filter causes the machine to overfill because water can't escape fast enough, triggering E4.
No code but blinking lights. On models without a display, count the blinks. Three rapid blinks on the "Heavy" or "Normal" button often mean a drain fault.
Check your owner's manual for the specific blink pattern for your model.
If you see a code after clearing the drain, unplug the dishwasher for 10 minutes to reset the board. The code should clear on its own.
When to Call It – Repair Cost vs. Replacement
Not every Kenwood dishwasher problem is worth fixing yourself, and some aren't worth fixing at all. Here's how to decide when to keep going and when to call in a pro or start shopping for a new machine.
The DIY Cost Breakdown
Let's be realistic about what you'll spend if you tackle the repair yourself.
| Part | Typical Cost | Time to Replace |
|---|---|---|
| Filter assembly (if damaged) | $15 – $30 | 5 minutes |
| Drain hose | $10 – $20 | 20 minutes |
| Drain pump | $30 – $60 | 30 – 60 minutes |
| Float switch | $10 – $20 | 15 minutes |
| Check valve | $5 – $15 | 10 minutes |
Total for parts: roughly $20 to $110 depending on what's broken. Tools you'll need include a screwdriver, possibly a nut driver, and a multimeter if you're testing electrical components.
When to Call a Technician
If you've gone through the full diagnostic sequence and the dishwasher still won't drain, the problem might be on the control board. Control board failures are rare compared to mechanical clogs, but they do happen. Diagnosing a board requires more advanced electrical testing and sometimes a replacement that costs $100 to $200 for the part alone.
Another scenario warrants a call. If you find signs of water damage under the dishwasher or notice a burning smell when the pump tries to run, that could indicate a shorted motor or wiring issue. That's best handled by someone who knows how to work safely with appliance electrical systems.
A service call typically runs $100 to $250 plus parts. For a simple pump swap, that's $130 to $310 total. Compare that to a new Kenwood dishwasher which as of 2026 runs $400 to $800 for a mid-range model.
When to Replace the Dishwasher
If your Kenwood is more than eight to ten years old and the drain pump has failed, you've got a decision to make. Older machines tend to have less efficient wash cycles, higher water usage, and fewer features. A $60 pump repair might buy you another year or two, but it could also be followed by a heating element failure, a leaking door seal, or a broken spray arm.
Aggregate repair data suggests that once a dishwasher passes the eight-year mark, any single repair over $150 is a borderline call. At that point, the money is often better spent on a new unit with a warranty and better energy efficiency.
Here's a simple rule of thumb. If the repair cost is more than half the price of a comparable new dishwasher, replace it. If the repair cost is less than half and the machine is under eight years old, fix it.
Step-by-Step Pump Replacement – If You Need to Go All the Way
If your multimeter confirmed the pump motor is dead, here's what the replacement looks like. You'll need a new pump that's specific to your model. Expect to pay $30 to $60.
The job takes about 30 minutes and requires a screwdriver, a nut driver, and possibly a pair of pliers.
Unplug the dishwasher first. Remove the lower access panel. You'll see the pump mounted to the bottom of the tub.
Disconnect the wire harness. Take a photo first so you know exactly where each wire connects.
Remove the drain hose from the pump outlet. Have a bucket ready for any residual water. Unscrew the pump mounting bolts.
There are usually two or three. Lift the old pump out.
Install the new pump in reverse order. Attach the drain hose. Reconnect the wires per your photo.
Secure the mounting bolts. Replace the access panel.
Plug the dishwasher back in and run a rinse cycle. If water drains freely and you hear the pump run without grinding, you're done.
Stop It Happening Again – Simple Maintenance That Works
The best way to deal with a Kenwood dishwasher that won't drain is to make sure it never happens in the first place. A few minutes of preventive maintenance every month can save you hours of troubleshooting later.
Clean the filter monthly. Set a calendar reminder for the first of each month. Pull the filter, rinse it under hot water, and scrub it if needed.
If you cook a lot of oily or starchy food, bump it to every two weeks.
Run a hot water cycle before loading. If your dishwasher is connected to a long hot water line, the water that enters the machine for the first fill might be lukewarm at best. Cold water doesn't dissolve grease or food particles as well.
Before you start a cycle, run the kitchen faucet on hot for about 30 seconds. That ensures the dishwasher fills with hot water from the start.
Use the rinse cycle for dirty loads. If you're not running a full load right away, use the rinse cycle on dishes that have heavy food residue. This pre-washes the worst of the debris off the plates before it has time to dry and harden in the bottom of the tub.
Check the drain hose routing every year. Pull the dishwasher out far enough to inspect the drain hose. Look for kinks, crimps, or signs of wear.
Make sure the hose has a high loop. It should rise up near the underside of the countertop before dropping down to connect to the sink drain.
Run a cleaning cycle with vinegar every three months. Place a cup of white vinegar in a dishwasher-safe bowl on the top rack and run a hot water cycle. The vinegar helps dissolve mineral deposits and mild grease buildup in the sump and drain path.
If you have a stainless steel interior, check your owner's manual first. Some manufacturers recommend commercial dishwasher cleaner instead of vinegar.
Frequently Asked Questions
Why is my Kenwood dishwasher humming but not draining?
A humming sound from the drain pump usually means the impeller is jammed by a small object or the motor is getting power but can't spin. Unplug the dishwasher, access the pump from below, and check for obstructions. If the impeller moves freely and the pump still hums, the motor may have failed.
How do I reset my Kenwood dishwasher?
Unplug the dishwasher for 5 to 10 minutes to reset the control board. Some models also respond to pressing and holding the Start and Cancel button for 10 seconds while the machine is in standby. After the reset, run a rinse cycle to test the drain function.
Where is the filter on a Kenwood dishwasher?
The filter assembly is located at the bottom center of the tub underneath the lower dish rack. It's a round plastic piece that twists counterclockwise to unlock and lift out. Most Kenwood models use a two-stage filter with a coarse basket and a fine mesh disc.
Can I use Drano in my dishwasher?
No. Chemical drain cleaners can damage the rubber seals, plastic pump housing, and drain hose inside the dishwasher. They may also leave residue that causes leaks.
Mechanical cleaning, removing and scrubbing the filter and clearing the hose, is always safer.
How much does it cost to fix a Kenwood dishwasher that won't drain?
If you do it yourself, parts cost $10 to $60 depending on what needs replacing. A service call from a technician averages $100 to $250 plus parts. If the dishwasher is over eight years old and needs a major repair, replacement is often more cost-effective.
What error code means the dishwasher isn't draining?
On many Kenwood models, error code E1 indicates a draining problem. Some models use blinking light patterns instead of numeric codes. Check your owner's manual for the specific error code system on your model.
Your Next Step – A Quick Decision Guide
Let's wrap this up with a simple decision map so you know exactly what to do next.
If you have standing water right now:
- Unplug the dishwasher for safety.
- Remove and clean the filter. Replace it and run a rinse cycle.
- If water remains, check the drain hose for kinks. Straighten or reposition as needed.
- If still no drain, access the pump. Check for a jammed impeller or test the motor with a multimeter.
- Replace the pump if the motor is dead. Cost is $30 to $60 and about 30 minutes of your time.
If the water drains but drains very slowly:
- Clean the filter thoroughly.
- Run a cycle with vinegar or a commercial dishwasher cleaner.
- Check the drain hose for grease buildup. If you suspect it's coated inside, disconnect it and flush it with hot water from the faucet.
If the dishwasher drains fine but won't fill or wash:
That's a different problem. You're likely looking at a faulty water inlet valve, a stuck float switch, or a clogged water line. Those issues follow a different diagnostic tree and aren't covered in this guide.
If you're unsure about any step:
Stop and call a technician. Dishwashers involve both electricity and water. A mistake with wiring can cause a shock or a short.
A mistake with plumbing can cause a leak that damages your flooring or cabinets. There's no shame in knowing when a job is better left to someone with more experience.
The majority of Kenwood dishwasher draining problems are solved by cleaning the filter or straightening the hose. Start there. Nine times out of ten, that's all it takes.

Similar Posts