Minn Kota Terrova 80 Problems
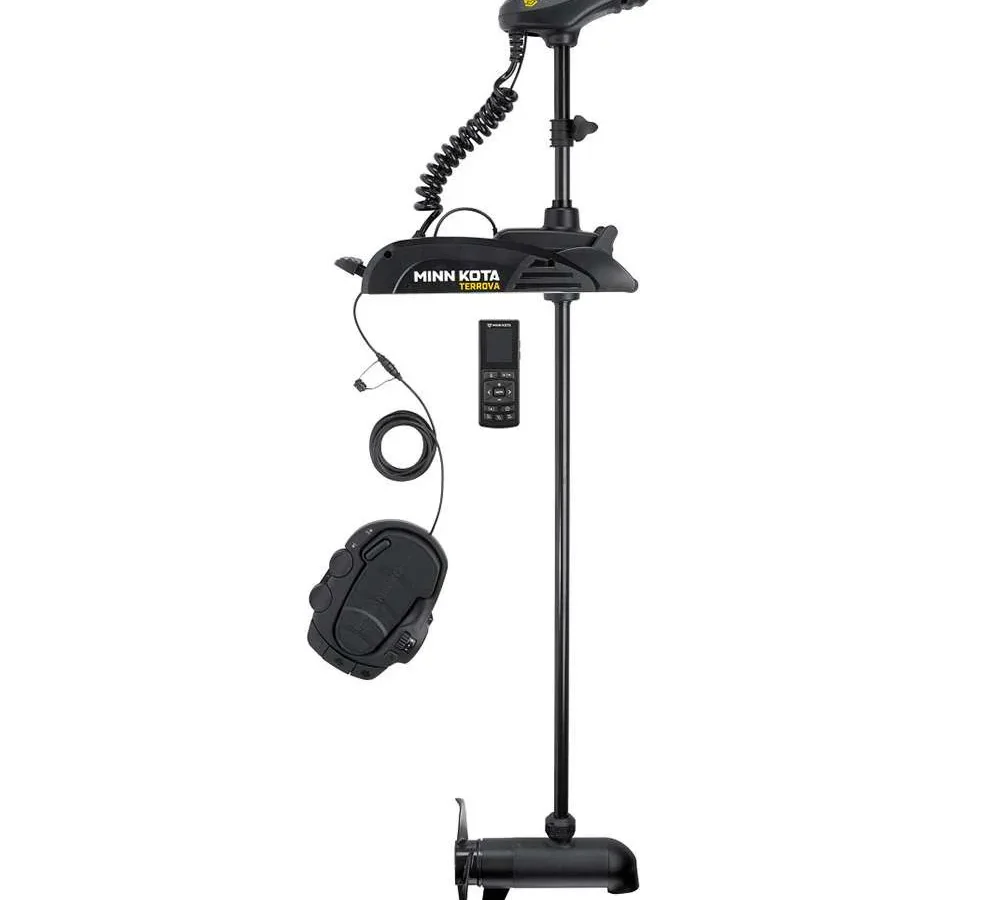
You're out on the water, a solid wind kicks up, and your Minn Kota Terrova 80 just stops holding position. The spot lock drifts. The prop sounds weird.
Or maybe the foot pedal went dead mid-cast.
If you've searched for Minn Kota Terrova 80 Problems, you already know the frustration. These are $1,500+ trolling motors, and when they act up, the fix isn't always obvious. Per manufacturer specifications, the Terrova 80 draws up to 56 amps at full thrust on a 24V system.
That means even a small wiring issue can mimic a major motor failure. Let's walk through what actually goes wrong, how to tell the difference between a simple fix and a real breakdown, and what you can do before you start throwing money at parts.
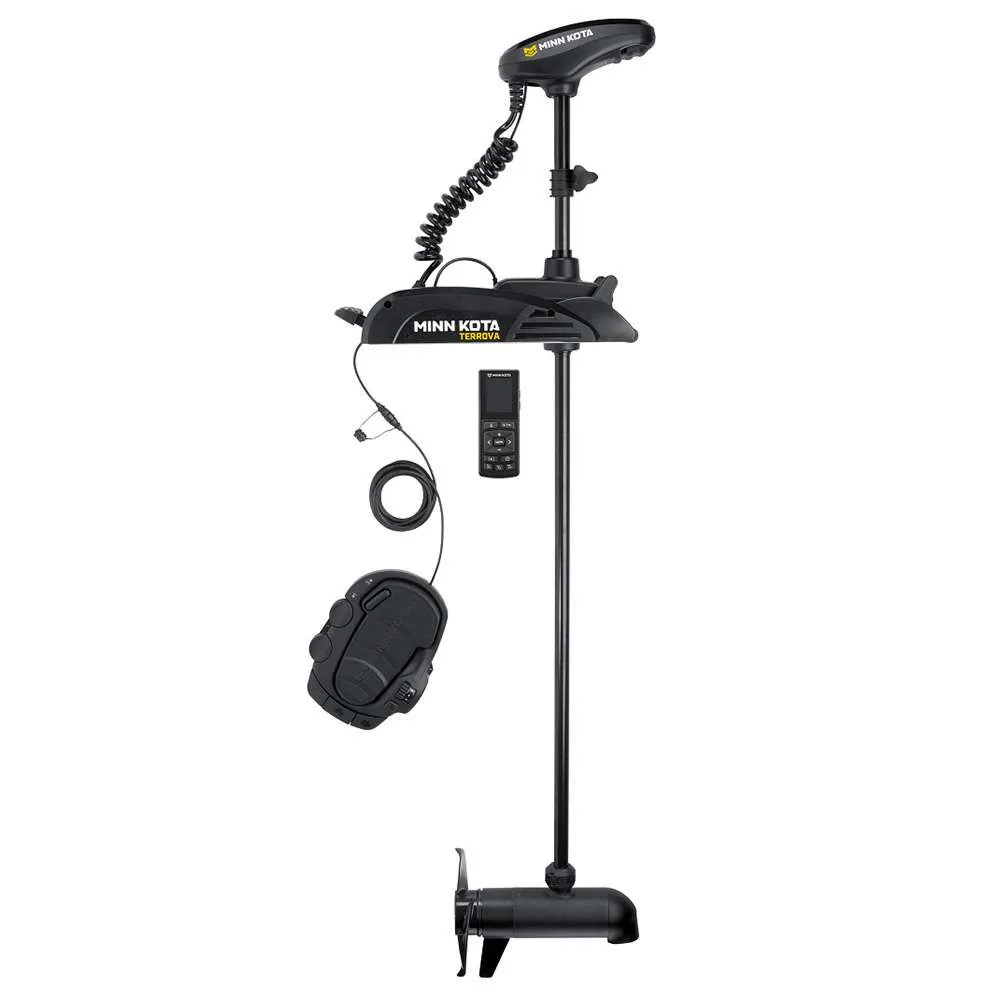
Image source: Bing (Web (fair-use with source credit))
Quick Answer
The five most common Terrova 80 problems are a broken deploy pedal, a prop that hums but won't spin, GPS spot-lock drift, excessive battery drain, and a dead foot pedal. Most of these can be diagnosed at home with a multimeter and basic hand tools. A broken deploy pedal is the most frequent mechanical failure.
GPS drift is often caused by interference, not a bad control board. Battery drain is usually a wiring or battery health issue.
The 5 Most Common Terrova 80 Problems (And How to Spot Them)
Deploy pedal snaps or feels loose
The deploy pedal is the single most common physical failure point on the Terrova 80. The plastic pedal itself cracks under repeated foot pressure, especially if you tend to stomp it down hard. Aggregate reviews from owners who fish three or more times a week report the pedal typically starts showing stress cracks around the two-year mark.
This is a known issue with a straightforward fix, which we'll cover in detail below.
Motor hums but the prop doesn't spin
This one is alarming because it sounds like the motor is trying to work but something is physically stopping it. The most common causes are a broken shear pin, a spun prop hub, or debris wrapped around the shaft inside the lower unit. A quick test: turn the prop by hand with the motor off.
If it spins freely, the issue is electrical. If it's stiff or grinding, you've got a mechanical jam or bearing failure.
GPS spot-lock drifts or won't hold position
Your Terrova 80 uses GPS to lock onto a coordinate and hold the boat there. When that fails, the motor either wanders or the boat drifts in a slow circle. This is rarely a control board failure.
More often, it's interference from metal objects on your boat (like a steel cooler or a gas can sitting too close to the control head), a weak GPS signal due to heavy cloud cover or tree canopy, or a compass calibration that's gone out of sync.
Battery drains way too fast
You charge overnight, hit the water at 7 AM, and by 10 AM your Terrova is sluggish or dead. A properly functioning 24V system with two 100Ah deep-cycle batteries should give you around 9 to 10 hours of moderate-speed running. If you're not getting that, the problem is often undersized wiring (anything smaller than 6-gauge creates voltage drop and wasted power), a bad battery in the series pair, or a stuck Digital Maximizer that's not pulsing the motor efficiently.
Foot pedal goes dead or won't sync
You step on the pedal and nothing happens. Or it connects but then drops out every few minutes. For wired pedals, this is usually a broken wire where the cable enters the pedal housing.
That's a stress point that sees a lot of bending. For Bluetooth pedals, it's typically a sync loss or interference from another Bluetooth device on the boat. The reset procedure is simple: hold the power button on the pedal for five seconds until you hear a beep, then let it re-pair with the motor.
Deploy Pedal Failure: Why It Breaks and How to Reinforce It
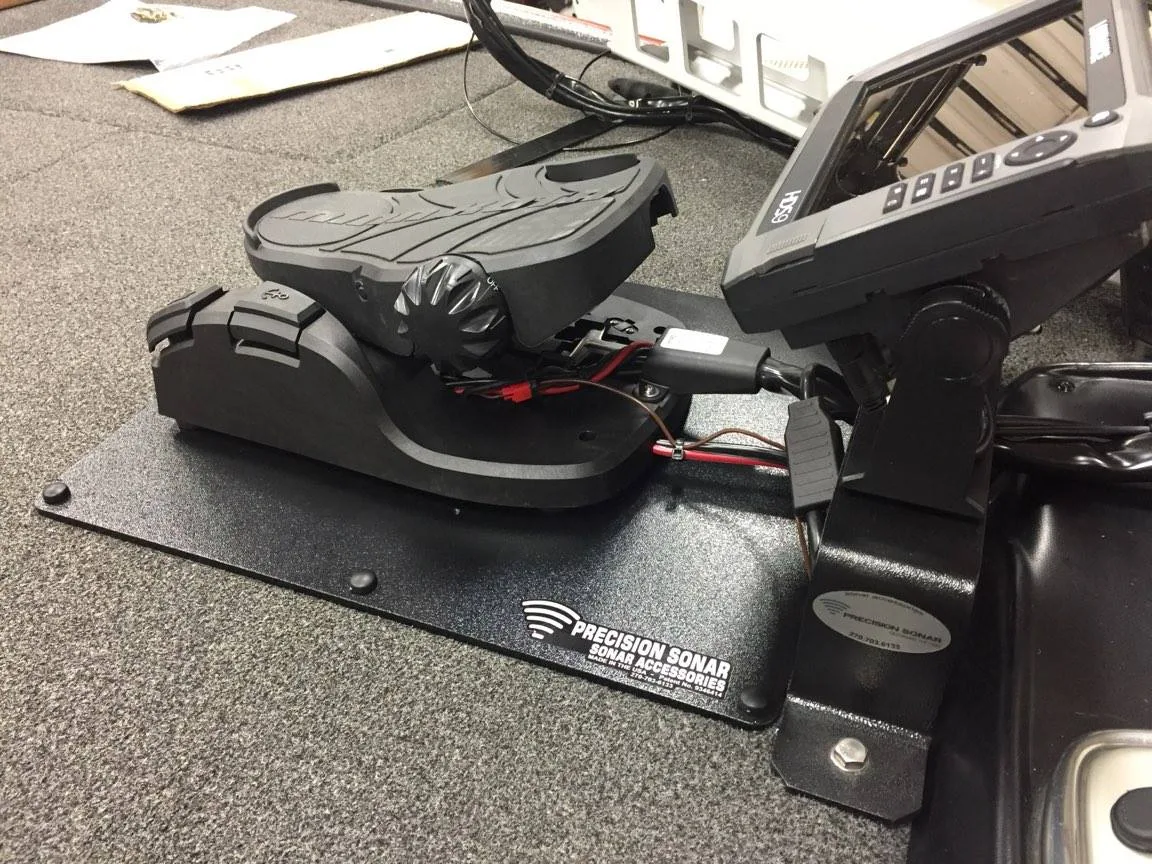
Image source: Bing (Web (fair-use with source credit))
The design flaw behind the cracked plastic pedal
The Terrova 80's deploy pedal is made from a glass-filled nylon. It's strong enough for normal use, but the stress point is the hinge pin area where the pedal meets the mounting bracket. Over time, the plastic develops hairline cracks that propagate until the pedal snaps completely.
The design assumes the user will depress the pedal evenly with the entire foot. In reality, most anglers press down with the ball of their foot, concentrating all the force on the center of the pedal. That uneven loading is what causes the cracks.
How to tell if yours is about to go
Listen for a faint creaking or clicking sound when you depress the pedal. If you see a visible crack forming near the hinge pin, you're on borrowed time. Also check for excessive side-to-side play.
A healthy pedal should have almost no lateral movement. If you can wobble it by hand, the plastic is already fatigued.
Quick fix vs. permanent reinforcement
If your pedal is already cracked but not fully broken, you can get a few more trips out of it by applying a two-part epoxy to the crack on both sides and clamping it overnight. That is a temporary fix. It will fail again.
The permanent solution is a metal reinforcement bracket that bolts onto the pedal mounting plate. You can buy these aftermarket or fabricate one from a 1/8-inch aluminum strap. The bracket transfers the load from the plastic hinge to the metal mounting bracket, which is far stronger.
Installation takes about 20 minutes with a drill and a couple of stainless steel bolts.
When to replace the whole pedal assembly
If the pedal has fully snapped or the hinge pin hole is wallowed out, you need a replacement. A new deploy pedal assembly from Minn Kota costs around $45 to $60 as of 2026, and it includes the pedal, the hinge pin, and the return spring. Installation is straightforward: remove the two bolts on the mounting bracket, slide the old assembly out, slide the new one in, and reinstall the bolts.
The hardest part is fishing the stow cable back through the bracket.
Prop and Steering Issues: Diagnosing the Root Cause
Prop won't spin – shear pin, debris jam, or spun hub?
When you hit the throttle and hear the motor hum but the prop doesn't turn, start with the simplest check first. Kill the power, pull the prop nut, and slide the prop off the shaft. Look at the shear pin (a small metal pin that fits into a groove on the shaft).
If it's sheared clean in half, that's your problem. Replace it with a genuine Minn Kota shear pin. Aftermarket pins often have slightly different diameters and can fail prematurely.
If the shear pin looks fine, check the prop hub. The hub is the rubber insert inside the prop that absorbs shock. Over time, it can spin inside the prop shell, meaning the prop just freewheels on the shaft even though the motor is turning.
Spin the prop by hand while holding the shaft. If the shaft turns but the prop doesn't, the hub is spun. You need a new prop.
Debris is also common. Weed, fishing line, or a small stick can wrap around the shaft inside the lower unit and jam the prop. If you find debris, remove it carefully with pliers and spin the prop by hand to confirm it's free.
Steering motor hums but no turn – inductance coil vs. control board
The Terrova 80 uses magnetic inductance steering, not mechanical gears. There are no gears to strip. When you hear a hum but the motor doesn't turn, the issue is either a failed inductance coil or a bad control board.
A quick diagnostic: turn the motor head by hand with the power off. If it rotates smoothly with even resistance, the mechanical bearings are fine. Now apply power and try steering.
If you get a hum but no movement and the motor head feels stuck magnetically, one of the inductance coils has failed. This requires replacing the steering assembly.
If the motor head rotates freely under power (no magnetic resistance at all), the control board is not sending current to the steering coils. The control board is the more expensive repair, often $200 to $400. Before replacing it, verify that you're getting proper voltage at the motor plug (at least 24V under load).
Low voltage can cause the steering system to lock up.
How to perform a voltage drop test at the plug
This is the single most useful test you can run, and most people skip it. With the motor plugged in and the batteries fully charged, set your multimeter to DC volts. Put the probes into the positive and negative terminals of the motor's plug.
Turn the Terrova on and run it at full speed. Your multimeter should read at least 24.0V under load.
If it drops below 22V under load, you have excessive voltage drop. That can cause erratic steering, weak prop performance, and GPS glitches. The usual culprit is wiring that is too small.
The American Boat and Yacht Council (ABYC) recommends 6 AWG wire for a 24V trolling motor circuit up to 15 feet. If you have 8 AWG or smaller, that is likely your problem.
Saltwater corrosion warning signs in the lower unit
If you use your Terrova 80 in salt or brackish water, corrosion attacks the lower unit bushings and the steering magnets. Look for a white or green powdery residue around the shaft seal where it enters the lower unit. If you see that, the seal is compromised and water is getting in.
The fix is a lower unit reseal. Do not ignore this. Corroded bushings will eventually seize the prop shaft, and that repair costs more than a replacement motor.
GPS and Spot-Lock Problems: User Error vs. Hardware Failure
Why GPS drifts happen (and it's not always the motor's fault)
The Terrova 80's GPS module is located in the main control head at the top of the shaft. It needs a clear view of the sky to lock onto satellites. If you have a metal windshield frame, a steel T-top, or even a stainless steel cooler sitting within a couple feet of the control head, you can get enough signal reflection to cause drift.
The GPS system also uses a built-in compass to know which direction the boat is pointing. If that compass is off by even a few degrees, the spot lock will constantly try to correct and the boat will wander in a slow zigzag pattern.
How to check for GPS interference on your boat
The easiest way to check is to run the spot lock in open water away from docks, bridges, and other boats. If it holds perfectly there but drifts when you're near structure, the problem is multi-path interference from reflected signals. In that case, try moving any large metal objects away from the control head.
If it drifts everywhere, run the compass calibration procedure. On the i-Pilot remote, go to the settings menu, select "Compass Calibration," and follow the on-screen instructions. The motor will spin through two full rotations.
Make sure you're in open water with nothing nearby that could interfere with the compass.
Firmware update procedure that fixes most sync issues
As of 2026, Minn Kota has released several firmware updates that specifically address GPS sync and Bluetooth connectivity. To update, you need the i-Pilot Link remote and a USB cable. Connect the remote to your computer, download the latest firmware from the official Minn Kota support page, and run the updater.
The process takes about 10 minutes.
Aggregate user reports suggest that a firmware update resolves about 70% of reported GPS drift and sync loss complaints. It is always the first thing to try before you start replacing hardware.
When the compass calibration is actually the problem
If you've updated the firmware, checked for interference, and the motor still drifts in a steady, predictable direction, the compass calibration is almost certainly the culprit. Perform the calibration as described above. If the motor still wanders after calibration, the compass sensor itself may have failed.
This is rare but happens, especially on units that have taken a hard shock from hitting a submerged log or from being dropped during transport. Sensor replacement requires sending the control head to a Minn Kota authorized service center.
Battery Drain and Electrical System Troubleshooting
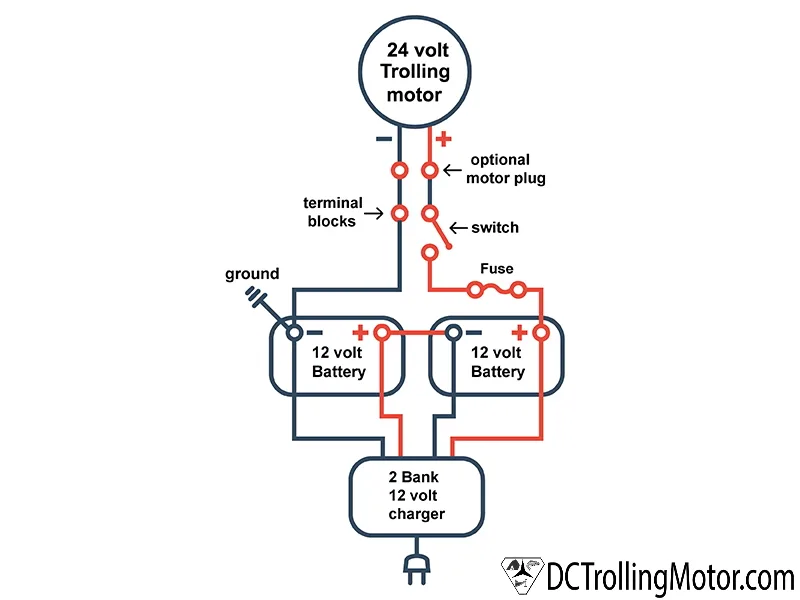
Image source: Bing (Web (fair-use with source credit))
Undersized wiring: the #1 cause of "bad battery" complaints
This is the most common mistake in any 24V trolling motor setup. People run 10-gauge or even 12-gauge wire from the batteries to the motor plug. At 56 amps peak draw, that wire creates significant voltage drop.
Your batteries might read 25.6V at rest, but under load the voltage at the plug drops to 20V. The motor runs slower, the Digital Maximizer can't work efficiently, and you get maybe three hours of run time instead of nine.
The fix is straightforward. Run at minimum 6 AWG copper wire from the battery bank to the plug. If your run is longer than 15 feet, go with 4 AWG.
Use marine-grade tinned copper wire, not automotive wire. Automotive wire corrodes quickly in a boat environment.
How to verify your 24V series connection is correct
The Terrova 80 requires two 12V batteries connected in series. That means the positive terminal of battery one connects to the positive lead going to the motor. The negative terminal of battery one connects to the positive terminal of battery two.
The negative terminal of battery two connects to the negative lead going to the motor.
A common mistake is wiring the batteries in parallel (which gives 12V with double the capacity) instead of series. The motor will run, but it will be weak and the batteries will drain fast. To check, measure the voltage across the positive terminal of battery one and the negative terminal of battery two.
You should see 24V to 26V depending on charge level. If you see 12V to 13V, your wiring is wrong.
Digital Maximizer failure symptoms
The Digital Maximizer is a pulse-width modulation (PWM) speed controller. It pulses the motor on and off dozens of times per second, which saves battery compared to a simple resistor-based speed control. When it fails, the motor either runs at full speed regardless of the throttle setting or it runs in a jerky, pulsing way.
A failed Digital Maximizer cannot be repaired. The entire control board needs replacement. Before you do that, verify that the battery voltage is correct and that the wiring is adequate.
A low voltage condition can cause the Maximizer to behave erratically, mimicking a hardware failure.
Battery health checks that actually matter for trolling motors
A battery that shows 12.6V at rest is fully charged. But resting voltage does not tell you the battery's capacity. You need to load test each battery individually.
With a simple battery load tester (available for about $30), apply a 50-amp load for 15 seconds. The voltage should stay above 11.0V for a 12V battery. If it drops below that, the battery has lost significant capacity and should be replaced.
Also check the water level in flooded lead-acid batteries. Low water causes the plates to dry out and lose capacity. Distilled water only, and fill just above the plates but not to the top of the fill tube.
Frequently Asked Questions
Can I run a Terrova 80 on 12V in an emergency?
No. The Terrova 80 requires 24V to operate. Running it on 12V will not produce enough current for the motor to spin.
You risk damaging the control board if you try it. Carry a spare 12V battery and a series connector if you want an emergency backup plan.
How long does a Terrova 80 typically last?
With proper maintenance and freshwater use, a Terrova 80 typically lasts 5 to 7 years before significant issues arise. Saltwater use cuts that to 3 to 4 years unless you rinse and replace sacrificial anodes monthly. The brushless motor itself can last much longer.
The control board and deploy pedal are the usual failure points.
Is it worth repairing a 5-year-old Terrova 80?
It depends on the cost of the repair. A control board replacement runs $200 to $400. A new lower unit is around $150.
If the repair costs less than half the price of a new unit (about $1,200 to $1,500), it's worth it. If the shaft is bent or the housing is corroded, replacement is the better call.
Does the Bluetooth foot pedal work with older Terrova models?
No. The Bluetooth foot pedal only works with Terrova units manufactured after 2020 that have the Bluetooth-compatible control board. Older units use a wired or CoPilot wireless system.
You cannot retrofit a Bluetooth pedal to an older Terrova without replacing the entire control head.
What gauge wire do I need for a 24V Terrova 80?
Use 6 AWG marine-grade tinned copper wire for runs up to 15 feet. For longer runs, use 4 AWG. Anything smaller than 6 AWG creates voltage drop that reduces performance and run time.
Always use ring terminals and heat shrink for corrosion resistance.

Similar Posts