Nikon D750 How to Record Video
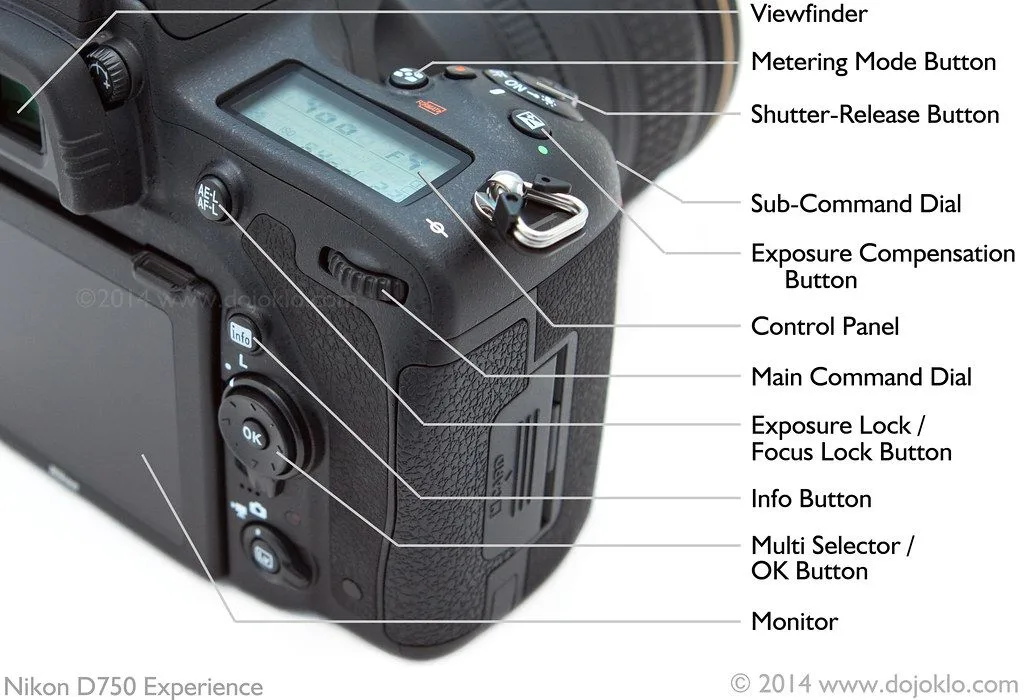
If you've been searching "Nikon D750 how to record video," you probably already know this camera is brilliant for photos. But the video controls are a different story. The buttons and menus were designed with photographers in mind.
That layout can leave first-time videographers scratching their heads.
Manufacturer specs confirm the D750 records 1080p video at up to 60 frames per second from its full-frame sensor. That is solid HD quality with shallow depth of field. But there is no 4K here, so managing expectations matters.
Let's clear up the biggest point of confusion first.
Image source: Bing (Web (fair-use with source credit))
The Confusion Between Live View and Movie Mode
Most people pick up the D750, flip the Live View switch, and think they are recording. They are not. That switch only activates the rear screen so you can see what the sensor sees.
It is a preview, not a recording.
The actual recording happens when you press the small red button inside the mode dial. That is the dedicated movie record button. You need both steps.
Flip the lever to enter Live View mode. Then press the red button to start rolling.
A lot of users miss that first step. If you press the red button while the camera is in viewfinder mode, nothing happens. The camera will not start recording through the optical viewfinder.
The mirror needs to be locked up first. That is the whole point of the Live View lever.
The mode dial position matters too. You can technically record in any mode, but Manual gives the best results. The D750 does support automatic exposure in video mode.
But the camera tends to shift exposure mid-shot as the scene changes. That looks amateurish.
This confusion is not unique to Nikon. Similar workflow quirks show up across many DSLRs. The same systematic approach to diagnosing problems applies whether you shoot Nikon or Canon.
Quick Answer: How to Start Recording Video on the D750
Flip the Live View lever near the mode dial. The rear screen turns on. Press the red movie button in the center of the mode dial.
Recording starts immediately.
Set the mode dial to M for full manual control. Go into the shooting menu. Enable Manual movie mode.
Set your frame rate to 24p or 30p. Use a shutter speed double your frame rate. Adjust aperture and ISO for exposure.
To stop, press the red button again. Flip the Live View lever back to end video mode.
The Core Workflow Explained: Mode Switch, Settings, and the Red Button
Let's walk through this step by step.
Step 1: Set the mode dial to M. This is not strictly required, but it is the smart move. In M mode, you control shutter speed, aperture, and ISO independently. The camera will not suddenly brighten or darken your footage mid-scene.
Step 2: Enable manual movie mode in the menu. This is the hidden step that trips everyone up. Go to the shooting menu. Find Movie settings.
Select Manual movie mode and turn it on. Without this, the camera locks your aperture and shutter even in M mode. You only get ISO control.
The setting says On when it is working properly.
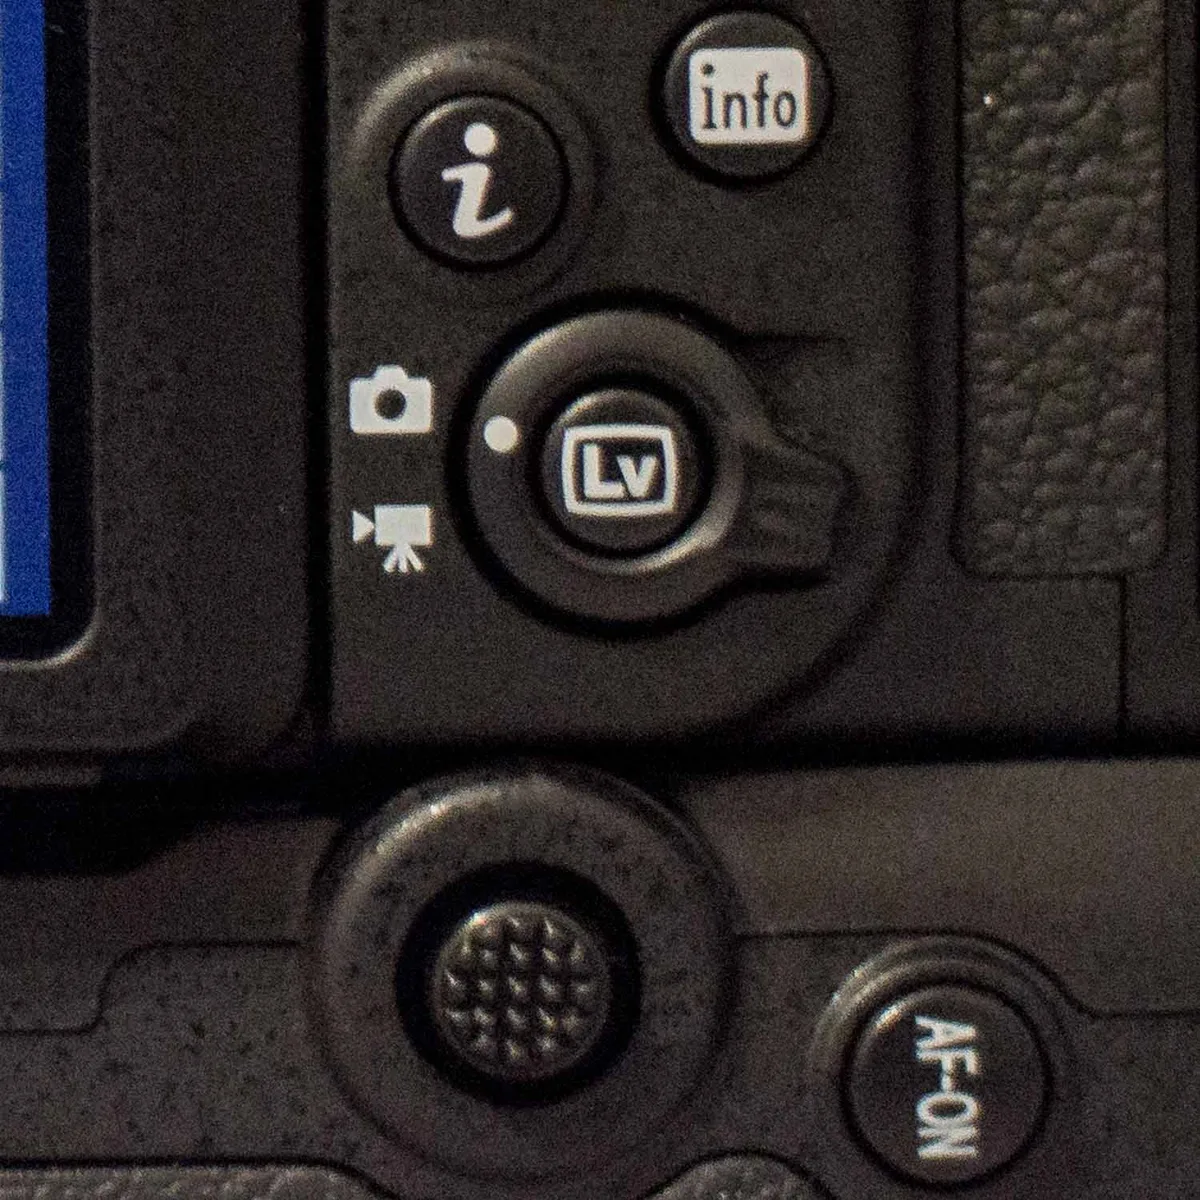
Image source: Bing (Web (fair-use with source credit))
Step 3: Set your frame rate and picture control. In the same Movie settings menu, choose your frame size and rate. 1920×1080 at 24p gives that cinematic look. 60p lets you slow footage down in editing. For picture control, select Flat or Neutral if you plan to color grade. Standard works fine for straight-out-of-camera footage.
Step 4: Flip the Live View lever. It is on the back of the camera near the viewfinder. Push it toward the lens. The mirror flips up and the rear screen activates.
Step 5: Set your exposure. With manual movie mode enabled, use the rear command dial for shutter speed. Use the front command dial for aperture. Use the ISO button for sensitivity.
Remember the 180 degree rule. Shutter speed should be roughly double your frame rate. Use 1/50 for 24p, 1/60 for 30p, and 1/125 for 60p.
Step 6: Press the red button. It is recessed inside the mode dial. Press it once. Recording begins.
A red dot appears on screen. Press it again to stop.
If things are not working, basic troubleshooting steps like checking that firmware is up to date can resolve odd behavior. As of 2026, the D750 is on firmware version 1.13. For similar issues on other cameras, you can find dedicated troubleshooting guides online.
Step-by-Step Decision Workflow: Manual vs. Automatic Video
Should you shoot manual or automatic? The answer depends on your situation.
If you are filming a talking head or interview in controlled lighting:
Go full manual. Set your shutter, aperture, and ISO once. They stay locked for the whole shoot.
No flicker and no exposure shifts. This is the gold standard for predictable results.
If you are filming an event with changing light:
You have two options. Option one is still manual but with auto ISO enabled. The camera adjusts brightness by raising or lowering ISO as you move between light and shadow.
The trade off is visible noise as ISO climbs. Option two is aperture priority mode with auto ISO off. The camera adjusts shutter speed, which can look jarring in video.
Neither is perfect. Manual with careful exposure planning wins for quality.
If you are a beginner who just wants to capture the moment:
Use Program mode. The camera handles everything. The footage will not look cinematic, but it will be properly exposed.
You can always learn manual later. The key is actually getting the shot.
The actual menu path to enable manual movie mode:
Menu button, Shooting menu (camera icon), Movie settings, Manual movie mode, On
Without that setting enabled, even in M mode, your shutter and aperture are locked in auto exposure mode. That is the single most common reason people think the D750 video controls do not work.
The camera's autofocus in video mode is usable but not amazing. AF-F mode tracks subjects continuously. Half press the shutter button to lock focus.
For static shots, manual focus with the lens ring gives you more control. Common autofocus troubleshooting applies here. The same hunting and pulsing issues that show up on other DSLRs affect the D750 too.
Common Mistakes Beginners Make With D750 Video
Let me save you some frustration. These are the mistakes that come up constantly.
Forgetting to enable manual movie mode. This is the number one complaint. You set the dial to M and adjust your settings, but the camera does not respond. The fix is in the menu.
Enable it once and it stays on until you turn it off.
Using the wrong shutter speed. Video needs motion blur. A 1/200 shutter at 24p looks stuttery and unnatural. Stick to the 180 degree rule unless you have a specific reason not to.
Not using the flat picture control. Standard mode crushes shadows and blows out highlights. Flat mode preserves more detail for editing. The downside is that footage looks washed out on the camera screen.
That is normal. You bring back contrast in post.
Ignoring the audio limitations. The D750 has no headphone jack. You cannot monitor audio while recording. That is a serious limitation for professional work.
Use an external recorder like an Atomos if audio quality matters. Or use a microphone with its own headphone output.
Not testing before the real shoot. The D750 video autofocus hunts in low contrast scenes. The rolling shutter is noticeable during fast pans. These are not dealbreakers, but they are limitations you need to plan around.
Shoot a test clip first.
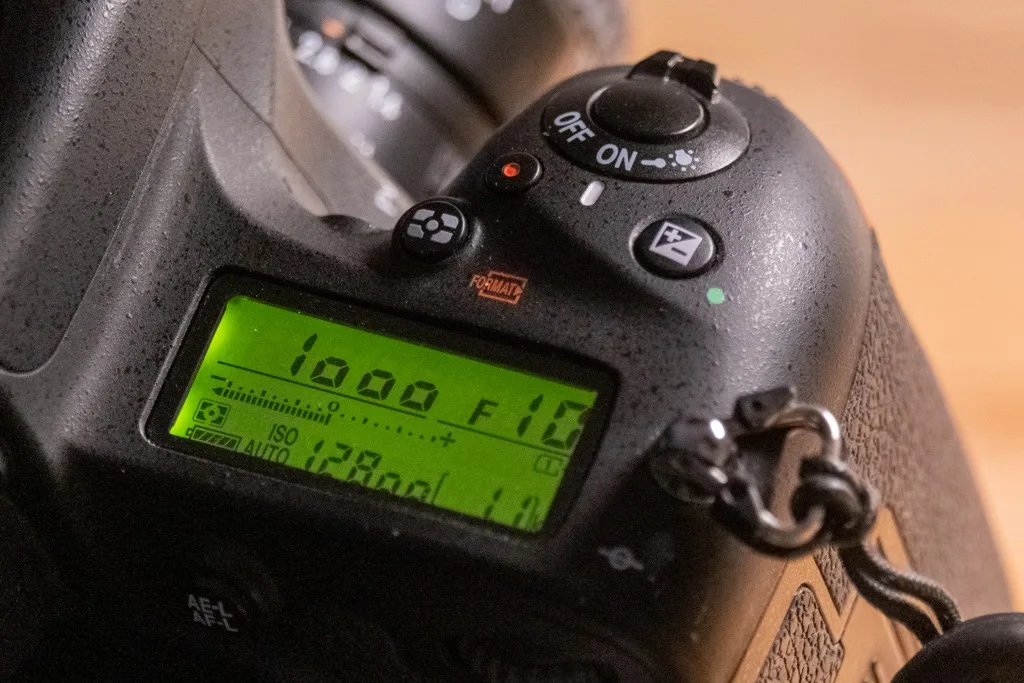
Image source: Web (Bing) / frederikboving.com (Web image (fair-use with source credit))
Running into the 29 minute 59 second record limit. This is a FAT32 file system limitation. The camera automatically stops at 30 minutes. If you are recording events, set a timer.
You will need to restart manually.
If you are running into persistent issues, running through a methodical checklist helps isolate the problem. Cross-checking against known issues for other full-frame DSLRs can also reveal that the D750 is behaving normally for its era.
Pro-Level Video Hacks for Better D750 Footage
Once you have the basic workflow down, a few tweaks can dramatically improve your video quality. These are not in the manual, but they make a real difference.
Use the Flat picture control for grading headroom. Go to Picture Control settings in the shooting menu. Select Flat. This reduces contrast and sharpening.
It gives you more latitude in post production. The footage looks washed out on the camera screen. That is intentional.
You bring back contrast and saturation in editing software. Standard mode clips highlights and shadows. Flat mode preserves them.
Set your white balance manually. Auto white balance shifts continuously during recording. You will see the color temperature change mid-clip. That is impossible to fix cleanly in editing.
Set a manual Kelvin value. Outdoors in daylight, try 5600K. Under tungsten lights, start at 3200K.
Use a white balance card for perfect results.
Enable Active D Lighting for high contrast scenes. This setting boosts shadows and controls highlights in camera. It works in video mode. For sunny outdoor shoots with deep shadows, set it to Normal.
The trade off is slightly more noise in shadow areas. Test it before a critical shoot.
Use a microphone with its own headphone jack. The D750 has no headphone monitoring. You cannot hear what the microphone is actually picking up. A microphone with a built-in headphone output lets you bypass this limitation.
The Rode VideoMic series is a common choice. Run a short test clip and listen back before recording important audio.
Disable vibration reduction on the lens for tripod shots. VR lenses can introduce a subtle wobble when the camera is perfectly still. Flip the VR switch to Off when the camera is on a tripod. Leave it on for handheld shooting.
The difference is small but visible on large displays. Nikon's official support site provides detailed documentation on lens VR behavior for video use.
Frequently Asked Questions About Recording Video on the D750
Do I need to flip the Live View lever every time?
Yes. The Live View lever must be engaged before the red record button works. The camera cannot record through the optical viewfinder.
The mirror must be locked up first. Flip the lever, then press the button.
Can I record 4K video on the Nikon D750?
No. The D750 hardware is limited to 1920×1080 resolution. The sensor and processor do not support 4K recording.
If 4K is essential, consider the Nikon D780 or Z6. Those models offer full-frame 4K video. Troubleshooting guides for newer models can help you compare features.
Why does my video look stuttery or choppy?
Your shutter speed is likely too fast. For 24p video, use 1/50 second. For 30p, use 1/60.
A fast shutter eliminates natural motion blur. That creates a staccato, video-like look. Lower the shutter speed to reintroduce motion blur.
The 180 degree rule prevents this problem.
How do I monitor audio while recording?
You cannot directly through the camera. The D750 lacks a headphone jack. Use an external recorder with headphone monitoring.
Or use a microphone that has its own headphone output. Record a short test clip and check audio playback before your actual shoot.
What is the maximum video length per clip?
29 minutes and 59 seconds. This is a FAT32 file system limit, not a hardware limitation. The camera stops automatically at 30 minutes.
You must press the red button again to continue recording. Some third-party firmware can remove this limit, but that voids the warranty.
Does the D750 overheat during video recording?
Aggregate user reports indicate the D750 handles heat well for 1080p recording. The magnesium alloy body dissipates heat effectively. Overheating is not a common complaint for this model.
It is more of an issue with 4K cameras that push the processor harder. Hot weather and direct sunlight can trigger the temperature warning after extended use.

Similar Posts