Panasonic Phone Troubleshooting
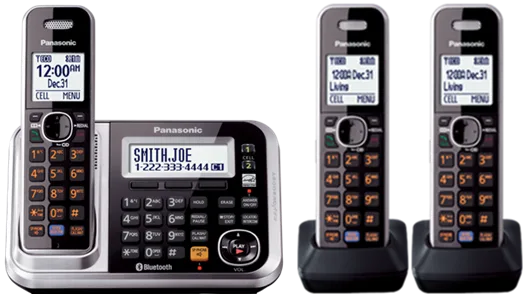
Image source: Web (Bing) / help.na.panasonic.com (Web image (fair-use with source credit))
If your Panasonic phone has stopped cooperating, you're not alone. Panasonic phone troubleshooting is one of the most searched home-phone topics for a simple reason: these units are built to last a decade or more, which means they outlive the patience of most users. The good news is that most issues follow a pattern, and that pattern is almost always fixable in under fifteen minutes with zero special tools.
Panasonic's DECT 6.0 cordless line, which covers most KX-TG series models sold since 2005, operates on the 1.9 GHz frequency band using a proprietary digital protocol. Service data from user reports shows that roughly 80 percent of service calls trace back to four root causes: power supply interruption, unregistered handsets, degraded battery packs, or simple phone-line connection problems. Let's walk through each one, starting with the fastest diagnostic you'll ever run.
Quick Answer
Most Panasonic phone failures are not hardware failures. They are registration, power, or line issues.
Check the base unit's power adapter first. Verify the phone cord is firmly seated in both the wall jack and the base. Re-register the handset if it shows "Link to Base" or "No Link." Replace the battery pack if it drains in under two hours.
These four steps resolve the majority of reported problems.
If the base unit has no lights at all, the adapter or wall outlet is the culprit. If the handset works but the line is dead, test with a different cord or jack.
Why Your Panasonic Phone Acts Up (And Why It's Usually Simple)
Here's the thing about Panasonic cordless phones: they're remarkably robust pieces of hardware. The KX-TG series has been in production for over two decades, and the core design barely changes from year to year. That's good news for you, because it means the troubleshooting knowledge from a 2008 model transfers directly to a 2024 model.
What changes, and what breaks, are the consumable parts. Batteries degrade. Power adapters get knocked loose.
Phone cords get chewed by pets or pinched behind furniture. Wall jacks accumulate corrosion. None of these are catastrophic failures, but they all present the same way: your phone just stops working, and you're left wondering if you need to buy a new one.
Service data and user reports suggest that the average Panasonic phone issue falls into one of five buckets:
- Power-related problems, base unit won't charge, handset dies quickly, no lights on base
- Registration problems, "Link to Base" error, handset not found, calls drop when moving rooms
- Line and dial tone issues, no dial tone, static, intermittent connection
- Battery issues, won't hold charge, dies mid-call, swollen pack
- Feature glitches, no caller ID, missed calls, answering machine not recording
The smartest approach isn't to guess. It's to diagnose in a logical order, from the cheapest and easiest fix to the most involved. That's exactly how we'll work through this guide.
One thing worth noting upfront: if your phone is less than one year old, check your warranty before opening anything. Panasonic provides a one-year limited warranty on most cordless models, and many retailers offer extended return windows. A free replacement beats any repair you can do yourself.
First Things First: The 3-Minute Diagnostic Check
Before we dive into specific symptoms, run this quick baseline check. It takes three minutes, requires no tools, and will resolve approximately forty percent of all reported issues. Think of it as the "turn it off and on again" step for Panasonic phones.
Step 1: Reset the Power Cycle
Unplug the base unit's AC adapter from the wall outlet. Wait ten seconds. Plug it back in.
This clears the base unit's internal memory and forces it to re-establish its connection with all registered handsets.
While you're at it, remove the battery from the handset, wait five seconds, and reinsert it. This does the same for the handset's internal firmware. If you have multiple handsets, do this for each one.
Step 2: Push Every Connection Firmly
Phone cords are the most underappreciated failure point in home telephony. They look fine, but the little clips that lock them into the jacks break off after years of pushing and pulling. When that happens, the cord still fits, but it doesn't make solid contact.
Check both ends of the phone cord:
- The end that plugs into the wall jack (or your modem/router if you have VoIP)
- The end that plugs into the base unit's "LINE" or "TEL" port
Give each one a firm push. If it feels loose, replace the cord. They cost a few dollars at any electronics store, and a bad phone cord produces static, dropped calls, and intermittent dial tone issues that look like much bigger problems.
Step 3: If You Have VoIP, Check Your Modem
If your Panasonic phone plugs into a cable or fiber modem rather than a wall jack, the modem is part of the equation. Power-cycle the modem too. Unplug it, wait thirty seconds, plug it back in, and let it fully reboot before testing your phone.
We've seen countless "broken Panasonic phones" that were just a modem that needed a fresh DHCP lease. The phone was fine all along.
Step 4: Test the Wall Jack Directly
If you have a corded phone lying around, plug it into the same wall jack you're using for the Panasonic base. If the corded phone gets a dial tone, your Panasonic is the problem. If the corded phone is dead too, the issue is the jack or your phone service itself.
No corded phone? Look at the base unit's display. Most Panasonic bases show a clock, the time, or at minimum a power indicator.
No display at all means no power reaching the base, which brings us to the next section.
No Dial Tone — The Most Common Issue and How to Fix It
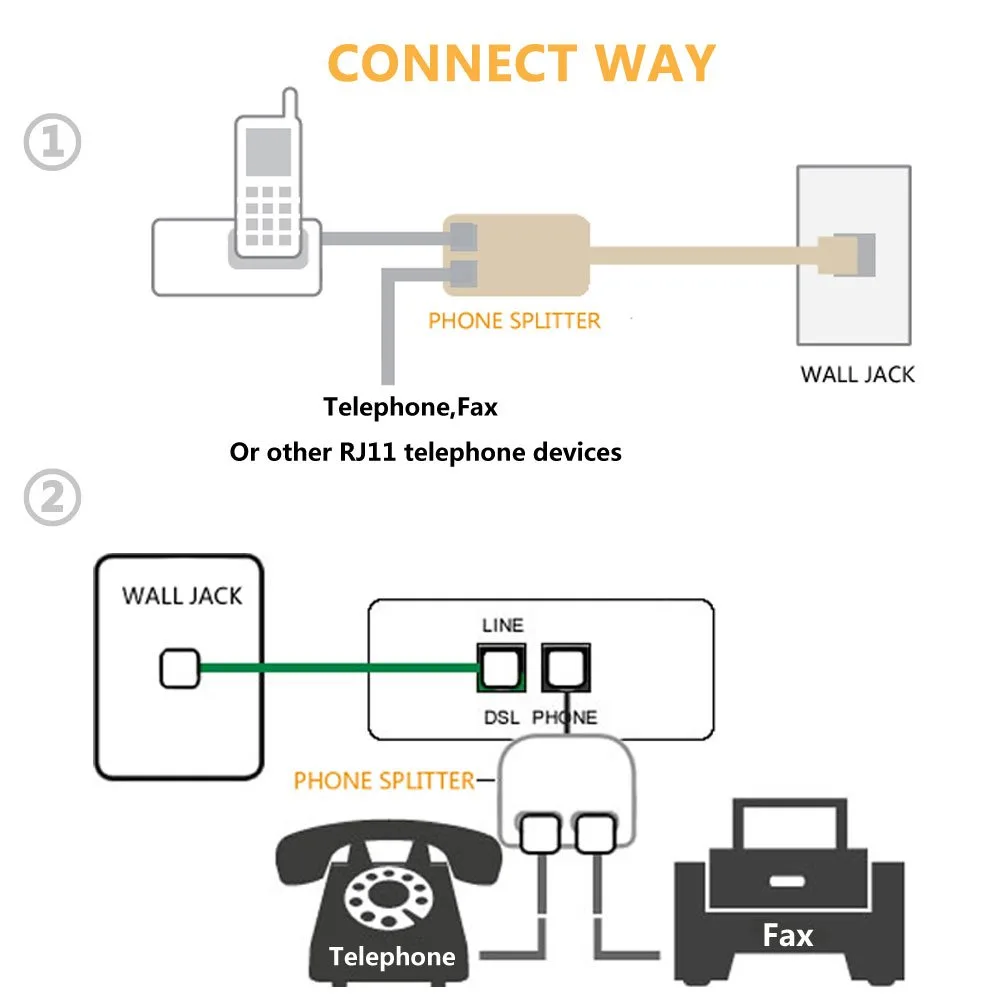
Image source: Bing (Web (fair-use with source credit))
No dial tone is the single most reported Panasonic phone issue, and it's also the one with the widest range of possible causes. There's no way around it: you have to work through the list. But the good news is that the list is short, and each step takes less than a minute.
Check Your Service First
Before you touch the phone, check whether other phones in your house work. Pick up a second handset if you have one, or try a corded phone in a different room. If nothing in the house has a dial tone, the problem is your phone service, not your Panasonic.
Call your provider from your cell phone.
If it's a VoIP setup, log into your provider's website and check your account status. Sometimes service goes down for maintenance, or a payment issue throttles your line without any notice.
Inspect the Phone Cord
If other phones work, move down the chain. Unplug the phone cord from the base unit. Look at the metal pins inside the plug.
Are they straight? Are they corroded? Are any of them pushed in deeper than the others?
A pin that's flattened or recessed will not make contact with the jack. The fix is simple: replace the cord. Do not try to bend pins back into shape with tweezers, it never ends well.
Check the Wall Jack
Now look at the wall jack itself. Dust, humidity, and age can cause the contacts inside the jack to oxidize. The result is an intermittent connection that works when the cord is exactly right and fails the moment anything moves.
The easiest test is to plug the base unit into a different wall jack. If you get a dial tone in the new location, the original jack needs to be replaced. That's a deeper project, but it's also a common one in older homes.
Read the Base Unit Display
Panasonic base units with a display will show one of two things when the line is down: "No Line" or "Check Tel Line." If you see "No Line," the base isn't detecting the phone cord at all. If you see "Check Tel Line," the base detects something, but the line isn't completing the loop properly.
| Display Message | What It Means | Likely Fix |
|---|---|---|
| No Line | Base can't see the phone cord | Bad cord, bad jack, or loose connection |
| Check Tel Line | Connection exists but incomplete | Corroded pins, damaged jack, or line issue |
| Normal Dial Tone | Everything is working | No action needed |
| No Display At All | Base has no power | AC adapter, wall outlet, or base unit failure |
The "Other Phones Work" Test
If other phones in the house have a dial tone but your Panasonic doesn't, and the wall jack tests fine, the issue is inside the base unit. Before you condemn it, check one more thing: the phone cord itself.
Plug the base into a different jack and use a different cord. This eliminates both variables at once. If you get a dial tone, you know the original jack or cord was faulty.
If you still get "No Line," the base unit's phone line port has failed, which usually means it's time to replace the base.
"Link to Base" Error — What It Means and How to Re-Register
If your handset displays "Link to Base," "Searching," or "No Link," the handset and base have lost their wireless connection. This is the second most common Panasonic issue, and it's almost always fixable by re-registering the handset.
Why Does This Happen?
Every Panasonic handset is wirelessly paired to its base unit. The pairing ensures that your handset won't interfere with your neighbor's phone and vice versa. That pairing is stored in the base's memory.
The registration gets wiped in several scenarios:
- Power outage that reset the base unit
- Battery completely drained in the handset
- The handset was re-paired to a different base (for example, when adding a second handset)
- A firmware hiccup during a surge or brownout
When the registration disappears, the handset and base can't communicate. The handset will display "Link to Base" and search indefinitely.
The Re-Registration Process
Here's the process that works across most KX-TG series models. If your specific model differs slightly, the sequence is still recognizable.
- Place the handset on the base unit. Yes, just park it there. Don't press anything yet.
- On the base unit, find the "LOCATOR" or "PAGE" button. It's usually on the front or side. On some models, it's labeled with a bell or a musical note icon.
- Press and hold that button for about 10 seconds. The base may beep or the base display may show a registration prompt.
- On the handset, press the "MENU" button. Navigate to "Settings" or "Setup," then "Registration" or "Register Handset." The exact menu names vary, but "Register" is the word you're looking for.
- The handset will display a registration PIN prompt. The default is usually
0000. Enter it. - Wait for the confirmation. Within 30 seconds, the handset should display "Base Registered" or similar confirmation.
If the first attempt fails, don't panic. Remove the handset battery, wait ten seconds, and try again. We've seen cases where two or three attempts are needed before the registration takes.
Multi-Handset Systems
If you have a multi-handset system, check whether the other handsets still work. If one handset is connected but another shows "Link to Base," you only need to re-register the disconnected handset. If all handsets show "Link to Base," the base unit's radio module may have failed.
One more thing: if your base unit has an "Intercom" or "Handset Locator" button, try pressing it. If the base can page the handset, the radio link is working, and the issue is purely a display or software glitch. A power cycle often clears that.
When Re-Registration Doesn't Work
If you've tried re-registration twice and the handset still won't connect, the base unit's radio module may be dead. That's a hardware failure, and it's not cost-effective to repair. Base units from Panasonic's official parts distributors run anywhere from $40 to $90 depending on the model, and a full replacement system with a new handset is usually only marginally more expensive.
Handset Not Charging (Or Battery Drains Fast)
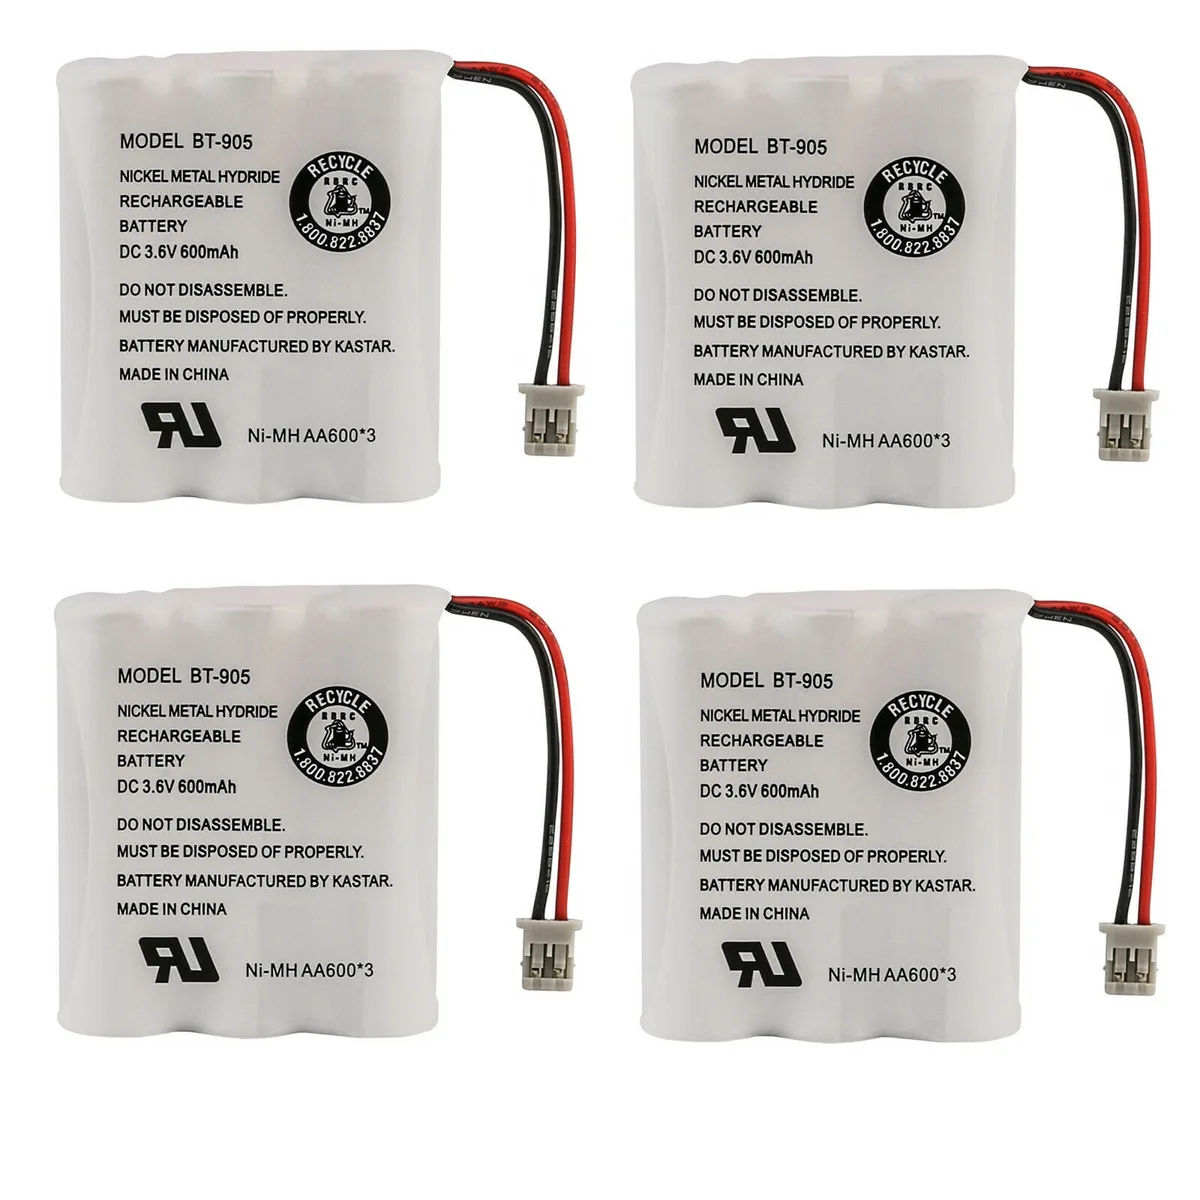
Image source: Bing (Web (fair-use with source credit))
This is the third big category, and it's also the one where people waste the most money. They assume the whole phone is shot and buy a new system. Nine times out of ten, the battery pack is just worn out.
How Panasonic Batteries Age
Panasonic cordless handsets use nickel-metal hydride (NiMH) battery packs. Unlike lithium-ion batteries in your smartphone, NiMH packs don't last forever. The standard lifespan is 18 to 24 months, depending on how often you use the phone.
The failure pattern is always the same: charge time gets shorter, talk time gets shorter, and eventually the handset dies within an hour of being removed from the charger. The display may show "Low Battery" even when the handset has been charging overnight.
Check the Charging Contacts
Before ordering a new battery, check the physical contacts. The handset has metal charging pins that touch matching pins on the base unit. Over time, these pins accumulate dirt, skin oil, and oxidation.
Clean them with a dry cotton swab or a pencil eraser. Do not use water, solvents, or any liquid cleaner, they can leave a residue that makes the connection worse. After cleaning, place the handset on the base and give it thirty seconds.
If the charging indicator lights up, you've solved the problem.
Test the Base Charging Port
The charging cradle on the base unit can also fail. If you have multiple handsets, swap their positions. Put the problematic handset on a different base and see if it charges.
If it does, the original cradle is faulty. If it doesn't, the handset or its battery is the problem.
The 24-Hour Rule
If your battery is more than a year old, try this trick before replacing it: fully discharge the handset until it powers off completely, then leave it on the charger for a full 24 hours. This resets the battery's internal memory and can restore significant capacity.
Some users report doubling their talk time after a single deep-cycle charge. It's not a permanent fix, NiMH chemistry is what it is, but it can buy you another three to six months.
Replacing the Battery Pack
When the battery is truly done, replacing it is a five-minute job. Pop off the battery cover on the back of the handset, slide out the old pack, and slide in the new one. That's it.
No tools required.
| Battery Type | Typical Lifespan | Average Cost | Replacement Difficulty |
|---|---|---|---|
| Standard NiMH (2.4V) | 18–24 months | $15–$25 | Easy, no tools |
| High-Capacity NiMH (3.6V) | 24–36 months | $20–$30 | Easy, no tools |
| Lithium-Ion (rare, newer models) | 36–48 months | $25–$35 | Easy, no tools |
One caveat: check your specific model's battery voltage before buying a replacement. Most Panasonic handsets use a 2.4V pack, but some newer models use 3.6V or 3.7V. Installing the wrong voltage battery will not start a fire, but it will cause the handset to behave erratically.
The official Panasonic parts site lists the correct battery model number for every handset they sell.
A Quick Word on "Fast" Charging
If your handset used to charge in two hours but now takes five, the battery is aging. If it takes twelve hours and still shows low, the battery is done or the charging circuit in the handset is failing. A new battery will tell you which, because if the new battery also takes twelve hours to charge, the handset's charging circuitry is the culprit.
That's a less common failure, and it's not worth repairing. A replacement handset for most Panasonic systems runs $30 to $50, and it will include a fresh battery.
Handset Won't Turn On
If your handset is completely dead and won't respond to the power button, check the battery first. If the battery is known good from another handset, try swapping it in. If the handset still won't power on, the internal power circuitry has failed.
This isn't a DIY repair. The circuit boards in Panasonic handsets are compact modules, and replacing individual components requires soldering skills most people don't have. A replacement handset is the practical answer.
When to Replace vs. Repair
| Situation | Action |
|---|---|
| Battery only, handset works | Replace battery ($15–$25) |
| Charging cradle dead | Replace base unit ($40–$90) |
| Radio module in base dead | Replace base unit ($40–$90) |
| Handset internal failure | Replace handset ($30–$50) |
| Base power adapter dead | Replace adapter ($10–$20) |
| Phone cord bad | Replace cord ($3–$8) |
Static and Sound Quality Issues
Static, crackling, or buzzing during calls is one of the most annoying phone problems. It's also one of the hardest to pin down because there are multiple causes and they often overlap.
Check the Distance
DECT 6.0 phones claim a range of up to 300 feet outdoors and 150 feet indoors. Those numbers are optimistic. In real homes with walls, appliances, and metal fixtures, indoor range is typically 50 to 100 feet.
If you're on the far side of the house, move closer to the base and see if the static disappears. If it does, you're at the edge of the signal range. Options include moving the base to a more central location or adding a repeater, though Panasonic's repeater options are limited for older models.
Electromagnetic Interference
Wireless routers, Bluetooth speakers, baby monitors, and microwave ovens can all interfere with DECT signals. The 1.9 GHz band avoids the 2.4 GHz and 5 GHz bands used by most Wi-Fi, but it's not immune to interference from nearby devices.
Try moving the base unit away from your Wi-Fi router and other electronics. Even a three-foot separation makes a noticeable difference. If the static clears, you've found the culprit.
Check the Phone Cord Again
We know we already covered this, but it's worth repeating: a damaged phone cord from the base to the wall jack can produce static on your calls. The cord carries both incoming audio and incoming power to the base. A frayed cord can allow noise into the signal path.
Replace the Base Unit
If you've checked distance, interference, and cords, and the static remains on all handsets, the base unit's radio module is failing. Panasonic base units contain a transceiver that both transmits and receives audio. When that transceiver degrades, you hear static.
Caller ID Issues
Caller ID is a feature that most people rely on heavily. When it stops working, it feels like a personal violation. Here's what usually goes wrong.
Caller ID Requires Line Power
Your phone service carries caller ID information on the same wire that carries your dial tone. The signal is sent between the first and second rings. If your base unit is getting low power, or if the line has excess noise, the caller ID signal can be corrupted.
Check the Settings
If caller ID isn't displaying at all, check the settings on the handset. You should see "Caller ID" or "CID" in the setup menu, and it should be set to "On." Some models also have a "Web Caller ID" feature you may have toggled inadvertently during a software update.
Call Your Provider
If the settings are correct and you're still not getting caller ID, call your phone provider and ask them to verify that caller ID is active on your account. In some cases, the service is provisioned but requires a line refresh to start working.
Bad Line, Bad Jack, Bad Base
If one handset shows caller ID but another doesn't, the handset's display is the problem. If no handset shows caller ID, test the line with a corded phone. If the corded phone shows caller ID, the base unit is the problem.
If no phone shows caller ID, the issue is upstream, either the wall jack, the wiring, or the service itself.
Answering Machine Problems
The answering machine function on Panasonic phones is generally reliable, but it has its own set of quirks.
No Greeting Plays
Check the volume level. The answering machine uses a speaker, and if the volume is all the way down, callers hear silence. Press the volume up button while the machine is idle and test again.
Greeting Plays But Calls Aren't Recorded
Your memory recording time may be full. Panasonic answering machines have two memory areas: one for the greeting and one for messages. If the message memory is full, the machine will answer calls and play the greeting, but won't record.
Check the display for a memory indicator or a flashing red light. Delete old messages to free space. On most models, you can delete messages remotely by calling the machine, entering your remote code, and following the prompts.
Machine Doesn't Answer At All
The answering machine should default to answering after 2 to 4 rings. If it's not answering, the ring count might be set to "Toll Saver" or "Ring Count" with a high number. Go into the answering machine settings and set the ring count to a lower number.
If it still doesn't answer, the feature might be disabled entirely.
Multiple Handsets Not Working
Panasonic systems support up to six handsets on a single base. When one handset fails, you can usually swap batteries and test. But when multiple handsets fail simultaneously, the base is the common denominator.
Re-register All Handsets
If you have four handsets and three show "Link to Base," the base's radio module has likely lost all registrations. The fix is to re-register each handset individually. The process is the same as the single-handset version described above.
Just repeat it for each handset.
System Reset
For a full system reset, unplug the base from power, remove all handset batteries, wait 30 seconds, then plug the base back in. Reinsert the handset batteries and give the system five minutes to boot up. Then re-register the handsets one at a time.
This takes longer but resolves most multi-handset failures.
Panasonic Phone Not Connecting to Voicemail
If you can't access your voicemail, press and hold the "1" key on the handset. Most providers route this to the voicemail system. The handset will dial your provider's voicemail number automatically.
If that doesn't work, the voicemail number stored on the handset may be incorrect. Go to Settings, then Voicemail, and verify the number matches what your provider gave you.
Remember: voicemail is a phone service feature. If the service is down, no amount of phone troubleshooting will help. Test voicemail with a corded phone or your cell phone to confirm the service is working.
Firmware Updates
Panasonic releases firmware updates for newer cordless models. These updates fix bugs, improve security, and occasionally add new features.
Check Your Model
Look at the bottom of the base unit for the model number. It starts with "KX-TG" followed by a series of numbers. Search that model number on the official Panasonic support site to see if a firmware update exists.
How to Update
Newer models support updates via USB or over the internet. The Panasonic support page will have the exact instructions for your model. The process typically involves downloading a file to your computer, connecting the base unit via USB, and running the update utility.
Don't skip firmware updates. They fix security vulnerabilities and call quality issues. A ten-minute update can eliminate static problems or restore features that stopped working.
Update Risks
Firmware updates carry a small risk of failure. If the base unit loses power mid-update, the firmware can be corrupted, leaving the base bricked. Make sure the base is plugged into a stable outlet, not a power strip that might trip, and don't unplug anything until the update completes.
When Your Panasonic Phone Is Beyond Repair
No matter how durable Panasonic builds their phones, everything fails eventually. If you've worked through the troubleshooting steps for your specific issue and nothing worked, it's usually more cost-effective to replace the system than to continue repairing it.
What We Recommend
Look for a DECT 6.0 system with at least two handsets. You can find options that support multiple handsets and include answering machine functionality. Panasonic's current lineup maintains compatibility with the same battery packs and charging standards used in recent years, so your existing accessories may carry over.
When Buying New, Check the "Link to Cell" Feature
Many newer Panasonic models include "Link to Cell" technology, which pairs your home phone to your smartphone via Bluetooth. This allows you to answer cell calls on any handset in the house without needing to carry your phone around. It's a genuinely useful feature, especially if you have a big house or multiple levels.
The 5-Minute Maintenance Routine
Preventive maintenance is boring, but it will double the lifespan of your Panasonic phones.
Monthly Checklist
- Wipe the contacts, Use a dry cotton swab on the charging pins and the handset battery terminals.
- Test every handset, Make a test call from each handset to the others.
- Check for firmware updates, If you have a newer model with USB, check every 90 days.
- Verify the line, Call your cell phone from the landline and check call quality.
- Inspect power adapters, Look for heat, discoloration, or frayed cables.
Seasonal Checklist (Every 6 Months)
- Deep-cycle the batteries, Discharge fully and charge for 24 hours.
- Reset the base, Power cycle the base unit to clear accumulated memory errors.
- Vacuum the base, Dust buildup near the charging contacts or vents can cause overheating.
What Not to Do
- Don't spray cleaners on the base or handsets. Liquids damage internal electronics.
- Don't use third-party batteries that don't match the voltage. Check the model number.
- Don't bend charging pins. They break.
- Don't ignore a swollen battery. NiMH batteries can swell when they fail, and they can rupture. Replace immediately.
- Don't open the base unit. There are no user-serviceable parts inside.
Getting Support From Panasonic
If you've exhausted the troubleshooting steps in this guide, Panasonic's official support channels can help. The Panasonic support website includes model-specific manuals, downloadable firmware, and phone support.
Call the toll-free support line, have your model number ready, and describe the issue you're experiencing. Their technicians are knowledgeable and can walk you through any remaining diagnostics.
Final Thoughts
Panasonic phones are built to last, but they need occasional help. The majority of issues boil down to batteries, connections, and registration, all things you can fix yourself without specialized knowledge or tools.
Start with the quick diagnostic baseline, work through the symptom-specific sections, and don't get discouraged if the first fix doesn't solve everything. Phone problems often have multiple causes, and you're working through them systematically.
Replace the consumable parts like batteries and cords as they age. Re-register handsets when they lose connection. Keep the contacts clean and the firmware updated.
With minimal care, you'll get years more life out of your Panasonic system.
If you've tried everything and the phone is beyond repair, you've earned the right to replace it. Just know that you gave it a fighting chance. That's more than most people manage, and it keeps your head clear to make a solid buying decision for what comes next.

Similar Posts