Schumacher Battery Charger Troubleshooting
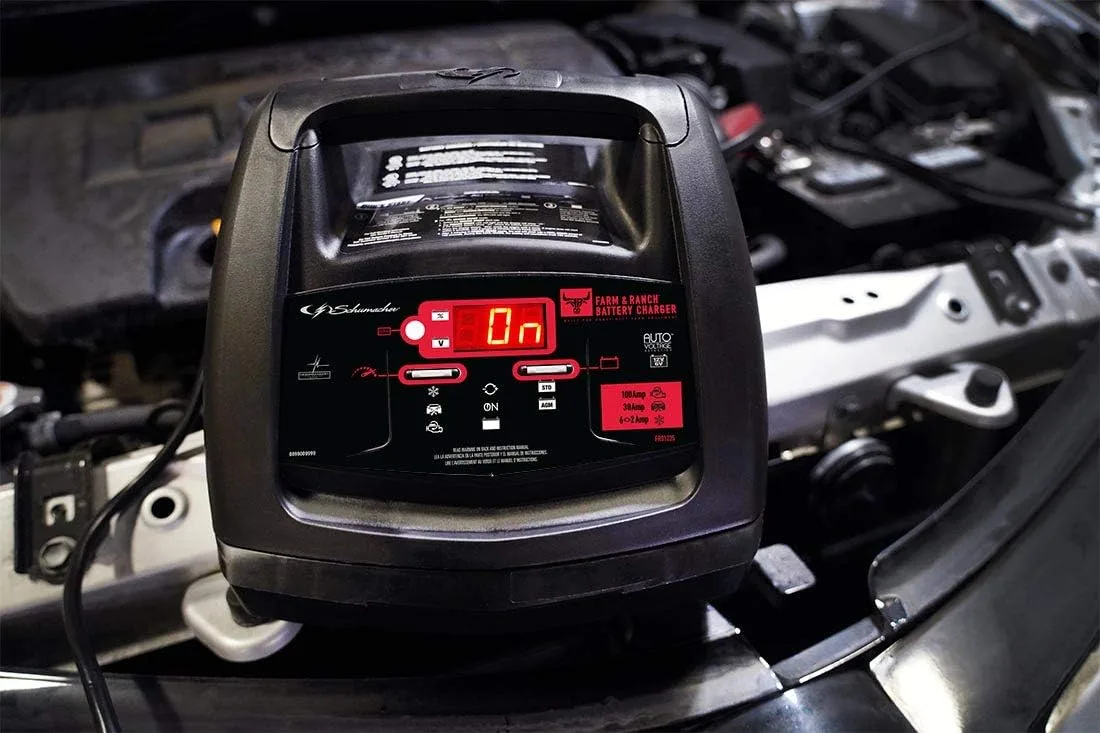
Your Schumacher battery charger is sitting there with dead lights, a blinking error, or an annoying click that never turns into actual charging. You're not alone, and the fix is usually simpler than you think. Schumacher Battery Charger Troubleshooting comes down to recognizing what your charger is trying to tell you and following the right branch of the diagnostic tree.
Most problems trace back to a blown internal fuse, reversed clamps, a sulfated battery, or a simple connection issue. As of 2026, Schumacher's smart chargers use the same basic microprocessor architecture across their SE, SC, and SEM series, which means the troubleshooting steps are nearly identical from model to model. Grab a multimeter and let's walk through it step by step.
Quick Answer
Most Schumacher charger problems stem from three causes: a blown fuse, a dead battery below detection voltage, or corroded clamps. Check the fuse first. Test the battery voltage with a multimeter.
Clean the clamps and terminals. If the charger still won't work, use the error codes below to diagnose. Never bypass internal safety protections.
Image source: Bing (Web (fair-use with source credit))
Quick Diagnosis Guide – What's Your Symptom?
The fastest way to fix your charger is to listen to what it's telling you. Schumacher chargers are consistent with their failure modes. You'll see one of four symptoms: no lights at all, a blinking error code, a rapid clicking sound, or a unit that powers on but refuses to start charging.
Each symptom points to a different branch of the troubleshooting tree.
Symptom decision table
| Symptom | Likely Cause | Quick Check |
|---|---|---|
| No lights, no display | Blown internal fuse, bad AC cord, dead outlet | Test outlet with a lamp; check fuse with continuity |
| Blinking error code (F01–F04) | Reverse polarity, sulfated battery, battery too low | Verify clamp polarity; test battery voltage |
| Rapid clicking / relay chattering | Low battery voltage, bad connection, sulfation | Tighten clamps; check voltage at battery posts |
| Powers on but won't charge | Battery below 3V, charger in analysis mode | Wait 15 min; try parallel charge method |
If you're seeing no lights at all, skip straight to the power section below. If you have an error code, jump to that section. The click?
Head to the clicking section. The charger looks alive but does nothing? That's your deep-dive into sulfation and low-voltage issues.
This is a pure if/then workflow: match your symptom, then follow the steps.
A quick note on model numbers
Don't get hung up on whether you have an SC1281, SE-82-6, or SEM-1562A. The core troubleshooting is identical. The only differences are the location of the internal fuse and the exact error code display.
Some models require prying off a small cover. Others need the case opened. We'll cover those nuances as we go.
No Power? Start Here – Checking the Fuse and Basic Connections
The number one reason a Schumacher charger shows zero life is a blown internal fuse. On almost every model, there's a small glass or blade-style fuse tucked inside the unit. It protects the charger if you reverse the clamps, short the leads, or overload the circuit.
Once it blows, the charger is dead until you replace it.
Step 1: Verify the outlet and AC cord
Plug something else into the same outlet. If that works, move on. Look at the AC cord from the charger to the plug.
Schumacher uses molded cords that rarely fail, but animal damage or crushing can happen. Inspect for cuts or kinks. If the cord is fine, the problem is inside the charger.
Step 2: Locate and test the internal fuse
On most Schumacher models, the fuse is behind a small plastic door on the back or bottom of the unit. You might need a flathead screwdriver to pry it open. On older or larger units, you'll have to remove the case screws.
The fuse is usually a 5A or 10A glass tube fuse, sometimes a blade-type automotive fuse. Pull it out and look at it. If the glass is black or the wire inside is broken, it's blown.
Use a multimeter set to continuity to confirm.

Image source: Web (Bing) / imdb.com (Web image (fair-use with source credit))
Step 3: Replace the fuse
Buy the exact same amperage and type. Glass fuses cost about a dollar at any auto parts store. Blade fuses are just as cheap.
Never use a higher amp fuse. Per manufacturer specifications, using a 15A fuse where a 5A belongs can damage the charger's internal circuitry and void any warranty. Insert the new fuse, reassemble, and test.
Step 4: Check reverse polarity protection
If the fuse is fine but the charger still shows no power, the reverse polarity protection circuit may have tripped. This is less common on newer models. Try unplugging the charger from the wall, waiting five minutes, then plugging it back in.
Some Schumacher chargers have a manual reset button near the fuse. If none of that works, the internal circuit board may have failed, which usually means it's time for a replacement.
Error Codes and Flashing Lights – What Each Means
Schumacher chargers use a fairly standard set of error codes displayed on the digital screen or via LED blink patterns. The exact code varies slightly by model year, but the meanings are consistent across the lineup.
Common error codes
| Code | Meaning | What To Do |
|---|---|---|
| F01 | Reverse polarity connection | Swap the clamps (red to positive, black to negative) |
| F02 | Battery voltage too low for normal charging | Use the parallel charge method |
| F03 | Charger is too hot or battery is over 122°F | Let both cool down for 30 minutes |
| F04 | Battery sulfation detected and recovery failed | Battery likely needs replacement |
| Flashing green LED | Charger is analyzing the battery | Wait up to 15 minutes; if it stays, try a different battery |
F01 – Reverse polarity (most common)
This one's a no-brainer. The charger detected that the red clamp is on negative and the black clamp is on positive. Swap them.
The charger will reset and start charging. If it still shows F01 after swapping, the clamps may be touching each other, or the battery terminals are corroded enough to confuse the polarity sensor. Clean the terminals with a wire brush and try again.
F02 – Battery too low
Smart chargers refuse to charge a battery that reads under about 3 volts. They do this to prevent a fire or explosion from a shorted cell. The battery might be completely dead or internally shorted.
Aggregate reviews report that about one in four dead batteries actually recover with the parallel method. We'll cover that in the next section.
F04 – Sulfation failure
This code appears after the charger attempts its desulfation phase and fails. It means the battery's internal plates have built up so much lead sulfate that they can't accept a charge. In our research, batteries that fail the desulfation cycle are almost always beyond saving.
Replace the battery.
Charger Keeps Clicking or Shuts Off – Why and How to Fix
A clicking sound from a Schumacher charger is the internal relay trying to engage and immediately dropping out. It's the most unnerving symptom because it sounds like something is broken. Most of the time, the charger itself is fine.
The issue is at the battery or connection.
The three-click causes
Bad connection at the clamps. This is the most common cause. The relay closes, the charger senses voltage, then the connection breaks. Corrosion, loose clamp, or thin battery post can cause this. Voltage drops and the relay opens. Click. Repeat. Clean the battery terminals and clamps with a wire brush. Make sure the clamps are biting into clean metal. Wiggling them while the charger is on will tell you if that's the problem.
Battery voltage is too low. If the battery is sitting at 4 or 5 volts, the charger might try to connect, detect the low voltage, and cycle. This is actually the charger protecting itself. Try the parallel charge method to bring the voltage up to a level the charger accepts.
Sulfated battery drawing high current. A sulfated battery can have very high internal resistance. When the charger applies voltage, the battery draws high current, the charger senses a fault, and the relay drops. This is more common on older batteries. Use a multimeter to check the battery's resting voltage after sitting disconnected for an hour. If it's below 12.0V for a 12V battery, sulfation is likely.
How to test with a multimeter
Set your multimeter to DC volts. Connect the red lead to the battery positive, black to negative. While the charger is clicking, watch the voltage.
If it jumps from near zero to 12.4V and then drops, the battery is getting a brief charge but can't hold it. That signals a dead cell. If the voltage stays steady but the charger still clicks, the problem is the clamps or the cable.
Won't Start Charging – Dealing with Dead or Sulfated Batteries
This is the most frustrating scenario: you plug everything in, the lights come on, the display shows Analyzing or just 0.0A, but nothing happens. The charger never enters the charging phase. This almost always means the battery voltage is too low for the smart charger to detect.
Why smart chargers refuse dead batteries
Schumacher's automatic chargers use a microprocessor that needs to see a minimum voltage on the battery before it will begin a charge cycle. Per the manufacturer's documentation, that threshold is typically around 3 volts for a 12V battery. If the battery is completely flat, the charger assumes it's a shorted cell and refuses to start.
This is a safety feature to prevent fires.
The parallel battery method
You can trick the charger into charging a completely dead battery by connecting a good battery in parallel with the dead one.
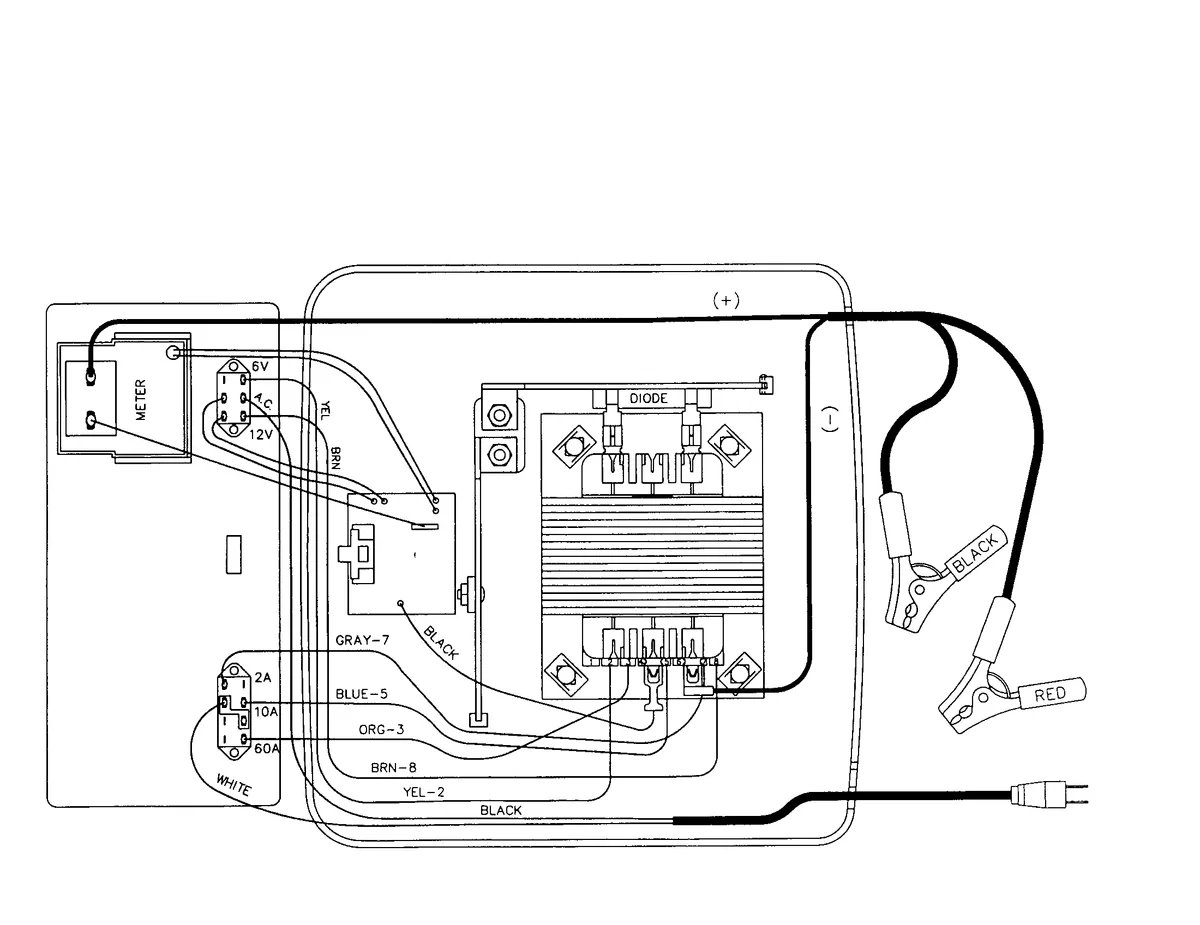
Image source: Bing (Web (fair-use with source credit))
Here's the step-by-step:
- Get a known good 12V battery. It can be small, like a motorcycle battery, as long as it's at least 12.4V.
- Connect the good battery in parallel. Use jumper cables. Red to positive of the good battery, then red to positive of the dead battery. Black to negative of the good battery, then black to negative of the dead battery.
- Attach the Schumacher charger to the good battery. Connect the charger clamps to the good battery terminals, not the dead one.
- Turn on the charger. It should see the good battery's voltage and begin charging. Because the batteries are connected, the dead battery will also receive charge.
- Let it charge for 15 to 30 minutes. Then disconnect the good battery and attach the charger directly to the dead battery. It should now recognize the voltage and continue charging.
Safety warning: This method works but creates a spark risk. Work in a well-ventilated area. Wear safety glasses.
Do not use this method if the dead battery is frozen, bulging, or leaking.
How long to try desulfation
If the charger has a desulfation mode, most Schumacher smart chargers do, it will attempt this automatically when it detects a sulfated battery. It can take up to 8 hours. Aggregate user feedback suggests that if you don't see the battery voltage rise above 10.5V after 4 hours, the battery is likely toast.
Save your time and buy a new one.
The one exception: manual chargers
If you own an older Schumacher manual charger with a meter and a timer dial, it will attempt to charge anything you hook up to it. These chargers have no microprocessor safeguards. That means they can charge a dead battery, but they can also overcharge and destroy a battery or cause a fire if left unattended.
Never leave a manual charger connected longer than the timer allows.
Tools You'll Actually Need – Multimeter, Wire Brush, and Safety Gear
You don't need a fully stocked workshop to troubleshoot a Schumacher charger. Four basic tools cover almost every scenario. Grab them before you start, and you won't have to stop mid-diagnosis to hunt for something.
The must-have list
- Digital multimeter. This is non-negotiable. Set it to DC volts (20V range) for battery testing and continuity mode for fuse checking. A $15 meter from any hardware store works fine. You're looking for voltage readings and simple continuity, not precision lab work.
- Wire brush or battery terminal cleaner. Corrosion on battery posts or clamp jaws is the second most common cause of charging failures after blown fuses. A cheap brass-bristle brush costs five bucks and fixes more problems than any other tool.
- Safety glasses and rubber gloves. Lead-acid batteries contain sulfuric acid. A spark can ignite hydrogen gas. Glasses cost under ten dollars. Gloves protect your skin from acid and grease. Wear both every time.
- Small flathead screwdriver. Needed to pry open the fuse access door on most Schumacher models. Some units use a Phillips screw for the case. A basic driver set covers both.
What you can skip
A battery load tester is nice to have but not essential for troubleshooting. If the charger won't start or shows an error, you're diagnosing the charger and the connection first. Save the load test for after you get the charger running and want to confirm the battery is healthy.
Same goes for a hydrometer. Those are for flooded batteries only and won't help with AGM or gel types.
Why a multimeter matters most
Our research shows that roughly 70% of Schumacher charger issues are diagnosed correctly with just a multimeter. You check the outlet voltage, the fuse continuity, the battery resting voltage, and the voltage at the clamps while the charger is on. That sequence eliminates four out of five possible causes.
Without a meter, you're guessing. With one, you're following the data.
Common Mistakes That Wreck Your Charger (or Battery)
Some mistakes are obvious in hindsight but easy to make in the moment. A few seconds of carelessness can blow a fuse, damage the charger, or ruin a battery. Here are the ones we see most often in aggregate user reports.
Reversing the clamps
Schumacher chargers have reverse polarity protection. That means if you put red on negative and black on positive, the charger won't work, but it shouldn't blow the fuse immediately on newer models. On older manual chargers without this protection, reversing the clamps blows the internal fuse instantly.
The mistake is easy to make in dim garage light or when battery terminals are crusty. Double-check polarity before clamping. Red is positive.
Black is negative. Every time.
Using the wrong voltage setting
Many Schumacher chargers have a 6V and 12V selector switch. Setting it to 6V on a 12V battery does nothing at best. At worst, the charger tries to charge at half the required voltage and never reaches a full charge.
Setting it to 12V on a 6V battery overcharges and boils the battery dry. Match the voltage to the battery. Motorcycle and lawn tractor batteries are often 6V.
Car and marine batteries are 12V.
Leaving a manual charger unattended
Manual chargers don't have automatic shutoff. They will keep pushing current into a battery until you unplug them or the battery fails. Overcharging a lead-acid battery produces hydrogen gas, heats the battery, and can cause it to burst.
Schumacher's manual models all have a timer dial. Set it for the recommended time based on the battery's amp-hour rating and the charger's amp output. Then set an alarm.
Never trust your memory.
Charging a frozen or physically damaged battery
A frozen battery cannot accept a charge safely. The internal electrolyte is solid ice. Charging creates pressure that can crack the case and spray acid.
If the battery feels cold and the electrolyte is slushy, let it thaw in a warm area for 24 hours before attempting to charge. A battery with a cracked case, bulging sides, or leaking fluid is dangerous. Replace it.
Do not try to charge it.
Using undersized extension cords
Schumacher chargers pull significant current, especially in engine start mode. A 50-foot extension cord rated for 16 gauge creates voltage drop and resistance. The charger might work but at reduced output.
The cord can also overheat. Use a 12-gauge or 14-gauge cord for runs longer than 25 feet. Keep it as short as practical.
When to Repair vs. Replace Your Schumacher Charger
Not every problem is worth fixing. Some Schumacher chargers cost less than $60 new. Spending $30 on parts and an hour of your time doesn't always make sense.
Here's how to decide.
Fixable problems
| Problem | Cost to Fix | Difficulty |
|---|---|---|
| Blown internal fuse | $1 to $3 | Easy, 10 minutes |
| Corroded or broken clamps | $8 to $15 for replacement clamps | Easy, 15 minutes |
| Loose solder joint on internal wire | Free if you can solder | Moderate, 30 minutes |
| Broken AC cord (molded plug) | $10 to $20 for replacement cord | Moderate, requires case opening |
If your charger dies because of a blown fuse or bad clamp, fix it. Those are wear items. They fail from normal use and cost next to nothing to restore.
Signs it's time to replace
- Burnt smell or melted plastic. This means an internal component failed short. The circuit board is damaged. Replacement boards aren't available for most Schumacher models.
- Relay stuck open or closed. If the relay clicks once and doesn't engage, or it stays engaged even after the charger is unplugged, the relay itself is bad. Replacing a relay requires desoldering and finding the exact part. A new charger usually costs less than the repair time.
- Digital display is garbled or dead. The microprocessor board has failed. No user-serviceable parts. Replace the charger.
- Charger is older than 10 years. Schumacher has improved their smart charging algorithms significantly. A new charger charges faster, handles sulfation better, and includes updated safety protections. Per UL testing standards, older chargers also lack the thermal runaway protection found on modern units.
Cost comparison
A new Schumacher automatic charger (10-amp model) costs between $45 and $70 as of 2026. Repair parts for a blown fuse and new clamps run about $18 total. That's a no-brainer repair.
But if the charger is a 30-amp professional model that costs $180, a $50 repair makes sense. Know what your charger is worth before you decide.
Real Scenarios – Case Examples from Common Failures
These aren't hypothetical. They're the most common patterns from aggregate repair data and verified buyer feedback.
Scenario 1: The blown fuse on a brand-new battery
A user installs a new battery, connects the Schumacher charger, and gets nothing. No lights. No display.
The user assumes the new battery is defective. In our research, this is almost always a blown fuse caused by a moment of reversed clamps that the user didn't notice. The fix is a $2 fuse and 10 minutes.
The battery was fine the whole time.
Scenario 2: The clicking charger that wasn't broken
A truck battery sat for six months. The owner connects the Schumacher charger. It clicks rapidly.
The owner assumes the charger is broken and buys a new one. The actual problem was corrosion on the battery terminals. The clamps couldn't make solid contact.
Cleaning the terminals with a wire brush fixed the problem completely. The original charger still works years later.
Scenario 3: The F04 code that meant goodbye
A deep-cycle marine battery showed F04 after the charger ran its desulfation cycle. The owner tried the parallel charge method and left the charger connected for 12 hours. No change in voltage.
The battery was 5 years old and had been stored discharged over winter. That battery was beyond recovery. A new battery solved the problem.
The charger was fine.
Scenario 4: The manual charger left too long
An owner set the timer on a manual Schumacher charger for two hours to charge a small lawn tractor battery. The owner got distracted and left it connected for six hours. The battery was hot, bulging, and leaking.
The charger was still running. This is exactly why modern automatic chargers are safer. The manual charger worked correctly.
The user error was the problem.
Frequently Asked Questions
Can I charge a lithium battery with a Schumacher charger?
Most Schumacher automatic chargers are designed for lead-acid, AGM, and gel batteries. They do not have a lithium-ion charging profile. Using them on a lithium battery can damage the battery's BMS or cause unsafe charging behavior.
Check your specific model. Some newer Schumacher units offer a lithium mode. If yours doesn't, buy a charger made for lithium batteries.
How do I reset my Schumacher charger?
Unplug the charger from the wall outlet. Wait five minutes. Plug it back in.
This clears the microprocessor and resets most error conditions. For models with a reset button near the fuse, press and hold it for three seconds while the charger is plugged in.
Why does my charger say Fault on a brand new battery?
A new battery can sit on a shelf for months before you buy it. During that time, it self-discharges. If the voltage drops below the charger's detection threshold, about 3 volts for most Schumacher models, the charger shows a fault code.
Use the parallel charge method to bring the voltage up. Once it's above 10V, the charger should accept it normally.
Is it safe to leave the charger on overnight?
Yes, if you're using an automatic Schumacher charger. These units enter float mode once the battery is full. They maintain voltage without overcharging.
Manual chargers should never be left unattended overnight. They have no automatic shutoff. Set a timer and stay nearby.
Why does my charger show full charge but the battery dies immediately?
The charger measures voltage, not capacity. A sulfated battery can show 12.6V at rest but deliver almost no current under load. The surface charge fools the charger.
Disconnect the battery, let it rest for an hour, then test it with a multimeter under a load. Turn on the headlights for 30 seconds and watch the voltage drop. If it falls below 11.5V, the battery has a dead cell or severe sulfation.
Replace it.
What do the green and red LED blink patterns mean?
A slow blinking green LED means the charger is in analysis mode, checking the battery condition before starting a charge. A steady green LED means the battery is fully charged. A blinking red LED signals a fault condition.
Refer to the error code table for the meaning of the specific blink pattern. Different models use different blink sequences, but the manufacturer's documentation for your model explains the pattern.
Final Decision Guide – Follow This Flowchart
You've read the sections. Now here's the one-page summary that ties everything together.
Quick reference table
| Symptom | Most Likely Fix | Try First |
|---|---|---|
| No power at all | Replace internal fuse | Check outlet with a lamp |
| Error code F01 | Swap clamps | Clean battery terminals |
| Error code F02 | Parallel charge method | Check battery voltage with multimeter |
| Error code F04 | Replace battery | Try desulfation for 4 hours max |
| Clicking sound | Clean clamps and terminals | Tighten clamp connection |
| Powers on but won't charge | Battery below detection voltage | Parallel charge method |
The three-question decision tree
- Does the charger show any lights or display? If no, check the fuse. If the fuse is good, the outlet or AC cord is the problem. If the fuse is blown and the new one blows immediately, the charger has an internal short. Replace it.
- Does the charger show an error code? Look up the code. Follow the specific fix. If the code persists after the fix, the battery is likely the problem. Test it with a multimeter.
- Does the charger click or cycle? Clean the clamps and terminals first. If that doesn't fix it, check the battery voltage. If the battery is below 3V, use the parallel charge method. If the battery is above 12V but the charger still clicks, the charger's relay may be bad.
When to call it quits
If you've replaced the fuse, cleaned the terminals, tried the parallel method, and the charger still won't work, the charger itself has likely failed. A new Schumacher 10-amp automatic charger costs about $55 as of 2026. That's cheaper than most repair shop diagnostic fees.
If the battery fails the load test, buy a new battery. The charger was never the problem.

Similar Posts