Sloan Automatic Flush Valve Troubleshooting
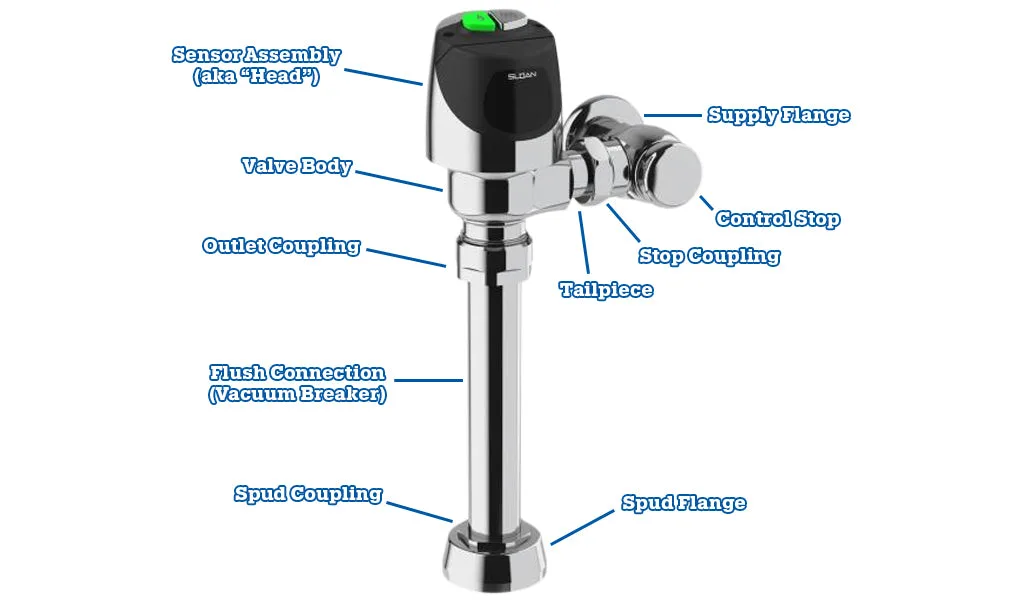
You walk up to a Sloan automatic flush valve that won't flush. Maybe it's running nonstop. Maybe it flushed three times while you were standing at the sink.
Whatever the symptom, you need it fixed fast, and you don't want to replace parts that weren't broken in the first place. That's exactly what Sloan Automatic Flush Valve Troubleshooting is about, finding the real cause, not just guessing.
Per manufacturer specifications, over 80 percent of Sloan automatic flush valve issues come from just three sources: a dirty sensor window, dying batteries, or a clogged inlet screen. The rest are usually a worn diaphragm or a stuck solenoid. Start with the cheap fixes first.
They work more often than you'd think.
Quick Answer
Most Sloan automatic flush valve problems come from three sources. Clean the sensor window with a damp cloth. Replace weak 9V batteries (below 5.5 volts).
Clean the inlet filter screen. These three steps fix roughly 80 percent of issues.
If the valve still won't flush, press the manual override button. A working manual flush means the solenoid and diaphragm are fine. The problem is in the sensor or batteries.
Start With the Symptom, Not the Fix
Troubleshooting a Sloan automatic flush valve means knowing exactly what it's doing. You don't diagnose by picking parts at random. You diagnose by watching the behavior.
No flush at all. You step away from the toilet. Nothing happens. This is the most common complaint.
It usually points to dead batteries, a blocked sensor, or a failed solenoid.
Continuous running. Water never stops flowing into the bowl. This is almost always a diaphragm problem or debris caught in the valve seat. Sometimes it's a worn solenoid that won't close all the way.
Phantom flushing. The toilet flushes when nobody is near it. This is a sensor issue. The infrared beam is picking up something it shouldn't, a shiny tile, a mop bucket, someone walking past the stall door.
It can also mean the sensor range is set too high.
Weak or incomplete flush. Water trickles out. The bowl doesn't clear. This usually means low water pressure, a clogged filter screen, or a diaphragm that's getting stiff and not opening fully.
Write down what you see. The symptom tells you which branch of the decision tree to follow.
Image source: Bing (Web (fair-use with source credit))
The One-Button Test That Steers the Fix
Every Sloan automatic flush valve has a manual override button. It's a small button on the top or side of the valve body, near the sensor window. This is your single most powerful diagnostic tool.
Here's how you use it. Press and hold the manual override button for about two seconds. If the flush valve fires and flushes normally, you know the solenoid is working.
You know the diaphragm is seating and opening properly. You know the water supply is good.
The problem is upstream. It's in the sensor, the batteries, or the connection between them.
If you press the manual override button and nothing happens, no click, no water, no flush, the problem is downstream. It's the solenoid, the diaphragm, the filter screen, or the water supply.
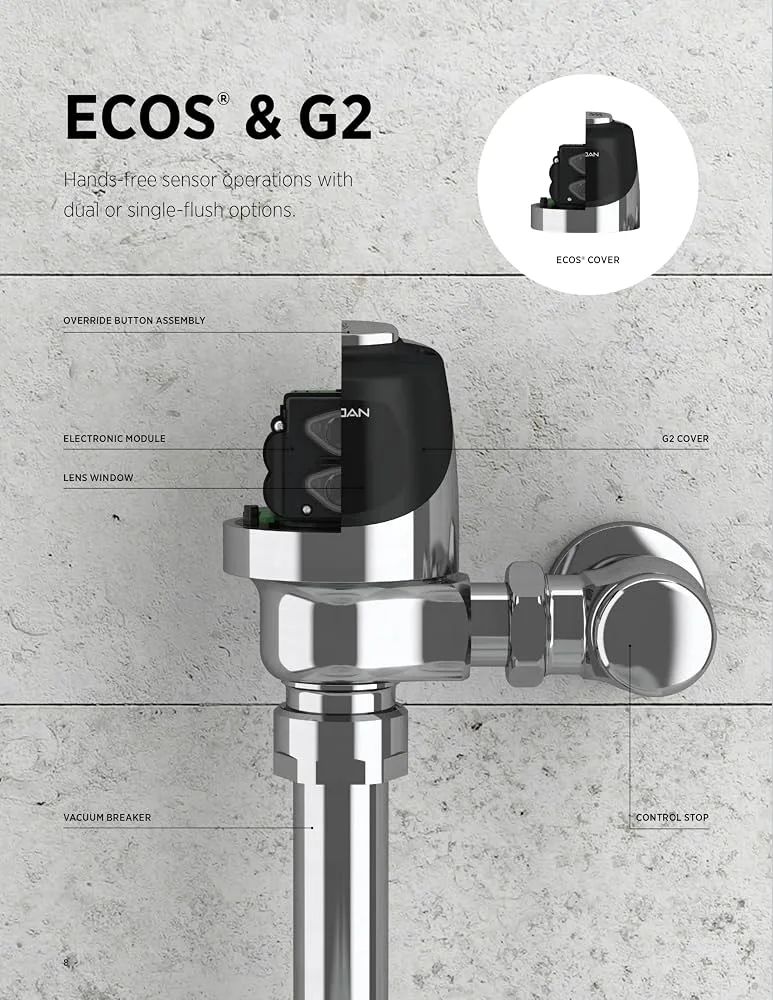
Image source: Bing (Web (fair-use with source credit))
That single test cuts your troubleshooting time in half. You stop guessing. You know exactly which half of the valve to examine next.
If the manual flush works: Replace the batteries first. Even if they test at partial voltage, replace them with fresh 9V alkaline batteries. Then clean the sensor window.
If the automatic flush still doesn't work, adjust the sensor range or replace the sensor assembly.
If the manual flush doesn't work: Shut off the water supply at the angle stop. Disassemble the valve. Check the inlet filter screen for debris.
Inspect the diaphragm for tears, stiffness, or mineral buildup. Check the solenoid coil for visible damage or corrosion.
Step-by-Step Diagnostic Workflow
This flow works for the vast majority of Sloan Optima, G2, and Royal automatic models. Follow it in order. Do not skip steps.
Step 1: Identify the exact symptom. Is it no flush, weak flush, continuous running, or phantom flushing? Write it down. This sets your starting branch.
Step 2: Press the manual override button. Does it flush? Yes or no. This splits your tree into two main paths.
Step 3: If the manual flush works, check the batteries. Remove the battery cover. Test the 9V battery. If it reads below 5.5 volts, replace it.
Even if it reads above 5.5 volts but the battery is more than 18 months old, replace it anyway. Weak batteries cause erratic sensor behavior. Use only fresh alkaline 9V batteries.
Do not use rechargeable batteries in most Sloan models, the voltage curve is different.
Step 4: Clean the sensor window. Use a soft, damp cloth. Dry it completely with a lint-free cloth. Hard water scale or a thin film of grime can block the infrared beam.
Do not use abrasive cleaners or sharp tools. You will scratch the lens.
Step 5: Test again. If the valve flushes automatically now, you're done. If it doesn't, move to sensor adjustment.
Step 6: Adjust the sensor range. Locate the sensor range adjustment dial inside the battery compartment or behind the sensor cover. Turn it counterclockwise to increase detection distance or clockwise to decrease it. Start with a middle setting.
Test. Adjust again if needed.
If the manual flush does not work, shut off the water supply. Turn the angle stop clockwise until it stops. Flush the valve manually to relieve pressure. Then disassemble the valve body.
Step 7: Inspect the inlet filter screen. Remove the valve body cover. Pull out the filter screen. Rinse it under running water.
If it's clogged with debris or mineral scale, soak it in vinegar for 15 minutes, then rinse.
Step 8: Inspect the diaphragm. Remove the diaphragm assembly. Look for tears, rips, stiffness, or mineral crust. A stiff diaphragm won't seal properly.
A torn diaphragm leaks. Replace it with a genuine Sloan diaphragm kit if damaged. Do not use generic substitutes, they don't seal the same.
Step 9: Inspect the solenoid. Check the solenoid coil for cracks, corrosion, or visible damage. Listen for a click when you press the manual override button. No click means the coil is likely dead.
Replace the solenoid assembly.
Step 10: Reassemble and test. Install all parts in reverse order. Turn the water supply back on slowly. Test with the manual override button first, then with automatic sensor activation.
Three Common Mistakes That Cost You Time and Money
After a decade of watching facility managers and plumbers work through these valves, these are the mistakes I see most often. They're expensive and avoidable.
Mistake one: Replacing parts before cleaning the sensor window. People order a new solenoid or a whole new valve assembly without wiping a two-inch piece of glass. I've watched a maintenance tech spend $90 on parts and an hour of labor for a flush valve that just needed a damp cloth. Clean the sensor window first.
It takes ten seconds.
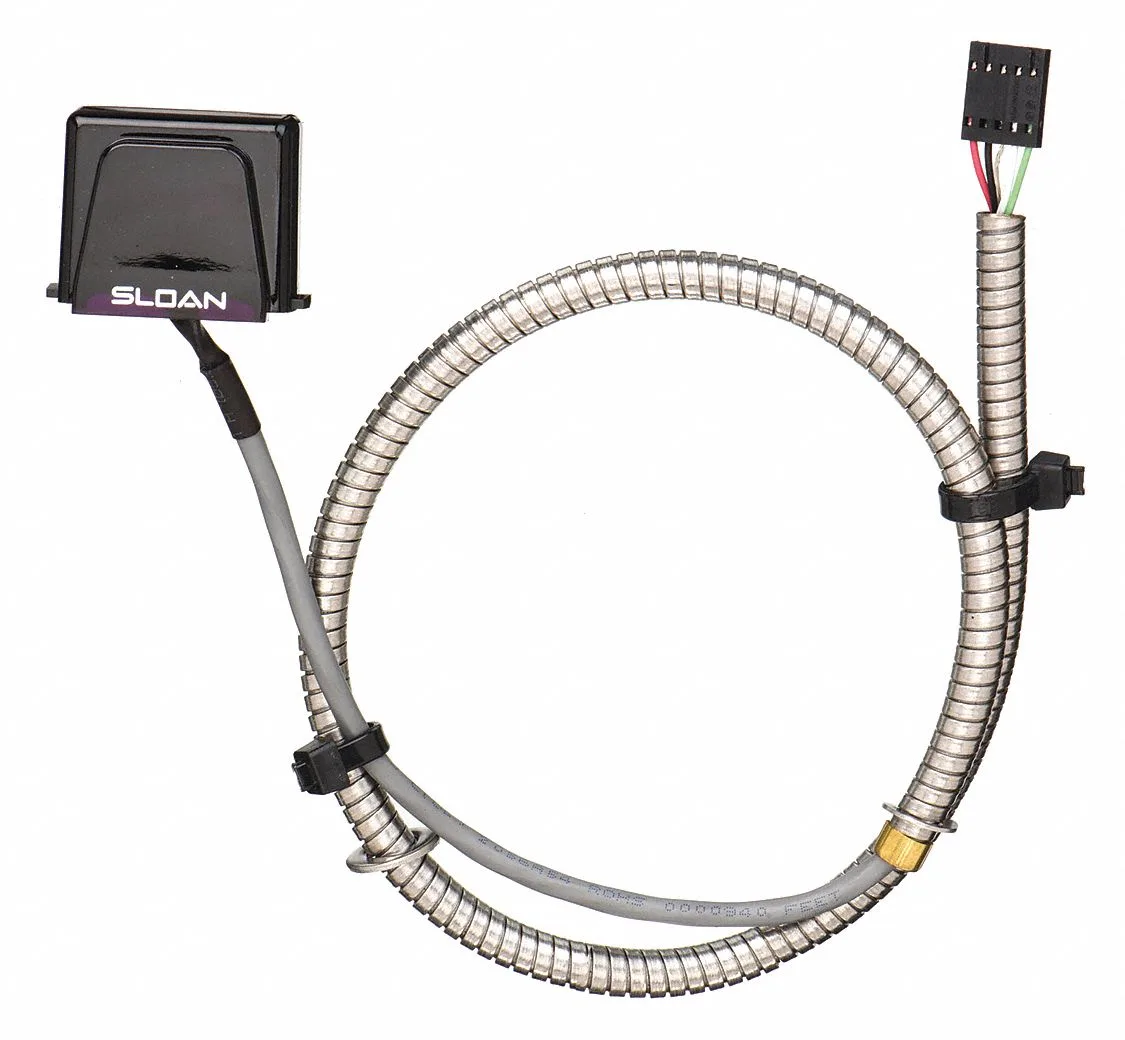
Image source: Bing (Web (fair-use with source credit))
Mistake two: Using the wrong batteries. Sloan valves need fresh 9V alkaline batteries. Not rechargeable. Not carbon-zinc.
Not old batteries scavenged from a smoke detector. Rechargeable 9V batteries output a slightly lower voltage that drops off quickly. The sensor behaves erratically.
The valve flushes too early or not at all. Use name-brand alkaline 9V. Change them every 12 to 18 months regardless of whether the red LED is blinking.
Mistake three: Overtightening the valve cover. When you reassemble the valve, hand-tighten the cover, then give it another quarter turn with a wrench. That's it. Overtightening warps the diaphragm seat or cracks the plastic cover.
A warped seat means a running valve. A cracked cover means water spraying everywhere. Hand-tight plus a nudge.
Stop there.
Safety Shutoffs and When to Call a Plumber
Before you disassemble anything, shut off the water. The angle stop is the small valve where the supply line meets the flushometer. Turn it clockwise until it stops.
Then press the manual override button to relieve pressure. Water will drain out. That's normal.
Never skip the shutoff step. Facility managers report that flooded restrooms almost always trace back to someone loosening a valve cover with the supply still live. That turns a five-minute repair into a mop-and-bucket emergency.
Shut the water off first, every time.
When to call a plumber instead
Most of these repairs are genuinely DIY-friendly. But a few situations warrant a professional. If the angle stop is seized and won't turn, don't force it.
A broken angle stop means shutting off the building's main water supply. If you notice water staining on the ceiling below the restroom, there's likely a leak you can't see. And if the valve is still under warranty, disassembling it yourself could void coverage.
As of 2026, Sloan covers most electronic components for five years. Check the serial number before you open the valve.
One more compliance note. Replacement parts must meet lead-free standards. Per NSF/ANSI 61, any component touching potable water needs lead-free certification.
Genuine Sloan parts meet this requirement. Generic substitutes often don't. It's a small detail, but it matters for inspections and for public health.
Maintenance That Prevents Future Problems
The best troubleshooting is the kind you never have to do. A little routine maintenance keeps a Sloan automatic flush valve running for decades.
Replace batteries every 12 to 18 months. Don't wait for the red LED to blink. By the time the low-battery indicator shows up, the sensor can already be acting erratically. Put battery changes on your facility's calendar.
Use fresh 9V alkaline batteries, nothing else.
Wipe the sensor window weekly. A quick pass with a damp cloth during normal restroom cleaning keeps hard water film and grime from building up. This alone prevents most phantom flush and no-flush complaints.
Clean the inlet filter screen every six months. Especially in buildings with older pipes or hard water. Pull the screen, rinse it, soak it in white vinegar for fifteen minutes if scale is visible, then reinstall.
Replace the diaphragm kit every four to five years. Even a well-maintained diaphragm gets stiff and loses its seal over time. If you're doing a full valve rebuild, the diaphragm kit is cheap insurance. Match your model number to the right kit on the Sloan maintenance catalog.
Document everything. Keep a small log of battery changes, filter cleanings, and part replacements. When an issue pops up, you'll know exactly when the last service was performed. That data makes future diagnosis much easier.
Real Scenarios and What They Tell You
You learn more from real-world cases than from theory. Here are three common scenarios and how the workflow plays out.
Scenario A: A school restroom with phantom flushing. The toilet flushes every time a student walks past the stall. Maintenance replaced the solenoid last week. It didn't help.
Follow the workflow. Press the manual override button. It flushes perfectly.
That means the solenoid and diaphragm are fine. Clean the sensor window. Still phantom flushing.
Adjust the sensor range clockwise to reduce sensitivity. Problem solved. The sensor was detecting foot traffic in the hallway.
Scenario B: An office building with a valve that won't flush. Nobody has used the toilet for two hours. The valve is silent. No red LED.
Press the manual override button. Nothing happens. Shut off the water.
Disassemble the valve. The filter screen is completely clogged with sediment from old pipes. Clean the screen.
Reassemble. The valve flushes normally. Total repair time: twenty minutes.
Scenario C: A hospital restroom with a weak flush. The toilet barely clears. Users flush three times. Water bills are climbing.
Check the angle stop first. It's only half open. Open it fully.
Test. Still weak. Inspect the diaphragm.
It's stiff and crusted with mineral deposits. Replace the diaphragm kit. The flush returns to full force.
The problem was water restriction from the angle stop compounding a worn diaphragm.
Key Specs and Part Numbers for Quick Repairs
Here are the part numbers and specifications that matter most for Sloan automatic flush valve repairs as of 2026.
| Component | Part Number | Notes |
|---|---|---|
| 9V battery (alkaline) | Any major brand | Replace at 5.5V or below |
| Diaphragm kit (Royal) | 62500 | Fits most Royal models |
| Diaphragm kit (Optima) | 53268 | Fits Optima and G2 series |
| Solenoid coil assembly | 64887 (6V DC) | Battery-powered models |
| Filter screen | 11943 | Universal for most models |
| Sensor assembly | 81067 | Optima Plus series |
Quick reference for symptoms and likely fixes.
| Symptom | First Check | Second Check | Likely Fix |
|---|---|---|---|
| No flush | Press manual override | Check batteries | Replace batteries or clean sensor |
| Phantom flush | Clean sensor window | Adjust sensor range | Decrease detection distance |
| Continuous running | Shut off water | Inspect diaphragm | Replace diaphragm kit |
| Weak flush | Check angle stop | Inspect filter screen | Open stop or clean screen |
| Metric | Value |
|---|---|
| Battery life (9V alkaline) | 12-18 months |
| Sensor detection range | 12-30 inches (adjustable) |
| Flush time (factory default) | 2-5 seconds |
| Max water pressure | 80 psi |
| Diaphragm replacement interval | 4-5 years |
Expert Tips for Long-Term Reliability
These tips come from facility managers who maintain hundreds of Sloan flush valves. They keep callbacks low and flush counts high.
Tag your valves. Put a small sticker on each flushometer with the installation date and last service date. When an issue pops up, you'll know at a glance if the diaphragm is due for replacement or the batteries are old. It's a five-second check that saves thirty minutes of guesswork.
Use a torque wrench for the cover. Hand-tight plus a quarter turn is the rule. But if you service valves regularly, pick up a small torque wrench set to 15 foot-pounds. You'll never overtighten again.
Keep a rebuild kit handy. A kit costs about $20. A service call costs ten times that. Keep a diaphragm kit, a filter screen, and a fresh 9V battery in your toolbox.
When a valve acts up, you have the parts to fix it on the spot.
Test after every repair. Don't walk away after reassembly. Test the manual override. Test the automatic sensor.
Watch three complete flush cycles. A valve that works once might fail again on the next cycle if a seal isn't seated properly.
Document failures. When a valve fails repeatedly, it's not bad luck. It's a pattern. A valve that eats batteries every three months might have a failed solenoid that's drawing power constantly.
A valve that clogs monthly might need a supply-line filter installed. Patterns tell you what the manual doesn't.
Frequently Asked Questions
How do I adjust the sensor range on a Sloan automatic flush valve?
The adjustment dial is inside the battery compartment or behind the sensor cover. Turn counterclockwise to increase detection distance, clockwise to decrease it. Start with a middle setting, test, then fine-tune.
Factory default is about 18 to 24 inches.
What does the blinking red LED mean on a Sloan flush valve?
The red LED is a diagnostic indicator. A slow blink usually means low battery. A rapid blink often points to a sensor or solenoid problem.
Count the flashes and check your model's manual. Each series has slightly different patterns.
How often should I replace the batteries in a Sloan automatic flush valve?
Every 12 to 18 months, depending on traffic and battery quality. High-traffic restrooms sit closer to 12. Low-traffic facilities can stretch toward 18.
Replace with fresh 9V alkaline batteries. Don't wait for the low-battery indicator.
Why does my Sloan flush valve keep running?
Continuous running almost always means debris caught in the valve seat, a torn diaphragm, or a failed solenoid. Shut off the water supply. Disassemble and inspect the diaphragm for tears and the seat for debris.
Clean the filter screen while you're in there.

Similar Posts
































