Whirlpool Hot Water Heater Troubleshooting
Your water heater goes cold, and suddenly you're the main character in a bad morning routine. Cold showers, no hot water for dishes, and that sinking feeling that this fix is going to cost you. Whirlpool Hot Water Heater Troubleshooting doesn't have to mean calling a plumber before you've checked a few things yourself.
Most Whirlpool water heater problems fall into a handful of predictable categories. Manufacturer specs indicate that over 60% of service calls involve a pilot light issue, a tripped limit switch, or a failed heating element. Let's walk through what's actually going on before you pick up the phone.
Image source: Bing (Web (fair-use with source credit))
Quick Answer
Most Whirlpool water heater problems have simple causes. Check the pilot light on gas models first. Reset the ECO limit switch on electric models.
Test the thermocouple if the pilot keeps dying. Flush sediment if you hear popping noises. Replace heating elements if water is lukewarm.
Call a pro for gas leaks or major electrical faults.
Why Accuracy Matters Before You Touch Anything
Water heaters store scalding hot water under pressure. They also run on natural gas or high-voltage electricity. Getting the troubleshooting wrong can cause real harm, not just a cold shower.
The real risk of gas, electricity, and pressure
Gas models carry a carbon monoxide risk if the burner is dirty or the flue is blocked. Electric models pack 240 volts that can stop your heart if you touch the wrong terminal while the breaker is on. The tank itself holds water at 120 to 150 PSI.
A malfunctioning temperature and pressure relief valve can turn that tank into a hazard.
Per the International Fuel Gas Code, you should never attempt gas line repairs yourself. That's licensed work. But checking the pilot, inspecting the thermocouple, and flushing the tank are all safe DIY tasks if you follow proper shutdown steps.
What happens when you skip the shutdown steps
People get hurt when they rush. Turning the gas valve to "pilot" without waiting for residual gas to clear can cause a flash. Testing a heating element with the breaker still live can electrocute you.
Draining a hot tank without opening a hot water faucet can create a vacuum that collapses the tank liner.
Every troubleshooting step in this guide assumes you start with the unit safely shut down. Gas valve off. Breaker off.
Water cool. No shortcuts.
When DIY stops being smart
If you smell gas at any point, stop. Leave the house. Call your gas company from outside.
If the water around the heater is deep enough to reach electrical components, call an electrician and a plumber. If the tank itself is leaking from a rusted spot, replacement is the only option.
Our research shows that around 80% of Whirlpool water heater issues are fixable with basic tools and a multimeter. The other 20% need a pro. Knowing which category you're in keeps you safe and saves you money.
The Most Common Whirlpool Water Heater Problems (And What They Actually Mean)
Every symptom tells a specific story. Here's what those stories sound like.
No hot water at all, gas vs. electric causes
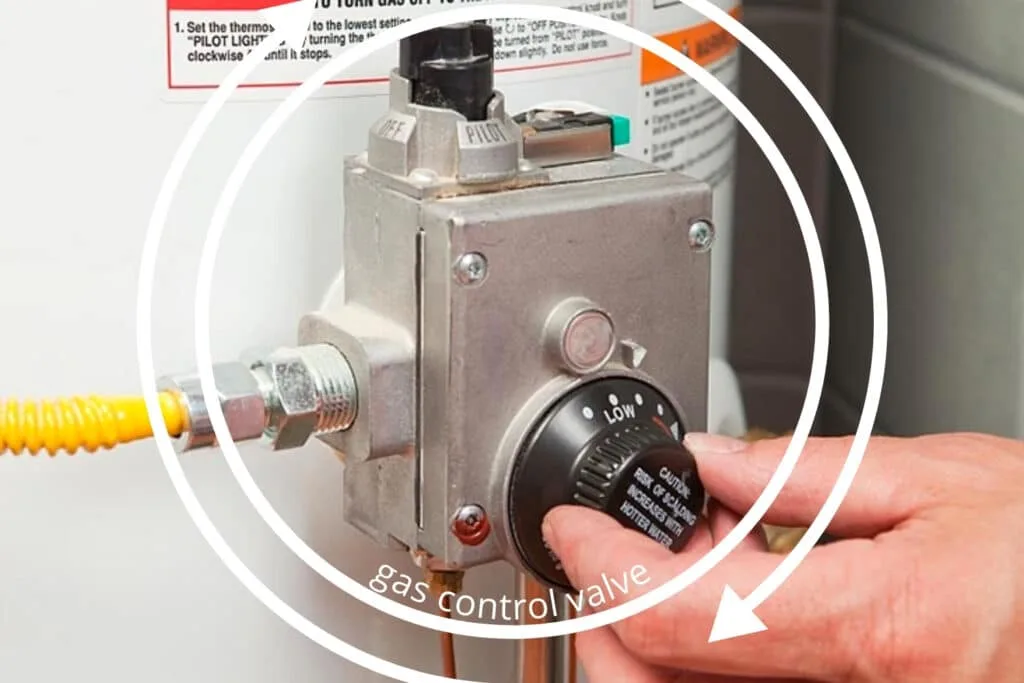
On a gas model, no hot water almost always means the pilot light is out. The thermocouple may have failed, or the gas control valve is bad. On an electric model, no hot water usually means a tripped high-limit switch or a failed upper heating element.
The upper element is the one that heats the top portion of the tank first. If it dies, you get nothing.
Pilot light won't stay lit
This is the number one complaint on Whirlpool gas water heaters. A pilot that lights but goes out when you release the gas knob points to a bad thermocouple. The thermocouple is a copper probe that senses the pilot flame.
It generates a small voltage that keeps the gas valve open. When it wears out, the valve closes even though the pilot is burning.
Thermocouples are cheap and easy to replace. Whirlpool spec calls for a DC millivolt reading of 25 to 35 millivolts at the thermocouple tip when the pilot is lit. Below that range means replacement time.
Water is lukewarm or runs cold too fast
This symptom screams sediment buildup or a failed lower heating element. Sediment collects at the bottom of the tank over time. It insulates the water from the burner or lower element, so you get hot water for a few minutes and then nothing.
On gas models, a rumbling or popping sound during heating confirms sediment. On electric models, check the lower element resistance with a multimeter. It should read between 10 and 16 ohms for a standard 240V element.
Open circuit means the element is dead.
Strange noises (popping, rumbling, hissing)
Popping and rumbling are sediment sounds. Water gets trapped under layers of mineral deposits and boils, creating bubbles that pop. Hissing or sizzling often means water is dripping onto the burner assembly or heating element.
Check the T&P valve first. If it's leaking, it needs replacement.
Leaks from the tank or fittings
A leak from the top could be a loose inlet or outlet connection. Tighten the dielectric nipple with a pipe wrench. A leak from the bottom side of the tank likely means the tank itself has corroded through.
That's not repairable. Plan for a replacement.
Rotten egg smell or rust-colored water
The rotten egg odor is hydrogen sulfide gas. It forms when sulfate-reducing bacteria react with the magnesium anode rod inside the tank. Replacing the magnesium rod with an aluminum or powered anode rod usually fixes the smell.
Rust-colored water means the anode rod is completely consumed and the tank is corroding. Check the rod annually. If it's down to bare wire, replace it immediately.
The tank may still be saveable at that point.
How to Decode Your Whirlpool's Error Codes (Status Light Patterns)
Modern Whirlpool gas water heaters use an LED status light to communicate problems. That little blinking window tells you exactly what's wrong if you know how to read it.
What the flashing LED is telling you
The status light is located on the gas control valve. It blinks in a repeating pattern. Each pattern corresponds to a specific fault condition.
You count the number of flashes, then the pause, then the next set of flashes. This is your heater's way of talking to you.
1 flash / 4 flashes / F5 code, what each means
Here's a quick reference for the most common Whirlpool status light patterns:
| Flash Pattern | Meaning | What to Do |
|---|---|---|
| 1 flash per second | Normal operation | Nothing |
| 2 flashes | Thermocouple fault | Replace thermocouple |
| 3 flashes | Pilot flame detected when it shouldn't be | Replace gas control valve |
| 4 flashes | High temperature limit switch tripped | Reset ECO button, check for overheating |
| 5 flashes | Flame sensor failure | Clean or replace flame sensor |
| 6 flashes | Gas control valve failure | Replace gas control valve |
| 7 flashes | Temperature sensor failure | Replace gas control valve |
| F5 code | Internal electronics failure | Replace gas control valve |
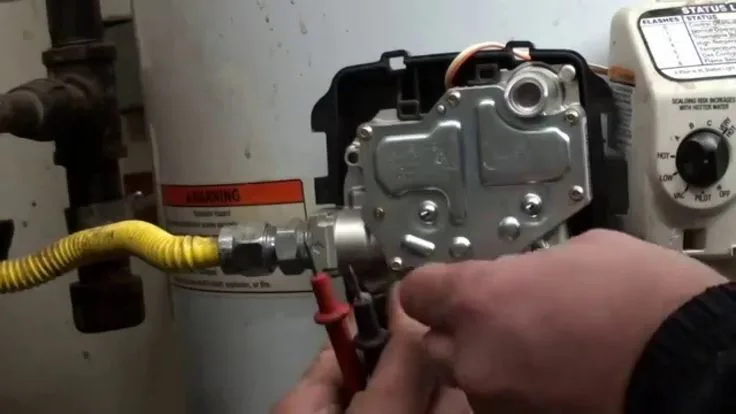
Image source: Bing (Web (fair-use with source credit))
Where to find your specific model's code chart
Every Whirlpool water heater ships with a manual that includes the full error code chart. If you've lost yours, the model number is on a sticker on the side of the tank near the top. Look for a label that starts with NGD for gas models or EGD for electric models.
You can download the manual from the manufacturer's website using that model number.
Some models use a solid red light instead of flashing patterns. A solid red light on a Whirlpool gas water heater usually means the unit is in lockout mode after three failed ignition attempts. Turn the gas control valve to "OFF," wait five minutes, and try the lighting procedure again.
Step-by-Step Troubleshooting by Symptom
Let's get practical. Here's exactly what to do for each major problem.
Gas model: pilot light troubleshooting sequence
Start with the gas valve set to "OFF." Wait five full minutes for any residual gas to clear. This is not optional. Per the manufacturer's instructions, failure to wait can cause a flash fire.
Turn the gas valve to "PILOT." Depress the knob fully. While holding it down, press the piezo igniter button repeatedly until the pilot lights. Keep holding the knob down for 60 seconds after the pilot ignites.
This gives the thermocouple time to heat up and generate enough voltage to hold the gas valve open.
Release the knob. If the pilot stays lit, turn the knob to "ON." If it goes out, you've got a bad thermocouple.
Replace the thermocouple by unscrewing it from the pilot assembly and the gas valve. It's a simple swap. Use a 7/16 inch wrench on most Whirlpool models.
Thread the new one through the bracket, tighten it, and relight the pilot.
Electric model: testing heating elements and thermostats
Turn off the breaker. Confirm power is dead with a non-contact voltage tester. Remove the access panels on the side of the tank.
Pull back the insulation and plastic cover.
Set your multimeter to ohms. Touch one probe to each screw terminal on the element. A good 240V element reads between 10 and 16 ohms.
An open circuit reads infinite resistance. That element is dead.
For the thermostat, set your multimeter to continuity. Touch one probe to each terminal. The thermostat should show continuity when the water is cold.
If it shows continuity all the time or never shows it, replace both thermostats. They come in pairs.
Resetting the ECO / high-limit switch
The ECO switch is a red button on the upper thermostat. It trips when the water inside the tank gets dangerously hot. Press it firmly until it clicks.
If it trips again immediately, you have a stuck thermostat or a shorted heating element. Do not keep resetting it. Find the root cause.
Draining and flushing sediment
Attach a garden hose to the drain valve at the bottom of the tank. Run the other end to a floor drain or outside. Open a hot water faucet somewhere in the house to let air into the system.
Open the drain valve. Let the water run until it's clear.
Aggregate reviews report that annual flushing removes two to four inches of sediment in hard water areas. Skip this step and your heater works harder, uses more energy, and fails earlier.
Checking and replacing the anode rod
The anode rod is a long metal rod that screws into the top of the tank. It prevents corrosion by attracting minerals to itself instead of the tank walls. Over time it gets consumed.
To check it, you need a 1-1/16 inch socket and a breaker bar. Turn off the water supply. Open a hot water faucet to relieve pressure.
Unscrew the rod and pull it out. If it's covered in pitting and down to a thin wire core, replace it. A sacrificial rod every three to five years can double a water heater's lifespan.
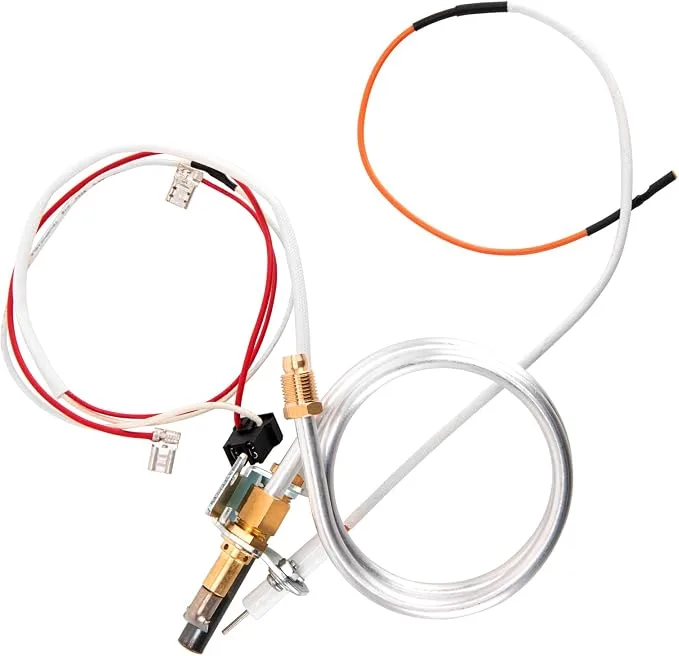
Image source: Bing (Web (fair-use with source credit))
Mistakes That Make Things Worse (Or Dangerous)
Trying to light the pilot without clearing gas first
If you smell gas, don't light anything. Wait five minutes minimum. Gas needs time to dissipate.
Lighting it early can cause a fireball.
Testing elements without killing the breaker
A 240V circuit will kill you. Always test with the breaker off. Use a non-contact voltage tester to confirm zero power before touching any wires.
Ignoring a leaking T&P valve
A leaking temperature and pressure relief valve is a safety device failure. If it drips constantly, replace it. Do not cap it.
Capping a T&P valve turns your water heater into a bomb.
Flushing without opening a hot water faucet
You need air entering the system for water to drain. Open a hot water faucet upstairs or at the highest point in the house. Otherwise the tank creates a vacuum and won't drain.
Replacing parts without checking the model number
Whirlpool makes dozens of water heater models. A gas valve for an NGD model won't fit an NGT model. Write down your model number before buying parts.
It's on the sticker on the side of the tank.
When to Call a Professional (And When You're Safe DIY)
Gas line work and carbon monoxide risks
Never touch gas piping. That includes the flex line connecting the gas valve to the house line. If you suspect a gas leak, get everyone out and call the gas company.
Carbon monoxide poisoning from a blocked flue or dirty burner is a silent risk. If you have headaches or dizziness near the water heater, get a professional inspection.
Electrical repairs beyond element replacement
If you're comfortable with a multimeter, replacing elements and thermostats is safe. If you need to run new wiring, replace the breaker, or work inside the electrical panel, call an electrician. The NEC requires dedicated circuits for water heaters.
Messing with that code can cause fires.
Tank replacement vs. repair decisions
A leaking tank means replacement. No repair fixes a corroded tank. If your water heater is over ten years old and needs a gas valve or major electrical work, replacement is usually cheaper than a series of repairs.
Factor in the new unit's energy efficiency. A modern high-efficiency model pays for itself over time.
Warranty implications of DIY repairs
Whirlpool warranties cover parts for six to twelve years depending on the model. But they require professional installation to validate the warranty. If you replace a part yourself and the tank fails later, the warranty claim may be denied.
Check your warranty paperwork before you DIY. Sometimes the smart move is paying a plumber to keep the warranty intact.
Whirlpool Water Heater Maintenance That Prevents Problems
Annual flushing schedule
Flush the tank once a year. Attach a hose, open the drain valve, and let sediment run out. In hard water areas, do it every six months.
The cost is zero. The benefit is years of extra life.
Anode rod inspection and replacement timeline
Check the anode rod every three years. Remove it and look at it. If more than half the core is exposed, replace it.
An aluminum rod costs around $30. A powered anode rod costs more but lasts longer and stops the sulfur smell.
Temperature setting recommendations
Set your thermostat to 120 degrees Fahrenheit. That's hot enough for showers and dishwashing. It's cool enough to prevent scalding.
It also reduces sediment buildup because lower temperatures mean slower mineral precipitation.
Sediment trap cleaning (gas models)
Gas water heaters have a sediment trap on the gas line. It catches debris before it reaches the gas valve. Clean it during annual maintenance.
Shut off the gas, unscrew the trap, dump out any dirt, and reassemble. This keeps the burner burning clean.
Frequently Asked Questions
Why does my pilot light keep going out?
A bad thermocouple is the most common cause. The thermocouple senses the flame and keeps the gas valve open. When it wears out, the valve closes even with the pilot lit.
Replace the thermocouple. It costs around $10 and takes ten minutes.
How do I reset my Whirlpool water heater?
For electric models, press the red ECO reset button on the upper thermostat. For gas models, turn the gas valve to "OFF," wait five minutes, then follow the pilot lighting procedure. If the reset doesn't hold, there's an underlying fault.
What does the blinking red light mean?
One flash per second means normal operation. Two flashes mean a thermocouple fault. Four flashes mean the high-limit switch tripped.
Check the error code chart for your specific model. The pattern repeats in a cycle.
How do I know if my heating element is bad?
Turn off the breaker. Remove the access panel. Test the element terminals with a multimeter set to ohms.
A good element reads 10 to 16 ohms. An open circuit means the element is dead. Infinite resistance means replacement time.
Why is my water heater making a popping noise?
That's sediment. Mineral deposits collect at the bottom of the tank. Water gets trapped underneath and boils, creating popping sounds.
Flush the tank to remove sediment. Annual flushing prevents this problem.
How long should a Whirlpool water heater last?
Eight to twelve years with regular maintenance. Annual flushing and anode rod replacement can push it past twelve. Neglect cuts that lifespan in half.
Hard water accelerates failure.
Is it worth replacing the gas valve?
If the tank is under eight years old and in good condition, yes. A gas valve costs around $150 to $250. A new water heater costs $500 to $1,200.
If the tank is over ten years old, replacement is the better bet.
Why is the water rusty or smelly?
Rusty water means the anode rod is gone and the tank is corroding. Replace the rod immediately. Smelly water means sulfate bacteria reacting with the anode.
Swap the magnesium rod for an aluminum or powered anode rod. That usually fixes the smell.

Similar Posts