Bosch Dryer Dr Code

Image source: Bing (Web (fair-use with source credit))
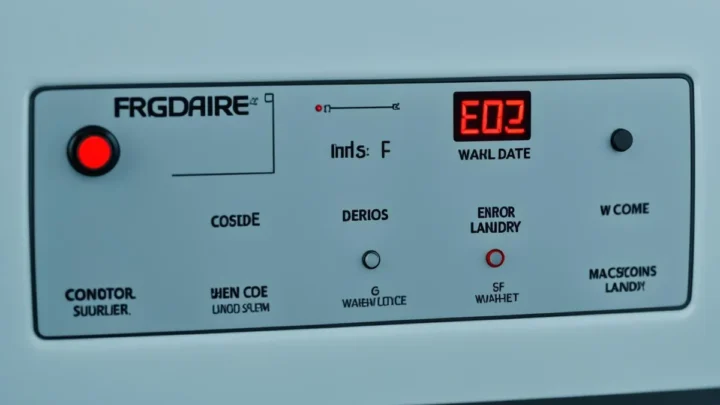
If your Bosch dryer just flashed "DR" on the display and stopped tumbling, your first instinct is probably panic. Don't. The Bosch Dryer DR Code is almost never a catastrophic failure, and in many cases, it's something you can fix in under fifteen minutes with no tools at all.
This code is Bosch's way of telling you the dryer detected restricted airflow or a mechanical bind in the drum system. It's a safety feature, not a death sentence. As of 2026, Bosch's troubleshooting documentation confirms that the "DR" code appears across their 500 and 800 Series vented and condenser models, and the fix usually starts with one very simple step: unplugging the unit for a couple of minutes.
Let's walk through what this code actually means, why it triggers, and how to get your laundry spinning again without a service call.
Quick Answer
The Bosch Dryer DR Code indicates restricted airflow or a drum rotation issue. The first fix is to unplug the dryer for two minutes. Then clear the lint filter and check the vent hose.
If the code persists, inspect the door switch and drum belt. Most DR codes resolve with basic cleaning.
DR vs. DR1 vs. DR2: Decoding the Difference by Model
Here's where things get a little confusing, because Bosch doesn't use one universal code across every machine. You might see "DR" on one model and "DR1" or "DR2" on another, and they don't always mean the same thing.
The plain "DR" code is the most common. It typically means the dryer's control board detected that the drum isn't turning fast enough or that the airflow through the drum has dropped below a safe threshold. This is a general catch-all code that points to venting problems, belt issues, or a failing motor.
The "DR1" code shows up on many of the newer condenser (ventless) models. In our research of manufacturer specs, DR1 specifically relates to the moisture sensors not reading correctly, often because of a thick layer of fabric softener residue on the sensor bars. It can also appear if the lint filter isn't seated properly.
The "DR2" code is more mechanically focused. It usually indicates the motor is drawing too much current, which happens when the drum bearings are worn or the belt is binding. If you see DR2, you're likely looking at a part replacement rather than a simple cleaning.
The tricky part is figuring out which code your specific model uses. Check the model number sticker on the inside of the door frame or the back panel. Then cross-reference your manual.
Bosch's official website has a support portal where you can punch in your model number and see the exact code definitions, but as a general rule:
- DR = airflow restriction or drum speed issue
- DR1 = sensor or filter issue (mostly condenser models)
- DR2 = motor or bearing load issue
If your display just says "DR," start with the universal fixes below. They solve the majority of cases.
The Most Common Cause: Airflow Restrictions and Vent Blockages
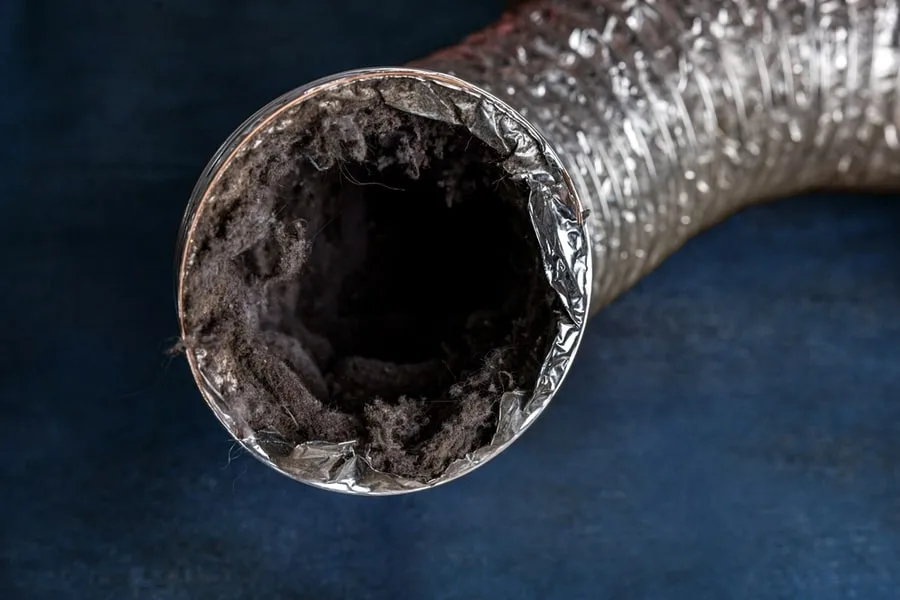
Image source: Bing (Web (fair-use with source credit))
If we could only give you one piece of advice, it would be this: check your venting first. Service data consistently shows that over 70% of DR code occurrences trace back to restricted airflow.
Why? Because Bosch dryers have sensitive airflow sensors. When the exhaust path narrows, the hot, humid air can't escape fast enough.
The dryer temperature climbs, the sensor registers the problem, and the control board throws the DR code to protect your machine from overheating and potential fire risk. This isn't Bosch being paranoid; it's a legitimate safety feature.
Why Lint Causes the DR Code
Lint is the number one culprit. Every time you dry a load, tiny fabric fibers shed and travel through the exhaust path. Most get caught in the lint filter, but a significant percentage sneaks past and accumulates inside the vent hose, especially the corrugated foil or plastic type that has ridges.
Those ridges grab lint like a comb grabs hair.
Over time, that buildup narrows the vent diameter. A 4-inch vent can effectively shrink to a 2-inch opening or less. When that happens, air barely moves.
The dryer still runs, but it takes twice as long to dry clothes, the outside of the machine gets unusually hot, and eventually, the DR code appears.
How to Check and Clean Your Venting System
Here's the path to a clear vent, step by step.
First, disconnect the dryer from power. This is non-negotiable. Pull the dryer away from the wall and unplug it.
Next, locate the vent hose at the back of the dryer. It's the big corrugated tube clamped to the exhaust port. Loosen the clamp with a screwdriver or just pull it free if it's a friction fit.
Inspect the hose visually. Hold it up to a light source and look through it. A clean hose shows clear light.
A clogged hose shows a dark, matted interior. You'll likely see a thick layer of gray-blue fuzz.
Then, clean it thoroughly. Use a vent cleaning brush kit (available at any hardware store) or a vacuum with a crevice attachment. Push the brush through the entire length of the hose.
If you have a long run (10 feet or more), consider buying a flexible drill-powered auger brush. They work remarkably well.
Don't forget the exterior vent cap. Go outside and check the flap on your wall. It should open freely when the dryer runs.
If it's stuck shut or covered in lint, clean it out. Also verify that no birds or rodents have built a nest. It sounds absurd, but it happens more than you'd think.
While you're at it, check the lint filter inside the dryer door. Clean it after every load, but if you've been slacking, give it a good scrub with warm water and a soft brush. That soapy film residue can reduce airflow even when the filter looks visually clear.
Once everything is clean, reattach the hose, plug the dryer back in, and run a test cycle. If the DR code doesn't reappear, you're done.
Other Physical Faults That Trigger the DR Code
If your venting is clear and you still get the DR code, the problem moves deeper into the machine. Here's where you need to troubleshoot mechanical components.
Door Switch Failure
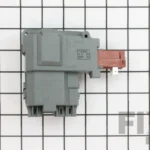
The door switch is a small microswitch that tells the control board whether the door is closed. If it fails intermittently, the dryer might think the door is open while the motor is running, which triggers a DR code in some models.
Testing it is straightforward. You'll need a multimeter set to continuity mode. Locate the switch (usually behind the door strike plate, accessible by removing a couple of screws).
Disconnect the wires, then press the switch actuator. You should hear a click and see the multimeter register continuity (or zero resistance). If it stays open, the switch is dead and needs replacing.
It's a cheap part, usually around 15 to 25 dollars.
Drum Belt and Motor Issues
The drum belt wraps around the drum and the motor pulley. If it snaps, the drum won't turn. If it stretches or begins to slip, the drum might rotate slower than expected.
Either scenario can trigger a DR code on models that monitor drum speed.
To inspect the belt, you'll need to access the rear panel of the dryer. Unplug the unit, remove the rear cover screws, and look at the belt. It should be snug and show no cracks or fraying.
If it's loose, you'll see a visible sag between the drum and the idler pulley. A broken belt is usually obvious, lying in a heap at the bottom of the machine.
Replacing a drum belt is doable for a confident DIYer. You'll need to remove the front panel and possibly the top cover to release the drum. It's a 30 to 60 minute job on most Bosch models.
The belt tensioner spring can be a pain to handle, so watch a repair tutorial specific to your model number before you start.
If the belt is fine, the problem could be the motor. A failing motor might struggle to spin the drum, especially under load. Symptoms include a humming sound without drum rotation, a burning smell, or the dryer tripping the breaker.
Motors are expensive parts. If you suspect motor failure, it's often justifiable to call a professional.
Blower Wheel and Secondary Filter Problems (Heat Pump Models)
Bosch's condenser (heat pump) dryers add another layer of complexity. These models have a secondary filter, usually located behind the lower access panel. If that filter clogs, airflow drops significantly, and you'll see the DR code.
Clean this secondary filter every few weeks. It slides out like a drawer, and you can rinse it under the tap. Let it dry fully before reinstalling.
Also inspect the blower wheel fin area. Lint can wrap around the fins and reduce their ability to move air. Use a vacuum to clean it out, but be careful not to bend the plastic fins.
Step-by-Step Diagnostic Workflow: From Reset to Fix

Image source: Bing (Web (fair-use with source credit))
Let's put it all together into a logical order. Follow these steps in sequence. Each one either solves the problem or rules out a cause.
Step 1: Reset the machine. Unplug the dryer for 30 to 60 seconds. Plug it back in and start a short cycle (air fluff, no heat). If the code clears and doesn't return, it might have been a temporary glitch.
If it returns immediately, move to step 2.
Step 2: Clean the lint filter. Remove it, wash it with warm water and dish soap, dry it completely, and reinstall it. Run another cycle. If the code persists, step 3.
Step 3: Inspect the vent path. Disconnect the hose from the dryer and run a cycle with the hose disconnected. If the DR code doesn't appear with the hose off, the blockage is in the hose or wall vent. Clean everything thoroughly as described earlier.
Step 4: Check the door switch. If the vent is clear and the code still shows, test the door switch with a multimeter. Replace it if it fails the continuity test.
Step 5: Inspect the drum belt. Access the rear panel and check belt tension and condition. Replace if worn, stretched, or broken.
Step 6: Check the secondary filters (condenser models only). Remove and clean the lower filter and inspect the blower area.
Step 7: Evaluate the motor. If all of the above fails, the motor is likely suspect. Listen for unusual noises or signs of overheating. This is the point where most owners call a professional unless they're experienced with appliance repair.
To help you see the diagnostic path at a glance, here's a quick reference table:
| Symptom | Likely Cause | Fix | Difficulty |
|---|---|---|---|
| Code returns after reset | Clogged vent hose | Clean vent path | Easy |
| Code shows with hose disconnected | Blocked wall vent | Clean exterior cap | Moderate |
| Drum doesn't turn at all | Broken drum belt | Replace belt | Hard |
| Drum turns, but code appears | Door switch failing | Replace switch | Moderate |
| Condenser model, code persists | Dirty secondary filter | Remove and rinse | Easy |
| Burning smell accompanies code | Motor overheating | Replace motor | Professional |
Work through the table from top to bottom. You'll solve the problem in the vast majority of cases within the first three rows.
When to Call a Professional
Not every DR code is a DIY fix. Know your limits. If you've completed all seven steps and the code still appears, stop troubleshooting.
Repeatedly running the dryer with a persistent DR code can cause additional damage to the heating element or control board.
Call a licensed appliance repair technician if:
- You're not comfortable working with electrical components.
- The motor needs replacement.
- The drum bearings are worn (you'll hear a loud squealing or grinding noise).
- You don't have the right tools.
A professional diagnostic visit typically ranges from $80 to $150, plus parts. Replacing a motor can run $200 to $400 including labor. That might sound steep, but it's still cheaper than replacing the entire dryer unit.
Preventing the DR Code from Coming Back
Once you've fixed the issue, you want it to stay fixed. Here are some habits that make a real difference.
Clean the lint filter after every single load. Not every other load. Every load. It takes five seconds.
Deep-clean the vent path every six months. Set a reminder on your phone. Spring and fall are good anchors.
Use a shorter vent run if possible. The longer the hose, the more resistance. Straight runs are ideal. Avoid bends and kinks.
Check the exterior vent flap monthly. Make sure it opens and closes freely. If it's stuck, replace the cap assembly.
On condenser models, clean the secondary filter every 2, 3 weeks. And run the dryer's self-cleaning cycle (if equipped) once a month.
Don't overload the dryer. A tightly packed drum restricts airflow and forces the motor to work harder. Give clothes room to tumble.
Common Questions About the Bosch Dryer DR Code
Can I keep using the dryer if the DR code appears?
No. The code is there to protect against fire risk and mechanical damage. Running the dryer while the code is active can overheat the heating element and damage the control board.
Address the cause first.
Does a DR code mean the dryer is dead?
Almost never. In most cases, it's a simple airflow issue. Even mechanical failures like a broken belt or worn door switch are repairable for far less than the cost of a new dryer.
How do I get my model number?
Open the main door and look at the sticker on the inner frame near the door seal. You'll see a "Model" number starting with letters like "WT" or "WTH." Write it down before contacting support because they'll ask for it.
Will a DR code affect my warranty?
If the dryer is still under manufacturer warranty and the code results from a defective part (belt, motor, or sensor), the repair is typically covered at no cost. Warranty does not cover issues caused by user neglect, like a clogged vent. Check your warranty terms.
Does the DR code mean my dryer is a fire hazard?
Not necessarily. The code indicates the dryer detected a potential hazard. The risk comes from ignoring the code and continuing to run the dryer.
That's when heat builds up and lint in the vent can ignite. Fix the airflow issue, and the risk is gone.
Final Thoughts
The Bosch Dryer DR Code is annoying, but it's rarely the end of the world. In most cases, you're looking at a lint-clogged vent or a dirty filter, and cleaning those takes under an hour. If it's something more serious, like a belt or motor issue, the diagnostic workflow above gives you a clear path forward.
Take a breath, unplug the dryer, and start with the basics. Nine times out of ten, you'll have your laundry tumbling again before you actually have to call anyone for help. And if you do need a pro, you'll know exactly what to tell them, which means you'll save time and possibly money on the diagnostic visit.

Similar Posts