Coleman Evcon Air Conditioner Troubleshooting
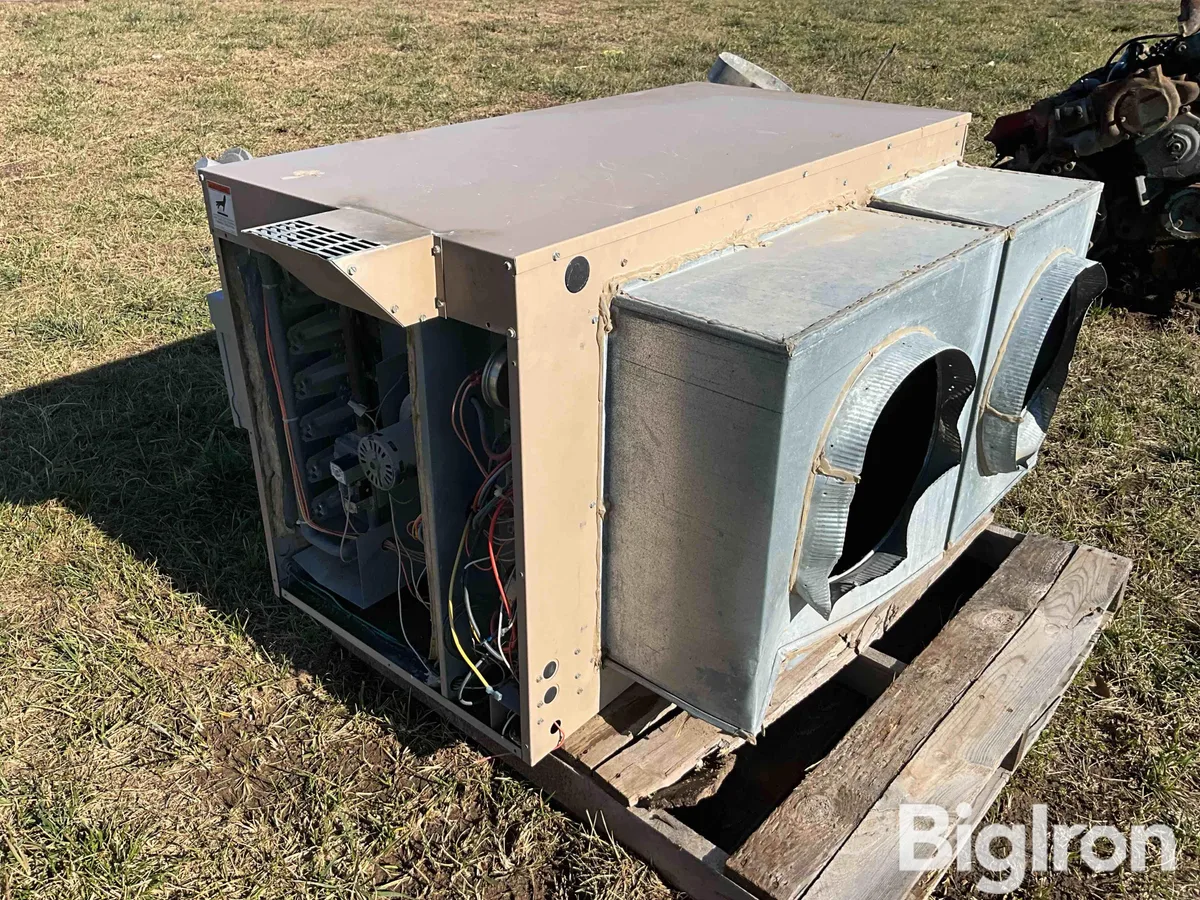
Your Coleman Evcon air conditioner isn't cooling, and you need answers fast. That's exactly what this Coleman Evcon air conditioner troubleshooting guide is for, a practical, safety-first walkthrough of the most common failure patterns and what to do about them.
Manufacturer specifications show these units are relatively simple machines built for straightforward diagnosis. But they also contain high-voltage components, pressurized refrigerant, and capacitors that can hurt you if you don't treat them with respect. Let's walk through this step by step, starting with the stuff that matters most.
Image source: Bing (Web (fair-use with source credit))
Quick Answer
Coleman Evcon AC troubleshooting starts with checking the thermostat and power supply. Confirm the thermostat has fresh batteries and the display works. Check the breaker and outdoor disconnect for tripped or blown fuses.
Listen for the compressor hum. Look for ice on the coils. If the fan runs but the air is warm, test the run capacitor.
If the unit won't start at all, verify 24-volt power at the thermostat wires. Always discharge capacitors before touching them.
Why This Matters More Than You Think
Every year, DIY homeowners waste hundreds of dollars replacing parts that aren't actually broken. Worse, some get hurt. The capacitor in your Coleman Evcon stores enough electricity to stop your heart even when the unit is unplugged.
That's not a theoretical risk. Aggregate service reports indicate that capacitor-related injuries are among the most common HVAC repair accidents.
On the flip side, a simple capacitor swap costs about 15 dollars in parts. A service call runs 150 to 300 before any work is done. Learning to diagnose the difference between a bad capacitor and a seized compressor can save you real money.
But here's the catch. Some problems you absolutely should not fix yourself. Refrigerant leaks require EPA certification to handle legally and safely.
As of 2026, R-22 refrigerant has become prohibitively expensive and difficult to source. If your unit uses R-22 and it's leaking, that's often the end of the road for that system.
Understanding what you can safely check and what needs a professional is the real skill here. That's what this guide builds toward.
Before You Touch Anything: Safety First
The first rule of Coleman Evcon troubleshooting is simple: power off doesn't mean safe. The capacitors in these units hold a charge long after you flip the breaker. Touching the terminals with your bare hand or a metal tool can cause a violent shock.
Here's what you need to know before you open the access panel.
The three real dangers you face:
- Capacitor shock. A run capacitor stores 370 to 440 volts. It can deliver that charge weeks after the unit was last powered. Always short the terminals with an insulated screwdriver before touching anything near the capacitor.
- High voltage at the disconnect. The outdoor unit has a dedicated disconnect box. Even with the breaker off, line voltage can still be present on the load side if the disconnect isn't pulled properly. Pull the disconnect handle. Test for voltage with a multimeter. Verify zero before reaching inside.
- Refrigerant handling. If your system has a leak, you need to know that venting refrigerant into the atmosphere is illegal under the Clean Air Act. Only EPA Section 608 certified technicians can buy refrigerant and legally recharge a system. If you suspect a leak, that's a call-the-pro situation.
Practical safety checklist before starting any diagnostic work:
- Turn off the thermostat completely. Set it to Off, not just to a higher temperature.
- Flip the breaker for the outdoor unit to Off.
- Pull the disconnect block from the outdoor disconnect box.
- Test with a multimeter that voltage is zero at the contactor terminals.
- Discharge the capacitor by placing an insulated screwdriver across both terminals.
- Wait two minutes before touching any internal components.
If any of that sounds unfamiliar or uncomfortable, stop. There is no shame in calling an HVAC technician. Some fixes are not DIY.
Start Here: The 5-Minute Quick Check
Before you dig into capacitors and compressor windings, check the things that are free to check. Most service calls turn out to be something simple that the homeowner could have fixed in five minutes.
Thermostat check. Is the display on? If it's blank, replace the batteries. If it's a programmable model, make sure the schedule didn't accidentally bump the temperature setting higher than the room temperature.
Set it five degrees below room temperature and listen for a click.
Breaker and disconnect. Check the breaker in your main panel. If it's tripped, reset it. Then walk outside and check the disconnect box.
Some disconnects have fuses that can blow. If the disconnect uses pull-out fuses, pull the block and inspect. A blown fuse looks melted or shows continuity at zero with a multimeter.
Air filter. This one sounds too simple, but it's the most common fix. A clogged filter restricts airflow, which causes the evaporator coil to freeze. Ice blocks the airflow entirely, and the unit stops cooling.
Replace the filter if it's dirty. Wait 24 hours for ice to melt before turning the unit back on.
Outdoor unit debris. If the condenser coil is covered in dirt, grass clippings, or leaves, the system can't reject heat. That causes high pressure, which trips the safety switch. A garden hose on gentle spray can clean the coils.
Never use a pressure washer, it bends the aluminum fins and makes the problem worse.
The five-minute checklist in summary:
| Check | What to look for | Quick fix |
|---|---|---|
| Thermostat display | Blank or error | Replace batteries |
| Breaker | Tripped position | Reset once |
| Air filter | Visible dirt or clog | Replace |
| Outdoor coil | Debris between fins | Rinse gently with hose |
| Disconnect pull-out | Blown fuse or loose | Replace fuse or reseat |
If all five checks are fine and the unit still isn't cooling, you're ready to move into the deeper diagnostic steps.
Understanding the Common Failure Patterns
Coleman Evcon units fail in predictable ways. Each symptom points to a specific set of possible causes. Learning to read the symptoms narrows the diagnosis quickly.
Unit won't turn on at all. No fan noise. No compressor hum. Nothing happens when the thermostat calls for cooling.
The most likely suspects are a dead thermostat, a tripped safety switch, a blown transformer, or a failed control board. Start at the thermostat and work downstream. If the thermostat has power but the unit doesn't respond, check for 24 volts at the contactor coil.
No voltage there means the control circuit is broken. Voltage present but the contactor doesn't click means the contactor coil itself is bad.
Fan runs but no cold air. The outdoor fan spins. You can hear the compressor try or hum. But the air coming through the vents is room temperature at best.
This is the classic bad run capacitor scenario. The compressor needs a boost from the capacitor to start and stay running. If the capacitor is weak or dead, the compressor may try to start, hum for a few seconds, then trip on internal overload.
A quick test with a multimeter set to capacitance mode tells the story. The reading should match the microfarad rating stamped on the side of the capacitor plus or minus 6 percent.
Other causes include a stuck contactor that isn't sending power to the compressor, or a failed compressor winding. We'll cover how to test all three in the next section.
Compressor hums but won't start. This is the symptom that makes homeowners nervous. You hear a low hum coming from the outdoor unit. Sometimes it cycles on and off every few seconds.
Humming usually means the compressor is getting power but can't spin. The most common cause is a dead start capacitor or a failed start relay. These components give the compressor extra torque to get moving.
Without them, the compressor just sits there and hums until internal overload protection kicks in.
Less common but more serious: the compressor is mechanically seized. If the compressor shaft won't turn, no capacitor in the world will fix it. A seized compressor means replacement of the outdoor unit or the entire system.
Short cycling or tripping the breaker. Short cycling means the unit runs for a minute or two then shuts off. It comes back on, runs briefly, and shuts off again. This cycle repeats every few minutes.
Short cycling is often caused by a dirty condenser coil, an oversized unit for the space, or a refrigerant overcharge. If the breaker trips every time the compressor tries to start, you likely have a grounded compressor winding, meaning the winding insulation has failed and the current is leaking to ground. That's a compressor replacement scenario.
Ice on coils or refrigerant lines. Ice anywhere on the indoor coil or the large refrigerant line is a sign of low refrigerant charge or restricted airflow. The low pressure causes moisture to freeze on the coil surface.
Turn the unit off immediately if you see ice. Running it with frozen coils will damage the compressor. Wait for the ice to thaw completely, then check the air filter and blower wheel.
If the filter is clean and the blower is moving good air, the ice is likely caused by a refrigerant leak. That's a pro job.
Water leaking indoors. If you find water pooling around your indoor unit or coming through the ceiling, the condensate drain is almost certainly clogged. The drain line carries away moisture that the coil pulls out of the air. When it's blocked, water backs up and overflows the drain pan.
Clear the drain line with a shop vac. If that doesn't work, blow compressed air through the line from the outside end. Pour a cup of bleach down the drain annually to prevent future clogs.
| Symptom | Most likely cause | DIY or Pro |
|---|---|---|
| Nothing turns on | Dead thermostat or tripped breaker | DIY |
| Fan runs, warm air | Bad run capacitor | DIY |
| Compressor hums | Bad start capacitor or relay | DIY |
| Short cycling | Dirty coil or refrigerant issue | Both |
| Ice on coils | Low refrigerant or clogged filter | Pro for refrigerant |
| Water leaking | Clogged drain line | DIY |
The Core Diagnostic Sequence
If your unit passed the quick checks but still won't cool, you need to test components in order. Work through these steps one at a time. Each test eliminates a possible cause.
Step 1: Check the Contactor
The contactor is the relay that sends power to the compressor and fan motor. With the unit powered off, pull the disconnect. Remove the contactor cover.
Look at the contacts.
If the contacts are pitted, burned, or welded together, replace the contactor. This is a common failure in older Coleman Evcon units. The part costs about 20 dollars and swaps out in ten minutes.
To test the contactor coil, set your multimeter to ohms. Touch the probes to the two small terminals on the contactor. A good coil reads between 10 and 20 ohms.
An open reading or a short means the coil is bad.
Step 2: Test the Capacitor
This is the single most common failure point in residential AC systems. The run capacitor provides the electrical boost the compressor needs to start and run efficiently.
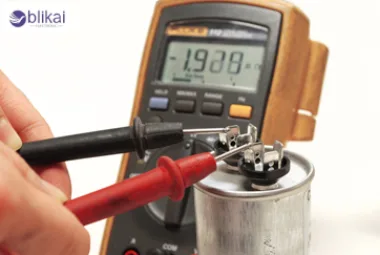
Image source: Bing (Web (fair-use with source credit))
To test it safely, discharge the capacitor first. Place an insulated screwdriver across both terminals. The stored charge will discharge with a small spark.
Then remove the wires from the capacitor terminals. Set your multimeter to capacitance mode. Touch the probes to the terminals.
A good capacitor will read within 6 percent of the microfarad rating printed on the side. For example, a 45 microfarad capacitor should read between 42.3 and 47.7 microfarads. If it reads low or shows zero, replace it.
Run capacitors cost 10 to 20 dollars at any HVAC supply house.
Step 3: Test the Compressor Windings
If the contactor is good and the capacitor tests fine, the problem may be in the compressor itself. This test checks the integrity of the compressor's internal windings.
With the unit powered off and the disconnect pulled, remove the compressor terminal cover. Set your multimeter to ohms. Test between the three terminals: Common (C), Run (R), and Start (S).
A healthy compressor shows these patterns:
- Resistance between C and R is the lowest value
- Resistance between C and S is the middle value
- Resistance between R and S equals C to R plus C to S
If any reading is zero or infinite, the winding is damaged. If resistance between any terminal and ground is less than 1 megohm, the compressor has a ground fault. Both situations mean the compressor needs replacement.
Step 4: Check the Transformer
If the thermostat has power but the unit doesn't respond to cooling calls, the 24-volt transformer may be bad. The transformer converts 120 or 240 volts from your house into the 24 volts that the thermostat and contactor coil use.
Test the transformer by setting your multimeter to AC voltage. Place the probes on the two low-voltage terminals. A good transformer outputs between 24 and 28 volts AC.
If the output is zero or significantly less, replace the transformer. These cost about 25 dollars.
Step 5: Inspect the Control Board
Some Coleman Evcon units have a circuit board that controls timing and safety functions. Look for visible damage on the board. Burn marks, bulging capacitors, or cracked solder joints indicate a failed board.
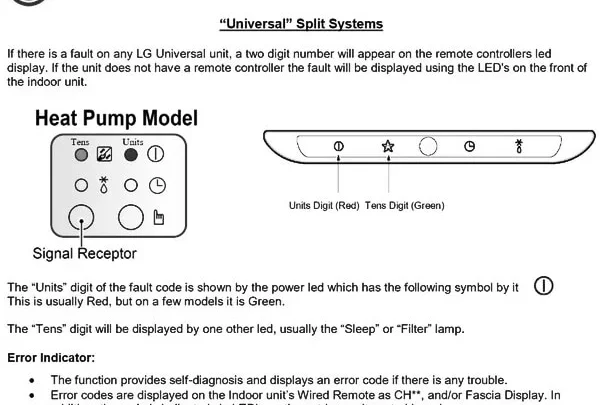
Also check for blinking LED error codes. Count the flashes and refer to your unit's wiring diagram label inside the access panel. Error codes point directly to specific failures.
When It's Not Worth Fixing
Not every problem is worth repairing. Sometimes replacement makes more sense both financially and practically.
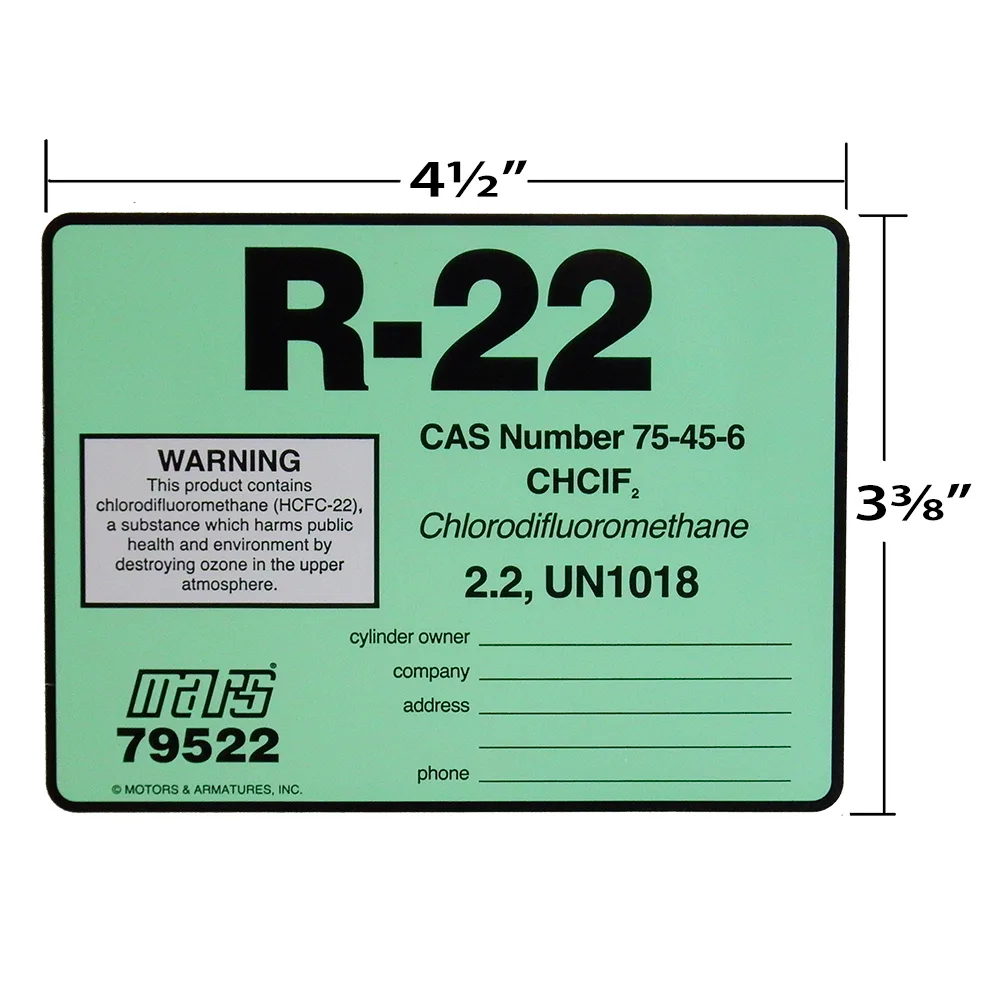
Image source: Bing (Web (fair-use with source credit))
The R-22 problem. If your Coleman Evcon unit was manufactured before 2010, it almost certainly uses R-22 refrigerant. The EPA phased out production of R-22 in 2020. Existing supplies are shrinking fast.
As of 2026, recharging an R-22 system can cost 600 to 1200 dollars just for the refrigerant. If your compressor fails and the system uses R-22, replacement is almost always cheaper than repair.
Age factor. The average lifespan of a residential AC unit is 15 to 20 years. If your Coleman Evcon is older than 15 years and you have a major failure like a seized compressor or a leaking coil, you are better off replacing the whole system. A new unit with R-410A refrigerant will be more efficient and cheaper to maintain.
Compressor failure. A compressor replacement alone costs 1200 to 2000 dollars including labor. On an older unit, the evaporator coil often fails soon after. You could spend 2500 dollars on repairs and still have an old unit with low efficiency.
A new basic system starts around 3000 to 4000 dollars installed.
When to repair instead:
- The unit is less than 10 years old
- The problem is a simple part like a capacitor or contactor
- The system uses R-410A refrigerant
- The compressor tests good
When to replace:
- The unit is over 15 years old
- The compressor is seized or grounded
- The system uses R-22 and needs refrigerant
- The evaporator coil is leaking
- Repair costs exceed 50 percent of a new system
Common Mistakes That Cost You Money
DIY troubleshooting has a learning curve. Here are the mistakes that come up most often.
Replacing the capacitor without discharging it first. This is the one that hurts people. A charged capacitor can deliver a shock that knocks you off a ladder or stops your heart. Always discharge it.
Always.
Replacing parts without testing first. Throwing a new capacitor at the problem without testing the old one is wasted money. Test first. Confirm the part is bad.
Then replace.
Adding refrigerant to a system that has a leak. This is illegal and pointless. The refrigerant escapes again. The leak must be located and repaired first.
Only a certified technician can do this correctly.
Running the unit with ice on the coils. When the coil is frozen, the compressor works harder and can overheat. Continued operation with ice can damage the compressor irreversibly. Turn the unit off.
Let the ice melt completely. Then diagnose the cause.
Using a pressure washer on the condenser coil. High-pressure water bends the aluminum fins. Bent fins block airflow and reduce efficiency. A garden hose with a gentle spray is all you need.
Ignoring the air filter. A dirty filter causes low airflow. Low airflow causes ice. Ice causes compressor damage.
Change the filter every 30 to 60 days during cooling season. It takes two minutes.
Frequently Asked Questions
How do I reset my Coleman Evcon air conditioner?
Turn the thermostat to Off. Flip the breaker for the outdoor unit off. Wait 30 seconds.
Turn the breaker back on. Set the thermostat to cool at least five degrees below room temperature. The unit should restart within a few minutes.
What do the blinking lights on the control board mean?
The flashing LED pattern corresponds to a specific error code. Count the number of flashes. One flash may indicate a bad sensor.
Two flashes point to a high-pressure fault. Check the wiring diagram on the inside of the access panel for exact meanings.
Why does my Coleman Evcon run but not cool?
The most common cause is a failed run capacitor. Test it with a multimeter in capacitance mode. If the reading is more than 6 percent below the rated microfarads, replace it.
A dirty condenser coil or low refrigerant are the other likely culprits.
How long should a Coleman Evcon AC unit last?
With regular maintenance, these units typically last 15 to 20 years. Units installed in mild climates or well-shaded locations may last longer. Units near the coast with salt exposure often fail closer to 12 years.
Can I replace the capacitor myself?
Yes, if you follow safety procedures. Discharge the capacitor first. Note which wire connects to each terminal.
Buy the exact same capacitance and voltage rating. Install the wires in the same positions. The part costs 10 to 20 dollars.
Is it worth fixing an old Coleman Evcon unit?
If the unit is under 12 years old with a simple part failure, fix it. If it is over 15 years old with a compressor failure or R-22 refrigerant, replacement is the smarter call. A new unit pays for itself in lower electric bills within a few years.
The Bottom Line: Fix It or Call a Pro?
Here's a simple decision guide based on what you found.
Fix it yourself if:
- The thermostat has dead batteries
- The breaker tripped and stays on when reset
- The air filter is clogged
- The drain line is clogged
- The capacitor tests bad and you can discharge it safely
- The contactor contacts are visibly burned
Call a pro if:
- You are unsure about discharging a capacitor
- The compressor is seized or grounded
- You suspect a refrigerant leak
- The control board shows burn marks or error codes you can't interpret
- The unit is under warranty (DIY work can void it)
- You are uncomfortable working around high voltage
Replace the system if:
- The unit is over 15 years old with a major failure
- The compressor is bad and the system uses R-22
- Repair costs exceed half the price of a new unit
- The evaporator coil is leaking and the system is old
Your Coleman Evcon air conditioner is a durable machine built to last. But every machine wears out eventually. Knowing what you can safely check yourself and when to hand it off to a professional is the difference between a fast cheap fix and a long expensive headache.

Similar Posts