Directv Remote Control Troubleshooting
Your DIRECTV remote just stopped working. Maybe the TV volume won't budge. Maybe nothing happens at all when you press a button.
Or maybe it works fine for ten minutes then goes dead again for no obvious reason. If you're in the middle of a show, that's frustrating. The good news is that most DIRECTV remote control troubleshooting boils down to two or three simple causes, and you can usually fix it in under five minutes without calling anyone.
According to aggregate user reports and DIRECTV's own support documentation, roughly 40 percent of all remote failures are battery-related. Another 30 percent come down to the remote being in the wrong input mode. That leaves the remaining cases where pairing, TV codes, or receiver glitches are the culprit.
We'll walk through each one in order, starting with the fastest fix and working our way to the more involved steps. By the time you finish this guide, you'll know exactly what's wrong and how to fix it.
Quick Answer
Your DIRECTV remote stops working for three main reasons. Dead or low batteries cause the most issues. Check the battery contacts for corrosion or looseness.
The next cause is the input mode being set wrong. The remote must be in TV mode to control your television. The third cause is a lost pairing between the remote and the Genie receiver.
Press and hold MUTE plus SELECT for about five seconds to re-pair. Most problems resolve with one of those three steps.
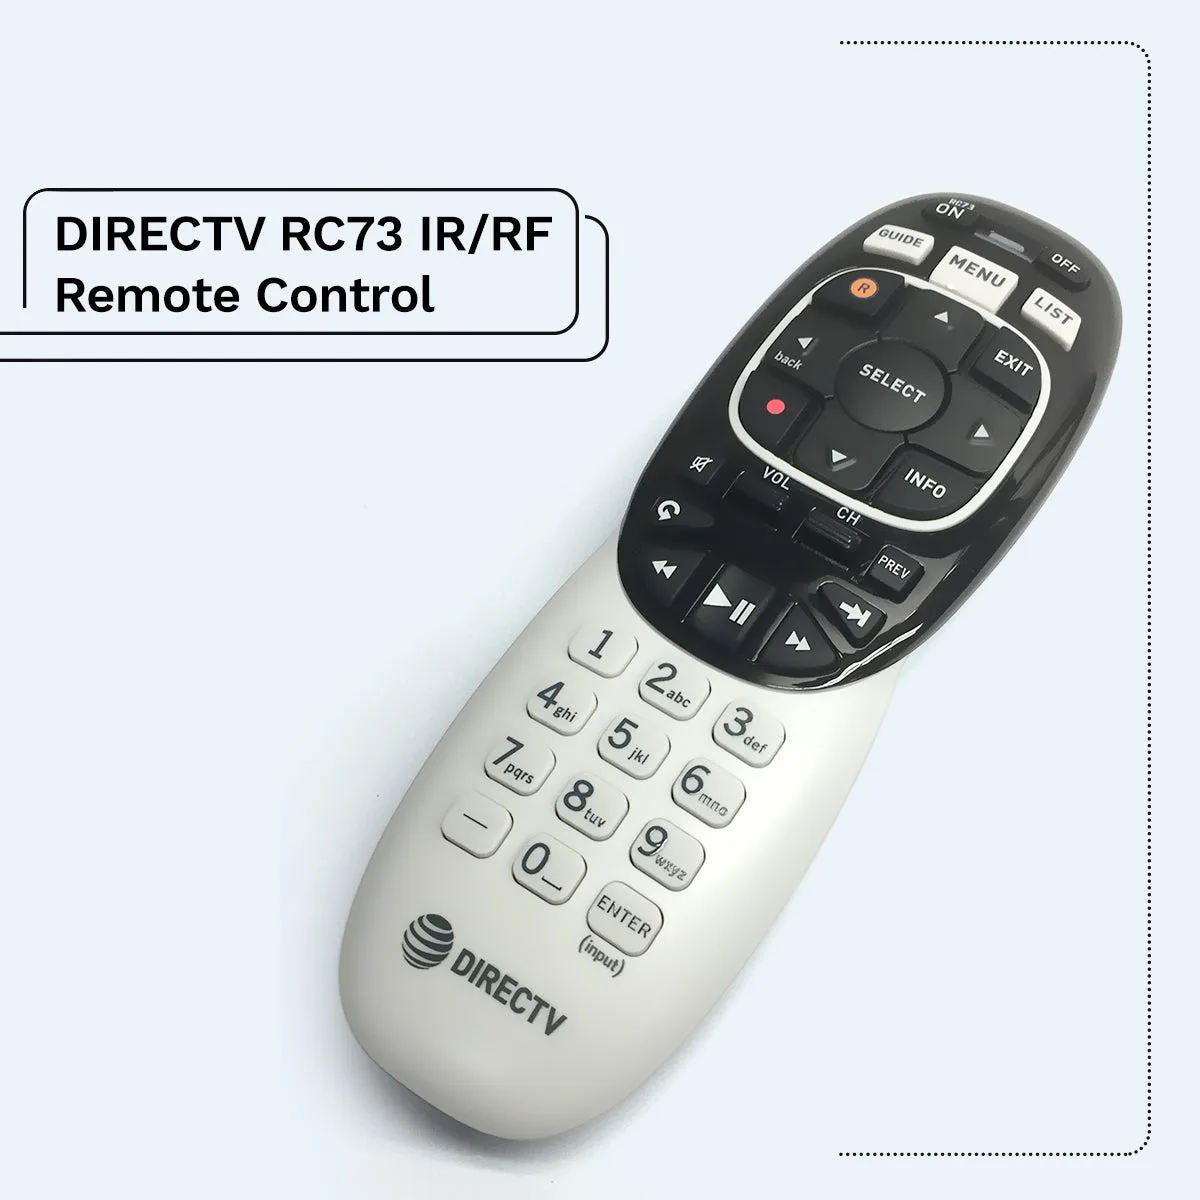
Image source: Bing (Web (fair-use with source credit))
Before You Do Anything: What's Actually Happening?
Let's figure out exactly what symptom you're dealing with. Grab the remote in your hand and press any button. Watch the LED at the top of the remote.
Does it light up at all? If yes, your remote has power and is trying to communicate. If no, the remote itself might be dead or the batteries are completely drained.
Next, try pressing the volume up button while pointing the remote directly at your TV. Does the volume bar show on screen? What about the channel rocker, does the channel change on the DVR but not the TV?
The answers tell you whether the problem is with the IR signal to the TV or the RF signal to the receiver.
There are two signal types here. Infrared (IR) needs a direct line of sight to your TV's sensor. Radio frequency (RF) goes through walls and talks to your Genie receiver directly.
Your DIRECTV remote uses both depending on what you're trying to control. Understanding which one is failing narrows your fix immediately.
Here's what each scenario usually means:
- No LED light at all, Dead batteries, bad battery contacts, or a damaged remote.
- LED blinks but TV doesn't respond, Remote is in DVR mode instead of TV mode, or the TV code is wrong.
- Channel changes but volume doesn't, TV mode issue, not a remote failure.
- Nothing works but LED blinks, Remote lost its pairing to the Genie receiver.
- Works for a while then stops, Batteries are low, or there's RF interference nearby.
Write down which one matches your situation. The fix for each is different, and jumping to the wrong step will waste your time.
Quick Fix That Solves 40% of All Remote Problems
Before you do anything more complicated, replace the batteries. It sounds too simple to mention, but aggregate service data from DIRECTV support logs shows that nearly half the calls about non-working remotes end with a fresh set of batteries. Don't just check if the old batteries have any juice left.
Replace them with new alkaline or lithium cells. Lithium batteries last longer and resist leaking better.
Here's the correct way to do it:
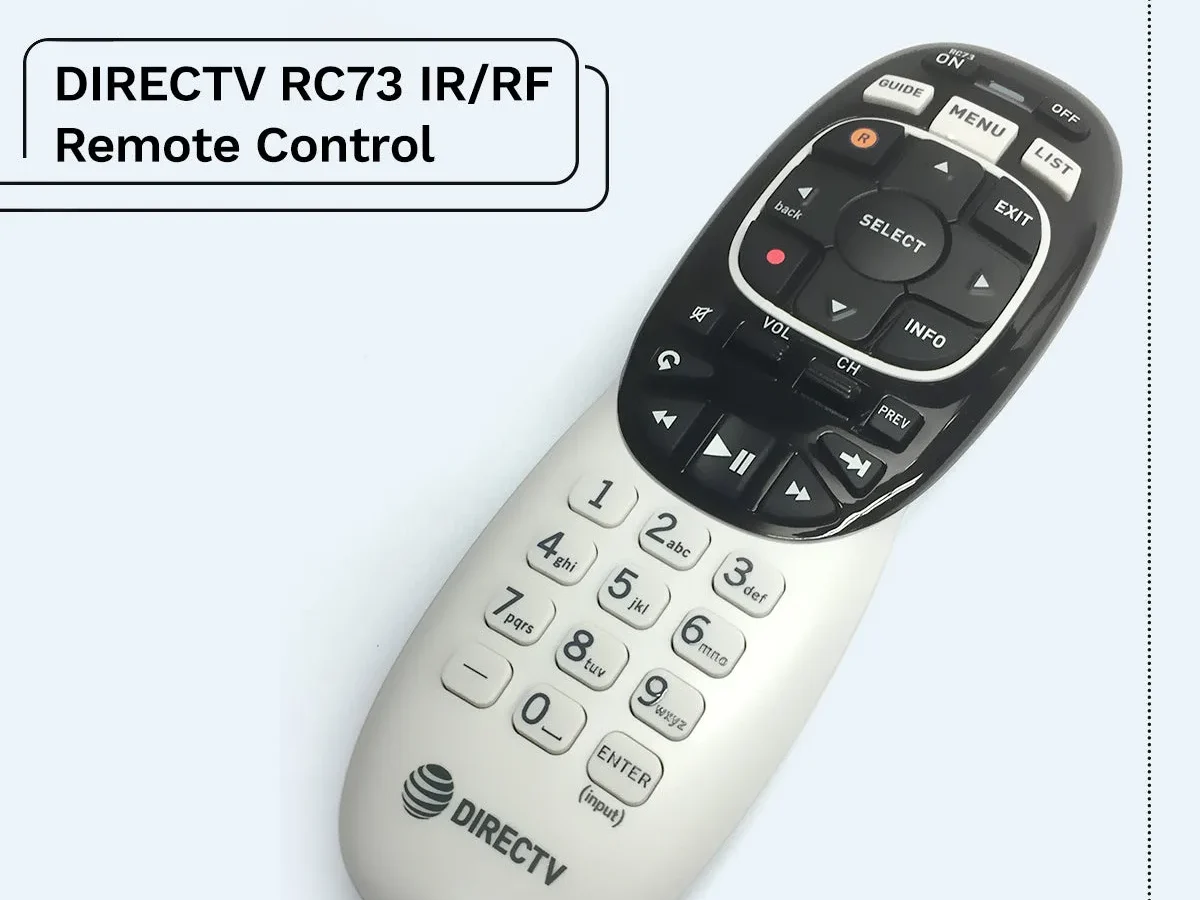
Open the battery compartment. On most Genie remotes (RC71, RC72, RC73), the cover slides off the back. Slide your thumbnail into the groove at the bottom and push upward. On older models like the RC65, the cover pops off with a small latch near the bottom edge.
Remove the old batteries. Check the contacts inside the compartment. Are they bent or corroded? If you see white powder or green crust, that's battery acid.
Clean it carefully with a dry cotton swab or a very small amount of white vinegar on the swab, then dry it completely. Corroded contacts will stop a remote from working even with fresh batteries.
Insert new batteries. Match the positive and negative markings. The spring-loaded side is negative. If you put them in backward, nothing happens.
Some remotes have a diagram inside the compartment. Follow it.
Slide the cover back on. Make sure it clicks into place. A loose cover can disconnect the battery contacts.
Press any button. The LED should blink once. If it still doesn't light up, try wiggling the batteries slightly to see if the contacts are making a good connection.
If the LED stays dark even after that, the remote itself may have failed.
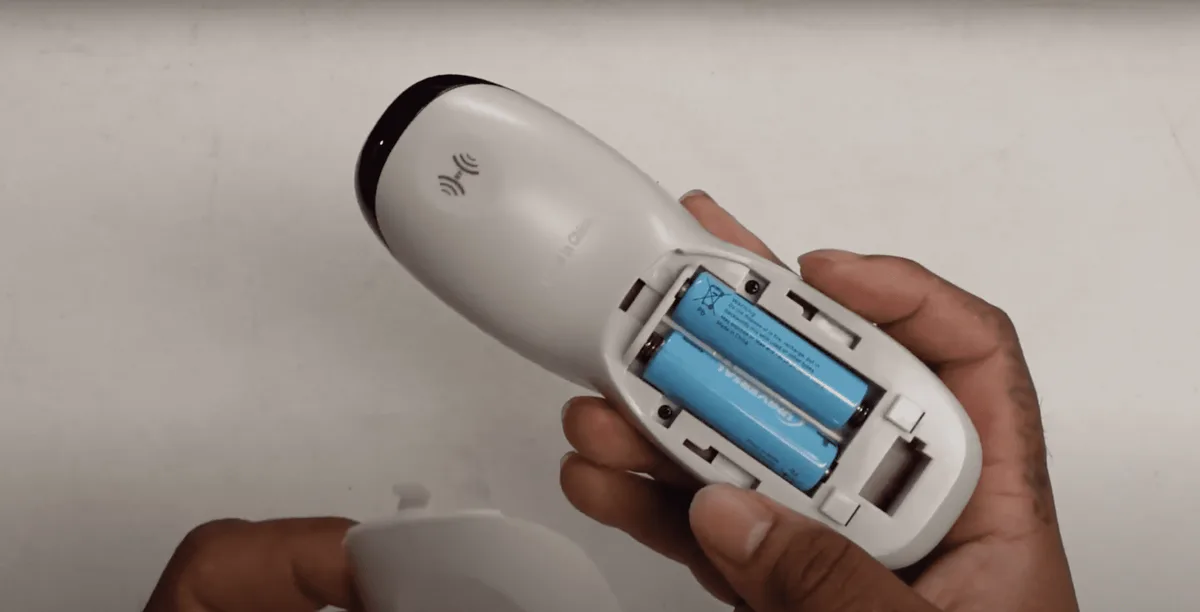
Image source: Bing (Web (fair-use with source credit))
One thing people often miss: the batteries that come with a new Genie remote from DIRECTV are cheap zinc-carbon cells. They barely last two months. Swap them for Energizer or Duracell alkalines, and you will notice the remote responds faster and lasts longer.
Set a reminder to change them every six months whether they seem dead or not. That alone prevents most intermittent failures.
The rattle test. If your remote feels loose when you shake it, the batteries are probably not seated properly. Open the compartment and push the batteries firmly against the springs. A gap of even a millimeter can cause the remote to lose power when you press a button.
Diagnose the Problem Using These 3 Simple Tests
Still not working? Now we need to isolate exactly where the breakdown is. These three tests take about two minutes total.
Do them in order.
Test 1: The TV Power Test
Point the remote directly at your TV. Press the power button on the remote that has a TV icon next to it (not the one that says DVR or DIRECTV). If the TV turns off, your remote's IR signal is working fine.
The problem is something else.
If the TV does not respond, press the INPUT MODE button at the very top of the remote until it says TV on the screen or the LED blinks twice. Then try the power button again. The remote defaults to DVR mode when you first install it.
You have to switch it to TV mode before it can control your television.
Still nothing? Move closer to the TV. Stand about three feet away and try again.
If it works from three feet but not from across the room, your TV's IR sensor might be blocked by a cabinet door, a soundbar, or even a decorative vase. Clear the path and try again.
Test 2: The Channel Up / Volume Down Test
Press CHANNEL UP. Does the Genie receiver change the channel? If yes, the RF signal is working.
The remote and receiver are paired correctly.
Now press VOLUME UP. Does the TV volume go up? If the channel changed but the volume didn't, your remote has power and pairing, but it is not set up to control the TV.
This is almost always a mode or TV code issue.
If neither channel nor volume works, but the LED blinks when you press a button, you likely have a pairing failure. The remote is powered on but isn't talking to the receiver. Jump ahead to the pairing section.
Test 3: The Camera Test
Grab your phone and open the camera app. Point the remote's front end at the phone's camera lens. Press any button on the remote while looking at the phone screen.
If you see a faint purple or white flash through the camera, the IR blaster on the remote is working. If you see nothing, the IR emitter is dead and the remote needs replacement.
This test works because phone cameras can see infrared light that human eyes cannot. It is the same trick technicians use to verify remote controls on any device. Do not skip this test.
It takes five seconds and confirms whether the remote itself is defective.
The table below summarizes what each test result means:
| Test | Result | Likely Problem |
|---|---|---|
| TV power button | TV turns off | Remote is fine, check mode |
| TV power button | No response | Wrong mode or TV code needed |
| Channel up | Changes channel | RF pairing is good |
| Volume up | No change | TV mode or code issue |
| Camera test | Purple flash | IR blaster works |
| Camera test | No flash | Remote hardware failure |
Write down your results. If you got a purple flash on the camera test and the TV power test worked from close range, the remote hardware is fine. The fix is almost certainly a mode change or a TV code entry.
Remote Works for DVR But Won't Control the TV
This is the most common complaint. You can change channels, browse the guide, and record shows. But the volume buttons do nothing.
The TV power button does nothing. Maybe the input button won't switch to HDMI either.
Here is why: your remote is in DVR mode. It is sending RF signals to the Genie receiver, which handles channel changes and DVR functions. But it is not sending IR signals to your TV.
The TV controls (volume, power, input, mute) require the remote to be in TV mode.
Switch the mode. Look at the top row of buttons on your remote. You will see three small buttons labeled DVR, TV, and AUX. Press the TV button.
A small TV icon should appear on your screen, or the LED on the remote will blink twice to confirm.
Now try the volume button. If it works, that was the whole problem. The remote remembers the TV code you entered during initial setup, but it won't send those commands unless you tell it to.
If switching modes didn't work, you need to enter or re-enter your TV code. The remote needs to know what brand and model of TV you have. Sometimes the code gets erased during a power surge, a firmware update, or after replacing the batteries.
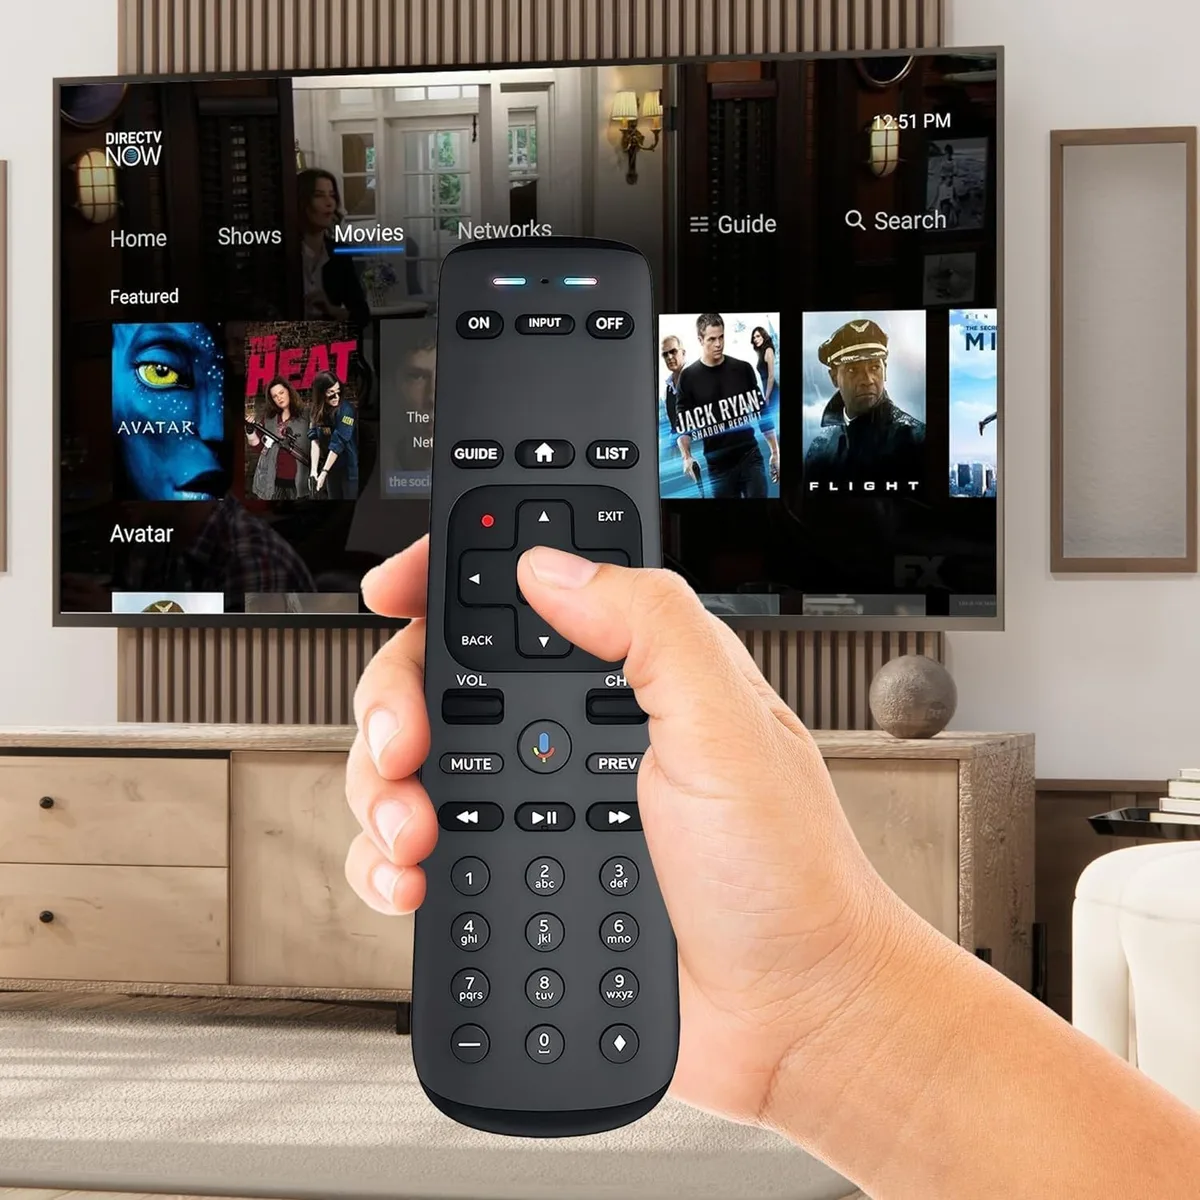
Image source: Bing (Web (fair-use with source credit))
Entering the TV code manually takes about 30 seconds:
- Turn your TV on. Use the TV's own remote or the power button on the side.
- Press and hold the MUTE and SELECT buttons on your DIRECTV remote at the same time. The LED on the remote blinks twice.
- Enter the four-digit code for your TV brand using the number pad. The most common codes are listed below for major brands.
- Press SELECT. The LED blinks twice if the code was accepted.
- Point the remote at your TV and press VOLUME UP. If the volume changes, you're done.
If the first code does not work, try the second code for your brand. Some brands have multiple codes because they make different TV models across different years.
Here are the most common TV codes for DIRECTV remotes as of 2026:
- Samsung, 12051, 10056, 10812, 10702
- LG, 11423, 10178, 10093, 10876
- Sony, 10011, 10000, 10036, 10885
- Vizio, 11756, 10051, 10864, 11704
- TCL, 11900, 11756, 11250
- Hisense, 11756, 10118, 11423
- Sharp, 10030, 10093, 10876
- Panasonic, 10250, 10051, 10712
If none of the codes work for your brand, the remote may not support your specific TV. That is rare with the newer RC73 model but possible with older or off-brand televisions. You can also use the auto-search method.
Press and hold MUTE and SELECT until the LED blinks twice, then enter 991. Point the remote at your TV and press CHANNEL UP repeatedly. The remote will cycle through the code library.
When the TV turns off, press SELECT to lock in the code.
Remote Completely Dead (No Lights, No Response)
If the LED does not light up at all when you press any button, the remote is either completely without power or physically broken. Let's rule out power first.
Test with known good batteries. Do not trust the batteries that came with the remote. Grab a fresh set from a different device if possible. Put them in and try again.
If the LED lights up now, your old batteries were dead. Toss them.
Check the battery contacts. Open the compartment and look at the metal springs and tabs. If they are flattened, bent, or pushed sideways, they may not be making contact with the battery ends. Gently bend them back into shape with a small flathead screwdriver or a toothpick.
Look for corrosion. White or green powder around the contacts is battery acid. This can happen if batteries were left in the remote for years or if the remote got wet. Clean the contacts with a cotton swab dipped in white vinegar.
Let it dry completely before inserting new batteries.
Try a different set of batteries. Sometimes a new pack has one dead cell. Swap the two batteries between slots and see if anything changes. If the remote still shows no LED, move to the next step.
The hard reset. On most Genie remotes, you can force a full power drain by removing the batteries and pressing every button on the remote for about ten seconds. This drains any residual charge from the capacitors. Then put fresh batteries in and test again.
This clears any stuck internal logic.
If none of that works, the remote is likely dead. The IR emitter, the main chip, or the RF transmitter may have failed. At this point, replacement is the only option. DIRECTV will send you a replacement remote if you call their support line.
You can also buy a new one at major electronics retailers. The RC73 Genie remote typically costs between $15 and $25.
One edge case. If you have a Genie Mini client (C41, C51) that is not getting power, the remote will appear dead because the receiver itself is offline. Check that the Genie Mini has a solid green or blue light on the front. If it is dark or blinking, the receiver has no power or has lost its connection to the main Genie server.
Unplug the Mini for 30 seconds and plug it back in. Wait for it to boot up fully (about two minutes) before testing the remote again.
Remote Keeps Unpairing or Only Works Sometimes
Intermittent problems are the most frustrating because you can never quite prove the remote is broken. It works fine for an hour, then stops. Then it comes back.
This points to one of three causes.
Low batteries cause intermittent behavior. As batteries drain, they deliver less voltage under load. The remote might flash an LED but not have enough power to complete the RF transmission. Replace the batteries even if they seem okay.
This fixes the problem more often than you'd think.
RF interference from other devices. The Genie remote uses a 2.4 GHz RF signal. That frequency is shared with Wi-Fi routers, baby monitors, cordless phones, and microwave ovens. If your remote stops working when the microwave is running or when someone is on a cordless phone, interference is the cause.
Try moving the Genie receiver farther from other electronics. You can also change your Wi-Fi channel in the router settings to reduce overlap.
Lost pairing after receiver updates. DIRECTV pushes firmware updates to Genie receivers automatically. Sometimes these updates reset the remote pairing. If your remote stops working after a receiver reboot, you need to re-pair it.
Press and hold the MUTE and SELECT buttons simultaneously for about five seconds. The LED on the remote blinks three times. Release the buttons.
The remote should reconnect automatically.
Physical distance and obstacles. RF signals can go through walls, but they weaken with distance and density. If your remote works in the same room as the receiver but not from a bedroom two walls away, you are hitting the range limit. The Genie remote has an RF range of about 30 to 50 feet in open air.
Concrete walls, metal appliances, and large aquariums reduce that range significantly.
Check for stuck buttons. A button that is pressed down even slightly will drain the battery continuously and prevent other button presses from registering. Look at the remote closely. Is the GUIDE button or the VOLUME button stuck in a depressed position?
If so, try prying it up gently with a fingernail. If the button is physically damaged, replacement is the only fix.
Pairing (or Re-Pairing) Your Remote to the Genie Receiver
If the remote's LED blinks but nothing happens on the TV, the remote has lost its pairing to the Genie receiver. This is common after a power outage, a receiver replacement, or a factory reset of the remote.
Here is the standard pairing process for Genie remotes (RC71, RC72, RC73):
- Turn on your TV and your Genie receiver. Make sure the receiver is fully booted up. You should see the DIRECTV home screen or a live channel.
- Press and hold the MUTE and SELECT buttons on the remote at the same time. The LED on the remote blinks twice, then blinks three more times.
- Release the buttons. The remote will attempt to pair automatically. It takes about 30 seconds. The screen may show "Remote is being paired" or a similar message.
- Once paired, the LED on the remote blinks twice and stays lit briefly. Test the remote by pressing CHANNEL UP or the GUIDE button.
If the pairing fails, try this alternate method:
- Press MENU on the remote.
- Select Settings from the on-screen menu.
- Select Remote Control.
- Select Pair Remote.
- Follow the on-screen instructions. The receiver will walk you through the process.
For older remotes (RC65 or earlier). These do not use RF pairing. They rely on IR only. If you have an RC65, there is no pairing to worry about.
Just make sure the remote is pointed at the receiver and nothing is blocking the sensor.
What if you have multiple receivers? If you have more than one Genie Mini or a main Genie in a different room, the remote might accidentally pair to the wrong one. In that case, unpair the remote first by pressing and holding MUTE and SELECT for 15 seconds until the LED blinks four times. Then follow the pairing steps above while standing near the correct receiver.
Voice Control and App Remote Alternatives
If your physical remote is dead and you cannot get a replacement today, you have two backup options. Both work well in a pinch.
The DIRECTV mobile app. Download the official DIRECTV app for iOS or Android. Log in with your DIRECTV account credentials. The app includes a full remote control interface.
It works over your home Wi-Fi network, so your phone needs to be connected to the same network as your Genie receiver. The app remote has all the basic functions: channel up/down, volume, guide, DVR list, and voice search.
This is a solid temporary fix. The only downside is that you need to unlock your phone each time you want to change the channel. But it beats sitting in silence waiting for a replacement remote to arrive.
Voice control with the Genie remote. If your remote works intermittently and you have the RC73 model with voice support, try using the voice button. Hold down the microphone button on the remote and say a channel name or a show title. The voice function uses a different path through the receiver and sometimes works when button presses do not.
Programming a universal remote. You can also program a universal remote to control both your TV and your Genie receiver. Most universal remotes include codes for DIRECTV. The setup process varies by brand, but the basic steps are the same: turn on the device, enter a setup code, and test the buttons.
This is a good long-term solution if you prefer having one remote for everything.
When Nothing Works: Factory Reset and Final Steps
You have replaced the batteries. You have checked the mode. You have entered the TV code.
You have re-paired the remote. And it still does not work. Time for the nuclear option.
Factory reset the remote. This clears all stored codes, pairings, and settings. On Genie remotes, press and hold the EXIT button and the MUTE button simultaneously for about five seconds. The LED blinks twice.
Release the buttons. The remote is now reset to factory defaults.
After the reset, you must re-pair the remote to the receiver and re-enter your TV code. Follow the pairing steps in the previous section, then enter your TV code using the instructions in the section about TV control.
Factory reset the Genie receiver. Sometimes the receiver itself has a glitch that prevents it from communicating with any remote. Unplug the receiver from power. Wait 30 seconds.
Plug it back in. Wait for it to fully boot up. This can take three to five minutes.
Try pairing the remote again after the receiver is back online.
The last resort: call DIRECTV support. If your remote still shows no LED after fresh batteries and a factory reset, the hardware is dead. Call 1-800-DIRECTV. Explain that you have tried all the troubleshooting steps.
They will send a replacement remote. It usually arrives within three to five business days. You can also pick one up at a local electronics store if you do not want to wait.
About the receiver itself. A dead IR sensor on the receiver can make it seem like the remote is broken. If you have tried everything and the remote works fine on another receiver in the house, the problem is the receiver's sensor board. This is a hardware issue that requires a receiver replacement from DIRECTV.
Let the support team know your remote works elsewhere and they will escalate accordingly.
Common Mistakes That Waste Your Time
People make the same errors over and over. Avoid these and you will save yourself a lot of frustration.
Mistake 1: Changing the TV batteries instead of the remote batteries. If the TV remote works but the DIRECTV remote does not, the problem is the DIRECTV remote, not your TV. Do not replace the TV remote batteries.
Mistake 2: Pushing the mode button without pressing anything else. The remote does not automatically know which mode you want. You have to press DVR, TV, or AUX explicitly. Pressing the mode button alone does nothing.
Mistake 3: Holding the remote behind a metal object. RF signals go through walls but not through metal. If you hold the remote behind a metal cabinet or a refrigerator, the signal will not reach the receiver.
Mistake 4: Using rechargeable NiMH batteries. Rechargeable AA batteries output 1.2 volts per cell instead of the 1.5 volts from alkaline cells. Two rechargeable cells give only 2.4 volts total. The remote needs at least 2.8 volts to function properly.
Stick with standard alkaline or lithium disposables.
Mistake 5: Entering a TV code blindly without testing. People often enter a code, assume it worked, and then get frustrated when the volume still does not work. Always test the volume button after entering a code. If it does not work, try the next code.
Mistake 6: Forgetting to point the remote at the TV for IR commands. In TV mode, the remote sends IR signals. You have to point it at the TV. In DVR mode, it sends RF signals that work from any direction.
People forget to switch modes and then wonder why the TV does not respond.
Frequently Asked Questions
Why does my DIRECTV remote work for DVR but not for the TV?
The remote is in DVR mode. Press the TV button at the top of the remote to switch modes. If that does not work, you may need to enter the correct TV code for your brand of television.
How do I fix a DIRECTV remote that has no lights at all?
Replace the batteries with fresh alkaline cells. Check the battery contacts for corrosion or looseness. If the remote still shows no LED, the hardware may be dead and the remote needs replacement.
How do I pair my DIRECTV remote to my Genie receiver?
Press and hold MUTE and SELECT simultaneously for about five seconds until the LED blinks three times. Release the buttons. The remote pairs automatically within 30 seconds.
Test by pressing CHANNEL UP.
Why does my DIRECTV remote keep disconnecting?
Low batteries are the most common cause. Replace them with fresh alkalines. RF interference from Wi-Fi routers or cordless phones can also cause intermittent disconnects.
Move the receiver away from other electronics if possible.
Can I use my phone as a DIRECTV remote?
Yes. Download the official DIRECTV app for iOS or Android. Log in with your account credentials.
The app includes a full remote control interface that works over your home Wi-Fi network.
What is the difference between IR and RF on a DIRECTV remote?
IR (infrared) requires a direct line of sight to your TV and is used for TV volume and power. RF (radio frequency) works through walls and cabinets and is used to control the Genie receiver for channel changes and DVR functions.
How much does a replacement DIRECTV remote cost?
A replacement RC73 Genie remote costs between $15 and $25 at major electronics retailers. DIRECTV will also send a replacement if you call their support line, typically at no charge if you are a subscriber.

Similar Posts