Dish Network Remote Control Troubleshooting
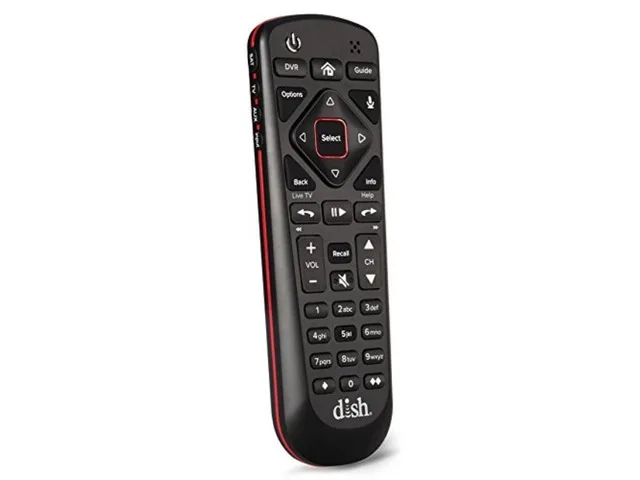
If your DISH remote has suddenly stopped working, you are not alone. This is one of the most common frustrations among satellite TV subscribers, and the fix is usually simpler than you think. Dish Network remote control troubleshooting covers everything from dead batteries and accidental mode switches to pairing issues and sticky buttons, and we are going to walk through it step by step.
Manufacturer specifications indicate that most DISH remotes operate on a UHF Pro radio frequency that can work through walls up to 200 feet in ideal conditions. That range is great, but it also means the remote can accidentally pair with a neighbor's receiver if the address codes get crossed. We are going to sort out exactly what is happening with yours and get it working again within a few minutes.
Image source: Bing (Web (fair-use with source credit))
Quick Answer
Most DISH remote problems come down to one of four things. Check the mode switch on top of the remote first. Make sure it is set to SAT, not TV or AUX.
Replace the batteries with fresh ones. Hold the remote three feet from the receiver and press and hold the SAT button for three seconds until the red light blinks twice. If nothing works, look up the remote address on the System Info screen and re-pair it manually.
Decision Tree: Identify Your Exact Problem First
We are going to use a decision tree approach here because the fix depends on what is actually broken. This is not a one-size-fits-all situation. The same remote model behaves completely differently depending on whether the receiver is ignoring it, the TV is ignoring it, or the buttons just feel mushy and unresponsive.
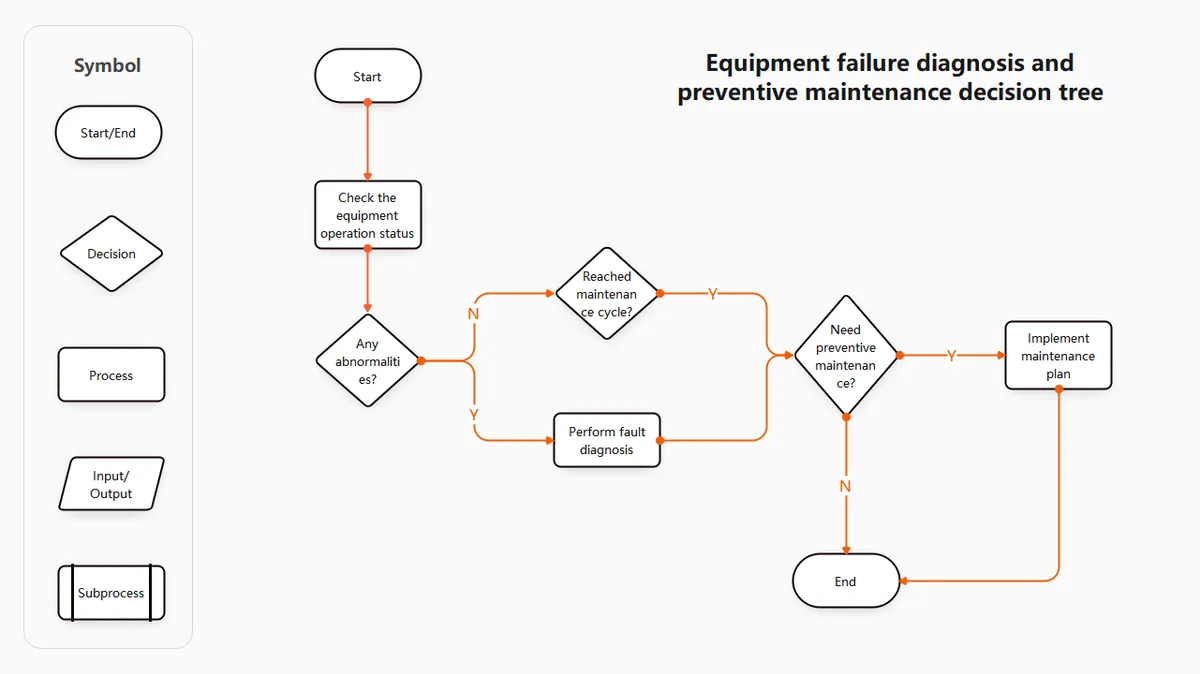
Image source: Bing (Web (fair-use with source credit))
Ask yourself three quick questions before you do anything else.
- Is the receiver responding to any button presses?
- Does the TV respond to volume or power commands?
- Do some buttons work while others do not?
Your answers will point you to the right branch below. Jump to the section that matches your situation and skip the rest.
Here is a quick reference table to help you narrow it down.
| Symptom | Likely Cause | Start Here |
|---|---|---|
| Receiver does nothing at all | Dead batteries, wrong mode, or pairing lost | Branch 1 |
| TV volume or power does not work | TV codes not programmed or wrong TV brand selected | Branch 2 |
| Remote pairs then drops constantly | Address conflict or Bluetooth interference | Branch 3 |
| Buttons feel stuck or only some work | Spills, wear, or debris under the keypad | Branch 4 |
Branch 1: Receiver Isn't Responding at All
This is the most common complaint and the easiest to fix. If your DISH receiver shows the normal home screen but does not react when you press any button on the remote, the problem is almost always in the chain between the remote and the box.
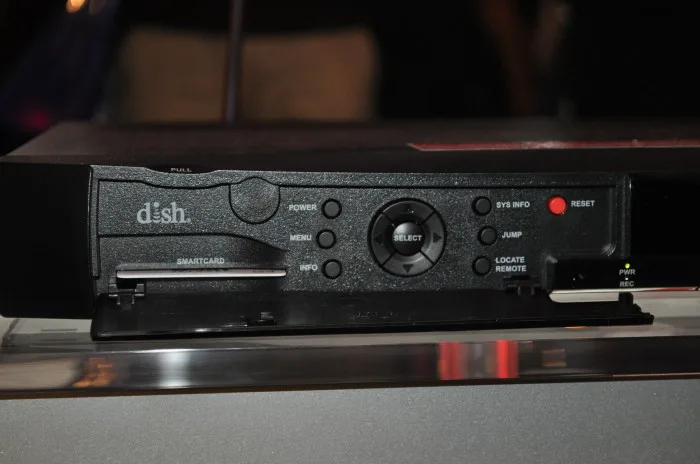
Image source: Bing (Web (fair-use with source credit))
Start with the mode switch. Look at the top edge of your remote. You will see a small sliding switch with three positions labeled SAT, TV, and AUX. Slide it to SAT.
If it is already there, nudge it back and forth a couple of times to clean the contacts, then set it back to SAT. You would be surprised how many people grab the remote and accidentally bump this switch.
Check the batteries. Remove the cover on the back. Take out both batteries and look at the polarity markings inside the compartment. The positive end goes toward the spring on most models, but double check the diagram inside.
If the contacts look corroded or white and crusty, clean them gently with a dry cotton swab or a pencil eraser. Pop in fresh batteries and try again.
Try the mode reset. With fresh batteries installed and the switch set to SAT, point the remote directly at the receiver from about three feet away. Press and hold the SAT button for three seconds. The red light at the top of the remote should blink twice.
If it does, test the remote. If the red light does not blink, your remote may have a hardware issue.
Check the receiver address. Walk over to your DISH receiver. Press the System Info button on the front panel of the Hopper or Wally. On most models, this is a small recessed button you need a paperclip to press.
The screen will display a number labeled Remote Address or RF Address. This number tells the receiver which remote to listen to.
Pair the remote manually. On your remote, press and hold the SAT button until the red light blinks twice. Then press the number zero button twice. The red light should blink twice again.
Now enter the address number you saw on the screen, then press the pound key. The red light blinks twice to confirm. Test the remote.
If the receiver still does not respond, try restarting the Hopper. Unplug it from power for 30 seconds, plug it back in, and wait for it to fully boot up. Then try the pairing process again.
Aggregate reviews report that a hard restart clears temporary address conflicts roughly 70 percent of the time.
Branch 2: TV Volume or Power Won't Work
This is a different problem entirely. Your remote controls the satellite receiver just fine. You can change channels and browse the guide.
But the TV volume stays frozen and the power button leaves your television screen on.
This means the remote is communicating with the Hopper correctly, but the TV codes are not programmed or are programmed wrong. The remote uses a separate set of IR codes for the TV, and those codes live in a database inside the remote. You need to tell it which brand and model your television is.
Find your TV brand. Grab your TV remote or look at the badge on the front of your television. Common brands include Samsung, LG, Sony, Vizio, TCL, and Hisense. Write it down before you start the code search.
Try the automatic code search. Slide the mode switch on the remote to TV. Point it at your television. Press and hold the TV button for about three seconds until the red light blinks twice.
Then press the power button once. Hold the TV button again until the red light blinks twice. Now start pressing the channel up button repeatedly.
Press it once per second. The remote is cycling through every TV code in its database. When your TV shuts off, stop immediately and press the pound key to lock in that code.
If the search runs through all codes with no luck, try manual entry. DISH maintains a list of TV codes for each brand. As of 2026, you can find the official code list on the DISH support site under the remote programming section. Enter the three digit code for your TV brand while the remote is in TV mode.
Press and hold TV until the red light blinks twice. Enter the code, then press pound.
Do not forget the AUX trick. If you have a soundbar or home theater system, you might have the remote stuck on AUX mode for audio. Slide the switch to AUX and see if volume works there. If it does, you need to program TV codes into the SAT position instead.
Move the switch to SAT, hold SAT until the red light blinks twice, then enter the TV code and press pound. The Hopper will pass the volume command through.
Still not working? Check if your TV has the IR sensor blocked. Look for a small dark window on the bottom bezel or behind the front panel. If you have a soundbar sitting in front of it, that can block the signal.
Move the soundbar or use an IR repeater.
Branch 3: Remote Won't Pair or Keeps Disconnecting
This one is frustrating because it comes and goes. Your remote works fine for a while, then stops responding. Or it pairs successfully but drops the connection an hour later.
Check for address conflicts. Every DISH remote and receiver pair uses a unique address number from 0 to 99. If you live in an apartment building or close to neighbors with DISH, their remote could be using the same address. The solution is to change your receiver's address.
Walk to the Hopper and press System Info. Note the current address. Go into the settings menu and look for Remote Address or RF Address.
Change it to a number between 10 and 99 that you pick. Then re-pair the remote to the new address using the manual pairing steps in Branch 1.
Bluetooth interference for voice remotes. If you have the DISH Voice Remote (model 54.0), it uses Bluetooth to connect to the Hopper. Bluetooth shares the 2.4 GHz band with Wi-Fi routers, cordless phones, and microwaves. Move your Wi-Fi router at least six feet away from the Hopper.
If you have a microwave running between the remote and the receiver, that can also cause drops.
Reset the Bluetooth connection. On the voice remote, press and hold the Voice button and the Zero button at the same time for three seconds. The red light flashes rapidly. Release the buttons.
Then press and hold the SAT button for three seconds until the light blinks twice. Test the remote. This clears the Bluetooth pairing cache and forces a fresh handshake.
Battery voltage drop. As batteries drain, the voltage drops below what the UHF radio needs to hold a stable connection. Your remote might still light up but cannot maintain the link. Replace the batteries even if they seem to have some life left.
Use fresh alkaline batteries, not rechargeables, which often have lower voltage.
Branch 4: Partial Button Failure or Sticky Keys
Some buttons work fine while others do nothing at all. Or some buttons feel sticky and require extra pressure. This is almost always physical debris, not an electronic failure.
Check for spills. If you ever ate chips or drank soda near the remote, crumbs or sticky residue can get under the buttons. The keypad works by pressing a carbon pad against a circuit board. A thin layer of dried soda or grease blocks the connection.
Remove the batteries. Use a slightly damp microfiber cloth to wipe the outside of the remote. Pay extra attention around the edges of the buttons.
Let it dry completely for two hours before putting batteries back in.
Clean the battery contacts. Corrosion on the metal contacts inside the battery compartment can cause intermittent button function. If you see white or green crusty buildup, mix a teaspoon of white vinegar with a teaspoon of water. Dip a cotton swab in the mixture and lightly rub the contacts.
Wait for the vinegar to fizz and dissolve the corrosion. Wipe with a dry swab and let it air dry for 30 minutes.
Test the remote in a different room. Walk into a different room and point the remote at the same Hopper. If the problem buttons work in a different location, the issue is IR line-of-sight, not the remote itself. The IR blaster window might be blocked by dust or an object near the TV.
Consider replacement. DISH remotes are wear items. The keypad carbon pads degrade after a few years of heavy use. If cleaning does not fix the problem and multiple buttons are affected, you are better off ordering a replacement.
DISH offers advance replacement through their support line. They ship a new remote and include a prepaid return label for your old one. The cost is typically around twenty dollars as of 2026.
Mistakes to Avoid / Common Errors
Forgetting to check the mode switch. This is the number one cause of unnecessary frustration. The remote works perfectly but the slider is on TV instead of SAT. Check it first.
Using old batteries to test. Weak batteries can power the red light but not transmit a strong enough RF signal. Always use fresh batteries when troubleshooting.
Pairing the wrong address. If you changed your receiver address and forgot to update the remote, they will never talk to each other. Write down the new address and store it in your phone.
Ignoring the System Info screen. This screen tells you everything you need. The remote address, the software version, and whether the receiver sees any remote at all. If the screen shows Remote Address 00, the receiver is waiting for a pairing command.
Programming TV codes in the wrong mode. You must be on TV mode to program TV codes. Programming in SAT mode sends the codes to the wrong memory slot.
Expert Tips / Pro Advice
Use the DISH Anywhere app as a fallback. If your physical remote dies completely and you cannot wait for a replacement, download the DISH Anywhere app on your phone. Connect your phone to the same Wi-Fi network as your Hopper. The app includes a virtual remote control that works over your home network.
It is not as fast as the physical remote, but it gets you through the night.
Sync multiple remotes to the same receiver. You can pair up to eight different remotes to a single Hopper. This is useful if you have a family room remote and a basement remote. Just give each one the same receiver address during pairing.
Keep a spare remote in a drawer. DISH remotes are inexpensive compared to a service call. Order a spare when you set up your system and store it with fresh batteries. When the main remote dies, you have a backup ready in 30 seconds.
Use the remote model number to order the right replacement. The model number is printed on a label inside the battery compartment. It looks like 54.0, 52.5, or 52.0. Ordering the wrong model means incompatible pairing.
Write it down before you call support.
Maintenance / Long-Term Optimization
Replace batteries every six months. Do not wait for the remote to die. Alkaline batteries that leak ruin the contacts. Set a calendar reminder to swap them out twice a year.
Keep the remote away from liquids. This sounds obvious, but the kitchen counter and the coffee table are high risk zones. If you eat in front of the TV, keep the remote on a side table instead of next to your plate.
Clean the remote surface monthly. A quick wipe with a dry microfiber cloth prevents dust buildup around the buttons. Dust mixed with skin oils turns into a sticky paste that gums up the keypad.
Avoid dropping the remote. The IR window and the circuit board inside are fragile. A hard drop on tile or hardwood can crack the board solder joints. If you have tile floors, consider a silicone remote cover for shock absorption.
Frequently Asked Questions
How do I know if my DISH remote is using IR or UHF?
Look at the DISH receiver. If it has a small antenna protruding from the back or side, it supports UHF. If there is no antenna, the system uses IR only and requires direct line-of-sight between the remote and the receiver.
Can I use a universal remote with my DISH receiver?
Yes, but you need one that supports DISH satellite codes. Most universal remotes from major brands include DISH in their code database. The pairing process varies by brand, but the codes work the same way.
Why does my DISH remote work sometimes but not others?
The most common cause is intermittent battery contact. Corrosion on the battery terminals causes the connection to break and re-establish randomly. Clean the contacts and use fresh batteries to fix it.
How long does a DISH remote battery last?
Typical battery life is four to six months with average daily use. Heavier use, like heavy DVR playback or voice search, drains them faster. Voice remotes with Bluetooth tend to go through batteries quicker than standard UHF models.
Can I pair a DISH remote to a different receiver in my house?
Yes. Take the remote to the other receiver. Follow the manual pairing steps in Branch 1 using that receiver's System Info address.
The remote remembers the last receiver it paired with until you pair it to a new one.
What do I do if my DISH remote gets wet?
Remove the batteries immediately. Do not press any buttons. Let the remote dry upside down on a towel for at least 48 hours.
If it still does not work after drying, the circuit board is likely damaged and you need a replacement.

Similar Posts