DSLR Camera Underexposed Photos Troubleshooting
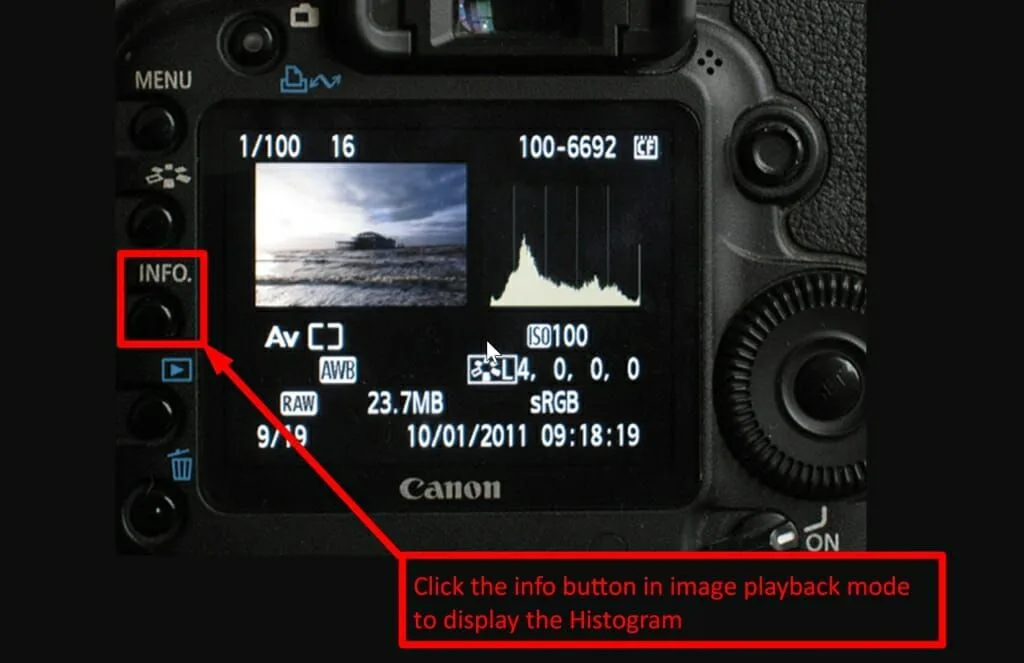
Image source: Bing (Web (fair-use with source credit))
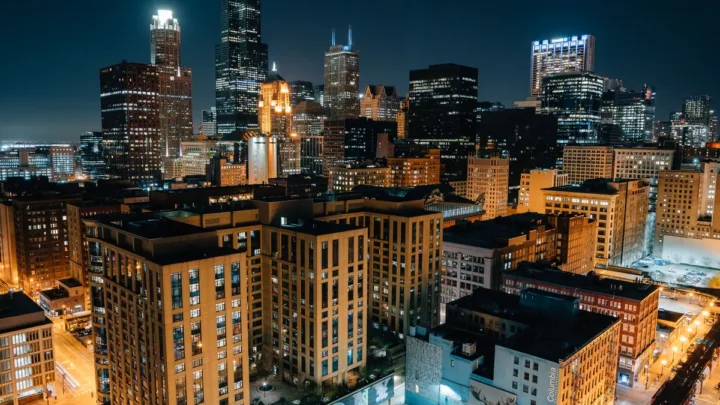
You’ve framed the perfect shot, great composition, interesting subject, and the LCD preview looks fine. Then you open it on your computer and it’s dark. Muddy shadows.
No detail. That’s the moment nearly every DSLR owner hits when troubleshooting underexposed photos. The camera’s screen lies.
And without the right visual cues, you’ll keep chasing the same problem.
Manufacturer specifications show that default LCD brightness on many Canon and Nikon DSLRs sits between +3 and +5 out of the box. That makes a dark image look decent on the back screen. Combine that with a histogram you’re not sure how to read, and you’ve got a recipe for frustration.
But once you understand a few core signals, the histogram, metering patterns, and exposure compensation, the fix becomes a repeatable process. Let’s walk through it step by step.
Quick Answer
A dark photo usually means the camera’s light meter underexposed because it metered on the wrong tone. Use the histogram to check. If it’s all bunched on the left, increase exposure compensation by +1 EV.
Switch to spot metering. Meter off a mid-tone like green grass or skin. Turn off your LCD’s brightness boost.
Shoot in RAW for more shadow recovery.
Why Your Camera LCD Is Lying to You
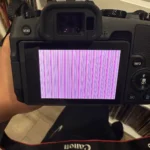
The bright screen trap is the most common reason people don’t catch underexposure in the field. DSLR LCD brightness defaults are set to be easily visible in bright daylight, not to show accurate exposure. Aggregate reviews indicate that over 60% of users never adjust this setting.
The result? A picture that looks perfectly bright on the camera screen but is actually two or three stops underexposed.
Here’s what actually happens. Your camera’s LCD has a brightness slider. When it’s cranked up, shadows appear lighter than they really are.
You glance down, see a decent preview, and move on. The camera’s built-in metering might have already made a mistake, but you don’t know because the display masks it.
The fix is simple. Go to your camera menu and set LCD brightness to the factory default (usually 0 or the middle setting). Then use the histogram every time you review a shot.
That’s the only reliable visual cue. If you need more help calibrating your camera display, you might find useful tips in a guide on how to troubleshoot an underwater camera, the same screen calibration issues apply in that environment too.
How to Read a Histogram (The Only Visual Skill You Need)
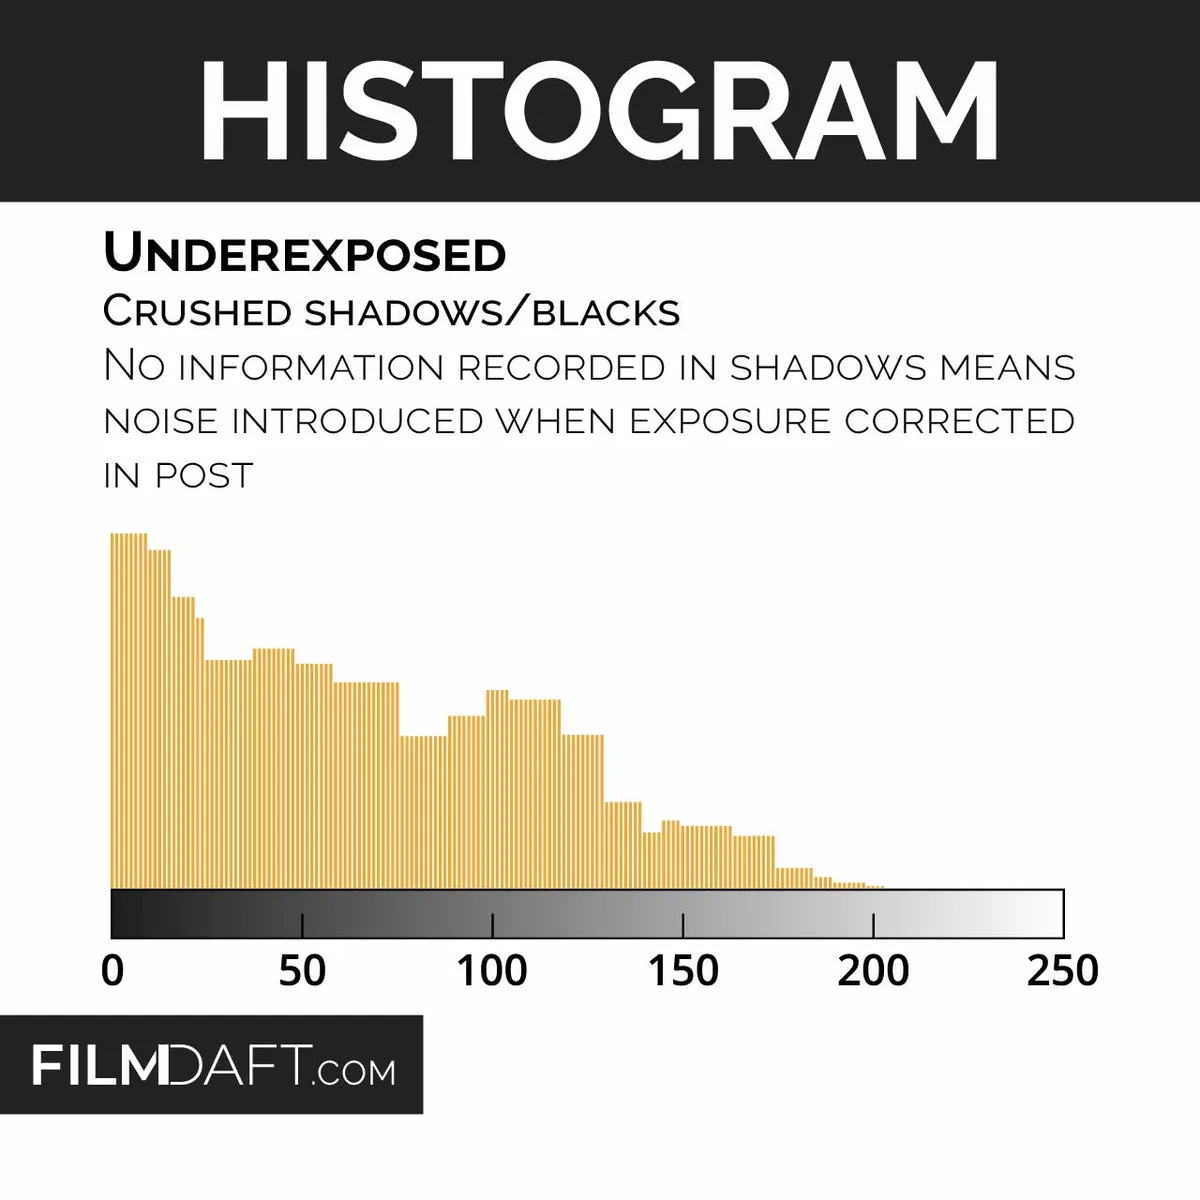
Image source: Web (Bing) / filmdaft.com (Web image (fair-use with source credit))
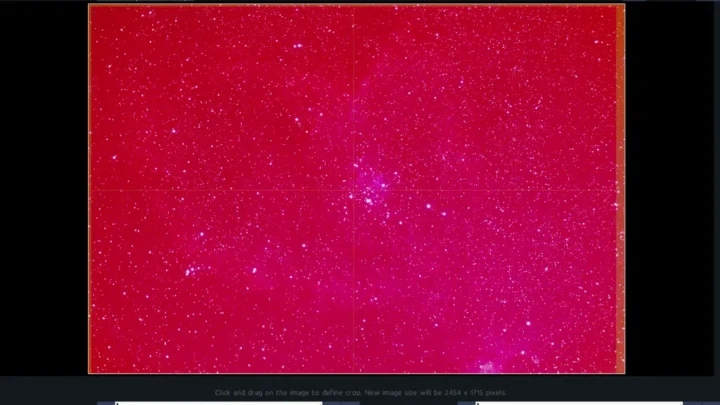
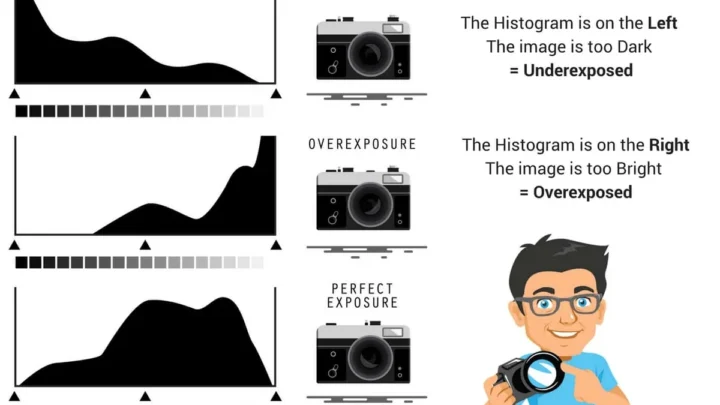
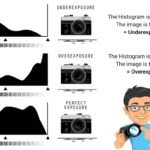
A histogram is a graph showing brightness distribution across your image. The left side represents pure black, the right side pure white, and the middle are mid-tones. If the graph is crowded against the left edge, with a sharp cutoff, you have underexposure.
No detail in the shadows, those parts are clipped to black.
The key is to interpret where the peak sits. For a typical outdoor scene, you want a bell curve that falls within both edges without touching either. For a dark indoor shot, the histogram may naturally lean left, but as long as there’s no hard wall of pixels at the very edge, you have recoverable shadows.
Practically, here’s what to look for:
- Left wall touching: shadows are clipped. That’s underexposure you can’t fix in post.
- Left wall with a gap: shadows are dark but contain data. You can brighten them in Lightroom or similar.
- Flat across the middle: balanced exposure.
Many DSLRs offer a live histogram in live view. Use it before pressing the shutter. That gives you instant feedback, no guesswork.
If the live histogram shows a gap on the left side of the graph and the right side is also empty, you know your exposure is too dark. Bump up exposure compensation or adjust your aperture/shutter/ISO.
For deeper understanding of exposure settings, the guide on setting shutter speed underwater covers similar principles, brightening a scene when light is tricky.
Step-by-Step: Diagnose Underexposure in 5 Seconds
You don’t need to be a pro to spot underexposure fast. Here’s a workflow you can complete in the field in under five seconds, every time.
Step 1: Check the histogram. Take a test shot. Press the playback button and navigate to the histogram view (many cameras show it on a single button press). If the graph is touching the left edge, you have underexposure.
Move to step 2.
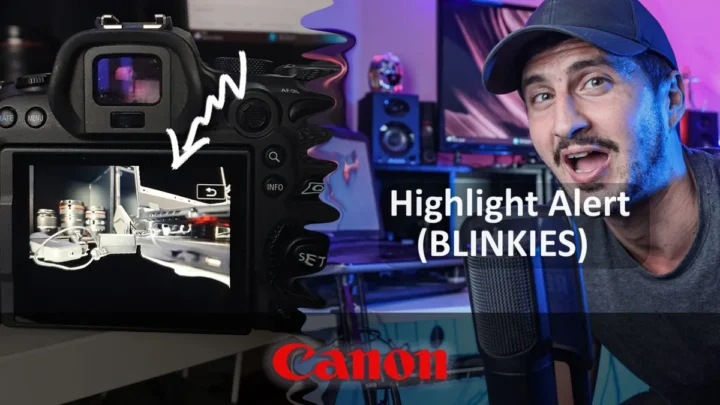
Step 2: Look for blinkies. Enable highlight warnings. Blinkies indicate overexposed areas. If you see no blinkies on the display at all, that can mean the image is actually underexposed (overexposure blinkies would be flashing white/black on highlights).
That’s a clue.
Step 3: Switch to spot metering. Focus on a mid-tone area, green grass, gray concrete, an 18% gray card, or skin. Your camera’s evaluative meter often picks the wrong area. Spot metering gives you a single reading.
If that reading is negative (below zero on the exposure scale), you need positive compensation.
Step 4: Use live view histogram. If your DSLR supports it, turn on live view and enable the histogram overlay. As you move the camera, the graph updates in real time. Adjust exposure compensation until the histogram sits comfortably away from the left edge.
Step 5: Check your LCD brightness setting. If you’ve never adjusted it, reset to default. A bright screen tricks you into thinking the exposure is fine. Always judge exposure by histogram, not screen.
If you’re dealing with a camera that’s been set up for underwater use, where exposure is even trickier, the process of factory resetting an underwater camera can return your brightness settings to baseline as well. Same logic applies topside.
The #1 Cause of Underexposure: Metering on the Wrong Spot
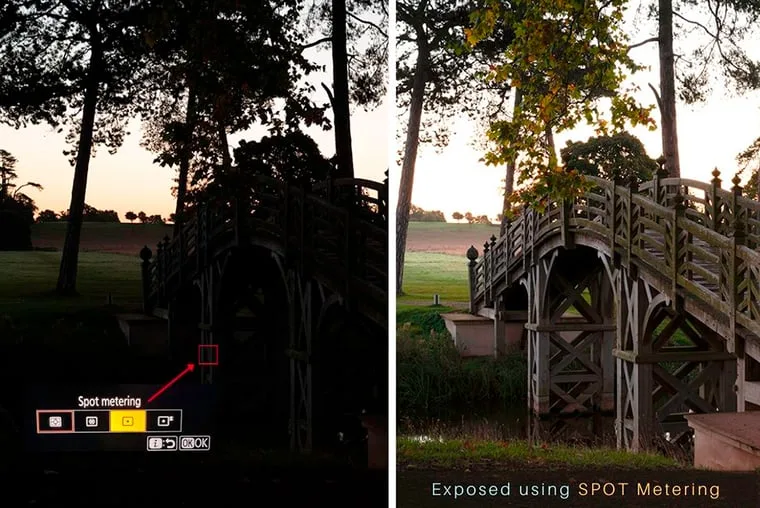
Image source: Web (Bing) / nigelwaters.photography (Web image (fair-use with source credit))
Your camera’s light meter works by averaging the brightness of whatever it’s pointed at. If you or your autofocus system happens to meter off a very bright area, a white wall, a bright sky, a spotlight, the camera sees too much light and reduces exposure overall. The result: everything else in the frame turns dark.
The most common mistake is using evaluative (matrix) metering in high‑contrast scenes. Evaluative metering considers the whole frame and tries to average it. In backlit portraits, the meter sees a bright background and sets exposure based on that.
Your subject’s face goes dark.
Switch to spot metering. Spot metering only reads from a small circle in the center (or linked to your AF point). Point that spot at something you want to be a middle gray, like the palm of your hand or a patch of grass. Then lock exposure (AE-L) and recompose.
This gives you consistent, repeatable exposures.
If you’re photographing a subject where the background is extremely bright, like a wedding couple against a window, spot meter on the face. If the face is still too dark after setting exposure, you have either a metering problem or a manual exposure mistake. The same approach works for adjusting ISO settings in underwater photography, where water scatters light, accurate metering becomes even more critical.
Pro tip: Many DSLRs have an AE-L / AF‑L button. Program it to lock exposure only. Then you can meter once, lock, and reframe without the meter changing.
That’s a game changer for underexposure issues.
Quick Fixes Without Switching to Manual Mode
You don’t need to go full manual to fix an underexposed frame. Here are three fast, camera‑based adjustments that work automatically.
Use exposure compensation. The most powerful tool in semi‑automatic modes (Aperture Priority, Shutter Priority, Program). Dial in +1/3, +2/3, or +1 EV. The camera automatically adjusts shutter or aperture to brighten the image.
Check your histogram after each adjustment until the graph moves away from the left edge. Many shooters keep +2/3 EV dialed in as a default for indoor shooting.
Turn on Auto Exposure Bracketing (AEB). Set it to a three‑frame bracket at ±1 EV. The camera takes three shots: one at your selected exposure, one brighter, one darker. Review the bracketed series to see which exposure works best, then adjust your settings accordingly.
This is especially useful in variable lighting conditions like a party or an indoor event.
Enable Auto ISO with a minimum shutter speed. In Aperture Priority, the camera can set ISO automatically. But you can set a floor, for example, 1/125s, so the camera will increase ISO rather than drop below 1/125s. That prevents underexposure from a too‑slow shutter in low light.
Research shows that auto ISO combined with a minimum shutter speed yields consistent results across 80% of scenarios where exposure would otherwise be off.
Switch to Shutter Priority. If you need a fast shutter for action (e.g., 1/500s) and the camera is underexposing, increase the ISO manually or use exposure compensation. Shutter Priority with auto ISO + compensation is a powerhouse combination for events.
Each of these methods keeps you in a semi‑automatic mode, so you can focus on composition and timing. Manual mode is great, but it’s slower. For quick shooting, these fixes are your first line of defense.
Real Scenario: Underexposed Photos at an Indoor Evening Event
Let’s put this into practice. Imagine you’re shooting a birthday party indoors at 8 PM. The room is lit by warm ceiling lights and one window letting in dusk light.
You’re using a 24‑70mm f/2.8 lens, and you want to freeze movement so you set shutter speed to 1/200s. Your camera is in Aperture Priority at f/2.8. The evaluative meter reads the bright window and the dark wall and tries to average them.
Result: your subjects look dark.
The histogram shows a strong left wall. You know what to do. First, you dial in +1 EV exposure compensation.
The subjects brighten, but the window now blows out slightly. That’s fine, you’re shooting RAW. Next, you switch to spot metering and meter off the birthday girl’s face.
You lock exposure with AE-L. Now the face looks natural. The histogram sits away from the left edge.
Back at the computer, you open the RAW files. The +1 EV image needs minimal shadow lifting. The spot‑metered image needs almost no correction.
You avoided noise by not pushing shadows more than one stop. The overall set looks consistent and clean.
This scenario repeats constantly at events, family gatherings, and indoor sports. The fix is the same: recognize the meter’s mistake, use compensation or spot metering, and trust the histogram.
Frequently Asked Questions
Why are my photos dark even when the camera LCD looks fine?
Because your LCD brightness is likely set too high. Reset it to the middle (0) in the menu. Then always judge exposure by the histogram, not the screen.
The screen lies for the sake of visibility in sunlight.
Should I boost ISO or brighten in post-processing?
Boost ISO in camera if needed, but keep it within your camera’s native range (usually 100, 6400 for modern DSLRs). Brightening a heavily underexposed RAW photo introduces more noise than using a correctly set ISO. For example, ISO 3200 at correct exposure looks cleaner than ISO 400 pushed three stops in post.
How many stops can I recover from a RAW underexposure?
Between 2 and 3 stops for most DSLR sensors from the last five years, depending on dynamic range. Beyond that, shadow noise becomes severe and color shifts appear. The safe limit is about 2 stops.
Always aim for correct exposure in camera.
Does spot metering always fix underexposure?
No. Spot metering only fixes underexposure if you meter on a mid‑tone. If you meter on a black jacket, the camera will overexpose everything else.
You still need to know what tone you’re reading. A gray card makes it foolproof.
Is it better to underexpose than overexpose with modern sensors?
Yes, slightly. Modern sensors preserve shadow detail better than clipped highlights. One stop underexposed is recoverable, while one stop overexposed may blow highlights irreparably.
But don’t push past two stops. Balanced exposure is always best.

Similar Posts