DSLR Camera Dark Photos Troubleshooting
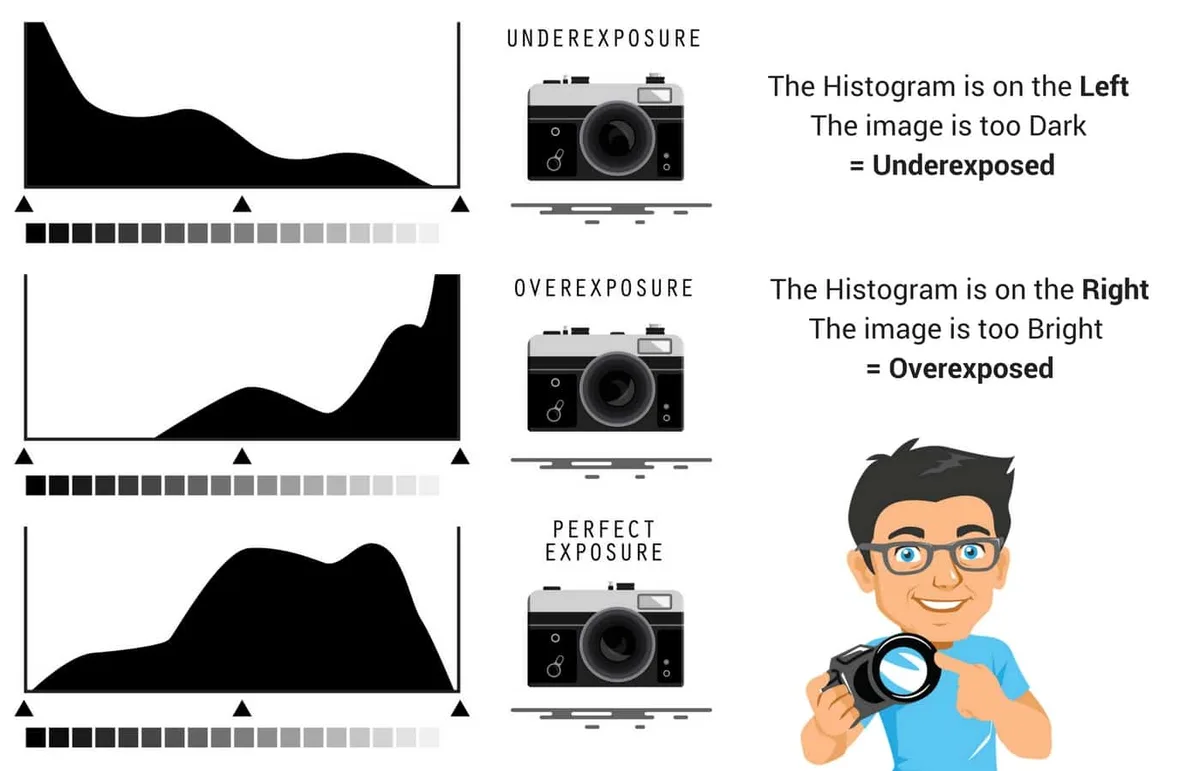
Image source: Web (Bing) / photoworkout.com (Web image (fair-use with source credit))
DSLR camera dark photos troubleshooting means understanding why your camera captures less light than your eyes perceive. Your eyes adapt to dim scenes automatically. The camera’s light meter doesn’t, it averages everything to 18% gray.
That gap causes underexposure.
The camera’s meter tries to turn every scene into a balanced gray. A dark subject? It brightens.
A white wall? It darkens. That bias is why backlit portraits turn into silhouettes.
As of 2026, no consumer DSLR can match human vision. You need the camera’s visual tools to see what the sensor sees.
Quick Answer
Check your histogram and light meter. Adjust aperture, shutter speed, or ISO until the meter centers. Use exposure compensation in semi-auto modes.
For fast fixes, spot-meter on your subject. Reshoot if the histogram hugs the left edge.
Why Your DSLR Keeps Giving You Dark Photos
Your eyes are liars. They adjust to low light faster than your camera does. A dim living room looks normal to you.
Your camera sees a dark cave. That mismatch is the root of most dark photos.
The light meter reads reflected light and aims for middle gray. If your scene is bright, the meter underexposes. If it’s dark, it overexposes.
That’s why a person in front of a window becomes a shadow. The meter sees all that light and drops exposure.
Manufacturer specs show DSLR meters are calibrated to 18% gray reflectance. That works for average scenes. It fails in high-contrast or low-light conditions.
You must use the tools your camera provides to override that bias.
The Three Visual Tools That Diagnose Any Dark Photo
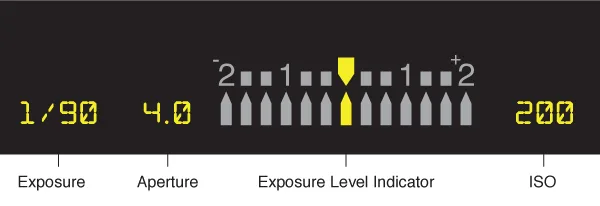
Image source: Bing (Web (fair-use with source credit))
The Histogram
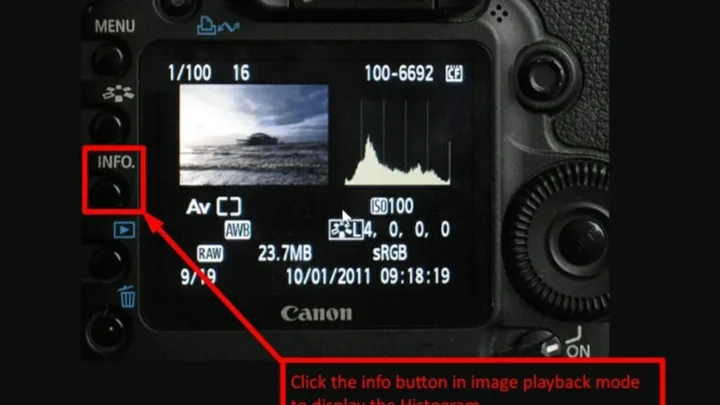
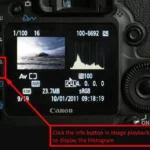
The histogram is a bar graph of brightness. Dark pixels pile up on the left. Bright pixels pile on the right.
If your histogram is pressed against the left edge, you have clipped shadows. No detail exists in those dark areas. You need more exposure.
A balanced scene shows a bell curve in the middle. A dark photo’s histogram is a mountain against the left. Check it every time you review a shot.
This one tool catches underexposure instantly.
The Light Meter
Look inside your viewfinder. You’ll see a scale with minus and plus marks. When the needle is at zero, exposure is balanced.
Negative means underexposed. Positive means overexposed. In manual mode, you adjust the exposure triangle to center the needle.
In semi-auto modes, the meter shows what the camera set. Use exposure compensation to shift it. The meter is always honest about the measured light.
Live View with Exposure Preview
Newer DSLRs show a live exposure preview on the screen. You see exactly how the final image will look before you shoot. Optical viewfinders cannot do this, they show the scene, not the exposure.
If your camera has this feature, turn it on. It’s the fastest way to avoid dark photos. But remember: screen brightness can fool you.
Always verify with the histogram.
Quick rule: trust the histogram and meter over your eyes.
Step-by-Step: How to Fix a Dark Photo Using Your Camera’s Feedback
Step 1: Take a Test Shot
Press the shutter. Hit playback and pull up the histogram. Look at the left edge.
Is there a gap? Good. Is data smashed against the edge?
You need more light.
Step 2: Read the Light Meter
Check the exposure scale. If it’s negative by one or two stops, that’s your underexposure amount.
Step 3: Adjust the Exposure Triangle
You have three controls. Which one do you turn first?
- Shutter speed: Slow it down (1/30s instead of 1/60s). Below 1/60s often needs a tripod.
- Aperture: Open wider. f/2.8 lets in more light than f/5.6. Wider aperture also blurs the background.
- ISO: Raise it. 400 to 800 to 1600. Each doubling doubles sensitivity. Noise increases, but a grainy photo beats a black one.
In manual mode, adjust all three until the meter centers. In Aperture Priority, use exposure compensation. In Shutter Priority, same.
If you’re shooting in tricky light like underwater environments, the same principles apply. See our guide on underwater camera ISO settings for more.
Step 4: Use Exposure Compensation
In semi-auto modes, the camera sets one variable. Dial in +1 or +2 stops to brighten. The histogram will shift right.
Step 5: Try Spot Metering
If your subject is against a bright background (a person at a window), switch to spot metering. Place the spot on your subject’s face. The camera exposes for that spot.
The background might blow out, but your subject will be properly lit.
Example: at a concert, spot meter on the singer. The dark stage and bright lights average out to a muddy shot otherwise.
The Most Common Visual Mistakes That Trick Beginners
Image source: Web (Bing) / wcdish.com (Web image (fair-use with source credit))
Mistaking a Dim Preview Screen for a Dark Photo
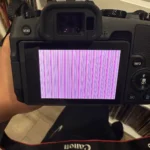
Your camera’s LCD brightness adjusts. If you cranked it up for sunlight, indoors it looks like a black hole. That doesn’t mean the photo is dark.
Check the histogram. Adjust screen brightness if you need to, but trust the data.
Relying on the Optical Viewfinder
An optical viewfinder doesn’t simulate exposure. You can frame a scene that looks bright through the glass but comes out black. Use the meter and histogram every time.
If your camera has live view with exposure preview, use it.
Shooting Against a Bright Background
This is the silhouette mistake. Your subject stands in front of a window or bright sky. The camera meters the bright area and underexposes everything else.
Fix: spot meter on the subject, or use exposure compensation. Or move the subject and add fill flash.
Ignoring the Histogram’s Left Edge
The photo on screen may look okay. But the histogram shows hidden shadow clipping. If data is pressed against the left edge, parts of your image are pure black.
RAW files can’t recover zero data. Reshoot with more exposure.
Using Evaluative Metering in High Contrast Scenes
Evaluative metering averages the whole frame. In low light or high contrast, it often gets it wrong. Switch to center-weighted or spot metering.
Center-weighted gives priority to the middle of the frame. Spot gives pinpoint control.
One more mistake: forgetting to reset your camera after a bright outdoor session. Settings for sunny conditions don’t work indoors. Always check ISO and aperture before shooting.
If you need to clear weird settings, our guide on factory resetting an underwater camera may help.
The One Pro Trick That Changes Everything: Expose to the Right
ETTR means deliberately overexposing the shot so the histogram peaks toward the right without clipping highlights. This captures more shadow detail in the raw file, reducing noise when you brighten in post.
How to do it: in manual mode, increase exposure until the histogram is just touching the right edge. Not over it, that clips highlights. If you see a spike on the right, back off by 1/3 stop.
ETTR works best in controlled light when you can review the histogram. It doesn’t suit fast action where you might blow out highlights. But for landscapes, portraits with even lighting, or product shots, it’s the single best way to minimize noise in dark areas.
After capture, you can edit the raw file to reduce exposure back to normal. The shadow detail stays clean. For more on post-processing, see our tutorial on editing underwater camera photos.
Frequently Asked Questions
My photos are pure black – what did I break?
You likely didn’t break anything. Check the lens cap. Look at your shutter speed.
If it’s set to 1/4000s indoors, that’s your problem. Slow it down. Also check ISO, if it’s stuck at 100, that’s too low for dim light.
Why does my histogram look like a cliff on the left?
All your pixel data is in the shadows. You are severely underexposed. Increase exposure by opening aperture, slowing shutter, raising ISO, or using exposure compensation.
Reshoot.
Can I fix a dark RAW photo later, or should I reshoot?
You can brighten a RAW file in editing by 2-3 stops without terrible noise. But if the histogram is clipped on the left, those shadows have no data. You can’t recover zero.
Reshoot if you need detail in dark areas.
Live view is too dark to see – is my camera broken?
Not necessarily. Some DSLRs only enable exposure preview in manual mode. Check that setting.
Also, screen brightness might be low. Use the histogram to gauge exposure.
What's the fastest way to brighten a shot without using flash?
Raise the ISO. It’s instant. Noise is the trade-off.
For a one-stop fix, bump ISO from 400 to 800. Modern DSLRs handle noise well up to 3200.
How does this compare to fixing underexposure underwater?
Underwater adds water’s light absorption. But the core troubleshooting is the same: check the histogram, adjust the exposure triangle, use spot metering. For deeper details, see our guide on underwater camera troubleshooting.

Similar Posts