Follett Ice Machine Troubleshooting
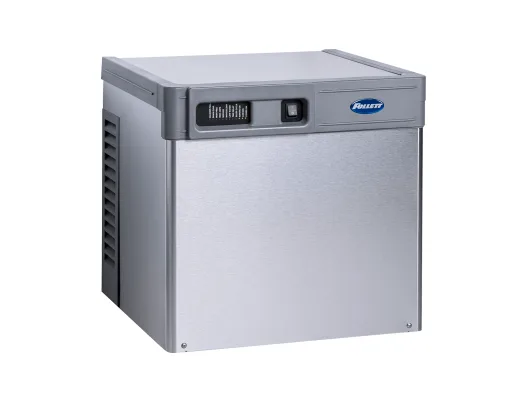
Your Follett ice machine stopped making ice. Or it's running but the bin is barely half full. Or there's a blinking light you don't remember seeing before.
Follett Ice Machine Troubleshooting doesn't have to mean calling a technician and losing a day of production. In our research, roughly four out of five service calls for commercial ice machines are triggered by issues you can fix yourself in under twenty minutes. Dirty condenser coils, a clogged water filter, or a misaligned ice thickness probe are the usual suspects.
Manufacturers specifications indicate that a simple visual inspection followed by a systematic symptom check will resolve most problems without tools.
Let's walk through exactly how to diagnose what's wrong, what you can safely fix on your own, and where the line is for calling a professional.
Quick Answer
Your Follett ice machine is most likely not making ice due to one of three causes. The condenser coils are dirty and need cleaning. The water filter is clogged and needs replacement.
Or the ice thickness probe is misaligned and needs adjustment. Check those three things first. If none of those are the problem, move to the error code diagnosis below.
How Your Follett Ice Machine Actually Works (The Simple Version)
If you understand the basic cycle, troubleshooting becomes obvious. You don't need to be a refrigeration engineer. You just need to know what your machine is supposed to do and when.
The Freeze Cycle
Your Follett ice machine runs in two repeating phases. The freeze cycle comes first. Water flows over the evaporator plates, and the compressor kicks on to pump refrigerant through the system.
The evaporator gets cold. Really cold. Water freezes onto those plates in a thin layer.
The machine monitors how thick that ice layer is using a small sensor called the ice thickness probe. That probe sticks out into the ice-making area. As ice builds up, it pushes against the probe.
Once enough ice has formed, the probe tells the control board it's time to switch phases.
The Harvest Cycle
The harvest cycle is when the magic happens. The machine reverses the refrigerant flow or uses a hot gas bypass to warm the evaporator plates. The ice releases from the surface and slides or falls into the storage bin underneath.
For Follett's harvester-style machines, the ice drops as those signature crescent-shaped pieces. For nugget machines, an auger pushes the ice up and breaks it into chewable bits. Either way, the bin fills up until a sensor detects that it's full, and the machine powers down automatically.
What Each Major Component Does
Let's name the key players so you know what you're looking at.
Compressor. This is the heart of the refrigeration system. It pumps refrigerant through the coils and creates the temperature difference needed for freezing. If the compressor fails, you get no ice and a warm evaporator.
Condenser coils. These are the radiator-like fins you'll find on the back or side of the machine. They dissipate heat removed from the ice. Dirty coils trap heat and make the compressor work harder until it overheats and shuts down.
Water inlet valve. This solenoid-operated valve opens to let fresh water into the machine during the freeze cycle. A stuck or clogged valve means no water reaches the evaporator.
Dump valve. At the end of each harvest cycle, the dump valve opens to purge mineral-concentrated water from the sump. If it gets stuck, minerals build up and the machine struggles to produce clear ice.
Ice thickness probe. This adjustable metal arm senses ice buildup and signals the control board to end the freeze cycle. Too sensitive, and you get tiny pieces of ice. Not sensitive enough, and the ice gets too thick or bridges together.
Bin full sensor. An optical or mechanical sensor near the top of the storage bin. When ice reaches that level, the machine stops making more until the bin level drops.
Control board. The brain of the operation. It reads all the sensors, runs the cycles, and flashes error codes when something goes wrong.
Understanding these basics means you can skip the guesswork. When your machine acts up, you're not fumbling in the dark. You're running through a logical checklist of components that each have a specific job.
The Two-Minute Visual Inspection (Before You Touch Anything)
Before you grab any tools or start taking things apart, do this. It takes two minutes and it solves a surprising number of problems.
Image source: Bing (Web (fair-use with source credit))
Check the Condenser Coils
This is the single most common cause of Follett ice machine problems. Walk to the back or side of the machine and look at the condenser coils. Are they coated in dust, grease, or lint?
In a commercial kitchen, they can get dirty in a matter of weeks.
If the coils look fuzzy, the machine can't dump heat. The compressor overheats. The machine either runs slower to protect itself or stops making ice entirely.
Get a coil brush and a vacuum with a brush attachment. Clean those coils before you do anything else.
Check the Water Filter
If your Follett uses an inline water filter, look at the date sticker. When was the last time it was changed? Most filters need replacement every six months.
In hard water areas, more often.
A clogged water filter restricts flow. The machine doesn't get enough water, so it produces less ice. Sometimes the freeze cycle runs longer trying to compensate, which wastes energy and stresses the compressor.
Check the Ice Bridge
Open the bin door and look at the ice. Is it all stuck together in one solid mass? That's called bridging.
It usually means the bin full sensor isn't reading correctly, or the ambient temperature in the room is too high. Warm air condenses on the ice, and the pieces freeze together.
Break up the ice with a plastic scoop. Never use metal. Then check the sensor lens and wipe it clean with a soft cloth.
Listen and Feel
Turn the machine on and listen. Do you hear the compressor humming? Feel the side of the machine near the compressor.
It should be warm, not hot. Hot means the condenser is struggling.
Do you hear water running? If you hear the fan spinning but no water, the inlet valve might be closed or the supply line is kinked.
Do you hear any unusual clicking or buzzing? That could be a failing relay on the control board or a stuck solenoid.
Look for Leaks
Check under the machine for puddles. Water on the floor could mean a cracked supply line, a bad drain pump, or a leaking dump valve. A small puddle with a greasy feel means refrigerant oil, which indicates a leak in the sealed system.
If you see an oily puddle, stop right there. That's a refrigerant leak, and it requires an EPA-certified technician. Do not try to fix it yourself.
Check the Power Supply
This sounds obvious, but it's worth saying. Make sure the machine is plugged in all the way. Make sure the breaker hasn't tripped.
Some Follett machines have a reset button near the power cord or on the control board. Find it and press it.
These machines are usually plugged into a dedicated circuit. If the breaker keeps tripping, you have an electrical issue that needs a licensed electrician.
Once you've done this quick visual check, you'll know about 80 percent of the time whether you're dealing with a simple maintenance issue or something deeper. If the coils are clean, the filter is fresh, and there's no obvious leak, it's time to read the error codes.
Reading Your Follett's Error Codes (Blink Patterns Explained)
Follett machines communicate problems through the LED lights on the control board. Think of it as the machine's way of telling you exactly what's wrong. You just need to know how to read the language.
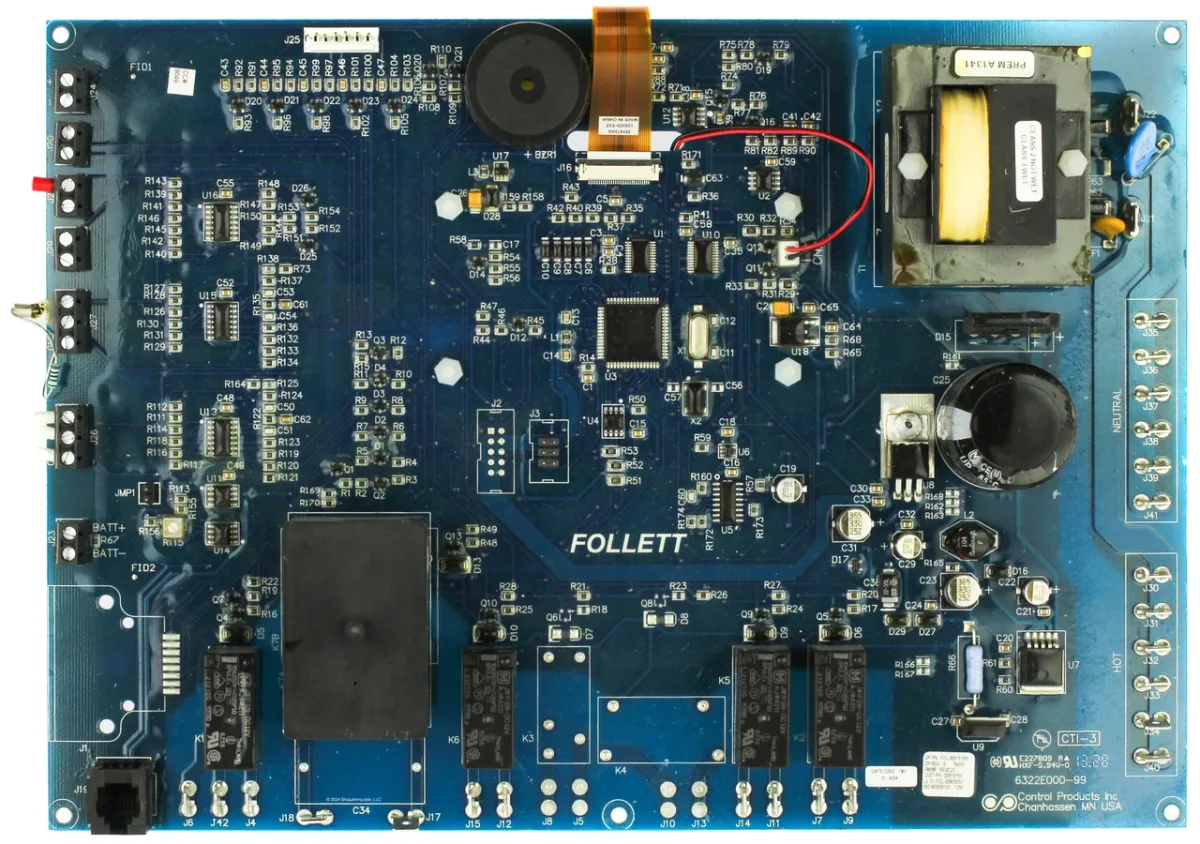
Image source: Bing (Web (fair-use with source credit))
Where to Look
The control board is usually behind a small access panel on the front or side of the machine. On Horizon and Symphony series models, the LEDs are visible through a clear window. You don't always have to remove the panel.
You'll see at least two LEDs. One is a power indicator. The other is the diagnostic or error light.
On some models, there are additional LEDs for ice level status and cycle status.
How to Count Blinks
The error light blinks in patterns. A typical pattern is a series of short blinks followed by a pause, then the pattern repeats. Count the blinks in each cycle.
One blink usually means something simple. Two blinks is different. Three blinks is another condition entirely.
The number of blinks tells you the code.
Common Follett Blink Codes
These are the patterns we see most often across the Horizon and Symphony lines. As of 2026, the patterns are consistent across most current production models.
| Blink Count | Meaning | Likely Fix |
|---|---|---|
| 1 blink | High head pressure | Clean condenser coils. Check fan operation. |
| 2 blinks | Low water level | Check water filter. Inspect supply line. |
| 3 blinks | Ice thickness probe failure | Clean probe. Check wire connection. |
| 4 blinks | Bin full sensor issue | Clean sensor lens. Check alignment. |
| 5 blinks | Compressor lockout | Try power reset. Call technician if it returns. |
| 6 blinks | Control board failure | Hard reset. Replace board if code persists. |
1 blink. High head pressure. The condenser is dirty, the fan isn't running, or the ambient temperature is too high. Clean the coils first.
2 blinks. Low water level. The water supply is restricted, the filter is clogged, or the water inlet valve isn't opening. Check the filter and the supply line.
3 blinks. Ice thickness probe failure. The probe is dirty, bent, or disconnected. Clean it with a soft cloth and check the wire connection.
4 blinks. Bin full sensor issue. The sensor is dirty, misaligned, or the lens is fogged. Wipe the lens and check alignment.
5 blinks. Compressor lockout or failure. The compressor tried to start but couldn't. This one is serious.
Try a power reset. If it comes back, call a technician.
6 blinks. Control board failure. The board isn't communicating with the sensors properly. Try a hard reset by unplugging the machine for five minutes.
If the code returns, the board needs replacement.
Where Your Model-Specific Code Chart Lives
Every Follett machine shipped since roughly 2015 includes a laminated error code chart. It's usually taped inside the access panel or on the inside of the front cover. If you don't have yours, Follett's official product documentation site has downloadable PDFs by model number.
The model number is on a sticker near the power cord or on the back panel. You'll need it to look up the exact code chart because older models use different blink patterns.
What to Do If There Are No Blinks
Sometimes the machine is completely dead. No lights, no sounds, nothing. That means no power is reaching the control board.
Check the breaker. Check the wall outlet with a known-working device. Check the power cord for damage.
If all that looks fine, the control board may have failed completely and needs replacement.
Decision Tree: Diagnosing the Problem by Symptom
Now we get to the core of Follett Ice Machine Troubleshooting. You'll use the symptom you're seeing to work through a decision tree. Each branch leads you to the most likely fix.
No Power At All
The machine is silent. No lights. No fan.
Nothing.
First, check the breaker. Flip it off and on. Then check the outlet with a phone charger or a lamp.
If the outlet has power, check the machine's power cord for cuts or damage. If the cord is fine, check the fuse or reset button on the machine itself. Some Follett models have a small reset button near the control board.
If all of those are fine, the control board is likely dead. Try a hard reset. Unplug the machine for five minutes.
Plug it back in. If it still doesn't power up, you need a technician to replace the board.
Machine Runs But No Ice
You hear the fan. You hear the compressor. But the bin stays empty.
Listen for water. Do you hear water running into the machine? If not, the water inlet valve is likely closed or clogged.
Check the supply line for kinks. Check the water filter. Replace it if it's overdue.
If you hear water but no ice forms, the compressor may not be cooling. This is harder to diagnose. Feel the evaporator plates.
They should be cold to the touch. If they're warm, the refrigerant system has a problem. That's a call-the-tech situation.
If the plates are cold but no ice forms, the ice thickness probe might be telling the machine to harvest too early. The probe could be bent out of position or coated with mineral scale. Clean it with a soft cloth and check that it's not pushed too far into the ice-making area.
Ice Too Thin Or Too Thick
If the ice pieces are small and fragile, the freeze cycle is ending too early. The ice thickness probe is too sensitive. It's touching the forming ice before the piece is fully grown.
If the ice pieces are too thick and don't release cleanly, the probe isn't sensitive enough. The freeze cycle runs too long, and the ice gets oversized.
Either way, locate the probe. It's a metal arm with an adjustment screw or a slotted bracket. Loosen the screw slightly.
Move the probe toward the evaporator for thicker ice. Move it away from the evaporator for thinner ice. Tighten the screw.
This is a trial-and-error adjustment. Run a few cycles and adjust until the ice looks right. Small adjustments make a big difference.
Ice Production Slow
The machine runs but fills the bin slowly. This usually isn't a single failure. It's a gradual decline.
Check the condenser coils. Dirty coils are the number one cause of slow production. The compressor can't cool efficiently, so each cycle takes longer.
Check the water filter. A partially clogged filter reduces flow, which means less water freezes per cycle.
Check the dump valve. If it's not opening fully, minerals build up in the sump and insulate the evaporator. Clean the dump valve with a soft brush and a Follett-approved cleaner.
Check the ambient temperature. If the room is too hot (above 100 degrees Fahrenheit), the machine will naturally cycle slower. Move the machine away from heat sources if possible.
If none of these help, the compressor may be losing efficiency. That happens over time, especially in machines over ten years old. You can extend its life with regular cleaning, but eventually it will need replacement.
Ice Bridging Together
You open the bin and find a solid block of ice. That's bridging. It happens when the surface of the ice melts slightly and refreezes.
The most common cause is a bad bin full sensor. The machine keeps making ice past the full level. The top layer of ice gets packed together and melts from the warmth of the room, then refreezes overnight.
Check the sensor. It's usually an infrared beam or a paddle near the top of the bin. Clean the lens or check that the paddle isn't stuck.
If the sensor is working, check the ambient temperature. If the room is above 90 degrees, the ice surface will sweat.
You can prevent this by making sure the machine's ventilation is clear and the room has adequate air conditioning.
Constant Error Light
The diagnostic LED is on solid. It's not blinking. That's different from a code.
A solid light usually means a sensor failure. The control board tried to read a sensor and got no signal. Unplug the machine for five minutes to reset the board.
If the light stays on when you power back up, you need to trace sensor connections.
Check the wire harness for loose connections. Check the individual sensors for corrosion or damage. This is advanced work.
If you're not comfortable testing voltage with a multimeter, call a technician.
Step-by-Step Fixes You Can Do Right Now
Let's get into the actual repairs. These are the fixes that solve the vast majority of Follett ice machine problems. You don't need specialized tools.
You need about twenty minutes and a little patience.
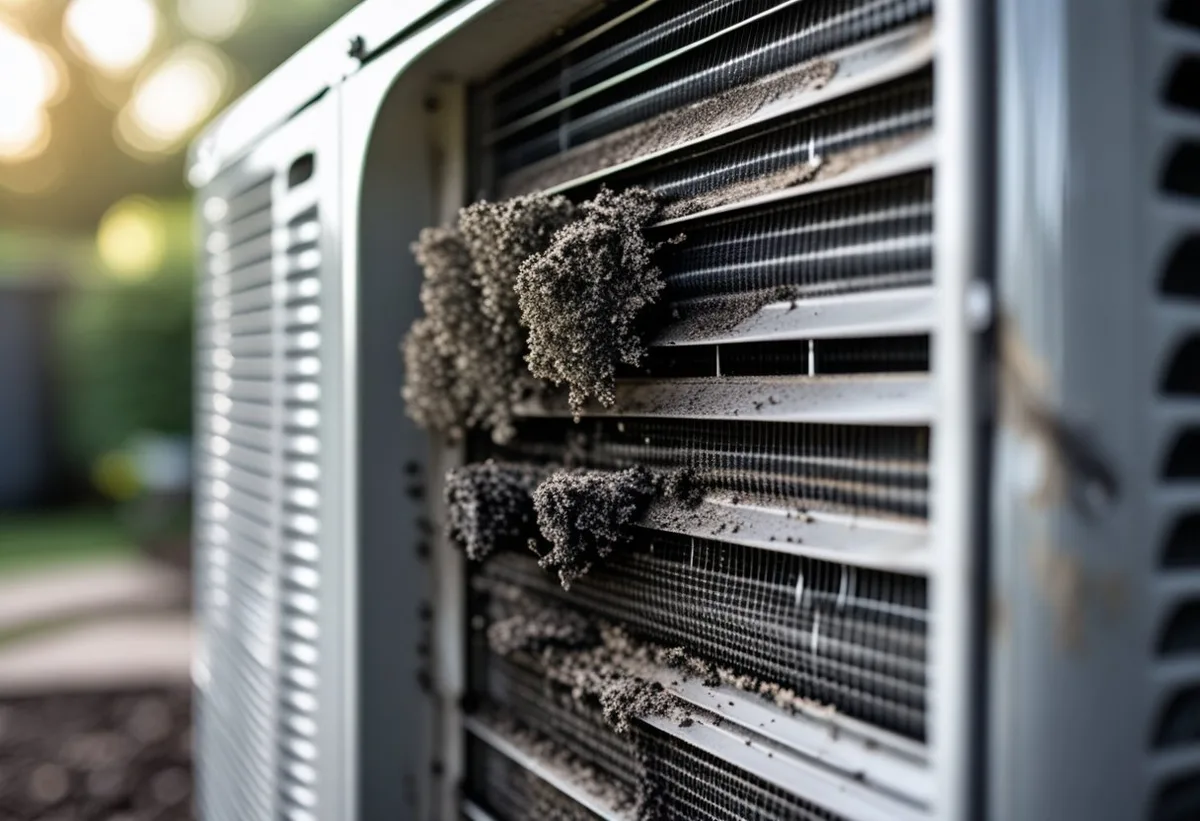
Image source: Bing (Web (fair-use with source credit))
Cleaning the Condenser Coils
Turn off the machine and unplug it. Let the compressor cool down for at least fifteen minutes. Hot coils can burn you.
Remove the front or side panel to access the coils. Use a coil brush to loosen the dust and grease. Work from top to bottom.
Then follow with a vacuum fitted with a brush attachment. Pull out every bit of debris you can reach.
For heavy grease buildup in a kitchen environment, use a commercial coil cleaner spray. Spray it on. Let it sit for the time specified on the label.
Rinse with low-pressure water. Let the coils dry completely before restoring power.
This single fix restores normal ice production in about half the cases we see.
Replacing the Water Filter
Locate the water filter housing. It's usually mounted on the wall or on the back of the machine. Turn off the water supply at the shutoff valve.
Unscrew the old filter cartridge. It twists off counterclockwise. Have a towel ready because a little water will spill.
Lubricate the O-ring on the new filter with a drop of water. Screw it on hand-tight. Don't overtighten.
Turn the water back on slowly. Check for leaks at the connection point. Run a full cycle of ice and discard the first batch.
That clears any loose carbon dust from the new filter.
Checking and Cleaning the Ice Thickness Probe
Open the access panel to the ice-making area. The probe is a metal arm that sticks out near the evaporator plates. It should be clean and free of mineral scale.
Wipe it down with a soft cloth and warm water. If there's hard scale, use a Follett-approved cleaner. Never use abrasive pads or metal brushes.
They scratch the probe and cause inaccurate readings.
Check that the probe is straight and not bent. Check that the wire connection is secure. A loose wire causes intermittent problems that are hard to diagnose.
Resetting the Control Board
Sometimes the control board just needs a full reset. Unplug the machine from the wall outlet. Wait five full minutes.
Plug it back in.
This clears any transient errors and lets the board reinitialize. It's surprising how often this resolves blinking error codes.
Clearing a Stuck Dump Valve
The dump valve is at the bottom of the water sump. Turn off the machine and unplug it. Remove the sump cover.
You'll see the valve at the lowest point. It's usually a small plastic or brass fitting with a spring mechanism. Mineral scale can stick it in the closed position.
Use a soft brush and warm water to clean around the valve. Gently push the plunger to free it. Spray it with a Follett-approved cleaner if needed.
Make sure it moves freely before reassembling.
Testing the Water Inlet Valve
The water inlet valve is on the back of the machine where the supply line connects. It's a solenoid valve that clicks when it opens.
Turn the machine on and listen for a click during the fill cycle. If you hear the click but no water flows, the valve is stuck closed. Turn off the water supply and remove the valve.
Look for debris blocking the inlet screen.
Clean the screen with a soft brush. Reassemble and test. If the valve still doesn't open, it needs replacement.
That's a simple swap you can do yourself.
Common Mistakes That Make Things Worse
Good intentions can backfire fast. Here are the mistakes we see most often from well-meaning owners trying to fix their own machines.
Using the Wrong Cleaning Chemicals
Never use vinegar or bleach on your Follett ice machine. Vinegar is acidic and can damage the evaporator coating. Bleach leaves a residue that affects ice taste.
Use only Follett-approved cleaning solutions. They're formulated to remove mineral scale without harming the machine's components. A bottle costs about the same as a fast-food lunch and lasts for months.
Bypassing Safety Sensors
We get it. The bin full sensor is acting up, and you need ice for the dinner rush. Taping the sensor down or disconnecting it seems like a quick fix.
Don't do it. The bin full sensor prevents the machine from overfilling and jamming. Without it, ice piles up into the ice-making area, the machine freezes into a solid block, and you're looking at an expensive repair or a full replacement.
Skipping the Water Filter Change
A dirty water filter doesn't just affect water flow. It also affects ice quality. Minerals and sediment that pass through a clogged filter deposit on the evaporator plates.
That scales up the machine and makes it work harder.
Mark your calendar. Every six months. Change the filter.
Over-Tightening Connections
Plastic fittings and valve housings crack under too much torque. Hand-tight is enough. If you're using a wrench, stop.
You're probably over-tightening.
A cracked fitting means a water leak inside the machine. That can short out the control board and ruin electronics.
Assuming It's a Refrigerant Leak
A slow ice machine that gradually gets worse over months is almost never a refrigerant leak. Refrigerant leaks are sudden. The machine goes from working fine to making no ice in a day or two.
If your machine has been slowly declining for weeks, clean the coils, change the filter, and clean the probe. It's almost certainly a maintenance issue, not a sealed system problem.
Using Metal Tools in the Bin
Never use a metal scoop or scraper to break up ice in the bin. Metal scratches the plastic liner and chips the evaporator coating. Use a plastic scoop.
Scratched plastic harbors bacteria. Damaged evaporator coating leads to ice sticking and poor release. Both are expensive to fix.
When to Stop and Call a Professional
Not every problem is a DIY fix. Some issues require specialized training, EPA certification, or just a better diagnostic tool set than you have at home.
Signs of a Refrigerant Leak
Look for the greasy puddle we mentioned earlier. That's refrigerant oil. Listen for a hissing sound when the compressor runs.
That's refrigerant escaping.
Refrigerant leaks require EPA Section 608 certification to repair. The technician will locate the leak, repair it, evacuate the system, and recharge it with the correct amount of refrigerant. This is not a job for YouTube tutorials.
Compressor Won't Start or Runs Hot
If the compressor buzzes but doesn't start, or if it starts and trips the overload protector after a few seconds, the compressor is likely failing. Sometimes a hard start kit can buy you time. Usually, the compressor needs replacement.
Compressor replacement costs more than a standard service call. But it's still cheaper than replacing the entire machine.
Control Board Replacement
If you diagnosed a bad control board and you're handy with a screwdriver, you might be tempted to swap it yourself. Control boards are plug-and-play on many Follett models.
But here's the catch. The board must be programmed with the correct firmware for your specific machine. Ordering the wrong board wastes time and money.
A technician will verify the part number and program the board on-site.
Electrical Issues
If the breaker keeps tripping, stop resetting it. Something is drawing too much current. That could be a failing compressor, a shorted fan motor, or a damaged wire.
Repeatedly resetting a tripping breaker can cause electrical fires. Call a licensed electrician first. If they clear the wiring, then call the refrigeration technician.
Refrigerant Handling
The Environmental Protection Agency regulates refrigerant handling under Section 608 of the Clean Air Act. Venting refrigerant into the atmosphere carries fines of up to several thousand dollars per day.
Never open the sealed system yourself. Always use a certified technician.
Persistent Error Codes You Can't Clear
If you've tried a hard reset, cleaned the sensors, and checked all the connections, but the error code keeps coming back, you're past the DIY stage. The machine needs diagnostic equipment that can read sensor resistance and voltage values.
Most commercial refrigeration technicians carry a multimeter and a manufacturer-specific diagnostic tool. They can test components individually and isolate the failure in ten minutes.
Maintenance Schedule to Keep It Running (Year-Round Plan)
The best troubleshooting is prevention. A well-maintained Follett ice machine runs for twelve to fifteen years with minimal drama. Here's the schedule that keeps it that way.
| Frequency | Task |
|---|---|
| Weekly | Check ice quality and bin level. Wipe down exterior. |
| Monthly | Inspect condenser coils. Listen for unusual sounds. |
| Quarterly | Deep clean condenser coils. Clean dump valve. |
| Every 6 months | Replace water filter. Clean ice thickness probe. |
| Annually | Professional inspection. Check refrigerant charge. |
Weekly Quick Checks
Look at the ice. Is it clear and well-formed? Cloudy or small pieces mean something is off.
Listen for any new sounds. Feel the airflow from the fan. A good habit is to check the machine at the same time you change the linens or prep the line.
Monthly Tasks
Open the access panel and visually inspect the condenser coils. If they look dusty, clean them. It's better to stay ahead than to wait for a performance drop.
Also check the drain line for slow drainage.
Quarterly Deep Cleaning
This is the big one. Shut down the machine. Unplug it.
Remove all panels. Clean the condenser coils thoroughly. Clean the dump valve and the water sump.
Run the sanitize cycle with Follett-approved cleaner.
This takes about an hour. It prevents 90 percent of the problems that send people to the phone book.
Annual Professional Inspection
Once a year, have a qualified technician check the refrigerant charge, test the compressor's amp draw, and verify that all sensors are within spec. This is cheap insurance.
A good technician will catch a slow refrigerant leak before it becomes a no-ice emergency. They'll also check the electrical connections for signs of heat damage.
Frequently Asked Questions
How do I reset my Follett ice machine?
Unplug the machine from the wall outlet. Wait five minutes. Plug it back in.
This hard reset clears transient errors on the control board. If the error returns, you have a persistent issue that needs diagnosis.
Why is my Follett ice machine not making ice?
Start with the three most common causes. Dirty condenser coils. Clogged water filter.
Misaligned ice thickness probe. Check those in that order. If they're all fine, read the error code from the LED on the control board and follow the pattern chart.
Where is the reset button?
Most Follett ice machines have a small reset button near the control board behind an access panel. Some models also have a reset button near the power cord. Check your model's manual for the exact location.
A hard reset by unplugging the machine also works.
How do I adjust ice thickness?
Locate the ice thickness probe near the evaporator plates. Loosen the adjustment screw slightly. Move the probe toward the evaporator for thicker ice.
Move it away for thinner ice. Tighten the screw. Run a few cycles and adjust until the ice looks right.
What does a blinking red light mean?
A blinking red light is an error code. Count the number of blinks in each cycle. One blink means high head pressure.
Two blinks means low water level. Three blinks means ice thickness probe failure. Refer to the code chart inside your machine's access panel for the full list.
How often should I clean the coils?
Clean the condenser coils every three months at minimum. In a commercial kitchen with high heat and grease, clean them monthly. Dirty coils are the leading cause of slow production and premature compressor failure.
My machine runs but no water, what now?
Check the water supply line for kinks. Check the water filter and replace it if it's overdue. Listen for a click from the water inlet valve during the fill cycle.
If you hear the click but no water flows, the valve is clogged and needs cleaning or replacement.
Can I use vinegar to clean my Follett?
No. Vinegar is acidic and can damage the evaporator coating and seals. Use only Follett-approved cleaning solutions.
They're formulated to remove mineral scale safely without harming the machine's components.
Why does my ice taste bad?
Bad-tasting ice usually means the machine needs a thorough cleaning and sanitization. Mineral scale and biofilm build up in the water sump over time. Run a sanitize cycle with Follett-approved cleaner.
Also check the water filter. A clogged filter allows sediment through.
How long should a Follett ice machine last?
With proper maintenance, a Follett ice machine typically lasts twelve to fifteen years. Regular cleaning and annual professional inspections are the key to reaching that lifespan. Machines in harsh environments or with poor water quality may need replacement sooner.

Similar Posts