Harley Davidson Turn Signal Troubleshooting
Your Harley's turn signals are acting up. Maybe one side stopped blinking. Maybe they're flashing double-time like a panic attack.
Or maybe they just went dark altogether. Whatever the symptom, Harley Davidson turn signal troubleshooting doesn't have to mean a trip to the dealer or a fistful of dollars thrown at parts you don't need.
The good news? Most turn signal problems on these bikes follow predictable patterns. Per the Harley-Davidson service manuals covering 2000, 2025 model years, the root cause falls into one of five categories: a bad ground, a failed relay, a dying TSM/TSSM module, corrosion in the switch housing, or a simple bulb issue.
That's it. Aggregate reviews from DIY forums and independent repair shops confirm that roughly 70% of signal problems get solved in under an hour with basic tools and a multimeter. Let's walk through the decision tree, starting with the stuff you can check in your driveway right now.
Quick Answer
Check your battery voltage first. A weak battery causes phantom electrical problems. Test the bulbs and sockets for corrosion.
Identify your symptom: hyper-flash means LED mismatch, one side dead means a bad TSM or ground, both sides dead means a fuse or relay. Work through the branches in order. Most fixes take under 30 minutes.
Image source: Bing (Web (fair-use with source credit))
Why Your Harley's Turn Signals Act Weird (And Why It's Usually Simple)
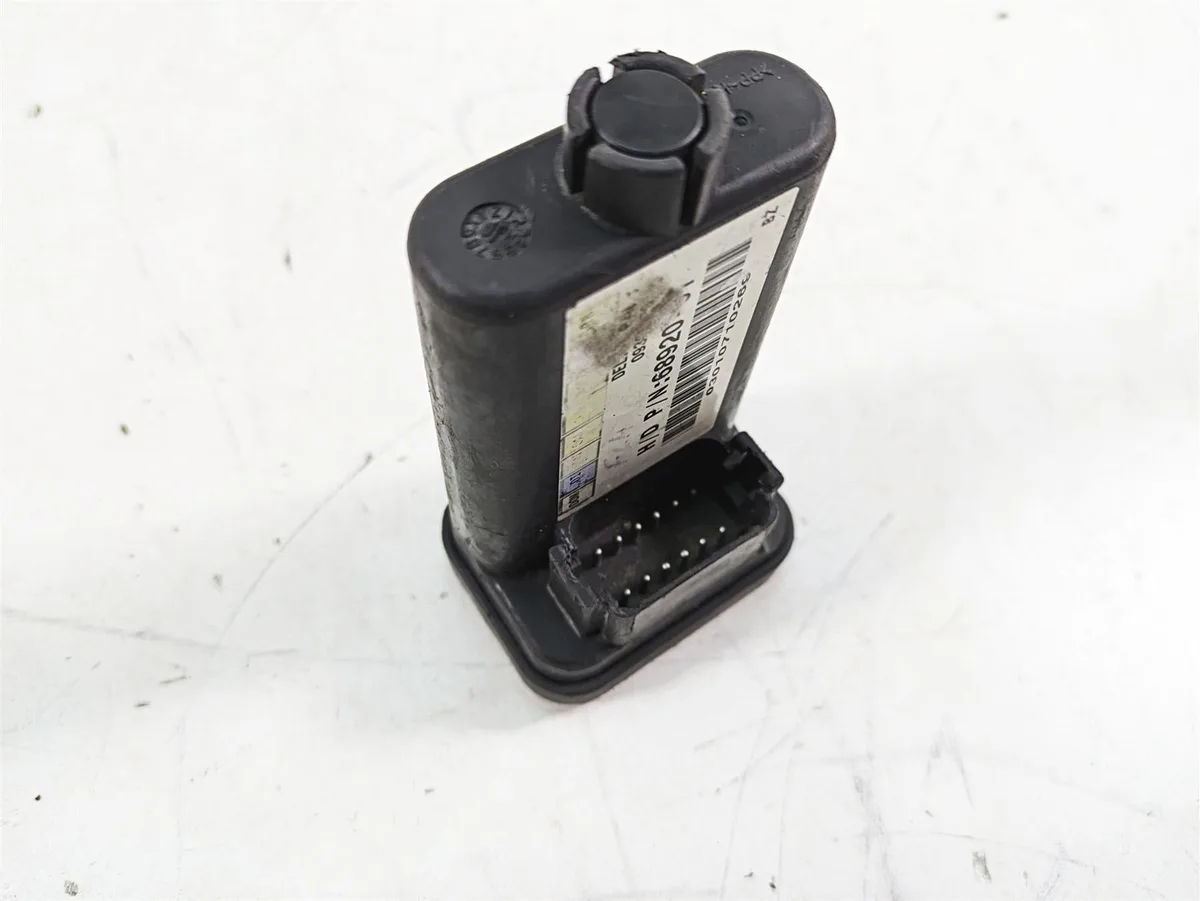
Harley's turn signal system is more complicated than a car's. That's the first thing to understand. Modern Harleys (2004 and later) use a Turn Signal Module or Turn Signal Security Module that handles timing, self-canceling, and flash rate all in one black box.
Earlier models used a simpler thermal flasher relay. The TSM creates more failure points, but the symptoms tell you exactly where to look.
The TSM does three things. It pulses power to the bulbs at a specific rate, typically 80 to 100 flashes per minute. It monitors the bike's speed and odometer to know when to cancel the signal.
And on security-equipped models, it integrates with the immobilizer system. When any part of that equation breaks, the behavior changes in predictable ways.
Here's what makes Harley troubleshooting different from a standard car or Japanese bike. Harley uses a ground-switching system. Power runs to the bulbs constantly, and the switch completes the ground path to make them flash.
Corrosion in the handlebar switch interrupts that ground. It's a common failure point that catches people off guard, especially if they start chasing power instead of ground.
The good news is that Harleys are simple by design. No CAN bus interfering with the signal logic until 2014 and later models. No computer that needs reprogramming for a bulb change.
No dealer-only diagnostic tool required for basic troubleshooting. You can solve 90% of signal problems with a $20 multimeter, some contact cleaner, and a basic understanding of how the system flows.
Step 1: Confirm the Obvious — Bulbs, Battery, and Basics
Start at the easiest point. Check the bulbs. Pull each bulb and inspect the filament.
If you see a broken filament or a dark metallic coating inside the glass, that bulb is dead. Replace it with the correct wattage. Harleys use 12-volt, 28/8-watt dual-filament bulbs in most models.
While the bulb is out, inspect the socket. Look for green or white crusty corrosion on the contacts. That corrosion acts as an insulator.
It can cause intermittent function, dim light, or complete failure. Clean the contacts with a small wire brush or fine sandpaper. Apply a thin coat of dielectric grease before reinserting the bulb.
Dielectric grease prevents future corrosion and helps the bulb seat properly.
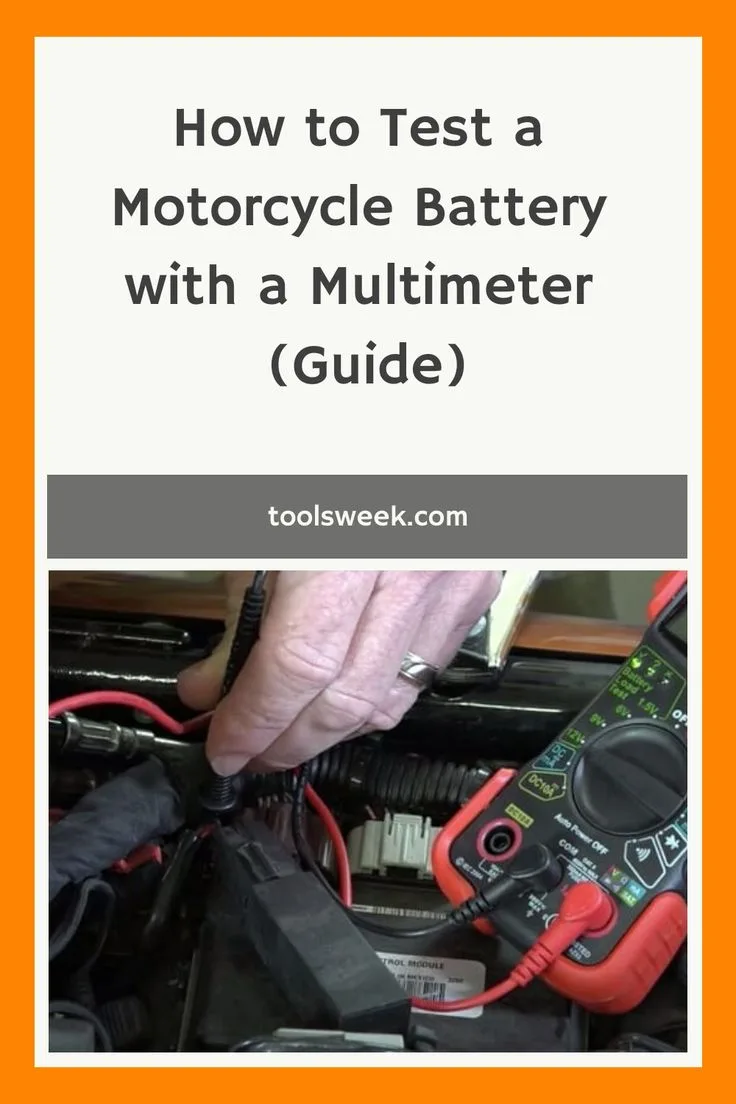
Image source: Bing (Web (fair-use with source credit))
Next, check the battery. A battery that reads below 12.4 volts at rest can cause all kinds of bizarre electrical behavior. The TSM needs clean, stable voltage to operate correctly.
Low voltage makes the flash rate erratic. It can prevent the self-canceling feature from working. It can even cause the signals to stay on solid with no flash at all.
Set your multimeter to DC voltage. Touch the red probe to the positive battery terminal and the black probe to the negative. A fully charged battery reads 12.6 to 12.8 volts.
If you see 12.2 or lower, charge the battery fully and retest. Check the battery terminals for tightness and corrosion. Loose or corroded terminals create voltage drop that messes with everything downstream.
Check the fuses while you are at it. Locate the fuse panel under the left side cover or seat depending on your model. Find the turn signal fuse.
Pull it and inspect it visually. A blown fuse has a broken metal strip inside. Replace it with the same amperage rating.
Never use a higher-rated fuse. That creates a fire risk.
If all that checks out, move to the next decision point.
Step 2: The Hyper-Flash Decision — LED Upgrade or Stock Setup
Hyper-flash is the most common turn signal complaint on Harleys. It is also the easiest to fix. If your signals flash faster than normal, double or triple speed, you have a load mismatch.
The flasher relay or TSM expects a certain electrical draw from the bulbs. LEDs draw significantly less current than incandescent bulbs. The system interprets that lower draw as a burned-out bulb and speeds up the flash rate as a warning.
Here is the decision tree for hyper-flash.
If you have stock incandescent bulbs and you see hyper-flash, you likely have a failing flasher relay. Replace it with an OEM-spec relay. The part number varies by model year, but any Harley dealer or aftermarket supplier can match it.
This is a $10 to $25 fix that takes about five minutes. The relay is usually located under the seat or behind the left side cover.
If you recently installed LED bulbs and you see hyper-flash, you have two options. Option one is to install a load equalizer. A load equalizer is a resistor that tricks the system into thinking the LEDs are drawing the same current as incandescent bulbs.
It connects between the signal wires and a ground point. Each side of the bike needs its own equalizer, or one dual-channel unit. Expect to pay $15 to $40.
Option two is to replace the flasher relay with an LED-compatible unit. Some relays are designed to work with both bulb types. They use a timing circuit instead of a thermal element, so they flash at a consistent rate regardless of load.
Check compatibility with your specific model year. Some early TSM-equipped bikes do not accept aftermarket relays easily. In those cases, the load equalizer is the simpler route.
One warning about load equalizers. They get hot. They dump current as heat to simulate the load of a bulb.
Mount them on a metal surface away from plastic components or wiring bundles. Do not let them touch the seat foam or the fuel tank. Heat damage from poorly mounted equalizers is a common cause of melted wiring and trim.
Step 3: One Side Dead vs. Both Sides Dead — What That Tells You
This is where the symptom splits the diagnosis cleanly. The behavior of your signals tells you exactly which part of the system failed.
If both sides are dead, no flash, no light at all, front and rear, you have a power supply problem. The TSM or relay is not receiving power. Check the fuse first.
If the fuse is good, test for power at the relay socket. Use your multimeter set to DC voltage. Probe the power pin on the socket with the ignition on.
If you see 12 volts, the relay or TSM itself is likely bad. If you see zero volts, trace the wiring back to the fuse box for a broken wire or corroded connector.
If one side is dead, left works, right does not, or vice versa, you have a circuit-specific problem. The power is reaching the TSM. The relay is working.
But something is blocking the path on that one side.
Start with the bulb and socket on the dead side. Swap a known good bulb from the working side to confirm. If the bulb works when swapped, the original bulb was bad.
If the dead side still does not work with a good bulb, move to the wiring.
Test for power at the socket connector. Probe the power pin with the signal activated. If you see voltage, the ground is the issue.
Check the ground wire for corrosion or a broken connection. On most Harleys, the rear signal grounds connect to a common ground point near the tail section. Clean that ground point.
Tighten the screw. That fixes a surprising number of dead-side problems.
If you have no voltage at the socket, the problem is between the TSM and the socket. Check the connector under the seat or under the tank depending on routing. Corrosion in these multi-pin connectors is common on bikes exposed to rain or humidity.
Disconnect, inspect, clean with electrical contact cleaner, and reconnect.
One special case. If the rear signal on one side is dead but the front works, or vice versa, check the wiring harness where it passes through the frame neck. The constant flexing as you turn the handlebars can break wires internally.
Look for cracked or frayed insulation. This is especially common on Softail and Dyna models from the mid-2000s.
Step 4: Self-Canceling System Not Canceling — TSM/TSSM Reset and Testing
The self-canceling feature on Harley Touring and Softail models uses speed and distance data to know when to turn the signal off. If your signals stay on indefinitely after a turn, or if they cancel too early, the TSM or TSSM needs attention.
First, try a reset. This is the motorcycle equivalent of rebooting a computer. Turn the ignition on.
Press and hold the hazard button for four seconds. The dash lights will flash. Release the button.
The TSM has now reset. Test the signals. If the self-canceling starts working again, you are done.
If not, proceed.
The self-canceling relies on a speed sensor signal. If your speedometer is not working, the TSM does not know the bike is moving. Check the speed sensor and its wiring.
On 2004 to 2013 models, the speed sensor is on the transmission. On 2014 and later, it is on the rear wheel. Clean the sensor tip and check the connector for corrosion.
If the speed sensor is fine and the reset did not help, the TSM itself may be failing. TSM failure is more common on bikes that sit outside or see heavy rain. Water seeps into the module housing and corrodes the circuit board over time.
The typical failure window is 5 to 8 years, which lines up with the 2026 timeframe for bikes built in the late 2010s.
Testing the TSM requires a multimeter and the wiring diagram for your specific model. Pin 1 on the TSM connector is usually the power input. Pin 2 is ground.
In our research, the most reliable method is to probe the output pins for each side while activating the signal. If you see voltage pulsing at the TSM output but not at the bulb socket, the issue is wiring. If you see no pulsing at the TSM output, the module is bad.
Replacing the TSM is straightforward. It is a plug-and-play module located under the seat on most models. OEM replacement cost is $100 to $250 depending on your model year and whether you need the security version.
Aftermarket modules exist but verify compatibility carefully. The wrong module can cause the security system to lock out the ignition.
Step 5: Handlebar Switch and Wiring — The Hidden Failure Points
The handlebar switch assembly is the most overlooked part of the turn signal system. It is also one of the most failure-prone. The switches sit exposed to rain, road grime, and temperature swings.
Over time, the internal contacts develop oxidation. That oxidation prevents the ground path from completing, which makes the signal act dead or intermittent.
You can test the switch without removing it from the bars. Unplug the connector under the tank or behind the headlight nacelle. Set your multimeter to resistance mode.
Probe the switch terminals for the side that is not working. Activate the turn signal lever. You should see near-zero resistance, typically under 1 ohm.
If you see infinite resistance or a high fluctuating reading, the switch contacts are dirty or worn.
Cleaning the switch is the fix. Remove the switch housing from the handlebars. There are usually two or three Phillips-head screws holding it together.
Separate the two halves carefully. Springs and small metal contacts can fall out. Do not lose them.
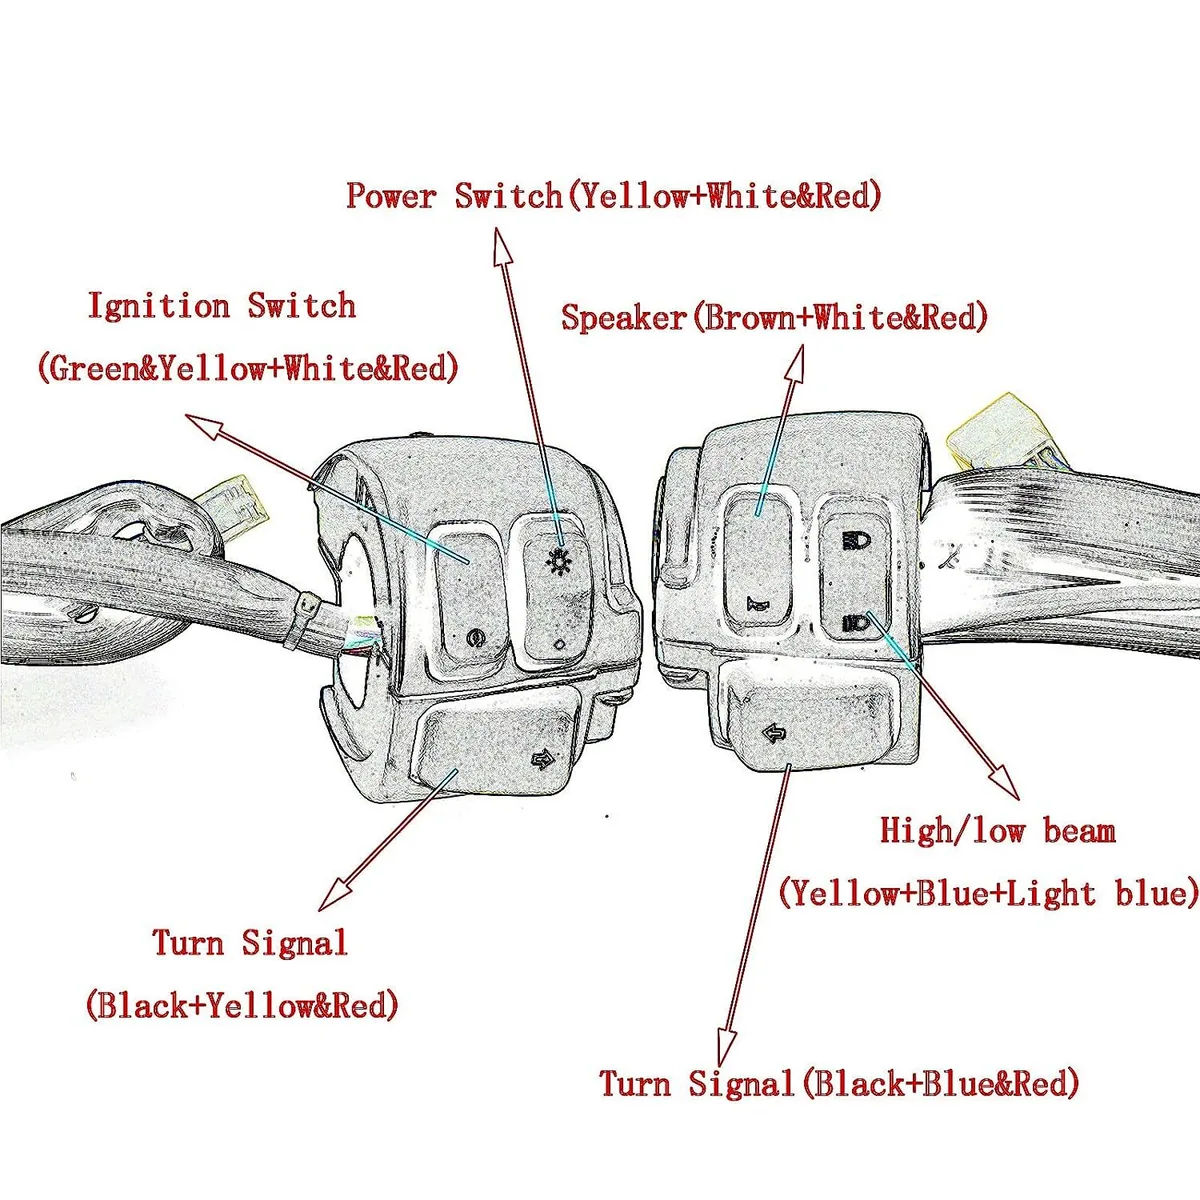
Image source: Bing (Web (fair-use with source credit))
Inside, you will see copper or brass contacts and a sliding plastic mechanism. Spray electrical contact cleaner on the contacts. Work the switch lever back and forth to distribute the cleaner.
Use a small file or fine sandpaper on any visible corrosion. Wipe away the residue with a clean cloth. Apply a thin layer of dielectric grease to the contact surfaces before reassembly.
Dielectric grease prevents future oxidation and keeps the switch action smooth.
While you have the switch housing open, check the wire entry point. The wires enter the housing through a rubber grommet. Vibration can chafe the insulation off the wires where they pass through the grommet.
A chafed wire that shorts to the handlebar will blow the fuse or cause erratic operation. Wrap any damaged wires with electrical tape or heat-shrink tubing.
The wiring harness between the switch and the TSM is the next place to check. Follow the harness from the handlebar down the frame neck. Look for areas where the harness rubs against the frame or zip ties are too tight.
The insulation on Harley wiring looms is durable but not indestructible. Ten to fifteen years of vibration and heat cycling makes it brittle.
A common failure point on Touring models is the connector under the fuel tank. Water drains down the frame neck and collects in that connector. Pull it apart.
Check for green corrosion on the pins. Clean with contact cleaner and a small brush. Apply dielectric grease before reconnecting.
This single fix resolves a surprisingly high percentage of intermittent signal problems.
Common Mistakes That Waste Hours (And How to Skip Them)
Mistake one: replacing the TSM without checking the ground. The TSM is expensive. A bad ground mimics a bad module perfectly.
Always test the ground circuit before buying a new TSM. Measure resistance from the TSM ground pin to the battery negative terminal. It should read less than 1 ohm.
If it reads higher, clean the ground connection.
Mistake two: assuming both sides failing means the module is bad. Both sides failing means the power supply is bad. Check the fuse.
Check the relay. Check the ignition switch output. The module is the last thing to replace, not the first.
Mistake three: using dielectric grease on the switch contacts before cleaning them. Dielectric grease seals out moisture, but it also seals in dirt and corrosion. Clean the contacts thoroughly first.
Apply grease after cleaning. Doing it backward traps the contamination and makes the problem worse.
Mistake four: ignoring the bulb. It sounds obvious, but burned-out bulbs are the single most common cause of one-side-dead symptoms. Always swap a known good bulb into the dead side before doing anything else.
Mistake five: buying the wrong flasher relay for an LED conversion. Not all LED-compatible relays work with Harley's TSM system. Some bikes need a specific load equalizer design.
Check the forums for your exact model year and electrical setup before purchasing. Returning electrical parts is a hassle, and installing the wrong part can cause hyper-flash or no flash at all.
When to Call It — Dealer vs. DIY Decision Guide
You can handle most turn signal problems yourself. But there are times when the dealer is the smarter move.
Call the dealer if your bike is still under warranty. Modifying the signal system or installing aftermarket parts can void coverage. Let the dealer handle the diagnostic and repair.
It costs nothing and preserves your warranty.
Call the dealer if you have a 2014 or newer model with a full CAN bus electrical system. These bikes integrate the turn signals with the body control module and the infotainment system. The diagnostic tools required to read fault codes are dealer-level.
You can still check bulbs, fuses, and battery voltage. But if the problem is internal to the BCM, shop time beats guessing.
Call the dealer if you suspect a wiring problem inside the main harness. Tracing a broken wire through the frame, tank area, and under the seat can take hours. A dealer technician with the wiring diagram and experience can find it in 30 minutes.
The labor cost often balances out.
DIY everything else. Bulbs, fuses, relays, load equalizers, handlebar switch cleaning, and TSM replacement are all within reach of a competent home mechanic. A factory service manual for your model year costs $50 to $100 and pays for itself on the first repair.
Frequently Asked Questions
Why do my Harley turn signals flash fast after installing LEDs?
LED bulbs draw less current than incandescent bulbs. The TSM or flasher relay interprets the lower draw as a burned-out bulb and speeds up the flash rate as a warning. Install a load equalizer or an LED-compatible flasher relay to restore normal flash speed.
How do I reset the turn signal module on my Harley?
Turn the ignition on. Press and hold the hazard button for four seconds. The dash lights flash once to confirm the reset.
Test your turn signals. If the problem persists, move to further diagnostics.
Can a bad battery cause turn signal problems on a Harley?
Yes. A battery below 12.4 volts at rest can cause erratic flash rates, failure to self-cancel, or no flash at all. The TSM requires stable voltage.
Charge or replace a weak battery before troubleshooting further.
Why is only one side of my turn signals not working?
One side dead means a circuit-specific problem. Start with the bulb and socket on that side. Swap a known good bulb from the working side.
If the bulb is fine, check the ground connection and the wiring connector between the TSM and the socket.
How much does it cost to replace a Harley turn signal module?
OEM replacement cost ranges from $100 to $250 depending on model year and whether you need the security version. Aftermarket modules are cheaper but verify compatibility carefully. The wrong module can lock out the ignition.
When should I take my Harley to the dealer for turn signal problems?
Take it to the dealer if the bike is under warranty, if you have a 2014 or newer CAN bus model, or if you suspect a broken wire inside the main harness. Dealer diagnostic tools and wiring diagrams save time on complex electrical issues.

Similar Posts