How To Connect A NAS Drive: Easy Setup Guide
A NAS drive connects through your network, then appears as shared storage on your computer or device.
If you want your files in one safe place that is easy to reach from home or the office, learning how to connect a NAS drive is a smart move. I have set up and used NAS devices in real homes and small work setups, and the process is usually simpler than people expect once you know the basic steps. In this guide, I’ll walk you through how to connect a NAS drive the right way, what to check first, and how to avoid the common mistakes that can slow you down.
What a NAS Drive Is and Why It Matters
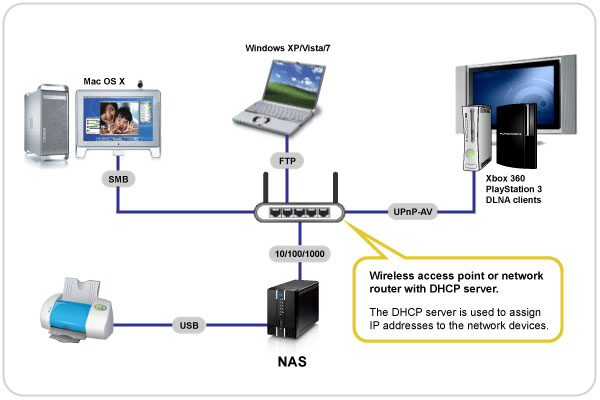
A NAS drive is a Network Attached Storage device. Think of it like a private file hub on your network. Instead of plugging a hard drive into one computer, you connect the NAS drive to your router or switch, and then multiple devices can access it.
That makes it useful for backups, media storage, shared files, and remote access. In many cases, it is the easiest way to keep family photos, business documents, and large project files organized in one place.
I often tell people to think of a NAS drive like a home library. Your files are the books, and the network is the hallway that lets everyone find the right shelf without carrying the whole library around.
Before You Connect a NAS Drive
Before you connect a NAS drive, it helps to gather a few basics. Skipping this step is one of the most common reasons setup feels frustrating.
Here is what you should check first:
- NAS device and power adapter: Make sure both are available and in good condition.
- Ethernet cable: Most NAS devices work best with a wired connection to the router.
- Router or switch: This is where the NAS will connect to your local network.
- Computer, phone, or tablet: You will use one of these to finish setup.
- NAS software or browser access: Many brands use a web portal or app for initial configuration.
- User login details: Some devices require an admin account before you can use shared folders.
I learned early on that a weak or loose Ethernet cable can cause weird setup problems. If the NAS does not show up, always check the cable and router port first. That small habit has saved me more time than any fancy troubleshooting tool.
How to Connect a NAS Drive to Your Network
The main process is simple. Once the NAS is on the same network as your computer, it can be discovered and used like a shared storage location.
Follow these steps:
Place the NAS near your router or switch
Keep it in a cool, stable spot with enough airflow. NAS units run for long periods, so good ventilation matters.Connect the NAS to your router with an Ethernet cable
Plug one end into the NAS and the other into an open LAN port on the router or switch. This gives the NAS a stable network link.Power on the NAS
Wait for the status lights to finish their startup process. This can take a few minutes, especially on first boot.Find the NAS on your network
Use the manufacturer’s app, web tool, or your router’s device list to locate it. Many NAS brands make this step easier with auto-discovery.Open the setup interface
In most cases, you will type the NAS IP address into a browser or use a desktop app. From there, you can create an admin account, set the device name, and prepare storage volumes.Create shared folders
Shared folders are where you store files. You can create folders for photos, backups, documents, or media.Set user permissions
Decide who can read, write, or manage each folder. This is especially important if more than one person will use the NAS drive.Connect from your computer
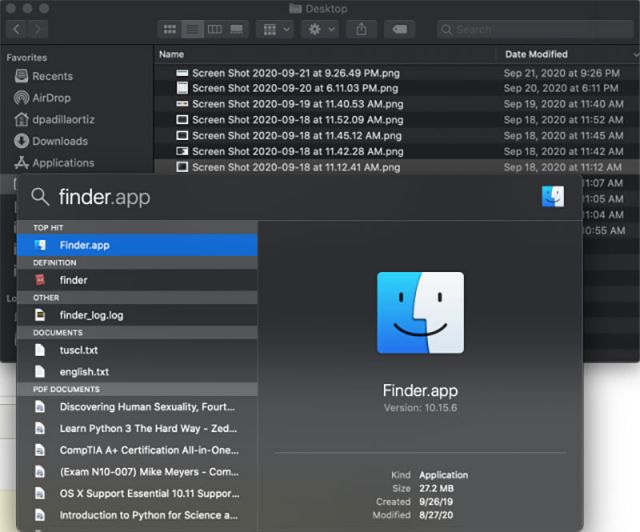
Once the share is ready, map the network drive on Windows or mount it on macOS. After that, it should appear in File Explorer or Finder like a regular drive.
A lot of people expect the NAS drive to feel like a giant USB stick. It is a little different. It behaves more like a network service, which is why setup and permissions matter so much.
How to Connect a NAS Drive on Windows
Windows makes it fairly easy to connect a NAS drive once the share is active.
Here is the usual process:
- Open File Explorer
- Click This PC
- Select Map network drive
- Choose a drive letter
- Enter the NAS path, such as
\\NASNAME\SharedFolder - Check Reconnect at sign-in if you want it to stay available
- Enter your NAS username and password if prompted
If the NAS does not connect right away, confirm that network discovery is turned on. Also check that the NAS and PC are on the same local network. In my experience, Windows users often forget the path format, and that tiny typo can make the drive seem broken when it is actually fine.
Useful Windows tips:
- Use the NAS IP address if the device name does not work.
- Save credentials in Credential Manager if you access the NAS often.
- Keep SMB sharing enabled if your NAS uses Windows file sharing.
How to Connect a NAS Drive on macOS
On a Mac, the process is also straightforward.
Try these steps:
- Open Finder
- Click Go in the menu bar
- Choose Connect to Server
- Type the NAS address, such as
smb://NASNAME/SharedFolder - Click Connect
- Enter your NAS login details
- Select the shared folder you want to mount
If the NAS does not appear, use the IP address instead of the device name. That often solves discovery issues, especially on mixed home networks. I have also seen Macs fail to connect when the NAS firmware was updated but the saved credentials were outdated.
Helpful macOS notes:
- SMB is the most common sharing protocol.
- You can add the NAS to Login Items if you want it to mount automatically.
- If permissions are wrong, you may connect but not be able to open the folder.
How to Connect a NAS Drive on Linux
Linux users can connect a NAS drive too, and the method depends on the desktop and file manager.
A simple approach is:
- Open the file manager
- Choose Connect to Server or Network
- Enter the NAS address using SMB or NFS
- Authenticate with your NAS username and password
- Save the connection if your desktop supports it
For command-line users, mounting can be done with tools like mount.cifs for SMB shares or NFS utilities for NFS shares. This is useful for servers, media boxes, and advanced home labs.
A good rule of thumb is to use SMB if you want broad compatibility. Use NFS when your environment is more technical and performance matters more. The best choice depends on your setup, not just on speed.
How to Connect a NAS Drive on Smart TVs, Media Boxes, and Phones
A NAS drive is not just for laptops and desktops. Many people use it for movies, music, and photo backup too.
You can often connect through:
- Smart TV media apps
- Streaming boxes like Apple TV or Android TV devices
- Phone apps from the NAS brand
- Third-party file manager apps
- Photo backup apps on iPhone or Android
For example, I have seen families store vacation videos on a NAS and stream them to a living room TV without moving files around. That setup feels simple once it is working, but it depends on proper app permissions and network speed.
Keep in mind:
- Some TVs support only certain protocols or formats.
- Mobile apps may require remote access to be enabled.
- Large media files work better on a strong wired network.
Common Problems When You Connect a NAS Drive
Even a good NAS setup can run into a few bumps. Most problems are small and fixable.
Here are the most common ones:
- The NAS does not appear on the network: Check cables, router ports, and power first.
- Wrong login credentials: Make sure the username and password are correct.
- Permission denied: Review folder access settings on the NAS admin panel.
- Slow transfer speeds: Use wired Ethernet instead of Wi-Fi when possible.
- Drive letter or mount fails: Re-map the drive or reconnect with the IP address.
- Antivirus or firewall blocks access: Allow local file sharing in your security settings.
One mistake I see often is confusing internet access with local network access. Your NAS can be perfectly alive on your home network even if remote access is not set up. That is why it helps to test local access first before chasing more complex issues.
Best Practices for a Safer NAS Connection
Once you connect a NAS drive, the next step is protecting it. Storage is only useful if your files stay safe.
Good practices include:
- Use a strong admin password
- Turn on two-factor authentication if the NAS supports it
- Create separate user accounts instead of sharing one login
- Keep firmware updated
- Enable scheduled backups
- Use RAID for redundancy, not as a full backup
- Limit remote access to only what you need
According to common storage security guidance from major device makers and industry best practices, updates and access control are two of the biggest factors in reducing risk. I strongly agree with that from experience. Most real-world issues I have seen were not dramatic hardware failures, but simple oversights like old firmware or weak passwords.
Benefits of Connecting a NAS Drive Properly
When the setup is done well, a NAS drive can make daily life much easier.
Main benefits include:
- Centralized storage for files, backups, and media
- Multi-device access from laptops, phones, and tablets
- Better file sharing for families and teams
- Local backup protection against accidental deletion
- More control than cloud-only storage
- Remote access when configured securely
A NAS can feel like a private cloud you own yourself. That is a big reason it has become popular with home users, creators, photographers, and small businesses. You get flexibility without handing every file to a third-party service.
When a NAS Drive Is the Right Choice
A NAS drive makes sense if you need more than one device to access the same files. It is also a smart choice if you want a backup target that stays inside your home or office.
It is especially useful for:
- Families with shared photo and video libraries
- Small offices with shared documents
- Content creators storing large files
- People who want a home backup system
- Users who stream media to multiple devices
If you only need a small portable drive for one laptop, a NAS may be more than you need. But if your files have started to feel scattered across devices, a NAS can bring real order to the mess.
Frequently Asked Questions of How to Connect a NAS Drive
Do I need internet to connect a NAS drive?
No, you usually only need a local network to connect a NAS drive at home. Internet is mainly needed for remote access, cloud sync, or setup features that rely on online services.
Can I connect a NAS drive directly to my computer?
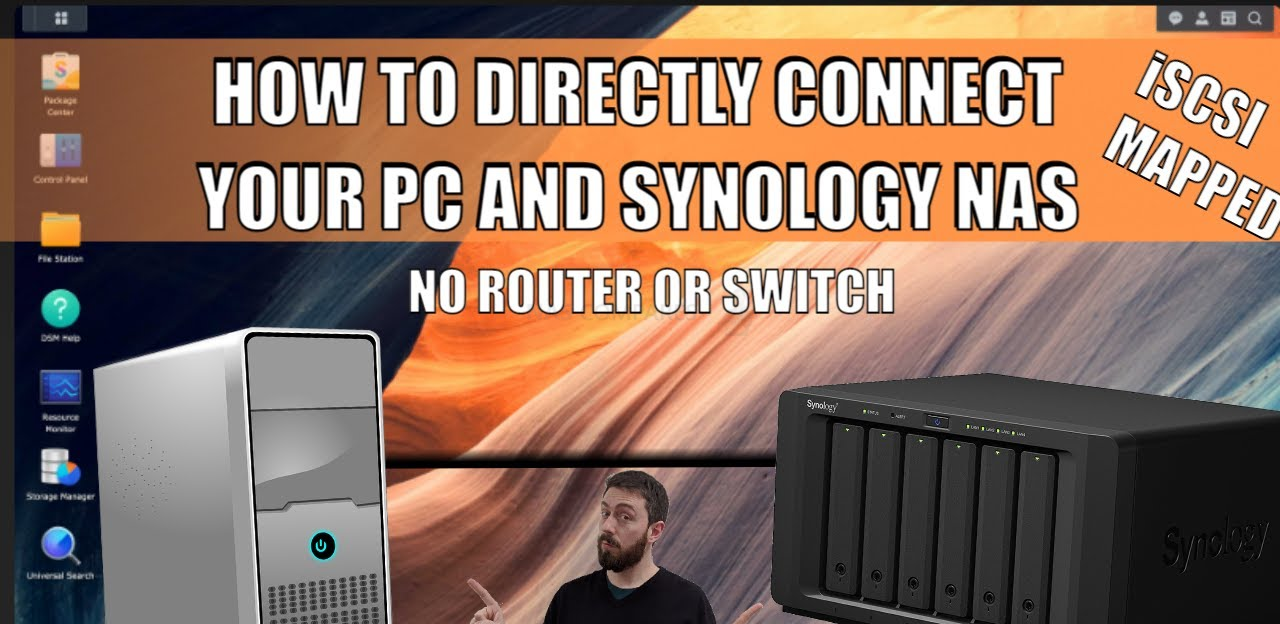
Yes, but most NAS devices are designed to connect through a router or switch. A direct connection can work in some cases, but it often needs manual IP setup and is less convenient.
Why can’t I see my NAS drive on my computer?
The most common reasons are cable issues, wrong network settings, disabled sharing, or incorrect permissions. Try the IP address instead of the device name, and make sure both devices are on the same network.
Is Wi-Fi good enough for a NAS drive?
Wi-Fi can work, but wired Ethernet is usually faster and more stable. For large file transfers, backups, and media streaming, a wired connection is the better choice.
How do I make my NAS drive appear every time I start my computer?
Map the network drive on Windows or add the server to Login Items on macOS. You may also need to save your NAS credentials so the system can reconnect automatically.
Conclusion
Learning how to connect a NAS drive is not just about plugging in a box. It is about building a simple, dependable storage setup that makes your files easier to manage and safer to keep. Once the NAS is on your network, mapped on your devices, and secured with good settings, it becomes one of the most useful tools in your digital life.
If you are setting one up now, start with the wired connection, confirm the shared folder path, and test access on one device before expanding to others. Take it step by step, and you will avoid most of the headaches people run into. If you found this guide useful, explore more storage tips, bookmark this article for later, or leave a comment with your NAS setup question.

Similar Posts