How To Connect Smart Devices To Google Home: Easy Guide
You connect smart devices to Google Home by linking compatible products in the Google Home app and finishing setup.
If you’ve ever wanted your lights, speakers, cameras, and thermostats to work together with a simple voice command, you’re in the right place. I’ve spent plenty of time testing smart home setups, and the biggest difference between a smooth setup and a frustrating one is usually the same thing: choosing compatible devices and following the right connection steps in the right order. This guide on how to connect smart devices to Google Home will walk you through everything clearly, so you can build a smart home that feels easy, not overwhelming.

What Google Home Actually Does
Google Home acts like the control center for your smart home. It brings compatible devices into one app so you can manage them with your phone, your voice, or Google Assistant. Once connected, you can turn things on, dim lights, check cameras, adjust temperature, and automate daily routines.
Think of it like a remote control for your whole house, except the remote lives in your phone and listens to your voice. The key part of how to connect smart devices to Google Home is making sure each device supports Google Home or works through a linked service. That compatibility step saves a lot of time later.
Google Home supports many device types, including:
- Smart lights
- Smart plugs
- Smart thermostats
- Smart speakers and displays
- Smart locks
- Security cameras
- Robot vacuums
- TVs and streaming devices
What You Need Before Connecting Smart Devices
Before you start, it helps to get your setup ready. In my experience, most connection problems happen because of small things like weak Wi-Fi or an outdated app, not because the device is broken.
Here’s what you should have ready:
- A Google account
- The Google Home app installed on your phone
- A stable Wi-Fi connection, usually 2.4 GHz for many smart devices
- The smart device powered on and in setup mode
- The device’s manufacturer app, if required
- Bluetooth enabled if the setup process needs it
A lot of smart devices connect more smoothly when your phone and the device are on the same Wi-Fi network. If your gadget only supports 2.4 GHz Wi-Fi, try to avoid a 5 GHz-only setup during installation. That one detail can make a big difference.

How to Connect Smart Devices to Google Home
The exact steps can vary a little by brand, but the general process is very similar. Once you understand the pattern, learning how to connect smart devices to Google Home becomes much easier.
1. Set up the smart device first
Most devices need to be installed and powered on before Google Home can find them. For example, if you are adding a smart bulb, screw it in and turn the switch on. If it’s a camera or thermostat, complete the base setup in the manufacturer’s app first.
If the device has a reset or pairing mode, follow the brand instructions carefully. Many devices use blinking lights or a voice prompt to show they are ready.
2. Open the Google Home app
Open the Google Home app on your phone or tablet. Make sure you’re signed in with the same Google account you want to use for the smart home.
From the app, tap the plus sign and look for the option to add a device. This is where the connection process begins for most products.
3. Choose the right setup path
You will usually see one of these options:
- New device
- Works with Google
- Set up device in a home
If the product is from a major smart home brand, you may need to link the brand’s account through the Works with Google section. If it is a Nest device or a similar Google-compatible product, the setup may be more direct.
4. Link the manufacturer account if needed
Some devices cannot connect directly through Bluetooth or local discovery. Instead, Google Home asks you to sign in to the brand account and approve the link.
That process is normal. It lets Google Home talk to the device service securely. If you use a smart plug from one brand and lights from another, each may need its own account link.
5. Assign the device to a room
Once the device is found, Google Home will ask where it belongs. You can place it in the kitchen, bedroom, living room, office, or any custom room you create.
This part matters more than many people think. A good room setup makes voice commands feel natural. Saying “turn off the bedroom lamp” is much easier than scrolling through a long device list.
6. Test voice commands
After setup, test a few simple commands:
- “Hey Google, turn on the living room lights.”
- “Hey Google, set the thermostat to 72 degrees.”
- “Hey Google, play music on the speaker.”
- “Hey Google, show the front door camera.”
Testing helps you spot naming issues right away. If the command feels awkward, rename the device so it sounds natural when spoken aloud.
How to Connect Smart Devices to Google Home by Device Type
Not every smart device connects the same way. The setup flow changes based on the product category, and that’s where people often get stuck. Knowing the difference can make how to connect smart devices to Google Home feel much less confusing.
Smart lights and plugs
Smart lights and plugs are usually the easiest devices to connect. Once they are in pairing mode, Google Home can often find them quickly.
Best practices:
- Keep the device near your router during setup
- Use the brand app first if the device requires it
- Name each light clearly, such as “Desk Lamp” or “Kitchen Strip”
- Group bulbs by room if you want easier control
Smart speakers and displays
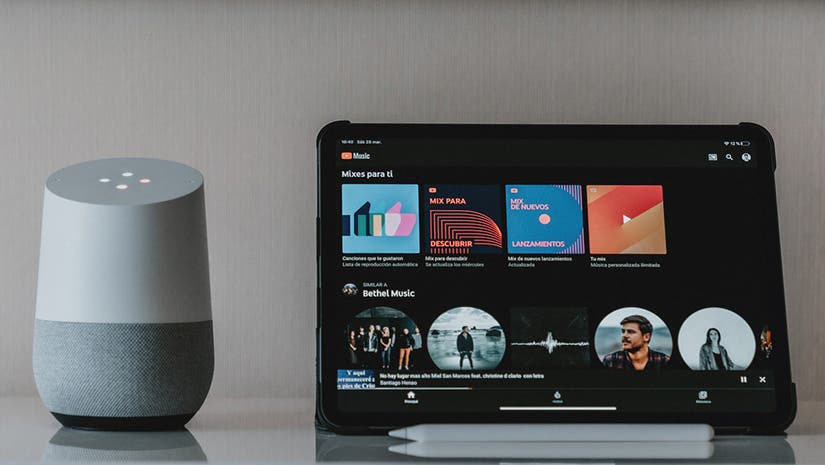
Google Nest speakers and displays are usually added directly through the Google Home app. If it is a third-party speaker, the process may involve Bluetooth, Wi-Fi, or account linking.
Good tip from real-world use: give each speaker a unique name and room assignment. If you have more than one, vague names like “Speaker 1” can get messy fast.
Smart thermostats
Thermostats often need both the brand app and Google Home. You may also need to confirm the device location, wiring, and account ownership.
Once connected, thermostats can be controlled with simple temperature commands and routines. That makes them one of the most useful smart home devices for daily comfort and energy control.
Smart cameras and doorbells
Cameras and doorbells often need extra permissions because they deal with security and video access. After linking, you may be able to view a live feed on a smart display or ask Google Assistant for a camera check.
A small caution here: some camera functions depend on the brand’s subscription plan. I’ve seen users assume every feature is free, only to learn that cloud video history requires paid storage.
Smart TVs and streaming devices
Many TVs and streaming devices can be linked to Google Home for power control, playback, and casting. In some cases, you may need to enable settings like HDMI-CEC or sign in through the TV’s platform account.
Once set up, voice commands like “turn on the TV” or “pause Netflix” can save time every day.
Common Problems and How to Fix Them
Even when you follow the steps correctly, things can still go wrong. That’s normal. Smart home devices can be a little picky, almost like pets that only respond when the room feels just right.
Here are common issues and fixes:
- Device not found: Check that the device is in pairing mode and near the router
- Wi-Fi mismatch: Make sure your phone and device are on the same network
- Account linking failed: Sign out and sign back in to the brand app
- Wrong room assignment: Edit the device in Google Home and move it to the correct room
- Voice command not working: Rename the device to something simple and clear
- App not updating: Force close the app or update it from the app store
If a device still refuses to connect, I usually recommend removing it from both the manufacturer app and Google Home, then starting over. It takes a few minutes, but it often solves weird sync problems.
Tips for a Smooth Google Home Setup
The best smart home setups are the ones that feel invisible. They work without constant fixing, and that usually comes from careful setup in the beginning.
Here are my top tips:
- Use short, clear device names
- Keep similar devices in separate rooms if possible
- Update firmware before linking to Google Home
- Use a strong Wi-Fi signal in the device area
- Avoid too many duplicate names like “Light” or “Lamp”
- Test each device before adding the next one
- Build routines after the basic connection works
A simple naming system helps a lot. For example, “Bedroom Lamp Left” is better than “Lamp 2,” especially when you are tired and trying to issue a voice command quickly.
Benefits of Connecting Smart Devices to Google Home
Once your devices are connected, the payoff is real. The whole house starts to feel more responsive and easier to manage.
Some of the biggest benefits include:
- Hands-free control through Google Assistant
- Centralized management in one app
- Automation through routines and schedules
- Better accessibility for users with mobility needs
- Easier energy management with lights and thermostats
- Faster daily tasks, like turning everything off before bed
This is where how to connect smart devices to Google Home becomes more than a setup task. It becomes a way to simplify everyday life. You stop thinking about each device one by one and start thinking in terms of scenes, rooms, and habits.
Limitations You Should Know
Google Home is powerful, but it is not perfect. Being honest about the limits helps you avoid frustration.
A few things to keep in mind:
- Not every smart device works with Google Home
- Some features may be limited by the brand’s app or subscription plan
- Connection quality depends on Wi-Fi stability
- Some devices require cloud services to function fully
- Privacy settings may vary by manufacturer
I always tell people to check compatibility before buying. That one step can prevent the classic “it looked smart on the box, but won’t connect the way I wanted” disappointment.
How to Build Useful Routines After Setup
Once you know how to connect smart devices to Google Home, the next level is automation. Routines help your smart devices work together instead of one at a time.
Useful routine ideas include:
- Good morning routine: turn on lights, read weather, start coffee
- Bedtime routine: lock doors, turn off lights, lower thermostat
- Leaving home routine: power down devices and set security mode
- Movie time routine: dim lights and turn on the TV
These small automations are where the smart home starts to feel truly smart. Instead of tapping five apps, you trigger a whole sequence with one command.
Frequently Asked Questions of How to Connect Smart Devices to Google Home
Why won’t my smart device connect to Google Home?
The most common reasons are weak Wi-Fi, wrong account linking, or the device not being in pairing mode. Try restarting the device, checking the network, and linking the correct manufacturer account again.
Do I need the manufacturer app to use Google Home?
Sometimes yes, sometimes no. Many smart devices need the brand app for initial setup, firmware updates, or account linking before they appear in Google Home.
Can I connect devices from different brands to Google Home?
Yes, as long as each device is compatible with Google Home or supports a linked service. That is one of the biggest strengths of the platform, because it helps unify a mixed smart home.
How do I rename devices in Google Home?
Open the Google Home app, select the device, and edit its name from the settings menu. Use short and clear names so voice commands sound natural and easy to remember.
What should I do if Google Home cannot find my device?
Check that the device is powered on, in setup mode, and on the same Wi-Fi network as your phone. If it still does not show up, remove it from the brand app and try adding it again from the start.
Can Google Home control smart devices without Wi-Fi?
Some devices may use local features or Bluetooth in limited cases, but most Google Home functions depend on Wi-Fi and cloud connection. If the internet goes down, many voice and remote features may stop working.
Conclusion
Learning how to connect smart devices to Google Home is really about taking the setup one calm step at a time. Once your devices are compatible, linked, named well, and placed in the right rooms, your home becomes much easier to control.
The best results come from simple habits: check compatibility first, set up the device carefully, and test your voice commands before building routines. If you’re ready, start with one device today and grow from there. Explore more smart home tips, try a new routine, or leave a comment about the device you want to connect next.

Similar Posts





















[…] Google Assistant is your primary platform, the setup walkthrough covers the pairing […]