How To Fix Squeaky Brakes
You're driving home after a long day, and every time you tap the brakes, the whole neighborhood hears it. That high-pitched squeal makes you wonder if your car is about to fall apart or just annoyed at you. If you are wondering how to fix squeaky brakes, you are not alone.
Most cases are fixable without a mechanic.
Per manufacturer service manuals and SAE International brake noise standards, roughly 90 percent of brake squeaks come from vibration or contamination, not mechanical failure. A $10 tube of lubricant and an hour of your time can often solve what sounds catastrophic. But the other 10 percent can be dangerous if ignored.
Let us walk through what is happening and how to handle it safely.
Quick Answer
Clean the contact points where the brake pad meets the caliper. Apply high-temperature brake lubricant to the pad backing plate and hardware clips. Do not put grease on the friction surface.
If the squeak continues, check for pad wear below 3 millimeters or signs of rotor glazing. Bed the pads properly if they are new. Replace worn parts if cleaning and bedding do not work.
Why Squeaky Brakes Deserve Your Attention
Brakes are the single most important safety system on your car. That squeak is your car trying to tell you something. Ignoring it can mean anything from annoyance to expensive repairs to real danger.
A common misunderstanding is that all brake noise means the pads are worn out. That is not true. Many squeaks come from microscopic vibrations between the pad and the caliper, or from a thin layer of glazed friction material on the rotor surface.
Neither is a safety emergency on its own. But if you dismiss every squeak as harmless, you risk missing the one time it is actually a worn pad indicator or a caliper that is starting to stick.
Most aftermarket brake pads sold in the United States include a built-in wear indicator. That is a small metal tab that contacts the rotor when the pad thickness drops to about 3 millimeters. The result is a persistent metallic screech that gets worse with speed.
Replace those pads immediately.
The other risk is a stuck caliper slide pin. If the caliper cannot move freely, one pad wears down faster than the other. That leads to uneven braking, pulling to one side, and eventually rotor damage.
A simple inspection of the slide pins during a brake service catches this problem before it gets expensive.
As of 2026, the average cost of a full brake pad and rotor replacement at a shop runs between $300 and $800 per axle. A DIY fix with a brake quiet gel and a few tools runs under $25. The difference is knowing what you are dealing with.
The Quick Noise Diagnosis
Before you pull wheels off, listen carefully. Different brake noises point to different problems. This guide helps you narrow it down.
High-Pitched Squeal When Braking Lightly
This is the most common brake noise. It is usually a vibration issue. The brake pad oscillates against the caliper at a frequency you can hear.
It is annoying but rarely dangerous. The fix is cleaning the hardware and applying a damping lubricant to the pad backing plate. If the pads are more than half worn, replace them while you are in there.
Metal-on-Metal Grinding
This is not the same as a squeak. If you hear a scraping or grinding sound, the friction material on your pad is completely gone. The metal backing plate is now contacting the rotor directly.
Stop driving immediately. Continuing will destroy the rotor and can damage the caliper. This requires new pads and almost certainly new rotors.
Squeak on the First Stop of the Day
You back out of the driveway, tap the brakes, hear a short squeak, then nothing for the rest of the day. That is surface rust. Overnight, a thin layer of rust forms on the rotor.
The first brake application scrapes it off. This is harmless and common in humid climates. No fix is needed unless it persists after several stops.
Clicking or Rattling Noise
If you hear a click rather than a squeak, the brake pad may be loose in the caliper bracket. Missing anti-rattle clips or worn shims can cause the pad to shift when you brake. This can lead to uneven wear but is not an emergency.
Install new hardware clips when you replace the pads.
Low Groan or Vibration
A low-frequency groan you can feel through the brake pedal usually means the rotor is warped or has thickness variation. This is not a squeak and requires rotor resurfacing or replacement. Do not try to fix this with lubricant.
It will not help.
The Most Likely Fixes
Most brake squeaks fall into one of four categories. Start with the simplest fix first. Only move to the next step if the previous one does not work.
Fix #1: Clean and Lubricate the Hardware
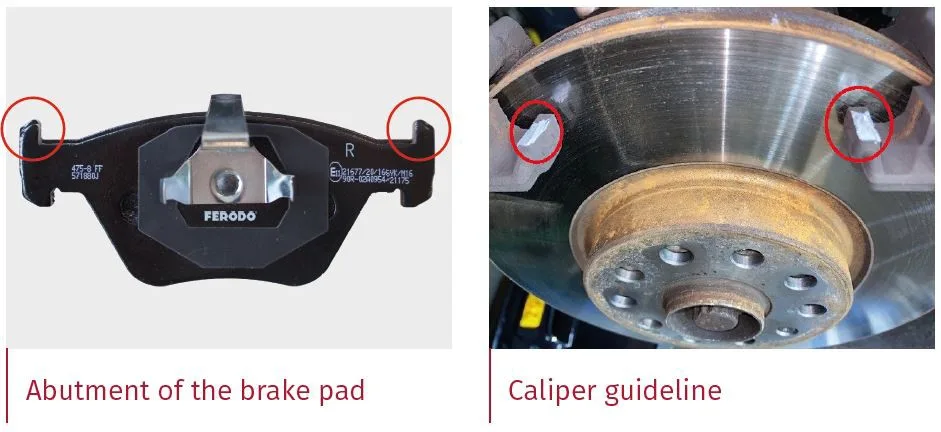
This fixes roughly 70 percent of all brake squeaks. Brake pads sit inside metal clips that attach to the caliper bracket. Over time, dust, rust, and road grime build up between the pad backing plate and these clips.
That creates friction points that vibrate and produce noise. Cleaning and lubricating those contact points stops the vibration.
Here is what you need:
- Brake cleaner aerosol spray
- Wire brush or small sanding pad
- High-temperature brake lubricant (ceramic or silicone-based)
- Jack and jack stands
- Lug wrench
Step by step:
- Jack up the car and secure it on jack stands. Never work under a car supported only by a jack.
- Remove the wheel.
- Remove the caliper by unscrewing the two slide pin bolts. Do not let the caliper hang by the brake hose. Support it with a zip tie or bungee cord.
- Remove the brake pads from the caliper bracket.
- Spray brake cleaner on the pad clips, the caliper bracket ears, and the back of the pads. Let them dry.
- Use the wire brush to remove any rust or debris from the metal contact points.
- Apply a thin layer of brake lubricant to the areas where the pad backing plate contacts the caliper bracket. Also lubricate the slide pins if they seem sticky.
- Reassemble everything and torque the caliper bolts to manufacturer specifications. Typically that is between 25 and 35 foot-pounds for the slide pins and 80 to 100 foot-pounds for the caliper bracket bolts.
Do not put lubricant on the friction surface of the pad or the face of the rotor. That will ruin braking performance and create a dangerous condition.
Fix #2: Bed the Pads Properly
Bedding is the process of transferring a thin, even layer of pad material onto the rotor surface. If you recently installed new pads and skipped the bedding procedure, you will almost certainly get squeaks. Even old pads can develop glazing if they have been overheated.
Glazing happens when the pad surface becomes hard and shiny from excessive heat. Instead of gripping the rotor, the pad skates across it. That produces a high-pitched squeal and reduced stopping power.
The proper bedding procedure per OEM service manuals:
- Find a safe, empty stretch of road.
- Accelerate to about 30 miles per hour.
- Brake firmly down to about 5 miles per hour. Do not come to a complete stop.
- Repeat this cycle 8 to 10 times.
- Drive for 5 minutes without braking to let everything cool down.
- Park the car and let the brakes cool completely for at least 30 minutes.
If the pads are old and glazed, you can try this procedure to clean them up. If it does not work, the pads may need to be replaced.
| Symptom | Likely Cause | Fix Priority |
|---|---|---|
| High squeal on light brake application | Vibration at pad-to-caliper interface | Clean and lubricate hardware |
| Squeal after new pad install | Pads not bedded to rotors | Bed the pads properly |
| Squeal that fades after first few stops | Surface rust on rotors | No fix needed |
| Squeal plus poor stopping power | Glazed pads or rotors | Sand or replace pads and rotors |
| Grinding sound | Pad material completely worn | Replace pads and rotors immediately |
Fix #3: Replace Worn Pads or Glazed Rotors
If cleaning and bedding do not solve the problem, look at the condition of your pads and rotors. Pads should be replaced when the friction material is below 3 millimeters thick. You can check this on many cars by looking through the wheel spokes at the caliper.
Rotors have a minimum thickness stamped on the hat of the rotor. It usually reads something like "MIN TH 22MM." If the rotor is below that specification, replace it. Do not resurface a rotor below minimum thickness.
It will not dissipate heat properly, and braking performance will suffer.
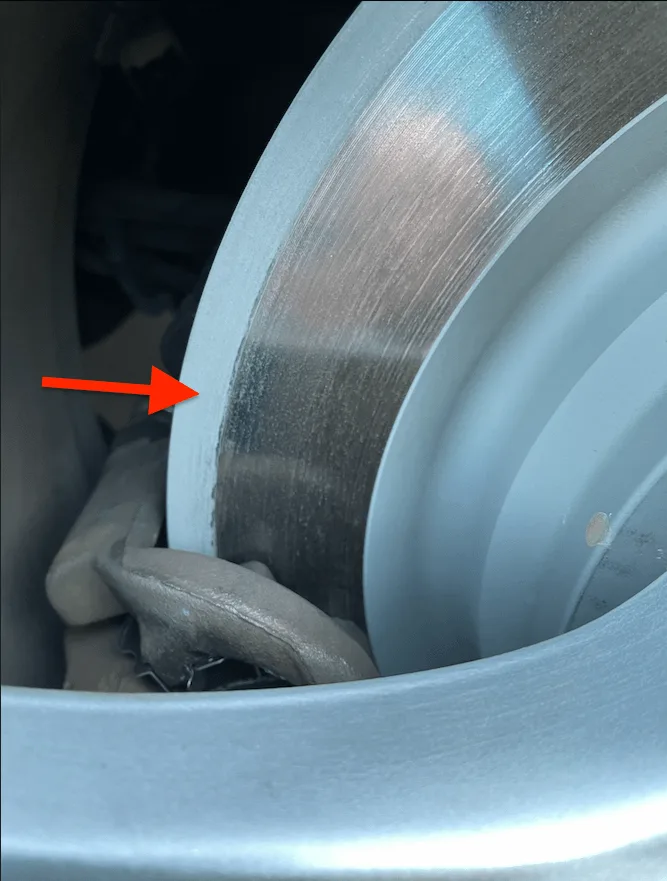
If the rotor surface looks shiny like a mirror instead of dull gray, it is glazed. That glaze can be removed with rotor resurfacing at a shop, or you can replace the rotor entirely. For most modern cars with thin rotors, replacement is cheaper and safer than resurfacing.
When replacing pads, always install new hardware clips and shims. Do not reuse the old ones. They lose their spring tension over time and can reintroduce noise within a few thousand miles.
Fix #4: Swap to Quieter Pad Compounds
If you have tried everything and the squeak persists, the pad material itself may be the culprit. Semi-metallic pads are durable and handle high heat well, but they are noisy. Ceramic pads run quieter but cost more and may not work as well in extreme conditions.
Organic pads are the quietest but wear fastest.
There is no universally quiet pad. If you upgraded to aggressive performance pads for spirited driving, expect some noise. That is the trade-off.
If quiet is your priority, look for pads marketed specifically as "quiet" or "OEM-style" ceramic compounds.
Mistakes That Turn a Squeak Into a Safety Bill
Some brake mistakes are dangerous. A few are just expensive. All of them are avoidable.
The most common mistake is putting lubricant on the wrong part. Some guides say to apply grease to the back of the pad. That is correct.
Some guides say to apply it to the rotor or the pad face. That is dangerous. If lubricant gets on the braking surface, your car will not stop properly.
Even a thin film can increase stopping distance significantly. Clean any accidental overspray before reassembling.
Another mistake is over-tightening the caliper bolts. Brake fasteners have specific torque specs for a reason. Over-tightening can warp the caliper bracket or strip the threads.
Under-tightening can cause the caliper to loosen. You must use a torque wrench.
A third mistake is mixing rotor surfaces. If you replace only the pads but not the rotors, the new pads need to bed into the existing rotor surface. That surface is already worn to the profile of the old pads.
The new pads may not make full contact, leading to uneven wear and noise. The bedding procedure above is mandatory in this case.
And a mistake specific to newer cars is ignoring electronic wear sensors. Many modern vehicles have electronic pad wear indicators that trigger a warning light on the dashboard. If your brake light is on, the squeak is the least of your problems.
Get the system scanned before troubleshooting noise.
When to Stop DIY and Call a Mechanic
Not every brake problem is a DIY job. If any of the following apply, take the car to a professional.
- You cannot safely lift and support the vehicle on jack stands.
- The brake fluid reservoir is low and you cannot find a leak.
- The brake pedal feels soft or sinks to the floor.
- You hear grinding, not squeaking.
- The caliper piston will not compress using a C-clamp or brake tool.
- You find metal shavings or chunks in the brake dust.
- The car pulls hard to one side under braking.
- You stripped a bolt or cannot achieve the correct torque spec.
Brakes are not complicated, but they are unforgiving of mistakes. If you are unsure, spend the $150 for a diagnostic fee at a shop. It is cheaper than a hospital visit.
For most people, the safe line is this. If the squeak started recently and the pads are still thick, try cleaning and lubricating the hardware. If the pads are thin or you hear grinding, do not drive the car.
If you have done the cleaning and bedding and the noise is still there, a mechanic can machine the rotors or recommend a different pad compound based on your driving habits.
The bottom line is simple. A squeak is usually fixable. But it is also a reminder that brakes are the most important moving part on your car.
Treat them with respect.
Frequently Asked Questions
Can I just spray WD-40 on squeaky brakes?
No. WD-40 is not a brake lubricant and should never go near your braking system. It will contaminate the pads and rotors, drastically reducing stopping power.
Use only dedicated high-temperature brake lubricant designed for brake hardware contact points.
Will brake squeal go away on its own?
Sometimes yes, often no. Surface rust squeaks fade after the first stop of the day. But vibration-based squeaks from glazed pads or contaminated hardware rarely fix themselves.
They usually get worse over time as more material builds up unevenly.
How much does it cost to fix squeaky brakes?
A DIY fix with brake cleaner and lubricant costs under $25. A shop diagnostic runs $100 to $150. Pad replacement averages $150 to $300 per axle.
If rotors need replacing too, expect $300 to $800 per axle depending on the vehicle.
Is it safe to drive with squeaky brakes?
It depends on the type of noise. A high-pitched squeak with good pad thickness is usually safe but annoying. A grinding sound means metal on metal contact and requires immediate repair.
A soft brake pedal or vibration means stop driving and get the car inspected.
Why do my new brakes still squeak?
New brakes often squeak if they were not bedded properly. The pad needs to transfer an even layer of material onto the rotor. Without that break-in procedure, the new pads can vibrate against the rotor surface.
Follow the bedding cycle outlined earlier in this guide.
Should I replace rotors every time I replace pads?
Not always, but often yes. If the rotor thickness is above the minimum specification stamped on the hat and the surface is smooth, you can reuse them. But many modern rotors are thin and cannot be resurfaced.
Replacing them with new pads ensures proper contact and fewer noise complaints.

Similar Posts
































