How to Set Exposure on DSLR Camera
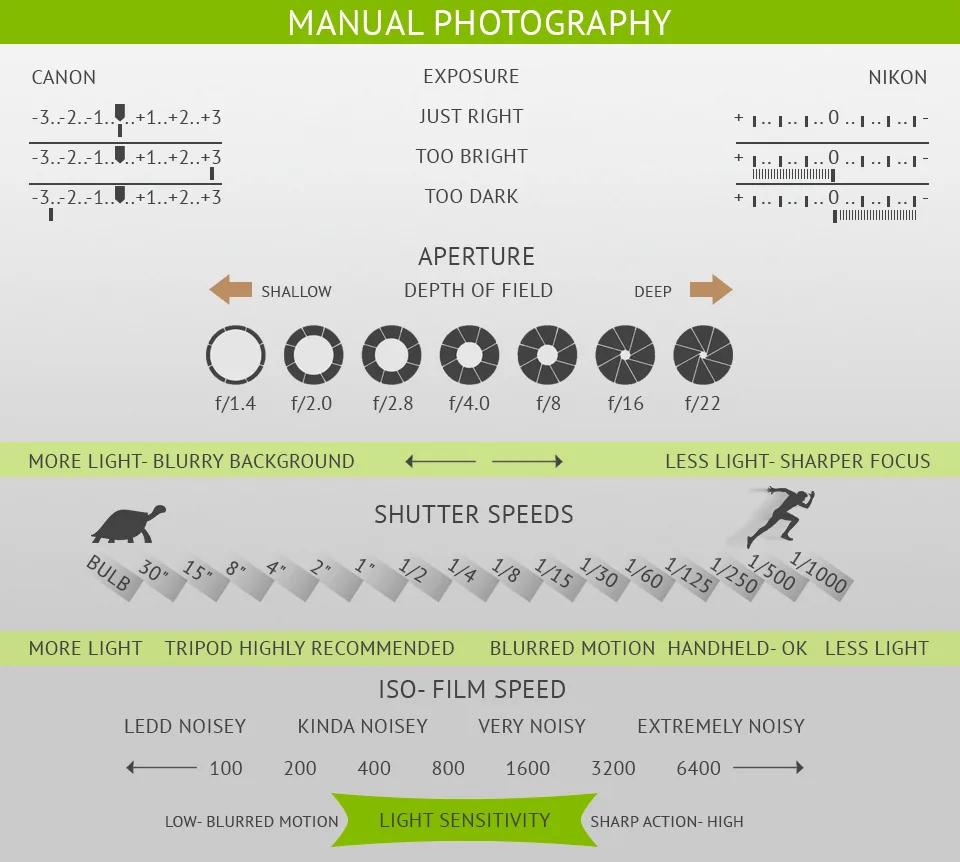
To set exposure on a DSLR camera, start with Aperture Priority mode. Choose your aperture for depth of field. The camera selects the shutter speed.
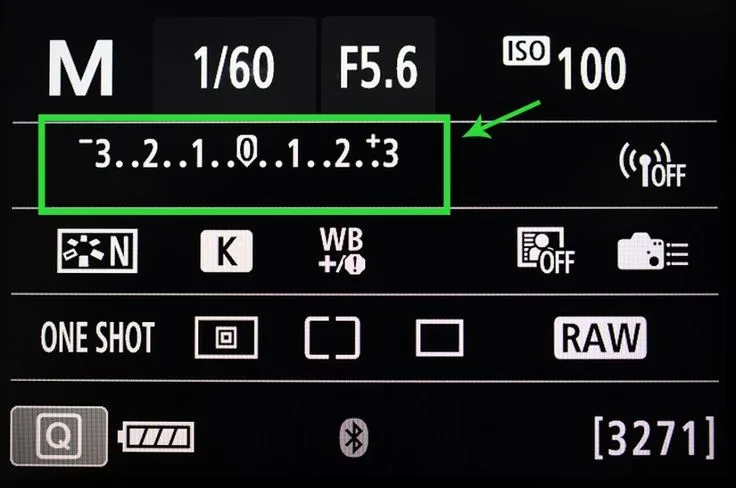
Check the meter in the viewfinder. Adjust exposure compensation if needed. Review the histogram after your first shot.
Your camera's light meter is a liar. It assumes every scene averages out to middle gray. That's why snow shots come out gray and portraits in dark rooms wash out.
Learning how to set exposure on a DSLR camera means knowing when to trust your meter and when to override it.
The Sunny 16 rule is a good starting point. On a bright sunny day, set aperture to f/16. Set shutter speed to 1/ISO so at ISO 100 that's 1/100s and you get a correct baseline exposure.
But real-world conditions change fast. Let's walk through how to make those decisions on the fly, as of 2026.
Quick Answer
To set exposure on a DSLR camera, use Aperture Priority mode. Choose your aperture for depth of field. The camera selects the shutter speed.
Check the meter in the viewfinder. Adjust exposure compensation if needed. Review the histogram after your first shot.
Why Your Camera's Meter Lies to You
Your DSLR's built-in meter measures reflected light. Per ISO 2720:1974, the standard for exposure meters, it's calibrated to assume every scene reflects about 18% of the light hitting it. That works fine for a green lawn or a brick wall.
But it fails hard on bright or dark scenes.
Point your camera at a snow-covered field. The meter sees all that white, thinks "too much light," and tells you to underexpose. You get gray snow.
Point it at a black dog in the shade. The meter sees little light, thinks "too dark," and tells you to overexpose. You get a washed-out gray dog.
That's where exposure compensation comes in. Most DSLRs let you dial +/- EV to correct for the meter's mistake. For snow, try +1 or +1.3 EV.
For a dark subject against a dark background, try -0.7 or -1 EV. The trick is knowing when to override.
The Three Settings That Work Together
Exposure is controlled by three variables. Aperture, shutter speed, and ISO. Change one and you have to adjust another to keep the same brightness.
Think of it as a triangle. Pull one corner, the others shift.
Aperture controls how much light enters through the lens. A low number like f/2.8 means a wide opening and lots of light, but shallow depth of field. A high number like f/16 means a narrow opening and less light, but everything stays sharp from foreground to background.
Shutter speed controls how long the sensor is exposed to light. 1/500s freezes motion. 1/30s starts to blur handheld shots. 1/2s needs a tripod.
ISO controls the sensor's sensitivity to light. ISO 100 is clean and sharp. ISO 3200 adds noise but lets you shoot in dim conditions without a tripod.
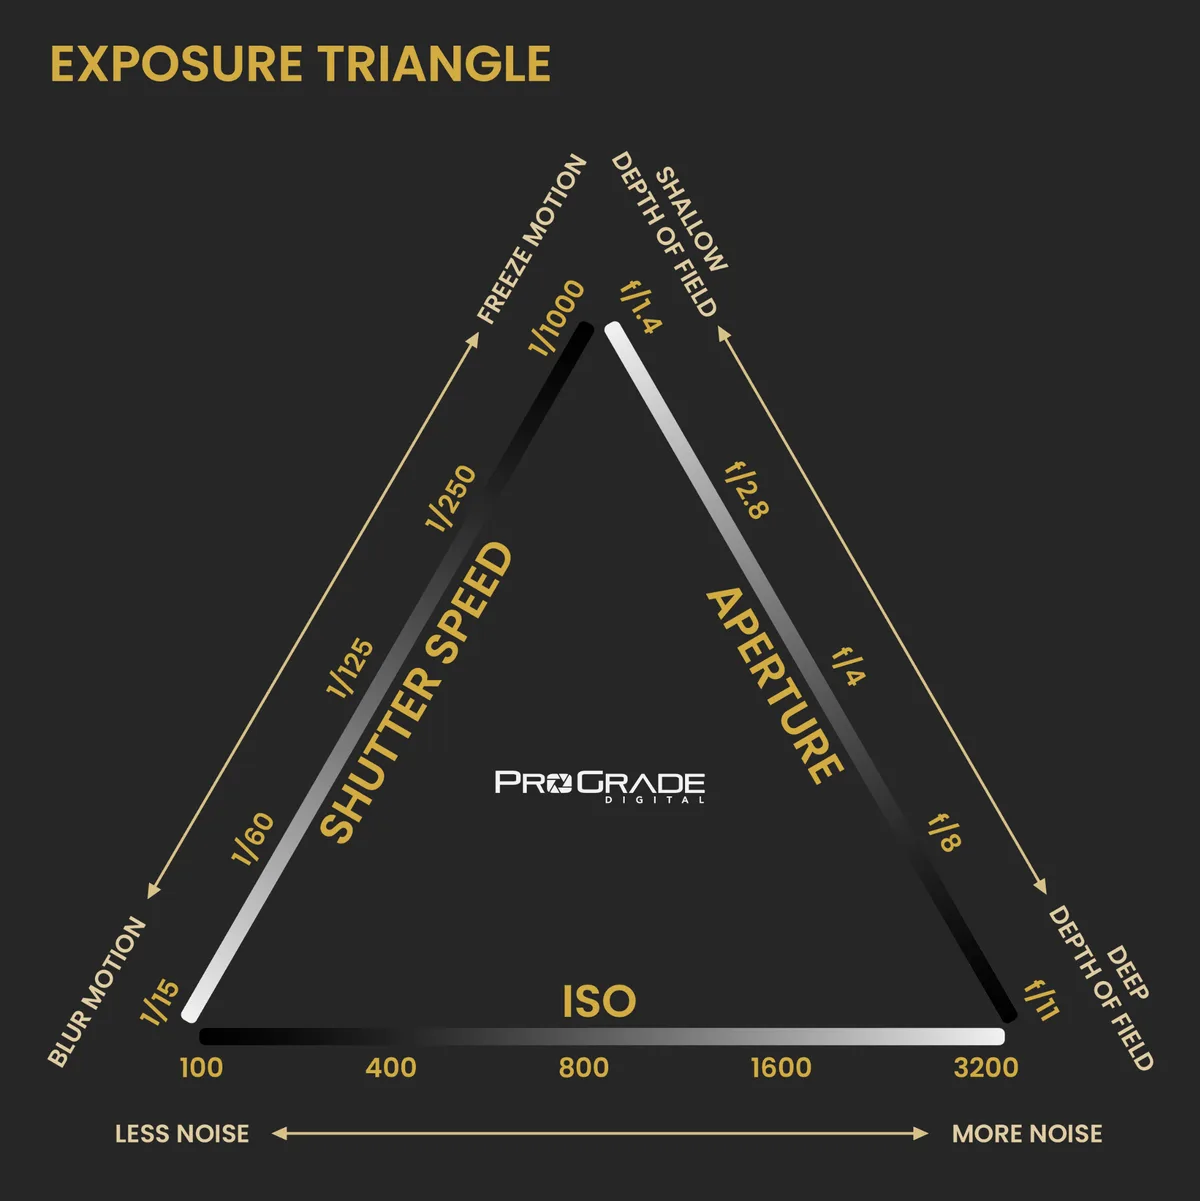
The key insight: your choice of which setting to prioritize depends entirely on what you're shooting. That's where the decision tree comes in.
How to Set Exposure: Your Real-World Decision Workflow
Start with one question. What matters most in this shot?
If you're shooting a landscape, depth of field matters most. Set your camera to Aperture Priority. Choose f/8 to f/16.
The camera picks the shutter speed. Check it. If it drops below 1/60s, raise ISO or use a tripod.
If you're shooting a moving subject, sports, birds in flight, kids running, shutter speed matters most. Set Shutter Priority. Choose 1/500s or faster.
The camera picks the aperture. If the aperture opens to its widest f-stop and the image is still dark, raise ISO. For fast action, consider a body with fast burst shooting.
If you're shooting in low light without a tripod, ISO matters most. Set Manual mode. Start with ISO 3200 or 6400 depending on your camera's noise ceiling.
Set aperture to your widest f-stop. Set shutter speed to the reciprocal of your focal length. Adjust from there.
| Scenario | Priority | Mode | Starting Point |
|---|---|---|---|
| Landscape | Aperture | Aperture Priority | f/8, ISO 100 |
| Portrait | Aperture | Aperture Priority | f/2.8, ISO 100 |
| Sports | Shutter speed | Shutter Priority | 1/500s, auto ISO |
| Low light | ISO | Manual | Widest aperture, ISO 3200 |
Check your histogram after the first shot. The graph should touch both edges without piling up on either side. If it's bunched left, you're underexposed.
Bunched right, overexposed. Adjust accordingly.
For richer detail in landscape shots, many experienced shooters use expose to the right. This pulls shadow detail out of the sensor. It pairs well with a dedicated landscape body.
Mistakes That Ruin a Good Shot
Blown highlights. The most common mistake. You expose for the shadows and the sky turns white. The fix: expose for the highlights and bring up shadows in post.
Your camera's highlight alert shows you where detail is lost.
Camera shake. At shutter speeds below 1/60s, even steady hands introduce blur. Use a tripod or raise ISO. If you're shooting in dim conditions, a camera with good high-ISO performance lets you push further without excessive noise.
Chimping the LCD. The screen on your DSLR is not calibrated for brightness. A photo that looks bright on the LCD might be underexposed on your computer. Trust the histogram, not the screen.
Forgetting to reset exposure compensation. You dial in +1 EV for a snow scene, then walk indoors. The next 50 shots are overexposed. Make it a habit to zero out compensation when conditions change.
Not checking ISO. Set it once and forget it. That's a recipe for noisy images. Auto ISO is a good middle ground.
It adjusts based on your shutter speed and aperture limits.
For street work, where light changes block by block, a compact body with tactile dials makes quick adjustments easier. Practice with your camera's controls until they're muscle memory.
Frequently Asked Questions
What is the Sunny 16 rule?
On a bright sunny day, set aperture to f/16. Set shutter speed to 1/ISO. At ISO 100, that's 1/100s.
This gives you a correct baseline exposure. Adjust from there for cloudy or shaded conditions.
How do I read a histogram?
The left side is shadows. The right side is highlights. The middle is midtones.
A correct exposure has data spread across the graph without touching either edge. A spike on the left means underexposure. A spike on the right means blown highlights.
Should I use manual mode or aperture priority?
Use aperture priority when you care about depth of field and the light is consistent. Use manual mode when the light is tricky, like backlit subjects or mixed lighting. Manual also works for panoramas where you need consistent exposure across multiple shots.
What does exposure compensation do?
It tells your camera to brighten or darken the image from what the meter thinks is correct. Dial +1 to make snow white again. Dial -1 to keep a black cat black.
It works in Aperture Priority, Shutter Priority, and Program modes.
Why are my photos blurry?
Two common causes. Slow shutter speed. Keep it above 1/60s handheld.
Or missed focus. Check your autofocus point and make sure it's on your subject. For low light, a dedicated low-light camera handles high ISO better, reducing the need for slow shutter speeds.

Similar Posts