How to Replace Underwater Camera Battery
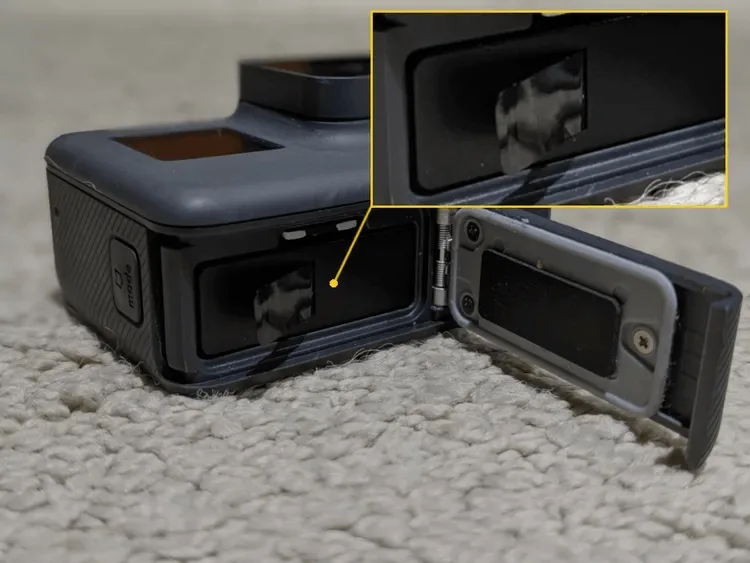
If you're dreading the moment you open that battery door, you're not alone. Learning how to replace underwater camera battery doesn't need to feel like defusing a bomb, but it does demand respect for one thing above all: the seal. That thin rubber O-ring is the only barrier between your camera's electronics and a slow, corrosive death.
As of 2026, most dive housings rely on a silicone O-ring sealed to an IPX8 rating, which means they survive submersion deeper than 1 meter for extended periods. But that rating only holds if the seal is clean, seated, and free of tiny nicks or stray hairs. Get this right, and a battery swap takes two minutes.
Get it wrong, and you'll be shopping for a replacement camera.
Image source: Web (Bing) / hollyland.com (Web image (fair-use with source credit))
Why This One Task Separates the Pros From the Flooded Cameras
Saltwater, sand, and a single speck of grit have ruined more cameras than any other cause. That's not an exaggeration. When you swap a battery on the beach or a dive boat, you're doing it in the worst possible environment for a waterproof seal.
A tiny grain of sand can scratch the seal channel, break the watertight barrier, and flood your camera on the next dive.
The math is unforgiving. A flooded compact camera is a $400 loss. A flooded mirrorless setup inside a housing can cost you $3,000 or more.
Corrosion spreads fast once water gets inside, and it rarely stops at the battery contacts. It attacks the mainboard, the lens ribbon cables, and the shutter mechanism.
So what separates a pro from a first-timer? Not talent. Not expensive gear.
It's the refusal to skip visual checks. Professionals don't have a secret trick. They just inspect the same three points every single time before closing the housing.
If you treat battery replacement as a rushed chore, you'll find out why divers call water "the great equalizer." If you're methodical about the seal, your housing will stay watertight for years. The battery swap itself is simple. The prevention is the actual skill.
What You'll Need Before You Open the Housing
Don't grab tools. Grab patience. The only tool you truly need is your hands, but a few supplies make the job safer and faster.
Lay everything out before you touch the camera. That way, you're not hunting for a cloth while the battery door hangs open.
We've researched dozens of housing manuals, and they all point to the same shortlist. Here's what you should have on hand:
| Item | Why You Need It |
|---|---|
| Fresh water | To rinse off salt and sand before opening |
| Lint-free microfiber cloth | To dry the housing completely |
| Silicone grease (only if the manual says so) | To keep the O-ring supple and seated |
| Cotton swabs | To clean the O-ring groove |
| Spare O-ring | To replace one that's cracked or stretched |
| Your replacement battery | Fully charged and the correct model |
| Silica gel desiccant pack | To absorb internal moisture after reassembly |
Never use metal tools near the seal. A screwdriver can scratch the housing face in half a second. Instead, use a plastic toothpick or a cotton swab for stubborn debris.
Some manufacturers explicitly forbid extra grease on their seals, so check your manual before applying anything. If the housing came with a small tube of grease in the box, use that one. If not, silicone grease is fine, but only a thin film.
The Step-by-Step Visual Guide (Pay Attention to These Cues)
Every housing is slightly different, but the sequence is universal. What changes are the latches, the battery tray, and the placement of the polarity symbols. Pay attention to the visual cues I'll mention, because they're the signals that tell you you're doing it right.
Step 1: Rinse and dry the exterior. Run fresh water over the whole camera to remove salt residue. Then dry it thoroughly with a lint-free cloth. Opening a wet housing invites water droplets to slide right into the seal groove.
Step 2: Open the latch and look at the seal. Most housings have a single locking latch or two side latches. Release it fully and lift the door without jerking. As you do, glance at the O-ring.
You'll see it sitting in a groove around the inner edge. Look for any visible hair, sand, or discoloration before you proceed.
Step 3: Remove the old battery. Grip it by the edges and lift it straight out. Don't use your fingernails to pry under it, and never tilt it in a way that lets contacts scrape against the housing wall.
Step 4: Read the polarity markers inside the slot. There's always a tiny embossed plus and minus symbol printed or molded inside the compartment. Match the new battery's markings to those symbols. If you ignore this, the camera simply won't power on, and you'll be right back where you started.
Step 5: Insert the new battery. Seat it flat, then press down gently until it clicks or feels flush. On many models, a small retaining clip holds it in place. You should feel a positive stop.
Step 6: Close the door and listen for the click. Press the door closed evenly, then push the latch until it snaps. Some newer housings have a red "lock" indicator that's visible when the latch engages. If yours has one, glance at it.
Step 7: Double-check the latch flushness. Run your fingertip across the latch and the seam. If anything feels raised or uneven, reopen the door and start again. A flush surface is your visual confirmation that the seal is compressed evenly.
The Three Visual Checks That Prevent a Flooded Camera
Before you reseal, perform these three inspections. They take twenty seconds total, and they're the difference between a dry camera and a one-way trip to the service center. If you only remember one section from this guide, make it this one.
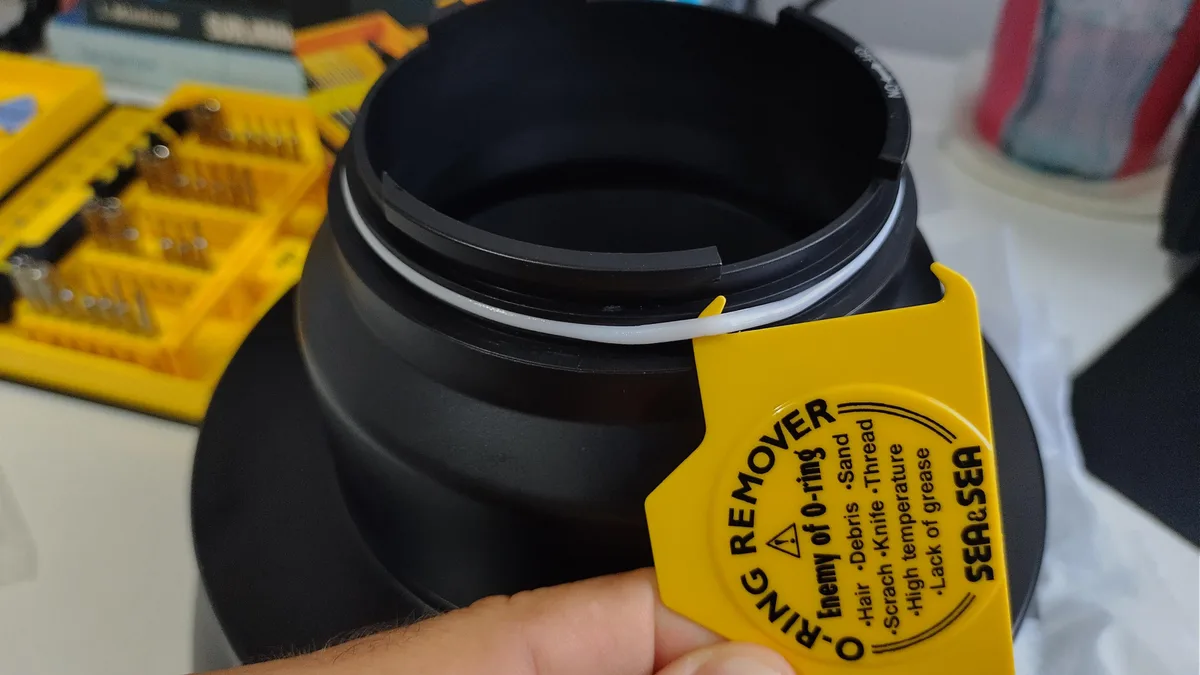
Image source: Web (Bing) / reddit.com (Web image (fair-use with source credit))
Check 1: The O-ring itself. Look at the entire circumference. You're hunting for nicks, cuts, flat spots, or a stretched segment that doesn't sit snugly in the groove. Pinch it gently between your fingers and roll it.
It should return to its original shape immediately. If it feels crispy, cracked, or stays deformed, it's done. Replace it.
Check 2: The O-ring groove. This is where hidden debris loves to hide. Run a cotton swab along the channel and look closely at what comes off. A single strand of hair, a fiber from your towel, or a grain of sand in that groove is a guaranteed slow leak.
The seal can't compress over a foreign object.
Check 3: The latch and mating surface. Look at the plastic edge that presses against the O-ring. It should be perfectly smooth. Any scratches, chips, or warping mean the housing won't create a uniform seal.
If you spot damage here, the housing isn't safe to dive until it's repaired or replaced. Organizations like PADI emphasize this same routine as the cornerstone of dive camera maintenance.
If all three checks pass, you're clear to close. If any one of them fails, stop and fix it before the battery goes back in. The same habit of inspecting seals before use applies to checking field cameras before deployment.
A quick once-over prevents expensive failures in any outdoor gear.
Common Visual Mistakes (And How to Spot Them)
Even experienced photographers slip up. The good news is that nearly every mistake is visible if you know what to look for. Here are the ones we see most often in aggregate user reports and service center forums.
Pressing the battery in backwards. The polarity symbols are engraved right in the plastic, but in low light or when you're rushing, it's easy to flip the battery. The camera just won't turn on. The fix is simple: look at the plus and minus marks before you push down.
Twisting the O-ring while closing the door. Sometimes the ring rolls out of its groove as you press the housing shut. You'll spot a small loop or bulge near a corner. That's the seal turning on itself.
Just reopen, reseat the ring, and close again slowly.
Closing on a hidden hair. It's nearly invisible, but it's the most common leak cause. After reseating the O-ring, sweep your finger around the entire ring one more time. Better yet, use the cotton swab trick from the previous section.
Cheap insurance.
Forcing the latch. If you have to push hard enough to feel resistance, something is wrong. A misaligned O-ring is usually the culprit. Don't force it.
Reopen and check. A cracked latch hinge is a repair that always costs more than the battery you were trying to change.
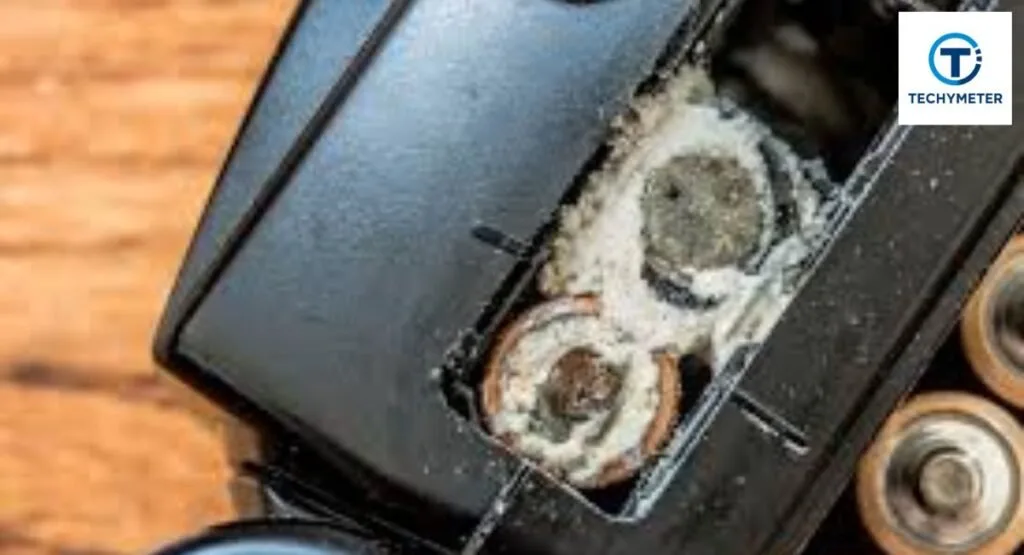
Image source: Web (Bing) / techymeter.com (Web image (fair-use with source credit))
Leaving the door one click short. The latch may look flush, but it hasn't fully rotated. Press down again until you hear a crisp snap. If your housing has a lock indicator, confirm it's showing.
When in doubt, treat the camera as unsealed and try the shallow-water test. The same troubleshooting logic applies to power issues with other outdoor cameras.
Corrosion starts small. You might not see it for weeks, but the damage is already underway. If you ever open a compartment and see white or green crust on the contacts, that's your wake-up call.
It means moisture has gotten in before, and it will again until you replace the seal. Consistent battery drain and poor connections are worth improving your battery habits across all your gear, not just your dive camera.
After the Battery Swap: Testing and Storing Your Housing
You've closed the latch. The battery is fresh. Now what?
Don't just drop the camera in your dive bag and assume everything is fine. A quick test on land can save you from discovering a leak 60 feet underwater.
The shallow-water test is your best friend. Fill a sink or bucket with fresh water. Submerge the housing for three to five minutes without the camera inside. If you have a vacuum leak check system, use it.
Otherwise, watch for bubbles. A steady stream of bubbles means a compromised seal. Open everything up, recheck the O-ring, and try again.
What about the camera itself? Power it on and cycle through the modes. Take a test shot. Check the screen for condensation.
If you see fog inside the lens, moisture is already present. You'll need to open the housing in a dry environment and let everything air out for 24 hours. A silica gel pack can help speed up the drying process.
Store the housing with the door cracked open. This is a mistake many people make. They seal the housing tight after a dive and store it that way. That traps any residual moisture inside.
Over weeks, that moisture corrodes the battery contacts and the O-ring groove. Instead, leave the latch partially open so air can circulate. The same logic applies to protecting outdoor cameras from the elements.
Fresh batteries and dry storage keep your gear ready for the next outing.
Replace the O-ring once a year. If you dive more than 50 times per year, replace it every six months. The rubber degrades with UV exposure, salt, and compression. A fresh O-ring is cheap insurance compared to a flooded camera.
The same principle applies to swapping batteries in other outdoor cameras. Routine upkeep prevents most field failures.
Frequently Asked Questions
How often should I replace the O-ring on my underwater camera housing?
Replace it annually if you dive fewer than 50 times per year. Replace it every six months if you dive more frequently. You should also replace it immediately if you see cracks, nicks, or flat spots during your visual inspection.
Can I use any brand of battery in my underwater camera?
No. Always use the manufacturer recommended battery type and voltage. Off brand batteries can have slightly different dimensions or terminal positions.
A poor fit inside the battery compartment can cause intermittent power loss or even prevent the door from sealing properly.
What should I do if the battery door latch won't close fully?
Stop and do not force it. Remove the battery and check the O-ring for misalignment. It may have rolled out of its groove.
Also check for debris in the seal channel. If the latch still won't close, the housing may have a warped or damaged hinge.
How do I know if water has already gotten inside the housing?
Look for condensation on the inside of the lens or the viewfinder. Check for white or green corrosion on the battery contacts. If the camera behaves erratically or won't power on, moisture may have reached the internal electronics.
Open the housing immediately and dry everything thoroughly.
Can I change the battery while I'm in the water?
No. Never open the housing underwater. Even a few drops of saltwater will destroy the electronics.
Always return to the boat or shore, rinse the housing with fresh water, and dry it completely before opening the battery compartment.
Why does my camera keep turning off after a fresh battery swap?
The battery may be inserted with the wrong polarity. Check the plus and minus markers inside the compartment. If the polarity is correct, the battery contacts may be corroded or the battery itself may not be fully charged.
Try cleaning the contacts with a cotton swab and a small amount of isopropyl alcohol.

Similar Posts
































