How to Test Underwater Camera Housing
If your camera housing floods, you don't just lose a dive. You lose thousands of dollars in gear. Knowing how to test underwater camera housing before every dive is the single most reliable way to protect your investment.
It's not complicated, but it is non-negotiable.
Manufacturer specifications indicate that a vacuum hold test must stay within 0.02 bar of pressure loss over five minutes to pass. As of 2026, many divers still skip this step. They rely on luck instead.
Here's the exact process you should run every time.
Quick Answer
How to test underwater camera housing, start with a dry vacuum test.
Pump to 0.3 bar and hold for five minutes.
Then submerge the closed housing in fresh water and watch for bubbles.
Fix any leak before inserting your camera.
Do this before every dive.
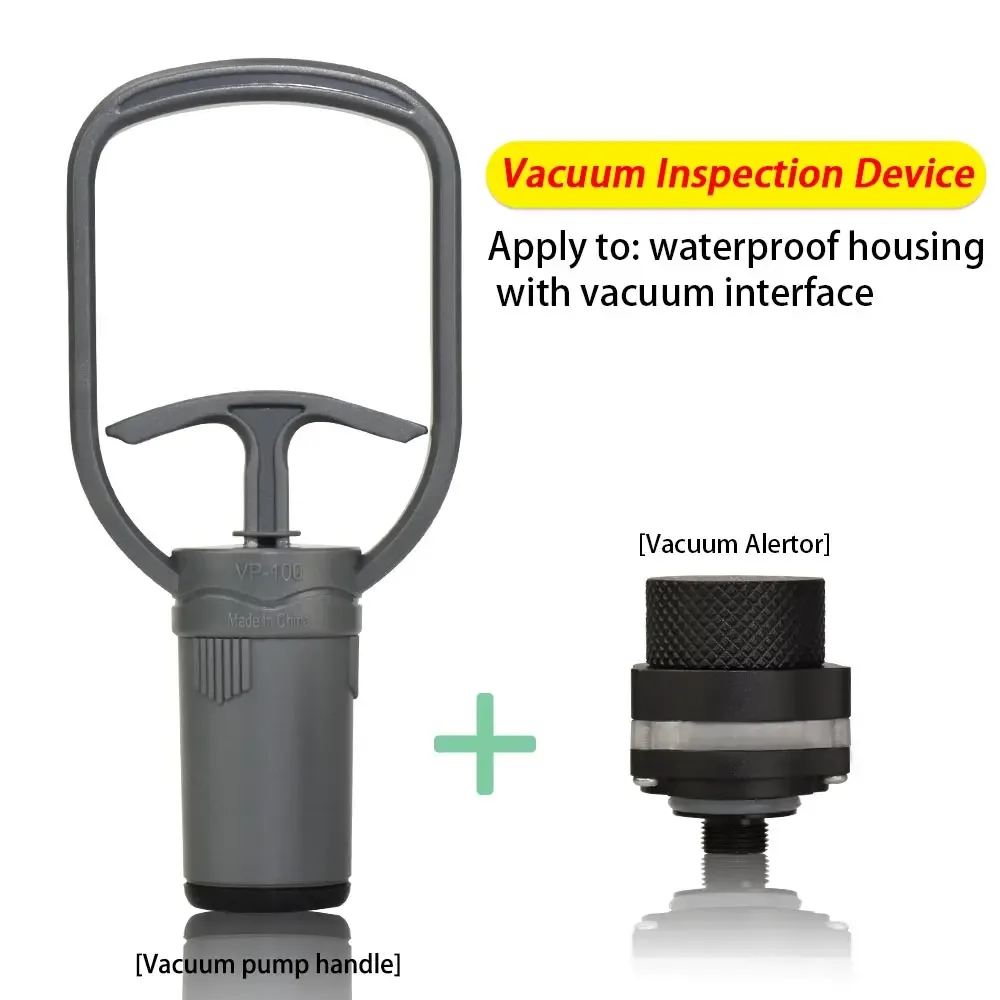
Image source: Web (Bing) / aliexpress.com (Web image (fair-use with source credit))
Why Testing Matters More Than You Think
A flooded housing can destroy a camera body, lens, and strobes in seconds. Saltwater is worse. It corrodes electronics almost instantly.
Even after rinsing, hidden damage often survives. That is a ruinous financial loss.
The real problem is false confidence. A visual check rarely reveals anything. Micro-cracks, dried-out seals, and tiny fibers in the groove are invisible.
Most floods happen to people who thought their housing looked fine. Aggregate reviews across diver forums confirm this pattern.
Testing catches those hidden failures. It also builds a routine. When you run the same pre-dive check, you notice small changes.
A gauge that drops faster than last week. A latch that feels different. That awareness prevents problems.
The NOAA Diving Program treats underwater equipment checks as a safety requirement. Your housing is a pressure vessel. Treat it with the same respect, just like testing any camera before field use.
What You'll Need: Tools, Gear, and Prep
You don't need a dive shop to test at home or dockside. The tool list is short, and most items cost under fifty dollars combined.
| Tool / Material | Purpose | Typical Cost |
|---|---|---|
| Vacuum pump with gauge | Creates negative pressure and reveals leaks | $20–$60 |
| O-ring grease (silicone-based) | Lubricates seals so they seat properly | $5–$15 |
| Lint-free cloth | Cleans grooves without leaving fibers | $2–$5 |
| Magnifying glass or loupe | Checks O-rings for nicks and cracks | $5–$15 |
| Leak detection fluid (optional) | Reveals bubbles on large leaks | $5–$10 |
| Fresh water container | Deep enough to fully submerge the housing | Free |
Image source: Web (Bing) / linkedin.com (Web image (fair-use with source credit))
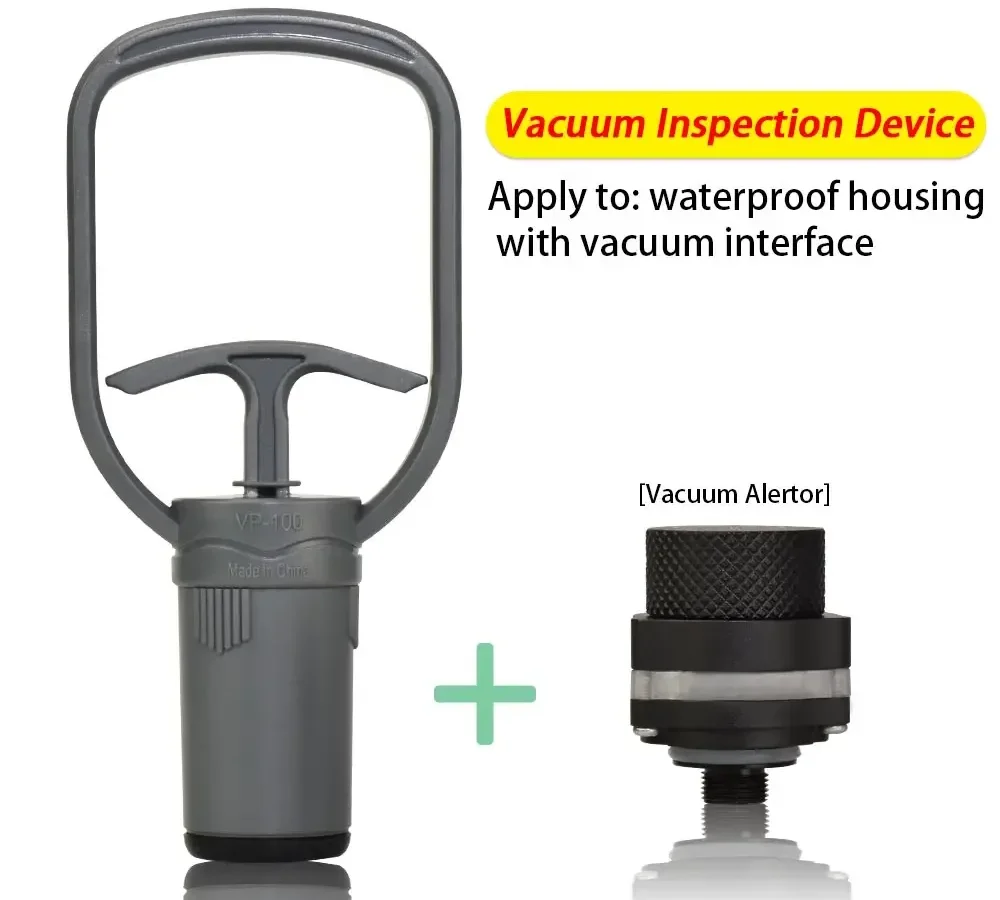
The vacuum pump is the core tool. It attaches to a valve on the housing. Pump air out until the gauge reads between 0.2 and 0.4 bar.
Then wait. If the needle holds for five minutes, the housing is sealed.
Some newer housings include a built-in vacuum system. Verify it works anyway. Watch the gauge and confirm the hold time.
Only use silicone grease on O-rings. Petroleum grease degrades rubber. Stick to what your housing manufacturer recommends.
The Decision Tree: Which Test Method Should You Use?
Your situation determines the right test. Match your condition to the steps below.
New housing, first time use? Run a full dry vacuum test with no camera inside. Then do a wet submersion test in fresh water. Watch for bubbles. This confirms the housing is defect-free out of the box.
Used housing with unknown history? Start with a thorough O-ring inspection. Remove every seal and inspect under magnification. Replace anything with nicks, flat spots, or discoloration. Then run both the vacuum test and the submersion test.
Pre-dive at the boat or shore? Use only the vacuum test with your camera inside. You cannot reliably check for bubbles in open water. Pump down the housing, verify the gauge holds, and go. This takes two minutes.
After a repair or O-ring replacement? Run the full sequence. Dry vacuum first, then wet submersion without the camera, then a final vacuum with the camera inside. Repairs introduce the highest leak risk.
Shallow dive vs deep dive? Shallow dives under ten meters put less stress on seals. A five-minute vacuum hold is enough. For deep dives beyond thirty meters, extend the hold time to ten minutes.
If the vacuum gauge drops more than 0.02 bar in five minutes, you have a leak. Start over. Inspect every O-ring, clean the grooves, regrease, and retest.
This is the same gear troubleshooting process you'd use on any camera setup.
Step-by-Step Workflow: From Dry Check to Final Pre-Dive Test
Follow these steps in order. Do not skip any.
Step 1: Remove and inspect every O-ring. Take all seals out of their grooves. Run your finger along the groove to feel for debris. Wipe it clean with a lint-free cloth.
Inspect each O-ring under magnification. Look for flat spots, cracks, and embedded particles.
Step 2: Lubricate and reinstall. Apply a thin, even layer of silicone grease. Too much grease attracts debris. Too little leaves the seal dry.
Seat the O-ring gently and make sure it lies flat.
Step 3: Close the housing. Align the back plate or port correctly. Latch it shut evenly. Do not overtighten.
Most locks click into place without excessive force.
Step 4: Dry vacuum test without camera. Attach the vacuum pump. Pump to 0.3 bar. Watch the gauge for five minutes.
If it stays steady, the housing is sealed.
Step 5: Wet submersion test. Submerge the closed, empty housing in fresh water. Watch for a steady stream of bubbles. A single bubble at the latch is normal as trapped air escapes.
A continuous stream means a leak.
Image source: Web (Bing) / poolburg.com (Web image (fair-use with source credit))
Step 6: Insert camera and accessories. Open the housing. Place your camera inside. Make sure nothing pinches the O-ring.
Close and latch.
Step 7: Final vacuum test. Pump down the housing with the camera inside. Hold for five minutes. Confirm the gauge does not drop more than 0.02 bar.
Step 8: Ready for dive. You have verified the housing is sound with your camera loaded.
The whole process takes fifteen to twenty minutes. That is a small investment compared to the cost of a flooded camera.
Common Mistakes That Still Flood Cameras
Even experienced divers make these errors. Avoid them.
Skipping the dry vacuum test. Many people go straight to the wet check. They miss small leaks that only show under negative pressure.
Over-greasing the O-rings. Too much grease traps dirt and prevents the seal from seating properly. It can also cause the O-ring to bulge out of the groove under pressure.
Testing at the full depth rating. Do not pressurize your housing to its maximum rated depth during a test. This stresses the seals unnecessarily. A vacuum hold test is more sensitive and safer.
Ignoring condensation on the lens. If you see fog inside the housing after a test, moisture got in. That is a leak, even if no water pooled at the bottom. This is the same issue that causes trail camera condensation.
Dry everything and retest.
Not cleaning the O-ring groove. A speck of sand or a single hair can lift the seal. Run your finger around the groove before reinstalling the O-ring. Regular cleaning of camera equipment prevents this failure point.
Relying only on bubble watching. Bubbles only show large leaks. Slow leaks from hairline cracks may not produce visible bubbles. That is why the vacuum test is essential.
Reusing old O-rings past their lifespan. Most manufacturers recommend replacement every twelve months or one hundred dives. A compressed O-ring looks fine but no longer seals effectively.
Forgetting to check the vacuum valve itself. If the vacuum test fails and everything else looks good, check the valve. Apply a small amount of leak detection fluid to the valve stem while under vacuum. Bubbles there mean the valve is the problem.
When to Skip the DIY Test: Professional Pressure Pot Service
DIY testing works for most situations. But sometimes you need professional help. A dive shop with a pressure pot tests your housing at real depth.
This is not optional in certain cases.
When to see a pro:
- After a flood: water inside means you need full disassembly and seal replacement.
- After repairs: if the housing was dropped, hit, or serviced, get a bench test.
- Aluminum housings: these can bend slightly and need precise inspection after impacts.
- When vacuum won't hold: if the gauge drops despite fresh O-rings, the problem is deeper.
- For critical, expensive rigs: if your setup is worth more than your car, spend the money.
A pressure pot is a sealed chamber that simulates depth. The shop places your empty housing inside, pressurizes the chamber, and watches for bubbles. This finds leaks that a vacuum test may miss.
Ask the shop to test to 80% of the housing's rated depth. That gives you a safety margin. Also ask for a written log of the test.
Most reputable shops provide one.
Professional service costs around fifty to one hundred dollars. That is cheap compared to a flooded housing.
Frequently Asked Questions
How long should a vacuum hold?
At least five minutes after the pump stops. If the gauge drops less than 0.02 bar in that time, you are good. For deep dives beyond thirty meters, hold for ten minutes.
Can I test a housing without a vacuum pump?
You can do a visual inspection and a submersion test, but it is not enough. Small leaks may not show bubbles. A vacuum pump costs twenty dollars and removes the guesswork.
Buy one.
What if bubbles appear after 10 minutes?
Any bubbles after a few minutes mean a leak. The only exception is a single bubble at the latch as trapped air escapes. A steady stream means the housing is compromised.
Reinspect every seal.
How often should I replace O-rings?
Most manufacturers say replace O-rings every twelve months or one hundred dives, whichever comes first. Do it sooner if you see cracks, flat spots, or embedded debris.
What does a 0.02 bar drop mean?
It means the seal is very tight. If the needle drops more than 0.02 bar, air is escaping. Start over.
Clean, regrease, reinstall O-rings, and retest.
Your Pre-Dive Checklist: Quick Reference Guide
Print this or save it on your phone. Run it before every dive.
- Inspect O-rings under magnification.
- Clean grooves with lint-free cloth.
- Lubricate O-rings with silicone grease.
- Seat O-rings correctly, no twists.
- Close and latch housing.
- Vacuum to 0.3 bar.
- Hold for five minutes, gauge stable.
- Submerge in fresh water for 10 minutes.
- Watch for bubble streams.
- Dry, open, insert camera.
- Final vacuum test.
- Ready to dive.
That is a fifteen-minute routine. It costs nothing compared to losing your camera.

Similar Posts