Onkyo Dx C390 Troubleshooting
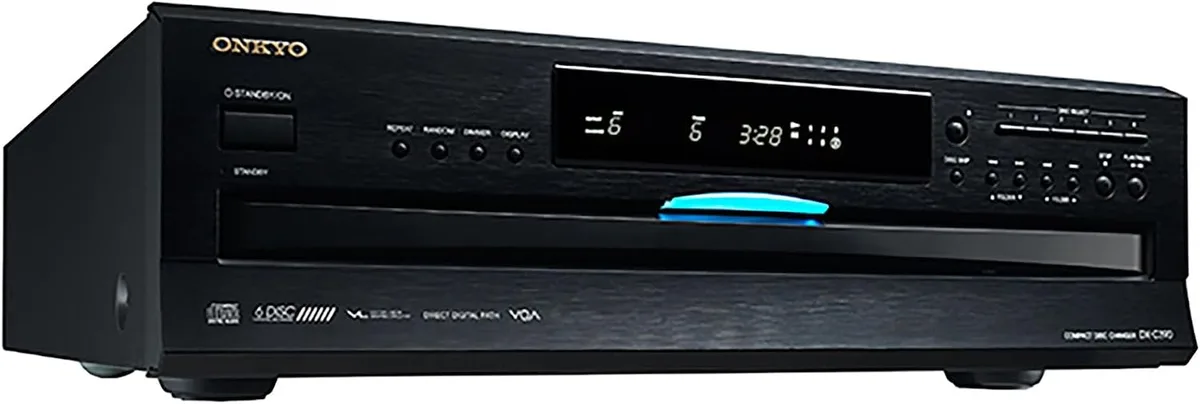
Your Onkyo DX-C390 is acting up again. Maybe the tray won't open. Maybe it reads "No Disc" on every CD you load.
Or maybe it just sits there dead, no lights, no sound, nothing. If you're knee-deep in Onkyo Dx C390 troubleshooting right now, you're in the right place. This machine has a few known weak spots, and they're all fixable with basic tools and a little patience.
The DX-C390 is a 6-disc CD changer from the early 2000s. It uses a Sony KSS-213C laser pickup and a belt-driven magazine mechanism. As of 2026, most failures come down to three things: a dried-out rubber belt, a stuck sled motor, or a failing capacitor on the power board.
Let's walk through each one.
Quick Answer
If your DX-C390 won't read discs, clean the laser lens first. Use 90% isopropyl alcohol on a cotton swab. If the tray won't open, replace the drive belt.
It's a small rubber square belt about 3.5 cm wide. If the unit has no power, check the fuse and inspect the power supply capacitors for bulging. Most repairs cost under $10 in parts.
The Onkyo DX-C390: What Usually Breaks First
This changer is simple by modern standards. No Wi-Fi, no streaming, no digital display beyond basic track info. But simple doesn't mean immune to age.
The tray drive belt. This small rubber belt connects the eject motor to the tray mechanism. After years of sitting in a cabinet, that rubber gets hard, cracks, or stretches. The tray stops opening all the way, or it opens but won't close.
Sometimes it makes a clicking noise. This is the single most common failure and the easiest to fix.
The sled motor. A small electric motor slides the laser pickup back and forth underneath the disc. When the lubrication grease on the sled rails dries out, the motor stalls. You'll hear it trying to move, but the pickup stays stuck.
That gives you a "No Disc" error even with a clean CD in the tray.
Power supply capacitors. Electrolytic capacitors dry out over time. On the DX-C390, the bulk capacitors on the main power board are the usual suspects. When they fail, the unit may not power up at all, or it may power up but behave erratically, skipping tracks, locking up, or suddenly shutting down.
The laser pickup itself. The Sony KSS-213C is a solid unit, but it's not immortal. Dust on the lens is the most common issue, and a simple cleaning fixes it 80% of the time. If the laser diode itself has weakened, you'll need to replace the whole pickup assembly.
The good news is that all of these parts are available online for a few dollars each. The service manual is also easy to find. So before you toss the changer in the trash, try the fixes below.
Image source: Bing (Web (fair-use with source credit))
Quick Checks: 10 Minutes Before You Open the Case
Before you grab a screwdriver, run through these quick checks. You'd be surprised how many "broken" DX-C390 units just needed a reset, a clean disc, or a properly seated magazine.
Check the obvious stuff first.
- Is the power cord plugged in all the way? Both ends.
- Is the outlet live? Plug a lamp into the same outlet.
- Does the display light up at all? If yes, the power supply is getting juice. If no, you're looking at a power supply issue.
- Is the CD magazine properly seated? Push it firmly until you hear a click.
- Are the CDs themselves clean? Try a known-good commercial CD, not a burned disc.
- Did you try the reset? Unplug the unit for 30 seconds. Plug it back in. Press and hold the power button and the eject button simultaneously for 5 seconds.
If none of these work, move on to the symptom-specific checks below.
Symptom Diagnosis: Follow the Branch That Matches Your Problem
This is a decision tree. Find your symptom and follow the path.
No Power / Dead Unit
The display is dark. No lights. No sound.
Step 1: Check the fuse. Unplug the unit, remove the top cover, and pull the glass fuse. If the thin wire inside is broken or you see a dark smear, replace it with the exact same rating, usually 1A or 1.25A, 250V, 5x20mm.
Step 2: Inspect the power supply capacitors. Look at the large cylindrical capacitors on the power board. If the tops are bulging, domed, or leaking brown residue, they're bad. Replace all the electrolytic caps on the power board at once.
Step 3: Check the voltage rails. With a multimeter, test the power supply output pins. You should see approximately 5V DC on the logic board and 12V DC on the motor driver circuits.
Tray Won't Open or Eject
You press eject. You hear a motor whirring. The tray stays put or jams halfway.
Step 1: Manual eject. There's a small hole on the front panel. Straighten a paper clip and push gently. This manually disengages the tray lock.
Step 2: Listen to the motor. If the motor is running but the tray doesn't move, the belt is slipping. If you hear nothing, the motor or power supply is the issue.
Step 3: Inspect the belt. Open the top cover. Look for the belt on the left side of the mechanism. If it's cracked, stretched, or feels greasy, replace it.
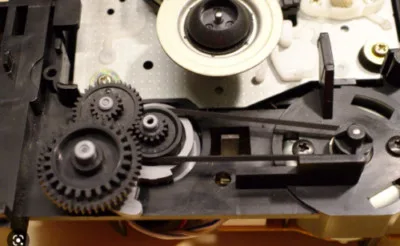
Image source: Bing (Web (fair-use with source credit))
Discs Skip, Get Rejected, or Show "No Disc"
You load a CD. The display shows "No Disc." Or the disc spins for a few seconds then stops.
Step 1: Clean the laser lens. Open the top cover. Locate the laser pickup on the sled. Dip a cotton swab in 90% isopropyl alcohol.
Gently wipe the lens in one direction. Let it dry for 2 minutes.
Step 2: Check the sled movement. Watch the laser pickup when you press play. It should slide smoothly. If it stutters or doesn't move, the sled grease has hardened.
Re-lubricate the rails with white lithium grease.
Step 3: Listen for the laser. When the disc spins, you should hear a faint ticking from the laser focusing. A rapid clicking means the laser is trying but failing. That usually means a dirty lens or a weak laser diode.
Mechanical Fixes: Tray Belts, Sled Motors, and the Magazine Mechanism
Most DX-C390 failures are mechanical. And mechanical failures are almost always fixable with simple parts.
The tray belt replacement. Remove the top cover. Locate the belt on the left side. Use tweezers to gently pry the old belt off.
Clean any rubber residue from the pulleys. Install the new belt by looping it over the smaller motor pulley first, then stretching it over the larger gear pulley. Test it before you put the cover back on.
The sled motor lubrication. The sled motor itself rarely fails. The grease on the metal rails turns into a sticky glue after years. Clean the rails with isopropyl alcohol and a lint-free cloth.
Apply a tiny dab of white lithium grease to each rail. Move the pickup back and forth manually to spread it. Don't use WD-40 or cooking oil.
The magazine mechanism. Over time, the plastic tabs inside the magazine can warp or break. If the changer can't load discs from the magazine, try a different magazine or test with a single disc in the tray without the magazine.
Electrical Fixes: Power Supply Capacitors and Voltage Rails
When the unit powers on but behaves erratically, the issue is often electrical.
Capacitor failure. Electrolytic capacitors have a lifespan of 15 to 20 years. The DX-C390 is past that. Signs include bulging tops, brown residue, or a visible gap between the sleeve and the capacitor body.
Replace with the same capacitance and equal or higher voltage rating.
The voltage regulator. The three-pin component labeled 7805 or 7808 on the main board can fail. If it gets hot enough to burn your finger after a few minutes, test the output voltage. If it's more than 0.5V below the rated output, replace it.
The fuse. A blown fuse is often a symptom. If you replace it and it blows again immediately, you have a short circuit. Find the short before replacing it again.
Laser Pickup: Clean It First, Swap It Second
The Sony KSS-213C in the DX-C390 is a well-known part. Replacements cost around $10 to $15.
Cleaning the lens. Use 90% or higher isopropyl alcohol. Dip a swab and gently touch the lens. Don't press or rub.
Wipe in one direction. Let it evaporate for two minutes.
When cleaning doesn't work. If the lens is clean and the unit still won't read discs, the laser diode may be weak or dead. Listen for the focusing tick. If you hear nothing, the laser isn't firing.
If you hear rapid clicking, the output is too weak.
Replacing the pickup. This is a moderate difficulty repair. Disassemble the sled mechanism, unplug the ribbon cable, and remove a few screws. The new pickup will have a small solder blob on a test point for static protection.
Remove it with a soldering iron before installation. Match the new pickup exactly to the old one.
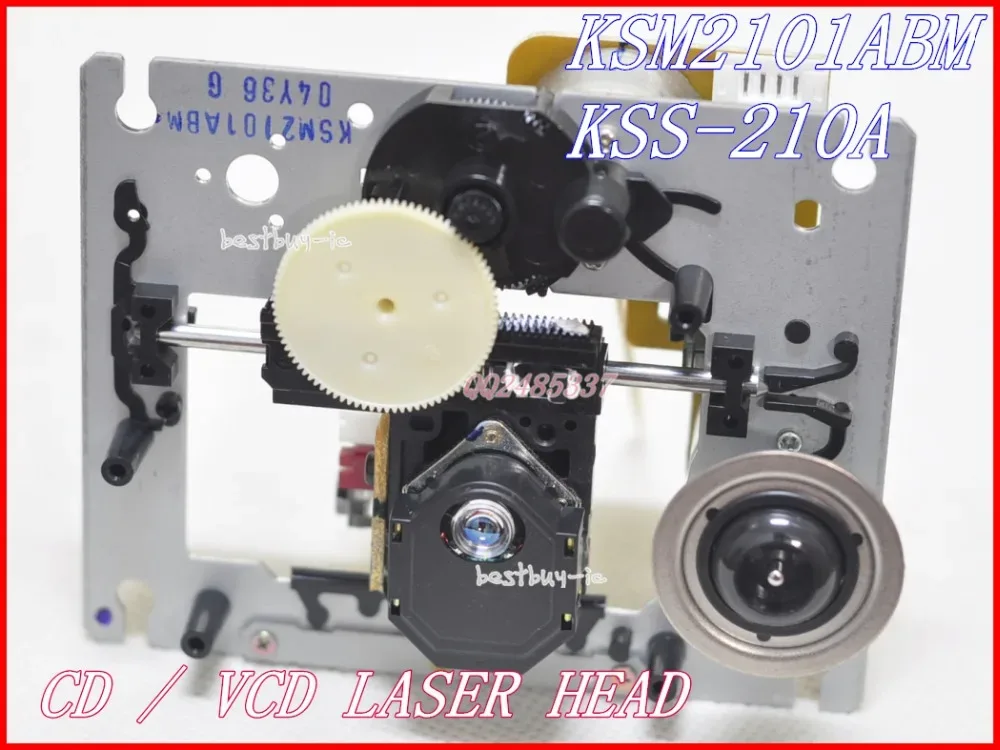
Image source: Bing (Web (fair-use with source credit))
Step-by-Step: Fixing the Most Common DX-C390 Failure
The most common repair is the tray belt and sled motor service. Here's the full walkthrough.
Tools and materials needed:
- Small Phillips head screwdriver
- Tweezers
- Replacement tray belt (measure the old one)
- White lithium grease
- 90% isopropyl alcohol
- Cotton swabs
Step 1: Remove the top cover. Unplug the unit. Remove the screws on the top and sides. Lift the cover off.
Set it aside.
Step 2: Locate the belt and pulleys. The belt is on the left side, near the front. It runs between the motor pulley and the tray gear pulley.
Step 3: Remove the old belt. Use tweezers to lift it off. Clean both pulleys with alcohol.
Step 4: Install the new belt. Loop it over the motor pulley first. Stretch it over the gear pulley. Rotate the gear by hand to seat the belt evenly.
Step 5: Lubricate the sled rails. Find the two metal rails the laser pickup slides on. Wipe them clean. Apply a thin film of white lithium grease.
Move the pickup back and forth to spread it.
Step 6: Test the repair. Plug the unit in. Press the eject button. If the tray opens and closes smoothly, you're done.
Mistakes to Avoid: What Will Make Your DX-C390 Worse
Forcing the tray. If the belt is stuck, pressing eject repeatedly strains the mechanism. Power down and manually rotate the large gear to free the tray.
Using the wrong lubricant. Automotive grease or WD-40 attracts dust and dries into glue. Use a light synthetic grease, applied sparingly.
Adjusting the laser power potentiometer blindly. That tiny screw controls the laser diode's output current. Crank it up and you can burn out the laser. If you must adjust it, measure voltage before and after.
Never increase it by more than ten percent.
Skipping the reset after a repair. The microprocessor stores error states. After reassembly, unplug the unit for 30 seconds. That clears fault flags and forces reinitialization.
Repair vs. Replace: Is It Worth Fixing Today?
On the used market, a working DX-C390 sells for roughly $50 to $100. That sets a practical ceiling for repair costs.
A new belt costs $3. A laser pickup costs $15. Capacitors cost a few dollars.
If the fix needs all three, you could spend $25 in parts. That's worth it if the rest of the unit is clean.
A scratched, yellowed unit with a cracked CD tray doesn't deserve the parts. Be honest about its condition before ordering.
Consider replacement options. A newer single-disc player offers better DACs but loses the six-disc convenience. A used DX-C390 from a seller who tested it can be a better deal than fixing a non-working unit.
One rule of thumb: if the unit has sentimental value, repair it. If it's just another box on a shelf, replace it.
Onkyo DX-C390 Troubleshooting FAQ
Why does my DX-C390 say "No Disc" after cleaning?
The lens may still be dirty, or the laser diode has reached the end of its life. Try a known-good commercial disc. If the unit still fails, inspect the sled rails for hardened grease that stops the pickup from reaching the disc.
Where can I find a repair manual for the Onkyo DX-C390?
Onkyo's official support site hosts service manuals for many legacy models. Third-party vintage audio forums also share scans of the original manufacturer documentation.
Will a standard CD player belt fit in the DX-C390?
Often yes, but not always. Measure the old belt after removing it and compare dimensions. A slightly tighter belt works, but a much tighter one strains the motor.
Buy a belt specifically listed for six-disc Onkyo changers.
How hard is it to replace the laser pickup?
Moderately easy with basic soldering skills. The pickup connects via a flat ribbon cable and a couple of mounting screws. Keep the surface clean and avoid touching the lens.
The hardest part is routing the ribbon cable correctly so it doesn't catch gears during reassembly.
Can I use WD-40 on the tray mechanism?
No. WD-40 is a solvent that evaporates quickly, leaving sticky residue. Use synthetic grease designed for plastic gears.
Why does the unit hum or buzz when powered on?
That humming usually points to failing capacitors in the power supply. Replace the electrolytic capacitors on the main power board.
The tray opens but won't close. What now?
Check the microswitch that detects when the tray is fully open. If it's stuck or broken, the logic never sends the close command. Test it for continuity and replace if needed.
How long should a belt replacement last?
With proper installation and monthly use, a quality replacement belt lasts another ten to fifteen years. Spend the extra dollar for a belt made from nitrile rubber.
Is it worth paying someone to repair the DX-C390?
Probably not. A professional repair shop charges a bench fee of $50 to $100. That meets or exceeds the unit's used market value.
Unless you have an emotional attachment, attempt the repair yourself or replace it.

Similar Posts