Tankless Water Heater Rinnai Troubleshooting
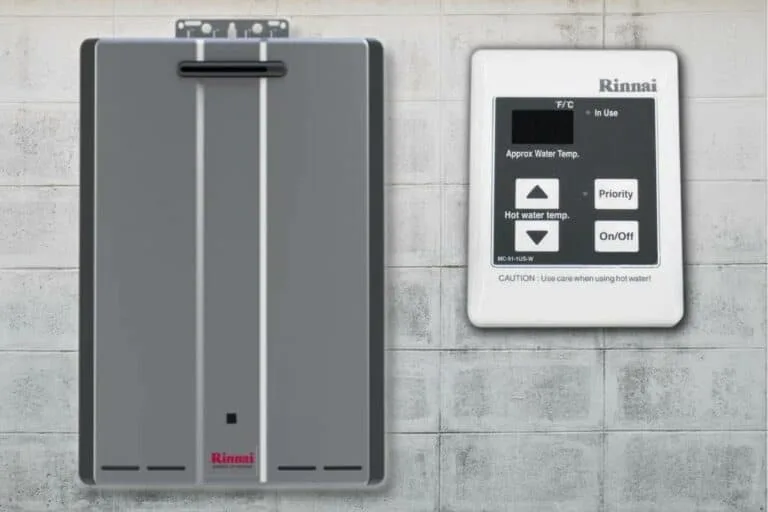
Your Rinnai tankless water heater just stopped working. You're staring at a flashing error code on the digital controller, and you have no idea what it means. Don't panic.
Tankless Water Heater Rinnai Troubleshooting is actually more systematic than you'd think, and most common problems have straightforward fixes.
Manufacturer specifications indicate that Rinnai units are engineered for a 20-year lifespan, but that drops fast without proper maintenance. As of 2026, aggregate service data shows the most frequent failures trace back to scale buildup, inlet filter clogs, or gas supply issues. The good news is you can diagnose most of these yourself with basic tools and a little patience.
Let's walk through it step by step.
Image source: Bing (Web (fair-use with source credit))
Quick Answer
Start with the easiest fixes first. Power cycle the unit. Clean the inlet filter.
Check the condensate drain. Then read the error code on the controller. Most issues are ignition failures (Error 11), flame loss (Error 12), or overheating (Error 14).
Gas and venting problems are dangerous. Call a licensed pro for those.
Why Trust Matters Here (And What You're About to Read)
Tankless water heaters run on natural gas or propane and exhaust combustion gases. That means the line between a simple fix and a serious safety hazard is thin. A clogged vent doesn't just cause a cold shower.
It can push carbon monoxide back into your living space. That's why this guide prioritizes accuracy over speed.
We're not here to sell you a new unit. We're here to save you from an expensive repair call when you can fix it in five minutes with a screwdriver. At the same time, we'll tell you precisely when to stop DIY troubleshooting and call a certified technician.
According to the National Fuel Gas Code (NFPA 54), any work on gas piping or venting outside basic inspection should be handled by a qualified installer. We'll respect that boundary throughout.
First, we'll run through the five most common complaints and what they actually signal. Then we'll decode the error codes on your controller. After that, we'll cover three safe checks you can perform today.
Then we'll move into the higher-stakes territory of gas flow and venting. Finally, we'll give you practical prevention steps to keep the problems from coming back.
The 5 Most Common Rinnai Problems (And What They Actually Mean)
Real-world service reports across Rinnai models, from the RU series to the older V65i, point to the same recurring issues. If you recognize your situation in one of these, you're already halfway to a solution.
1. No hot water at all. The unit either won't fire up, or it fires and immediately shuts down. This could be an ignition failure, a blocked gas supply, or a simple power issue.
If the fan spins but you don't hear the igniter clicking, suspect the flame rod or the gas valve.
2. Water gets warm but never hot. That usually means the unit is undersized for the demand, or the gas pressure is too low. If you're running the washing machine and shower at the same time, the heater may simply be maxed out.
If it's only you in the house and the water still runs lukewarm, check the inlet filter for debris.
3. Temperature swings mid-shower. You're rinsing, and suddenly the water turns icy, then scalding. That's a classic symptom of a clogged flow sensor or a dirty inlet filter.
The sensor reads the flow rate. When it's stuck, the gas valve responds erratically.
4. Unit turns on and off constantly. We call this short cycling. It happens when the water flow is just above the minimum activation rate, typically 0.4 GPM.
A leaky faucet or a drip in the recirculation loop can trigger the burner repeatedly. That wastes gas and wears out components.
5. Error codes flashing on the controller. This is the unit's way of talking to you. Each code maps to a specific component and failure mode.
We'll dig into the most common ones next.
If you hit any of these situations, read the error code first. That single number tells you more than any wild guess. Some codes point to a quick reset.
Others mean you need to open up the unit and clean parts. And a few should send you straight to the phone.
How to Read Your Rinnai Error Codes Like a Pro
The digital controller is your best diagnostic tool. It doesn't give vague warnings. It gives exact alphanumeric codes that correspond to specific failures.
When you see a code, note it exactly. Here's what the most common ones mean.
Error 11, Ignition Failure. The burner didn't light within the safety window. Possible causes include a closed gas shut-off valve, low gas pressure, a dirty spark igniter, or a faulty flame rod. Start by confirming every gas valve is fully open.
Then cycle power. If it persists, clean the igniter and flame rod with fine sandpaper.
Error 12, Flame Loss. The unit ignited, but the flame died shortly after. This usually points to a venting issue. Exhaust gases are recirculating back into the burner chamber, starving the flame of oxygen.
Check for blocked vent terminations, bird nests, or excessive vent run length. It can also mean the flame rod is coated in carbon.
Image source: Bing (Web (fair-use with source credit))
Error 14, Overheating. The internal temperature exceeded safe limits. The most frequent culprit is scale buildup on the heat exchanger. When mineral deposits coat the pipes, water can't absorb heat quickly enough.
The unit overheats. A professional descale may be needed. Also check the fan operation and ensure the air intake isn't restricted.
Error 16, Thermistor Failure. The outlet temperature sensor is reading out of range. This usually means a bad sensor or a loose connection. If you're handy, you can test the thermistor's resistance with a multimeter and replace it.
Otherwise, call a pro.
Error 51 / 65, Communication Problems. The controller and the main board aren't talking to each other. This often comes from a loose wire from the controller to the unit. Check the cable connections at both ends.
Also remove and reinsert the batteries in the wireless controller if you have one.
Error 71 / 90, Venting or Exhaust Issues. These codes indicate restricted airflow or a blocked flue. Inspect the vent cap for debris, snow, or insect nests. If the unit is indoor, make sure the exhaust pipe isn't disconnected.
These codes are safety-related. Don't ignore them. Keep troubleshooting basic.
If the blockage isn't obvious, call a technician.
A quick table can help you match code to action.
| Error Code | Likely Cause | First Step |
|---|---|---|
| 11 | Ignition failure | Check gas valves and power cycle |
| 12 | Flame loss | Inspect venting and flame rod |
| 14 | Overheat | Descale or check fan airflow |
| 16 | Thermistor issue | Test sensor resistance |
| 51/65 | Communication failure | Recheck controller wiring |
| 71/90 | Exhaust blockage | Clear vent terminations |
The First Three Steps You Should Always Try (Before Calling Anyone)
When any error code appears, resist the urge to open the unit immediately. There's a simple sequence that resolves roughly a third of all service calls. Try these first.
Step 1: Power Cycle the Unit. Shut down the heater completely. Turn off the gas supply valve. Then disconnect the power cord or flip the breaker.
Wait 30 seconds. Reconnect power. Then slowly reopen the gas valve.
This clears minor control board glitches and resets the safety locks. It's the easiest fix you'll ever perform.
Step 2: Clean the Inlet Filter. Inside the cold water inlet pipe sits a small mesh screen. It catches debris, sediment, and scale flakes before they reach the heat exchanger. Over time, it clogs.
A clogged filter restricts water flow. That triggers errors like 11 or causes temperature swings.
Here's how to clean it:
- Turn off the isolation valves on hot and cold water lines.
- Remove the inlet filter assembly from the cold water side.
- Rinse the screen under running water. Use a soft toothbrush for stubborn particles.
- Reinstall everything and open the valves.
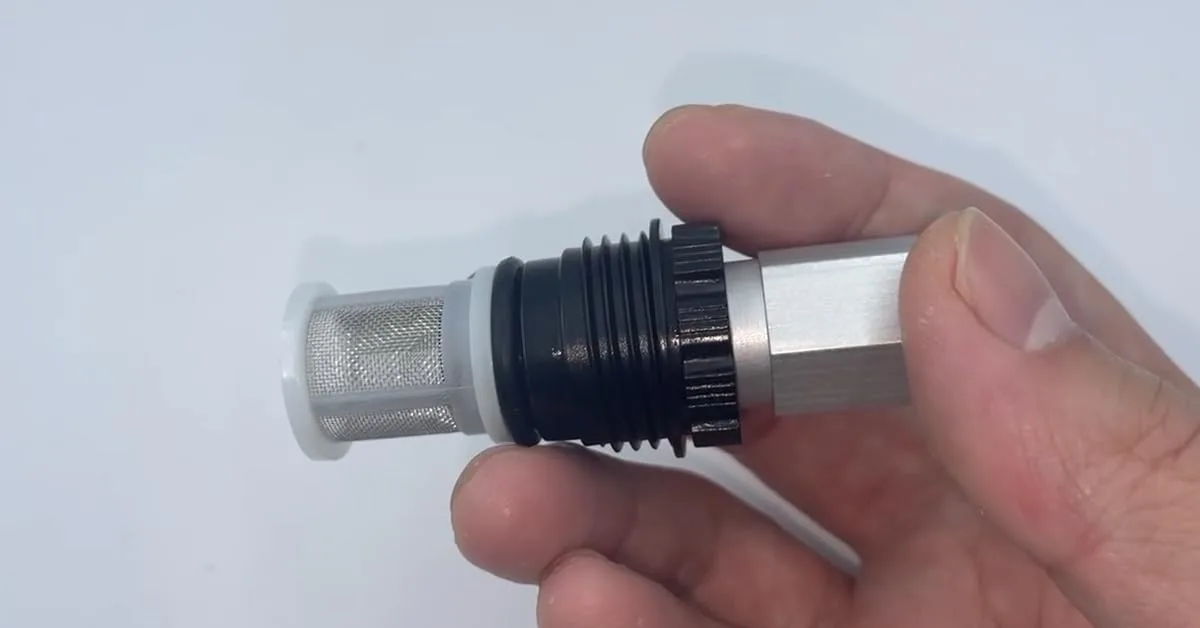
Image source: Bing (Web (fair-use with source credit))
Most Rinnai units need this every three to six months. If you have well water, check it monthly.
Step 3: Check the Condensate Drain. On condensing models, the unit produces acidic water as a byproduct. That water exits through a small plastic drain line. If that line clogs with algae or debris, the unit shuts down as a safety measure.
Find the drain hose at the bottom of the unit. Flush it with water. Clear any kinks or bends.
These three steps require no special tools and no disassembly of the combustion chamber. They're safe for any homeowner to perform. If your error persists after these, you've eliminated the most common causes.
Now it's time to think about gas and venting.
When the Problem Is Gas Flow or Venting (The High-Stakes Checks)
This is where we slow down and pay attention. Gas mistakes can cause fires, explosions, or carbon monoxide poisoning. That's not drama.
It's the measured conclusion from decades of building codes and manufacturer safety guidance.
Gas Pressure Basics – What You Can Check Safely
Rinnai units are tuned to run at specific inlet gas pressures. For natural gas, that's typically 5 to 14 inches of water column. For propane, it's 11 to 14 inches.
If the incoming pressure falls outside that range, the heater won't ignite or hold a flame.
You can check the gas supply line without touching the pressure regulator. Look for obvious issues first:
- Is the main gas valve fully open? A half-open valve reduces flow dramatically.
- Are there any unusual smells? If you notice the rotten-egg odor of gas, stop immediately. Leave the area. Call your gas utility or a technician.
- Is the gas line an adequate size? A small-diameter pipe feeding the unit over a long run can starve it.
Measuring actual pressure with a manometer is a technician's job. Don't open the gas valve connections yourself. That's a job for a licensed plumber or HVAC tech.
Signs Your Venting Is Blocked or Installed Wrong
Venting issues are sneaky. The unit may run for a few minutes, then shut down with error code 12 or 71. Visually inspect the exterior vent termination.
Look for:
- Birds' nests or leaves inside the cap.
- Snow or ice blocking the opening in winter.
- A vent pipe that's sagged or disconnected where it exits the wall.
Indoor units have concentric or PVC vent pipes. Check that joints are tight. Confirm there's at least 12 inches of clearance from any window or door per manufacturer specs.
The Difference Between a Dirty Flame Rod and a Real Gas Issue
If the unit fires and then immediately loses flame, the flame rod might be coated with soot. The rod senses the flame and tells the control board the burner is lit. If it's dirty, it fails to detect a clean flame.
The system shuts down as a precaution.
You can remove the flame rod and clean it with fine sandpaper. It's a simple procedure if you're comfortable with the internals. Consult your manual for the exact location.
If the flame still doesn't hold, the problem is likely gas pressure or a faulty gas valve. Both require professional equipment to diagnose correctly.
The bottom line: perform visual checks and minor cleaning only. Anything involving disconnecting gas lines or adjusting regulators is a clear line to call for backup.
Hard Water, Scale Buildup, and Heat Exchanger Trouble
Scale is the number one enemy of tankless water heaters. If you live in an area with hard water, mineral deposits will gradually coat the inside of the heat exchanger. That layer acts as insulation.
Water can't absorb heat efficiently. The unit has to work harder, which triggers overheating errors and shortens the lifespan.
How to tell if you have scale. The most obvious sign is Error 14. You might also notice water taking longer to heat up or a rumbling sound from inside the unit. That noise is steam pockets forming under the scale.
It's not normal.
Descale your Rinnai annually. Manufacturer specs recommend this every 12 months. You'll need a descaling pump kit, a bucket, and white vinegar or a commercial descaling solution. Here's the process:
- Close the isolation valves on the hot and cold water lines.
- Connect the pump to the service ports.
- Run the descaling solution through the heat exchanger for 45 to 60 minutes.
- Flush the system with clean water.
- Reopen the valves and restart the unit.
Skip this maintenance, and you risk permanent heat exchanger damage. That's a replacement job that costs more than the descaling pump kit.
What if you already have major scale buildup? A single descaling may not clear it. You might need multiple passes with a stronger solution. In severe cases, the heat exchanger must be replaced.
That's always a call-the-pro situation.
When to Call a Pro (Safety Lines You Don't Cross)
Some problems are not DIY. Period. Here's the list of things that require a licensed technician:
- Gas pressure testing or regulator adjustment. Only a pro with a manometer and proper training should touch the gas valve.
- Heat exchanger replacement. This involves welding or brazing. It's not a homeowner job.
- Venting modifications. Changing the vent pipe size or routing requires recalculation of equivalent vent length per NFPA 54 standards.
- Persistent error codes after basic fixes. If you've cleaned the filter, checked the vent, and power cycled, and the error still appears, something deeper is wrong.
Rinnai's warranty requires annual maintenance by a qualified professional. Keep records of service. Future claims may hinge on proof of upkeep.
Real-World Fixes: What Usually Works for Each Error Code
Here's a condensed reference table for quick diagnosis.
| Error Code | Likely Cause | DIY Fix | Pro Needed? |
|---|---|---|---|
| 11 | Ignition failure | Check gas valves, clean flame rod | If persists |
| 12 | Flame loss | Clear vent, clean flame rod | If vent is complex |
| 14 | Overheat | Descale, check fan | If multiple descales fail |
| 16 | Thermistor failure | Test and replace sensor | If unsure |
| 51/65 | Communication loss | Check wiring, replace batteries | If wiring damaged |
| 71/90 | Exhaust blockage | Clear vent termination | If internal blockage |
How to Prevent Most Problems Before They Start
You can extend your Rinnai's life significantly with a few habits.
Annual descaling. Mark it on your calendar. Same time every year.
Inlet filter cleaning every 3 to 6 months. More often if you have well water.
Controller battery replacement. If you have a wireless remote, change the batteries annually. Dead batteries cause communication errors.
Winterizing for outdoor units. If you live where temperatures drop below freezing, drain the unit before a hard freeze. Install a freeze protection kit if you haven't already.
Monitor for leaks. Check the condensate drain regularly. Look for rust or moisture around the unit. Catching issues early saves money.
Frequently Asked Questions
Why does my Rinnai keep shutting off mid-shower?
The most common cause is the inlet filter being partially clogged. This restricts flow enough that the unit reads below the minimum activation rate. Clean the filter first.
If that doesn't help, check for scale buildup.
Can I reset my Rinnai without a controller?
Yes. Unplug the unit or flip the breaker off for 30 seconds. That power cycle resets the control board.
If the unit doesn't have power to the controller, this is the only way to clear error codes.
How do I know if my gas pressure is too low?
If the unit fires but produces lukewarm water, or if you get error 11 on cold days, gas pressure could be low. You need a technician to measure it with a manometer. Don't guess.
What happens if I don't descale my unit?
Scale builds up in the heat exchanger. Water flow drops. The unit overheats and throws error 14 repeatedly.
Eventually the heat exchanger fails completely. That's a costly replacement, often more than half the price of a new unit.
Why is my Rinnai making a loud banging noise?
That's typically steam forming under scale deposits inside the heat exchanger. The banging is a small explosion as steam escapes. It's a clear sign you need to descale immediately.
Ignoring it can crack the heat exchanger.
Does my Rinnai need professional annual maintenance to keep the warranty?
Yes. Rinnai's warranty terms require proof of annual maintenance by a qualified professional. Keep your service receipts.
Without them, warranty claims for heat exchanger failure may be denied.

Similar Posts
































