Terra Cell Camera Troubleshooting
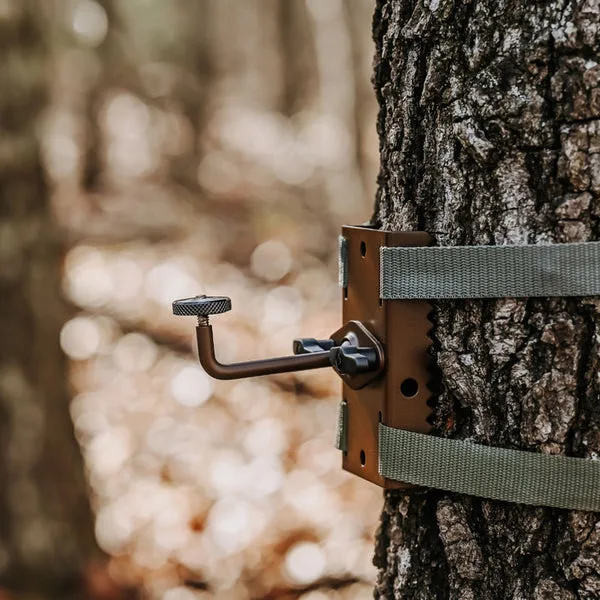
Your Terra Cell camera went dark, and the app says "offline" while the SD card fills with photos nobody can see. Terra Cell Camera Troubleshooting doesn't have to be guesswork once you understand how the device talks to the network. Most issues follow one of a few repeatable patterns, and each pattern has a clear fix path.
As of 2026, the Terra Cell line relies on LTE connectivity and three variables working together: power, signal, and an active data plan. When any one of those fails, the symptoms can look identical. That's why the right fix starts with the right diagnosis, not a factory reset.
Image source: Bing (Web (fair-use with source credit))
Start Here: Match Your Symptom to the Right Fix
If your Browning Terra Cell camera is acting up, eliminate the obvious stuff before diving into settings. Check that the battery compartment is clean, the SD card is formatted, and the power switch is on. That sounds basic, but it resolves a surprising number of support cases.
Cellular cameras are chain machines. The camera needs power, the radio needs a signal, the SIM needs an active plan, and the app needs to sync with the cloud. Break any link and you get symptoms that look identical to a dead camera.
So before you call it a hardware failure, work the chain.
Match your symptom to the right branch:
| If you see… | Likely root cause | Jump to |
|---|---|---|
| "Offline" in the app, no connection | Power, SIM, or signal | Branch 1 |
| Photos on SD card but not in app | Data plan or upload path | Branch 2 |
| No triggers, or blank frames | Batteries, sensor, settings | Branch 3 |
| Rapid battery drain | Cold temps, retry loops, settings | Branch 4 |
Here's the golden rule once you pick your path: change one variable at a time. Adjust a setting, test, then move on. If you tweak three things at once, you won't know which one solved it, or which one made things worse.
Keep a few tools nearby before you start. A multimeter, a spare set of lithium AA batteries, a freshly formatted SD card, and your phone with the Browning app installed. That's the whole toolkit.
You won't need all of it every time, but it beats walking back and forth to the truck.
One more thing before you begin. Power cycle the camera. Turn it off, pull the batteries for 30 seconds, reinstall them, and power back on.
This clears the internal radio's connection state and resets the network stack. It's the cheapest fix in the book, and it works more often than you'd think.
How the Terra Cell Camera Communicates (and Where It Fails)
Before you can fix a Terra Cell that won't connect, you need to understand what happens after the shutter clicks. The camera captures a photo, compresses it, then uses its built-in LTE modem to upload it to the carrier network. From there, the carrier routes the data to Browning's cloud servers, and the Browning app pulls it to your phone.
Four links in that chain can fail: power, signal, SIM, and plan. Let's look at each one.
Signal strength is the bottleneck most of the time. The Terra Cell needs a usable LTE signal at the camera's physical location, not where you park your truck. Walls, hills, and heavy timber all eat signal. Open the app and check the signal indicator.
Anything at or below -105 dBm means borderline or failed uploads. Mount the camera higher, clear the view toward the nearest tower, or move it a few feet. Sometimes a few feet makes the difference between two bars and zero.
The SIM card matters too. The Terra Cell ships with a pre-installed SIM tied to the Browning plan you activate. If you swap in a SIM from another carrier, make sure the camera supports that carrier's LTE bands, and you may need to adjust the APN settings in the camera's menu. Wrong APN?
The camera will show signal bars but never actually connect. Browning publishes the supported LTE bands in the manual for your specific Terra Cell model. If your chosen network doesn't match those bands, no amount of repositioning will help.
Your data plan must be active and current. It sounds obvious, but monthly plans expire. When they do, the camera goes silent. Log into your Browning account and confirm your plan status before you start moving cameras around the woods.
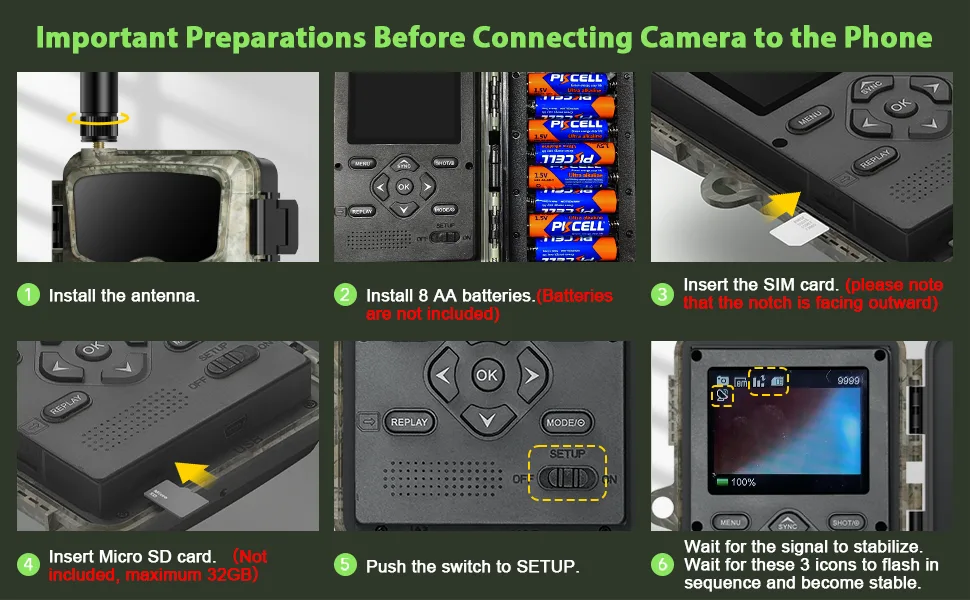
Image source: Bing (Web (fair-use with source credit))
Symptom Branch 1: Camera Shows "Offline" or Won't Connect in the App
If your camera shows "offline" in the Browning app, the device itself isn't reaching the network. Work through these steps in order. Don't skip ahead, because each step eliminates a whole category of causes.
Step 1: Verify power and SIM status. Open the camera and confirm the batteries have enough juice. Use a multimeter if you have one. Anything below 1.2 volts per cell under load means the radio can't transmit reliably.
Next, check the SIM card. Is it fully seated in its slot? Does the gold contact look clean?
A loose or dirty SIM causes intermittent "offline" status that comes and goes.
Step 2: Check signal strength at the camera location. Power the camera on and check the status screen for the signal indicator. If you see full bars, the camera can talk to the tower, so the problem is on the software side. If you see one bar or none, the camera's location is the problem.
Move it or mount it higher, then retest.
Step 3: Re-pair the camera with the Browning app. Sometimes the camera is fine but the app connection is stale. In the app, remove the camera from your account, then add it again using the QR code on the camera's back panel. Re-pairing forces a fresh handshake between the camera, the cloud, and the app.
This clears many sync errors.
Step 4: Factory reset as a last resort. If nothing else works, reset the camera to factory defaults. The exact method varies by Terra Cell model, but it usually involves holding the reset button for ten seconds with the power on. This wipes all settings, so only do it after you've exhausted the easier steps.
Symptom Branch 2: Photos Not Uploading to the Cloud
This one is frustrating. The camera takes photos fine, you can see them on the SD card, but nothing reaches the app. The problem is in the upload path, not the capture path.
Step 1: Confirm your data plan is active. Log into your Browning account and check your plan's status and remaining photo credits. When a plan runs out of credits, the camera keeps working but stops sending photos. It's not broken.
It's out of quota. Many people skip this step and buy new hardware for nothing.
Step 2: Check SD card health and formatting. The Terra Cell stores photos on the SD card before uploading them. If the card is full, corrupted, or formatted incorrectly, the camera can't queue the images for transmission. Use a Class 10 card, 32GB or larger, and format it inside the camera, not in a computer.
A card that works in your laptop may still fail in the camera because the file system is different.
Step 3: Look at file size versus upload speed. Large video files take a long time to upload on a weak signal. A 1080p clip can be 100MB or more, and at 3 Mbps, that's five minutes of constant transmission. During that time, the camera usually stops triggering.
If you're shooting long videos in a low-signal area, the camera might spend more time uploading than watching for game. Drop the video length or resolution for faster delivery.
Step 4: Test the upload path with a manual photo. Walk in front of the camera and force a trigger. Then watch the app. A single photo should appear within 60 to 90 seconds on a healthy connection.
If it doesn't, look at the signal strength reading again. Manual tests confirm whether the problem is the camera or the network.
Symptom Branch 3: Camera Not Triggering or Taking Blank Photos
A camera that doesn't trigger at all is usually one that isn't detecting motion. A camera that triggers but returns blank photos is usually dealing with a power issue or a misaimed sensor. Here's how to sort them out.
Step 1: Check battery voltage, not just battery bars. The on-screen battery indicator lies. It measures resting voltage, not real capacity under load. A camera with weak batteries can look half full on the status screen but fail to trigger because the sensor needs a clean voltage spike to fire.
Use a multimeter and check each cell. Replace anything below 1.25 volts for lithium batteries or below 1.3 volts for alkaline. Fresh batteries fix a huge percentage of "no trigger" complaints.
Step 2: Inspect motion sensor placement. The sensor detects heat moving across its field of view. If the camera faces a hot object, a road, or direct sunlight, the sensor gets confused. It either triggers constantly, which drains batteries and floods the SD card, or it becomes desensitized and stops triggering altogether.
Reposition the camera so the sensor sees open ground, not a heat source. Aim it slightly downhill if you're on a slope.
Step 3: Confirm mode settings. This is where "blank photo" complaints usually come from. If the camera is set to a super-fast burst mode or an extremely short trigger interval, it may fire before the animal is actually in frame. Likewise, if the trigger delay is set to zero and the recovery time is long, the camera can miss the action entirely.
Start with a medium trigger delay, around 5 seconds, and a single photo per trigger. Test, then adjust.
Step 4: Clean the lens and IR sensor. Dirt, spider webs, and condensation all reduce sensitivity. You'll see it as blurry or all-white frames. Wipe the lens with a microfiber cloth and check the IR sensor window for frost or grime.
Symptom Branch 4: Battery Draining Too Fast
A Terra Cell that eats through batteries in a week is usually stuck in a retry loop or fighting cold weather. The fix starts with understanding what drains them fastest.
Step 1: Know your battery chemistry. Alkaline batteries lose capacity fast in cold temperatures. Below 32°F, they deliver maybe half their rated power. Lithium AA batteries hold voltage much better in the cold and last three to four times longer.
Switching from alkaline to lithium is the single biggest battery life improvement you can make.
Step 2: Check for firmware or network retry loops. When the camera can't reach the tower, it keeps trying. Each retry burns significant power because the LTE radio draws current during transmission. If the camera has a weak signal, it may try to send every photo five or ten times before giving up.
That drains batteries in days. Check the signal strength indicator. If it's one bar or less, the retry loop is almost certainly the culprit.
Move the camera or use an external antenna if available.
Step 3: Reduce transmission frequency. Every photo upload consumes power. If you have it set to send every single photo immediately, change to a scheduled upload interval. Set it to transmit once every six hours or once per day.
This batch uploads all photos in one burst, then the radio goes to sleep. The radio uses more power during the transmission window, but it's off the rest of the time. That's a huge win for battery life.
Step 4: Use an external battery pack for cold climates. The built-in 8 AA holder can't keep up when temperatures stay below freezing for days. An external 6-volt or 12-volt battery pack connected via the camera's auxiliary power port keeps the radio fed. Many users pair a small sealed lead-acid battery with a solar panel.
That combo runs all winter without a visit.
What about rechargeable NiMH batteries? Manufacturer specs don't recommend them. They output 1.2 volts per cell instead of 1.5 volts. The radio needs clean voltage to transmit.
NiMH cells often trigger low-voltage cutoffs prematurely. Stick with lithium primary cells for reliability.
Common Setup Mistakes That Mimic Real Issues
Sometimes the camera isn't broken at all. It was set up wrong from the start. Here are the most common errors that send people down a needless troubleshooting rabbit hole.
Wrong SD card class or capacity. The Terra Cell needs a Class 10 SDHC or SDXC card. A slower Class 4 card can't write fast enough to keep up with the camera's capture and upload cycle. The camera may appear to hang or miss triggers.
Also, cards over 256GB may not be recognized. Format the card in the camera, not in a computer. That ensures the correct file allocation table.
Camera facing the sun or heat sources. Direct sunlight hits the motion sensor and causes constant false triggers. That floods the memory card and drains batteries. Any heat source like a metal shed or road will do the same.
Mount the camera facing north or east to avoid sunrise and sunset directly in the sensor's view.
Mounted too high or too low. The ideal height is about three to four feet off the ground, angled slightly downward. Higher than six feet and the detection zone shrinks dramatically. Lower than two feet and the sensor gets blocked by grass and terrain.
Height errors account for a large percentage of "no trigger" complaints.
Ignoring local hunting regulations for cellular cameras. Some states restrict cell cameras on public land during certain seasons. Others require your name and address on the camera. Check your state's wildlife agency website before mounting.
A ticket for an illegal setup is worse than any technical problem.
Forgetting to activate the cellular plan. This happens more often than you'd think. Unboxing the camera, inserting batteries, and turning it on doesn't make it work. You must activate the plan online and pair the camera to your account.
Without that step, the camera takes photos but never sends them.
Firmware Updates: When, Why, and How to Avoid Problems
Firmware updates fix bugs, improve signal handling, and add new features. But a botched update can brick your camera for days. Here's how to do it right.
Check your current firmware version. Open the Browning app and navigate to the camera's settings screen. The firmware version appears there. Compare it to the latest version listed on Browning's support page.
If they match, you're done.
The safe update workflow uses an SD card. Download the firmware file from Browning's official support site and save it to your computer. Copy the file onto a freshly formatted SD card. Insert the card into the camera.
Power the camera on. The camera detects the file and begins updating. Do not power off the camera during this process.
Wait for the status screen to confirm completion.
What to do if an update fails. If the camera stops responding during an update, remove the batteries for 30 seconds. Reinsert them. If the camera boots, try the update again with a different SD card.
If it doesn't boot, you may need to force a firmware recovery. Browning support provides specific recovery steps for each model. Contact them rather than guessing.
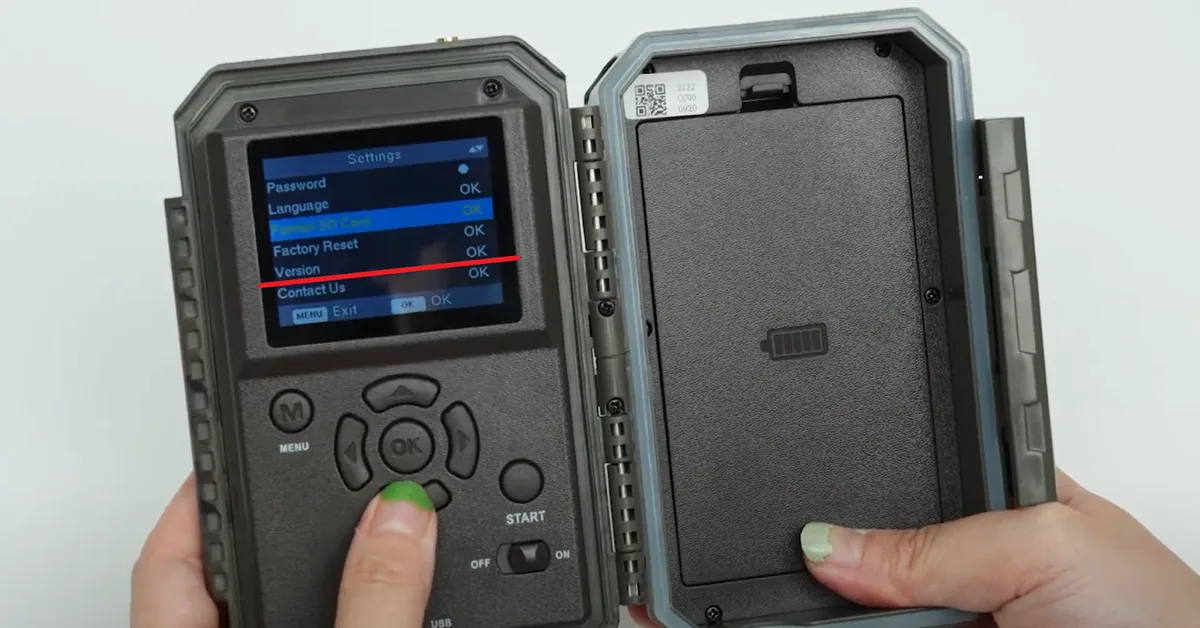
Image source: Bing (Web (fair-use with source credit))
When should you skip an update? If the camera is working perfectly and the update notes don't fix any issue you have, leave it alone. The old saying applies. If it's not broken, don't fix it.
Only update when you need a specific fix or when Browning issues a critical security patch.
The 60-Second Decision Guide: Walk Through Your Issue Fast
This table maps your symptom to the most likely fix. Read across and try the first action. If it doesn't work, move down the list.
| Symptom | Likely cause | First action | Second action |
|---|---|---|---|
| Camera shows "offline" in app | Power or signal | Power cycle camera | Check signal at camera location |
| Photos on SD card but not in app | Data plan expired or SIM issue | Log in and check plan status | Re-seat SIM card |
| Camera not triggering | Weak batteries or sensor misalignment | Replace with fresh lithium batteries | Check sensor height and direction |
| Battery draining in days | Cold weather or retry loop | Switch to lithium batteries | Reduce transmission frequency |
| Blank photos | Trigger delay too short or dirty lens | Clean lens and IR sensor | Reset trigger delay to 5 seconds |
| App says "camera not responding" | Pairing is stale | Remove camera from app and re-add | Factory reset as last resort |
When to contact Browning support. If you've tried everything in the sections above and the camera still doesn't work, reach out to Browning customer service. Have your model number, serial number, and a description of what you've tried ready. They can run a diagnostic on the camera's connection logs.
Frequently Asked Questions
Do I need a cellular plan for the Terra Cell camera to work?
Yes. The camera cannot send photos without an active data plan. It will still take photos and store them on the SD card, but the videos and images won't reach your phone.
You activate the plan through the Browning app or website.
Can I use any SIM card in the camera?
It depends. The camera is locked to the Browning carrier, usually Verizon or AT&T depending on the model. You cannot simply swap in a generic SIM from another carrier.
If you want to change carriers, you need to request an unlock from Browning support.
Why is my camera only sending photos at night?
That usually means the camera is located in a position where daytime heat triggers false alarms. The sensor may be desensitized by constant triggers. Reposition the camera away from direct sunlight and heat sources.
Also check that the photo schedule isn't set to daytime only.
How do I know if my SD card is compatible?
Use a Class 10 SDHC or SDXC card between 16GB and 256GB. Format it inside the camera, not in your computer. Cards that work in a DSLR or dash cam may still fail in the Terra Cell.
Test with a known good card first.
Does cold weather make the Terra Cell camera stop transmitting?
Cold weather reduces battery capacity, which can cause the camera to lose connection. Lithium batteries hold up much better than alkaline. Also, snow buildup on the sensor can block motion detection.
Clear snow from the lens and sensor window after heavy storms.

Similar Posts