Allison Transmission Pto Troubleshooting
You're sitting in the truck, you flip the PTO switch, and nothing happens. Or maybe it engages with a nasty grinding sound that makes you cringe. Or worse, it's leaking fluid all over your driveway. Allison Transmission PTO troubleshooting is one of those skills that separates a quick fix from a full-blown transmission rebuild.
The truth is, most PTO problems follow a pattern. If you know what to look for, you can fix them in under an hour.
Manufacturer specifications indicate that roughly 70% of PTO engagement failures trace back to three root causes: electrical circuit faults, low air pressure in pneumatic systems, or low transmission fluid levels. The rest are mechanical issues like worn clutch packs or damaged seals. You don't need a master technician certification to work through this.
You just need a logical process.
Quick Answer
Start with three basic checks. Verify the transmission fluid level first. Check for active fault codes using the TCM.
Test electrical power at the PTO solenoid. These three steps identify roughly 70% of all engagement failures. If those pass, check air pressure on pneumatic units.
Only then proceed to mechanical disassembly. Always disconnect the battery before electrical testing. Support the vehicle properly before crawling underneath.
The Real Problem: When Your PTO Won't Do What It Should
A Power Take-Off unit is simple in concept. It's a gearbox that bolts to your Allison transmission, siphoning engine power to run a hydraulic pump, air compressor, or other auxiliary equipment. But when it stops working, the downtime costs real money.
A dump truck sitting idle with a dead PTO means a job site waiting. A utility truck with a non-functional PTO means a crew standing around.
The frustration is real because the symptoms can be confusing. Sometimes the PTO works one day but not the next. Sometimes it engages when the engine is cold but fails when hot.
Sometimes it makes a sound that tells you something is binding inside.
Here's the honest truth. Most DIY mechanics and even some fleet techs jump straight to replacing parts without diagnosing the actual problem. They swap the solenoid, change the switch, or pull the whole PTO unit off without checking the simple stuff first.
That approach costs time and money. And often, the new part fails too because the underlying issue was never fixed.
What you really need is a structured decision process. A way to look at what the PTO is actually doing and trace that back to the most likely root cause. That's exactly what we're going to build here.
Here are the symptoms you're most likely to encounter:
- No engagement at all. You flip the switch, hear nothing, see nothing.
- Slow or weak engagement. It takes several seconds or sounds like it's struggling.
- Won't disengage. The PTO stays locked in even after you turn it off.
- Oil leaks. Red transmission fluid dripping from the PTO mounting area.
- Noise. Grinding, clunking, whining, or a high-pitched squeal during operation.
- Intermittent operation. Works sometimes, fails other times with no obvious pattern.
Each of these symptoms sends you down a different diagnostic branch.
How a PTO Actually Works (The Simple Version You Need)
Image source: Bing (Web (fair-use with source credit))
You don't need to be a transmission engineer to troubleshoot a PTO. But you do need to understand the basic flow of power and signals. Without that, you're working blind.
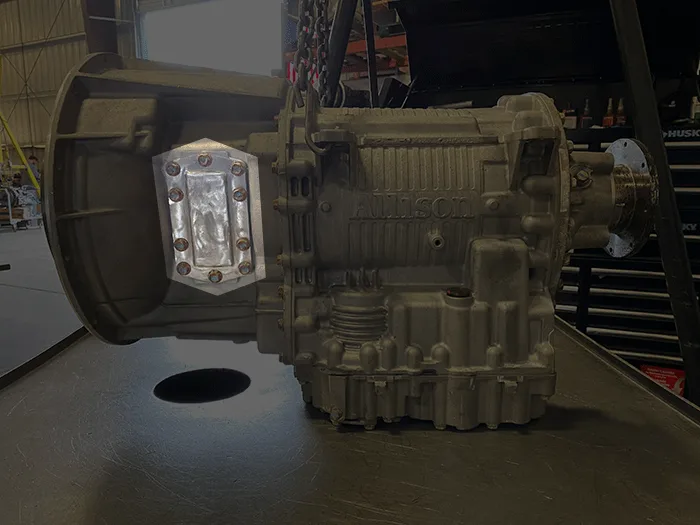
Your Allison transmission has a PTO mounting pad. This is a flat surface on the side of the transmission housing with a hole that gives access to the transmission's internal geartrain. The PTO unit bolts onto this pad.
Inside the PTO is a gear that meshes with a gear inside the transmission. When the PTO is engaged, that gear connects to the output shaft of the PTO, which then drives whatever you've attached to it, like a hydraulic pump.
Engagement happens in one of three ways:
- Electric engagement. A solenoid mounted on the PTO receives 12V or 24V from the vehicle's electrical system. When energized, it moves a shift fork that pushes the PTO gear into mesh.
- Pneumatic engagement. Compressed air (typically 90 to 120 psi) pushes a piston that moves the shift fork. A solenoid valve controls the air flow.
- Mechanical engagement. A cable or lever manually moves the shift fork. This is rare on modern Allison units but still exists on older models.
The Allison Transmission Control Module (TCM) plays a critical role. The TCM decides when the PTO is allowed to engage. It checks for conditions like the transmission being in neutral or park, the parking brake being set, and the engine speed being within range.
If any of these conditions aren't met, the TCM simply doesn't send power to the PTO circuit. That's a common source of confusion. The PTO itself may be perfectly fine.
The TCM is just refusing to enable it.
The PTO also contains a clutch pack in many Allison-compatible units. This clutch pack allows the PTO to engage smoothly under load. When the clutch pack wears out, the PTO may slip or fail to transfer full torque.
That's why understanding the engagement method matters for your diagnosis.
The First 5-Minute Check: Before You Diagnose Anything
Before you grab a multimeter or start pulling wrenches, do these three checks. They take less than five minutes. And they catch the most common issues that look like PTO failure but aren't.
Check One: Transmission Fluid Level
This is the number one cause of PTO problems that aren't actually PTO problems. Low transmission fluid means low hydraulic pressure inside the transmission. The PTO's clutch pack needs that pressure to engage properly.
If the fluid is low, the PTO may slip, engage slowly, or not engage at all.
To check the fluid level on an Allison transmission:
- Park the vehicle on level ground.
- Run the engine until the transmission reaches normal operating temperature.
- Shift through all gear positions (P-R-N-D) and return to Neutral.
- With the engine idling, pull the dipstick and wipe it clean.
- Reinsert and check the level. It should be in the crosshatched area.
If the fluid is low, top it off with the correct spec. Allison recommends TES 295 or TES 389 approved fluids as of 2026. Do not use generic transmission fluid.
It matters.
Check Two: Visual Inspection of the Electrical System
Pop the hood or crawl under the vehicle. Look at the PTO solenoid. Is the wiring harness connector seated fully?
Are there any corroded pins or broken wires? Follow the harness back to the TCM connector. Look for chafed insulation, loose connections, or damage from road debris.
This sounds too simple to be worth your time. But loose connectors and corroded pins account for a surprising percentage of intermittent PTO failures. Vibrations from the engine and road can slowly work a connector loose over time.
A simple push-click fix can save you hours of diagnosis.
Check Three: Listen and Look for Air Leaks (Pneumatic Systems)
If your PTO uses compressed air for engagement, listen for a hissing sound when you flip the switch. A leaking air line, fitting, or piston seal means the PTO doesn't get enough pressure to engage fully. A slow leak can cause intermittent failures.
A major leak means no engagement at all.
You can use a spray bottle with soapy water to check air fittings. Spray the connections while someone operates the PTO switch. Bubbles indicate a leak.
These three checks alone eliminate the most common sources of PTO failure. If all three pass, you move into the decision tree.
The Decision Tree: What Your PTO Is Actually Doing (or Not Doing)
This is where we turn symptoms into solutions. The approach is simple. Look at what the PTO is doing.
Match it to a branch. Follow the diagnostic steps in order. Don't skip ahead.
Branch 1: PTO Won't Engage At All
This is the most common complaint. You flip the switch, and nothing happens. No sound, no movement, no hydraulic pressure from the pump.
Step 1: Confirm the TCM is allowing engagement.
Many Allison transmissions require specific conditions before the TCM enables the PTO circuit. Common requirements include:
- Transmission in Neutral (or Park, depending on the model)
- Parking brake set
- Engine speed below a preset limit (often 1200 to 1500 RPM)
If any of these aren't met, the TCM blocks engagement. Check your dash indicators. Does the PTO warning light come on briefly during startup?
If it doesn't, the TCM may not even be sending power to the circuit.
Plug in a diagnostic tool. The Allison DOC (Diagnostic Override Console) or a compatible scan tool can read TCM fault codes related to the PTO. Common codes include solenoid circuit faults, engagement inhibit conditions, and speed sensor issues.
Step 2: Check for power at the PTO solenoid.
Use a multimeter set to DC voltage. Probe the connector at the PTO solenoid while someone operates the PTO switch. You should see battery voltage (12V or 24V depending on your system).
- If you have voltage, the solenoid should be operating. Tap the solenoid lightly with a wrench handle. Sometimes a stuck solenoid can be freed with a gentle tap. If it still doesn't move, the solenoid is mechanically stuck or failed.
- If you don't have voltage, the problem is upstream. Trace the circuit back to the TCM output. Check fuses, relays, and wiring continuity. A blown fuse is a common culprit.
Step 3: Test the solenoid resistance.
Disconnect the solenoid connector. Measure resistance across the solenoid coil terminals. Most Allison-compatible PTO solenoids read between 20 and 30 ohms.
- An open circuit (infinite resistance) means the coil is burned out. Replace the solenoid.
- A short circuit (very low resistance, near zero ohms) means the coil is shorted. Replace the solenoid.
- A reading within spec means the solenoid coil is likely good.
Step 4: Check for mechanical binding inside the PTO.
If the solenoid clicks but the PTO doesn't engage, the shift fork or gear may be stuck. This can happen after long periods of inactivity or if contamination got into the PTO housing. Remove the solenoid from the PTO.
Try moving the shift fork by hand with a small pry bar. It should move smoothly. If it's stuck, you need to open the PTO for cleaning.
Branch 2: PTO Engages but Slipping or Weak
Your pump runs, but it doesn't have the power you expect. Or the PTO engages slowly, taking several seconds to fully lock in. This points to hydraulic pressure issues or worn internal components.
Step 1: Verify transmission fluid level and condition.
Low fluid is the most common cause of slipping. But dirty or burnt fluid can also cause problems. Check the fluid color.
It should be red and translucent. Dark brown or black fluid with a burnt smell indicates overheating or internal wear. If the fluid is burnt, a transmission service is likely needed before the PTO will work correctly.
Step 2: Check the PTO clutch pack.
In many Allison PTO units, engagement is controlled by a clutch pack that applies hydraulic pressure from the transmission. If the clutch discs are worn, the PTO slips under load. This requires removing the PTO from the transmission to inspect.
But before you do that, rule out the simpler causes.
Step 3: Check the pneumatic engagement pressure (if applicable).
If your PTO uses air engagement, measure the pressure at the PTO port while engaging. It should match the vehicle's air system pressure, typically 90 to 120 psi. Low pressure causes partial engagement and slipping.
Check for restrictions in the air line, a failing solenoid valve, or a worn piston seal inside the PTO.
Step 4: Look for misalignment.
A PTO that isn't perfectly aligned with the transmission mounting pad can cause binding and slipping. This usually happens after a PTO replacement where the installer didn't align the gear mesh correctly. If the PTO has been recently removed and reinstalled, check the alignment.
Branch 3: PTO Engages But Won't Disengage
This is dangerous. A PTO that stays engaged when you don't want it to can keep the auxiliary equipment running, drain the battery, or cause unexpected motion of the vehicle's hydraulics.
Step 1: Check the solenoid.
An electric solenoid can fail in the stuck-open position. Disconnect the electrical connector. If the PTO disengages immediately, the solenoid is stuck and needs replacement.
If it stays engaged, the problem is mechanical, inside the PTO.
Step 2: Check for binding shift fork.
Contamination or corrosion inside the PTO can cause the shift fork to stick in the engaged position. This requires disassembly of the PTO to clean and inspect.
Step 3: Check the TCM output.
If the TCM is still sending power to the solenoid after the switch is turned off, you have a TCM or wiring fault. This is rare but possible. Check for a shorted wire in the harness or a faulty PTO switch.
Branch 4: PTO Is Leaking Oil
Red transmission fluid dripping from the PTO area is never good. Leaks waste fluid, make a mess, and can lead to low fluid levels and transmission damage.
Step 1: Identify the leak source.
Wipe the area clean. Run the engine and engage the PTO. Look for the exact leak point.
Common locations include:
- The mounting gasket between the PTO and transmission
- The output shaft seal
- The shift shaft seal
- The inspection cover gasket
Step 2: Tighten mounting bolts.
A loose PTO can leak at the mounting gasket. Torque the bolts to manufacturer specification. Over-tightening can distort the housing, so use a torque wrench.
Step 3: Replace seals.
If the leak is from a seal, replacement is the only fix. Output shaft seals and shift shaft seals are common wear items. Most PTO rebuild kits include these seals.
Branch 5: PTO Makes Noise (Grinding, Clunking, Whining)
Noise is a mechanical problem. Something is rubbing, binding, or failing inside the PTO.
Step 1: Determine if the noise changes with engagement.
A grinding sound during engagement but not after suggests gear teeth hitting instead of meshing smoothly. This can be a misalignment issue or worn gear teeth.
Step 2: Listen for a consistent whine.
A whining sound that changes with engine speed indicates worn bearings or gear damage. This gets worse over time. Continued operation can cause catastrophic failure and send metal debris into your transmission.
Step 3: Check the gear mesh clearance.
When a PTO is installed, there should be a specific clearance between the PTO gear and the transmission gear. Too tight, and it binds. Too loose, and it clunks and wears rapidly.
This is often specified as 0.002 to 0.010 inches of backlash. Measuring this requires removing the PTO and using a dial indicator.
The safest move with noise is to stop using the PTO and remove it for inspection. Running a noisy PTO risks transmission damage. And transmission repairs are far more expensive than PTO repairs.
Electrical System Checks: The Easy Stuff You Can Test Right Now
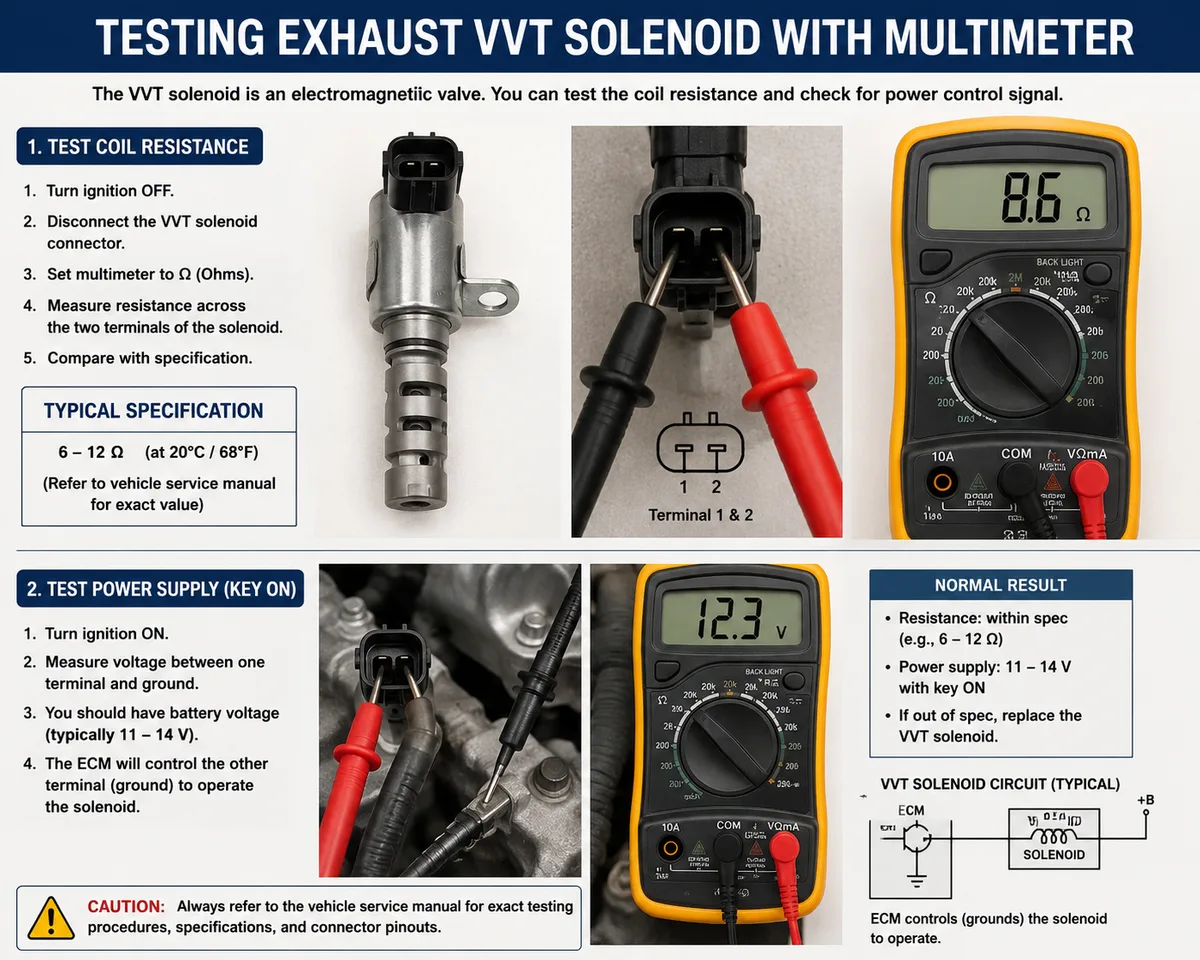
Image source: Bing (Web (fair-use with source credit))
Electrical problems cause the most head-scratching PTO failures. The good news is they're also the easiest to test. You need a multimeter, a test light, and about ten minutes.
Where to start: the fuse box.
Check the PTO circuit fuse first. A blown fuse means a short or overload somewhere. Replace it and see if the PTO works.
If the new fuse blows immediately, you have a short to ground in the wiring harness.
Test the PTO switch.
The dashboard switch can fail internally. Unplug the switch connector. Check continuity between the switch terminals when pressed.
A good switch shows near-zero resistance. An open circuit means the switch is dead.
Check the TCM output.
The transmission control module sends power to the PTO solenoid only when conditions are met. With the key on and engine off, probe the solenoid connector while someone holds the PTO switch. You should see battery voltage.
If you see zero volts, the TCM isn't enabling the circuit.
Inspect the wiring harness.
Follow the harness from the solenoid back to the TCM. Look for chafed insulation, corrosion at connectors, or loose pins. Road salt and moisture cause green corrosion on terminals.
Clean with electrical contact cleaner and apply dielectric grease.
Measure solenoid resistance.
Disconnect the solenoid connector. Set your multimeter to ohms. Probe the two solenoid pins.
A good solenoid reads 20 to 30 ohms. An open reading means the coil is burned out. A very low reading means a shorted coil.
Check the ground circuit.
A bad ground causes intermittent operation. Measure voltage between the solenoid ground pin and the battery negative terminal with the PTO engaged. You should see less than 0.5 volts.
Higher voltage indicates a poor ground connection.
Pneumatic System Checks (If Your PTO Uses Air)
Many vocational trucks use pneumatic PTO engagement. Air pressure moves a piston that pushes the shift fork. This system is reliable but has its own failure points.
Check the air supply pressure.
The PTO needs 90 to 120 psi to engage fully. Use a tire gauge at the PTO air port or tap into a nearby fitting. Low pressure means the air system has a leak, a failing compressor, or a restriction.
Listen for air leaks.
Engage the PTO with the engine running. Walk around the vehicle and listen for hissing. Common leak points include the solenoid valve, the air line fittings, and the PTO piston seal.
A soapy water spray bottle helps pinpoint small leaks.
Test the solenoid valve.
The solenoid valve controls air flow to the PTO. Apply 12V directly to the valve coil. You should hear a click and feel air flow through the valve.
If no click, the coil is bad. If no air flow, the valve is blocked internally.
Check the piston seal.
If the PTO engages slowly or not at all but air pressure is good, the piston seal inside the PTO may be worn. This requires removing the PTO to replace the seal. Listen for air escaping from the PTO vent.
A puff of air during engagement is normal. Continuous air loss indicates a bad seal.
Inspect the air lines.
Rubber air lines can crack or collapse over time. Look for kinks, soft spots, or hardened sections. A collapsed line restricts flow even if the pressure gauge reads normal.
Replace any damaged line.
System summary:
| Component | Symptom | Fix |
|---|---|---|
| Air supply | Low pressure | Repair leak or compressor |
| Solenoid valve | No click/no flow | Replace valve |
| Piston seal | Air leaking | Replace seal kit |
| Air lines | Cracked or kinked | Replace line |
Mechanical Inspection: When You Have to Get Your Hands Dirty
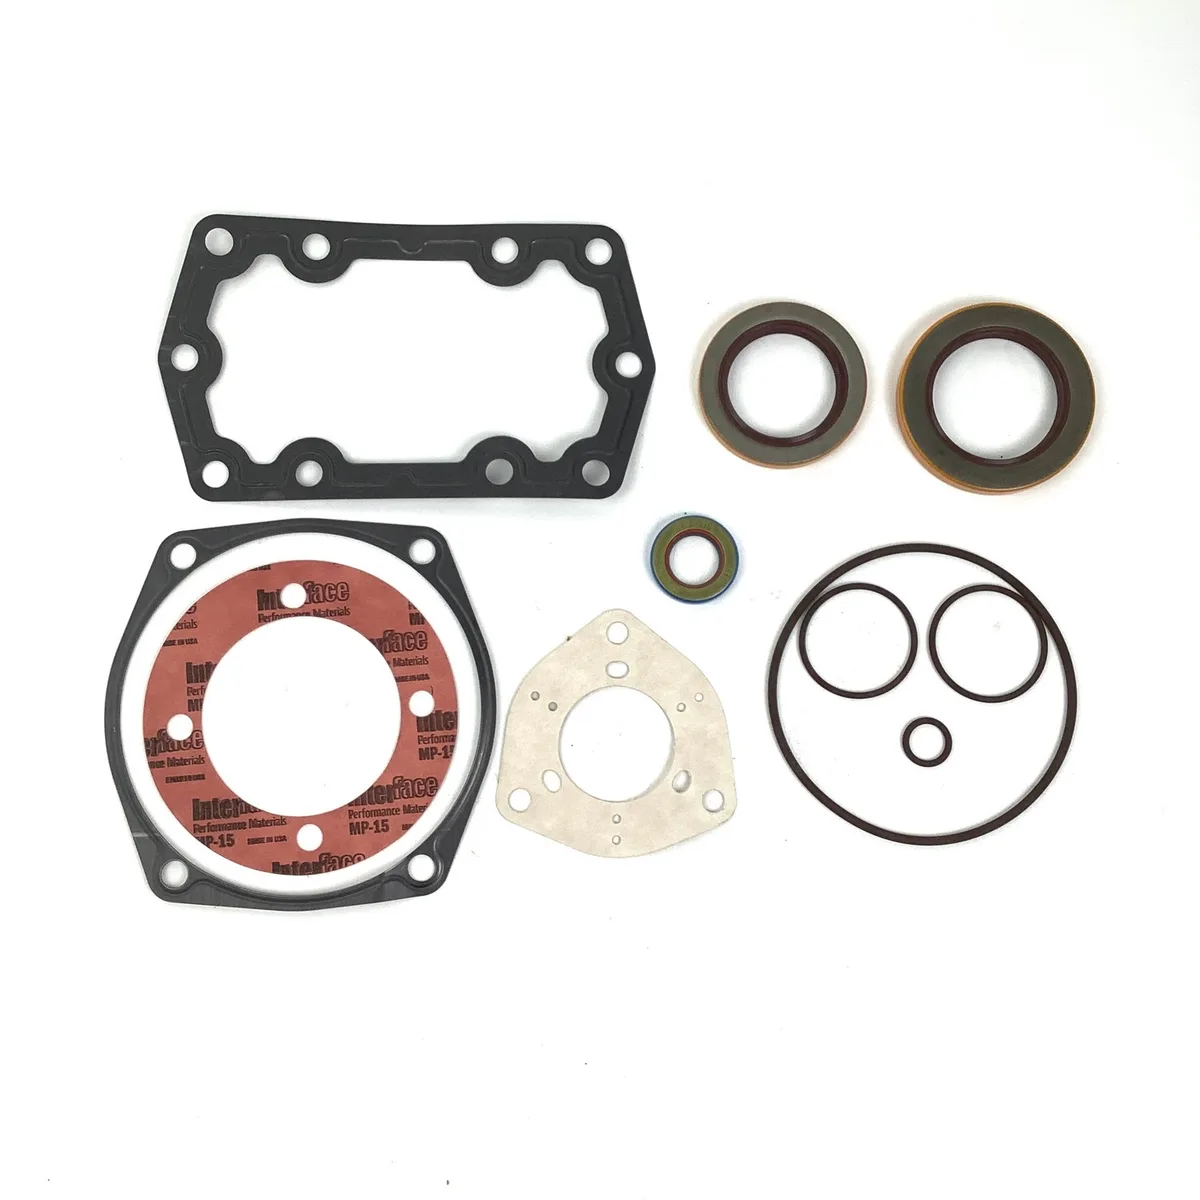
Image source: Bing (Web (fair-use with source credit))
When electrical and pneumatic checks come back clean, the problem is inside the PTO. You need to pull the unit off the transmission. This isn't a five minute job but it's well within reach for a competent mechanic.
Safety first.
Support the vehicle on jack stands. Disconnect the battery. If the vehicle has an air suspension, dump the air pressure.
Wear safety glasses. Transmission fluid is slippery and messy.
Remove the PTO.
Drain the transmission fluid to below the PTO opening, or be prepared for a small flood. Unbolt the PTO from the transmission pad. You'll need a torque wrench for reinstallation.
Lift the PTO straight off. The gear may be heavy on larger units.
Inspect the gear teeth.
Look for chipped, worn, or missing gear teeth. The PTO gear meshes with a transmission gear. Damaged teeth on either part cause noise and vibration.
If the PTO gear is damaged, check the transmission gear through the opening. Transmission gear damage means a transmission rebuild is needed.
Check the shift fork and sleeve.
The shift fork moves the gear into mesh. Worn fork fingers or a worn shift sleeve cause binding or incomplete engagement. Measure the clearance between the fork and sleeve using a feeler gauge.
Specs vary, but more than 0.020 inches of wear indicates replacement is needed.
Inspect the clutch pack.
If your PTO has a hydraulically applied clutch pack, remove the clutch housing cover. The clutch discs should be flat and smooth. Burned or glazed discs need replacement.
Check the piston seal for cracks or hardening.
Check the bearings.
Spin the input and output shafts by hand. They should rotate smoothly with no roughness, noise, or axial play. Rough bearings need replacement.
A worn bearing can cause misalignment and rapid gear wear.
Measure gear backlash.
With the PTO bolted to a workbench, mount a dial indicator against the gear. Rock the gear back and forth. Backlash should be 0.002 to 0.010 inches.
Too much or too little means the shims need adjustment.
Reinstall correctly.
Use a new mounting gasket. Torque the bolts to the manufacturer's specification in a cross pattern. Fill the transmission with the correct fluid type and level.
Common Mistakes That Waste Time or Cause Damage
Even experienced mechanics make these errors. Avoid them and you'll save hours.
Mistake 1: Replacing parts without diagnosing.
The number one mistake. You swap the solenoid, the switch, the relay, and the PTO still doesn't work. All you did was buy expensive parts.
Always diagnose first.
Mistake 2: Ignoring the TCM inhibit conditions.
Your PTO won't engage because the transmission is in Drive or the parking brake isn't set. Check the dash indicators. A simple operator error causes many service calls.
Mistake 3: Using the wrong transmission fluid.
Allison transmissions require TES 295 or TES 389 approved fluids. Using generic transmission fluid can cause clutch pack slip and premature wear. It also voids your warranty.
Mistake 4: Overtightening PTO mounting bolts.
More torque is not better. Overtightening distorts the PTO housing, causing binding and seal leaks. Use a torque wrench and follow the spec.
Mistake 5: Forgetting to check the fluid level.
You pulled the PTO, replaced seals, reinstalled, and still have slipping. The transmission was low on fluid the whole time. Check the fluid level before you disassemble anything.
Mistake 6: Running a noisy PTO.
That grinding sound won't fix itself. Every mile you drive with a noisy PTO sends metal particles into your transmission. Stop using it and inspect immediately.
Mistake 7: Not supporting the vehicle properly.
Crawling under a truck supported only by a hydraulic jack is dangerous. Use jack stands rated for the vehicle weight. A dropped vehicle can crush you in seconds.
When to Call in a Pro (And How to Save Money When You Do)
Some problems need a transmission shop. Know when to stop and hand it off.
Call a pro when:
- You find chipped teeth on the transmission gear inside the pad opening.
- The TCM has internal faults you can't clear.
- The PTO housing is cracked or warped.
- You suspect internal transmission damage from metal debris.
- You don't have a torque wrench or feeler gauges.
- The PTO won't come off the transmission pad due to corroded bolts.
Save money when you do call a pro:
- Do the simple checks first. You already ruled out fuses, fluid, and connectors.
- Remove the PTO yourself and bring it to the shop. They charge less for bench work than truck-side labor.
- Buy the PTO rebuild kit online before you go. Shops mark up parts.
- Ask for a quote before they start. Get the repair time estimate in writing.
The cost reality:
A PTO solenoid replacement costs about $60 for the part. A complete PTO rebuild with new seals, bearings, and clutch pack runs $200 to $400. A transmission rebuild from debris damage can exceed $3,000.
That math is why thorough diagnosis matters.
When it's an emergency:
If you're on the road and the PTO fails, call a mobile diesel mechanic. They'll come to your location. Give them the PTO model number and symptoms over the phone.
They'll bring the right parts. This costs more but gets you back to work faster than waiting for a tow.
FAQs: Quick Answers to the Most Common Questions
How much does a PTO repair cost?
You're looking at roughly $50 for a DIY solenoid swap. A full rebuild with new seals and bearings runs $200 to $400. If you ran it until parts broke and debris got into the transmission, that's a $3,000-plus job.
How long does it take to replace a PTO solenoid?
Set aside 30 to 60 minutes for a first-timer. You'll disconnect the battery, unbolt the old solenoid, and bolt on the new one. The tricky part is just getting under the truck safely, so use jack stands.
Can I rebuild an Allison PTO myself?
You can, if you have a torque wrench, feeler gauges, and a clean workbench. The rebuild kit is cheap, but the labor is detail work. If you doubt your ability to set gear backlash correctly, let a shop do it.
Why won't my PTO engage when the truck is in gear?
That's normal. The Allison TCM locks out PTO engagement unless the transmission is in Neutral or Park with the parking brake set. Check your dash's PTO indicator light.
If it's not lit, the truck isn't letting you engage.

Similar Posts