Watts Hot Water Recirculating Pump Troubleshooting
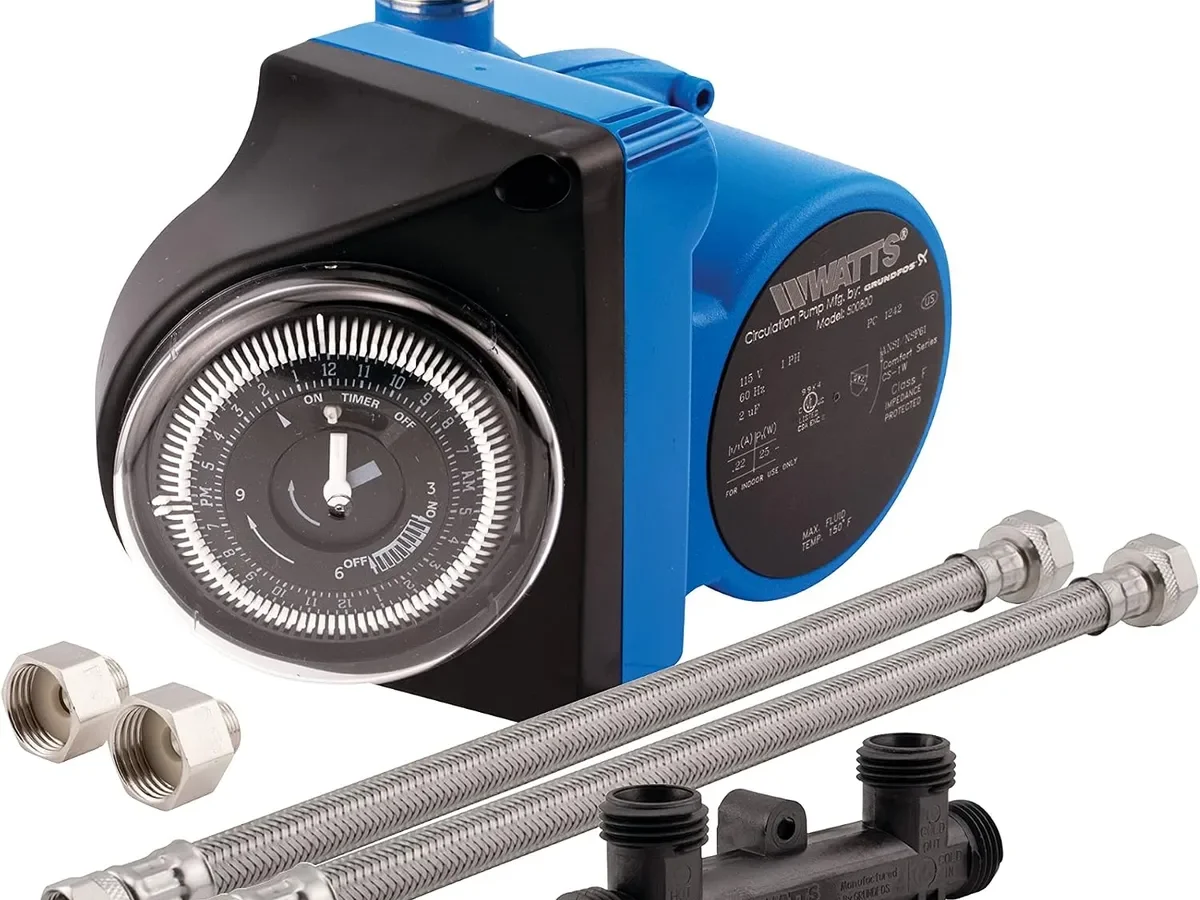
Match your symptom to the fix. Pump runs but water stays cold? Check the thermal bypass valve under the farthest sink.
Pump won't start? Verify power at the outlet and check the timer battery. Pump makes noise?
Bleed the air lock first. Pump leaks? Replace the motor cartridge if the weep hole is wet.
Most repairs take under 30 minutes with a wrench and a screwdriver.
How the Watts Recirculating System Works (and Why It Fails)
A Watts recirculating pump keeps hot water moving through your pipes so you don't wait at the tap. There are two ways these systems get set up. Your troubleshooting path changes depending on which one you have.
The dedicated return line setup. A separate pipe runs from the farthest fixture back to the water heater. The pump sits on that return line near the heater. Water circulates in a loop.
Hot water is always close to the tap. This is the more efficient setup and the easier one to troubleshoot because the flow path is straightforward.
The retrofit thermal bypass valve setup. No dedicated return line. The pump goes on the hot water line under the sink nearest the heater. A small brass valve, the thermal bypass valve, goes under the farthest sink.
When water in that cold line cools below a set temperature, the valve opens. Water flows through the cold pipe back to the heater, pushing the cooled water into the hot side. It works, but it's less efficient and more prone to valve failure.
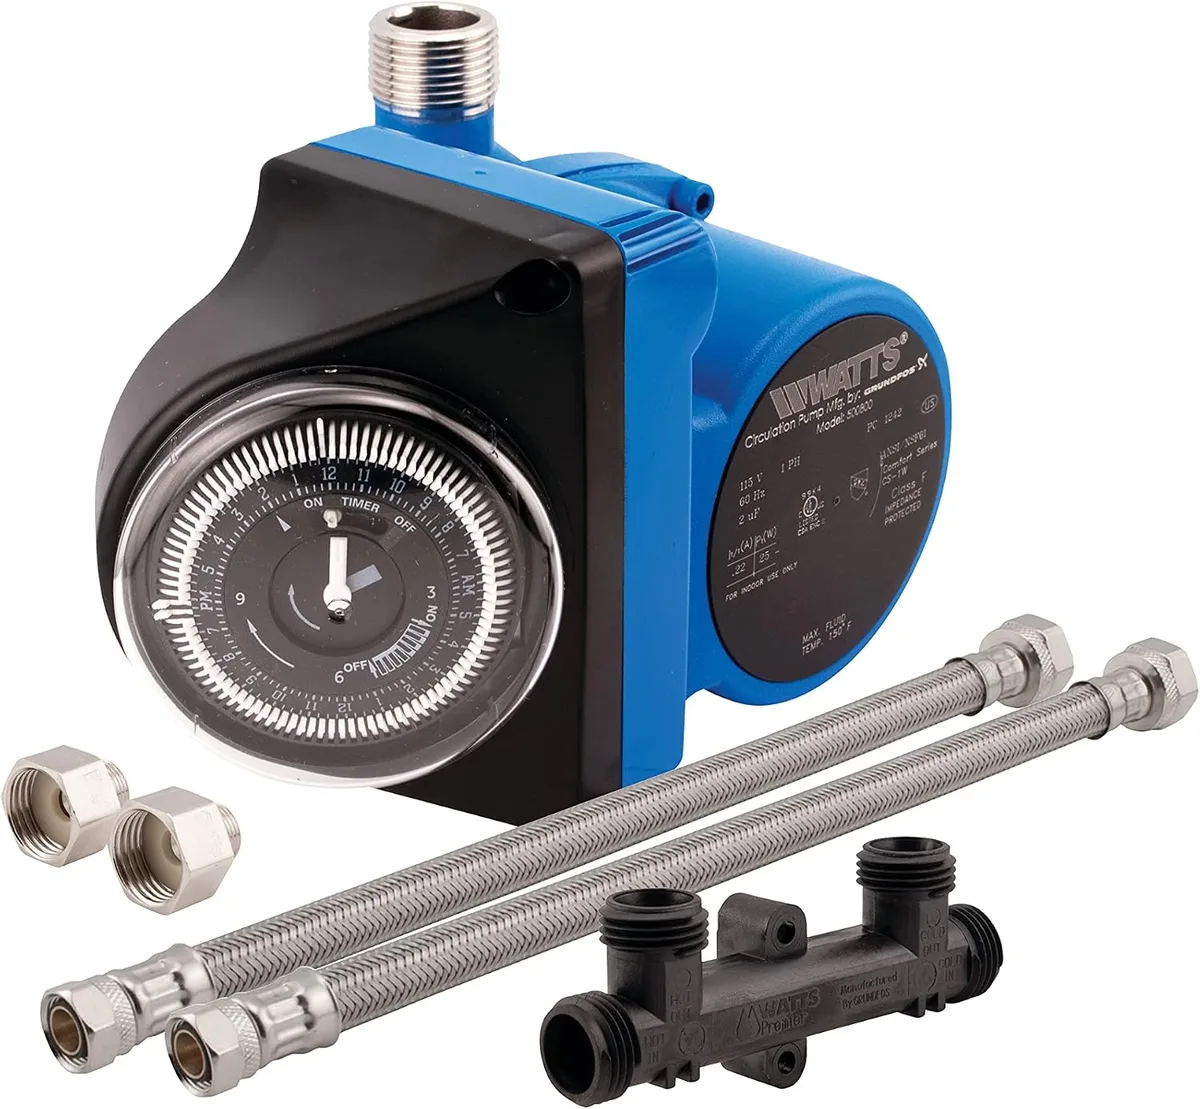
Image source: Bing (Web (fair-use with source credit))
The parts that fail. Every Watts residential pump has the same core components. The motor cartridge contains the impeller and the motor itself. That cartridge is replaceable.
The check valve sits inside the pump housing. It prevents hot water from flowing backward when the pump is off. The thermal bypass valve, if you have one, is a separate component at the far sink.
The timer or control module tells the pump when to run. Each part has a known failure mode, and that's what we're going to cover.
Symptom 1: Pump Runs But Water Stays Cold at the Tap
This is the most common complaint and also the easiest fix. If the pump is humming or running and the water at the farthest fixture is still cold, you have a flow problem, not a power problem.
Air lock in the pump housing. Air gets trapped inside the pump during installation or after a plumbing repair. The impeller spins but can't move water because it's spinning in air. The fix is simple.
Loosen the larger union nut on top of the pump housing while the pump is running. Have a towel and a bucket ready. A small amount of water will spurt out along with the air bubble.
Tighten the nut. The pump should start moving water immediately. If it doesn't, you may need to repeat the process once or twice.
Thermal bypass valve stuck closed. This is the second most common cause. The thermal bypass valve under the farthest sink has a temperature-sensitive mechanism inside. Over time, mineral deposits or debris can cause it to stick in the closed position.
The pump runs, but water can't flow through the cold line back to the heater. The fix is to open the valve manually. Find the small screw or hex fitting on the valve body.
Turn it counter-clockwise about a quarter turn. You should hear water begin to flow. If the valve doesn't open, it may need replacement.
In our research, this part fails more often in homes with hard water.
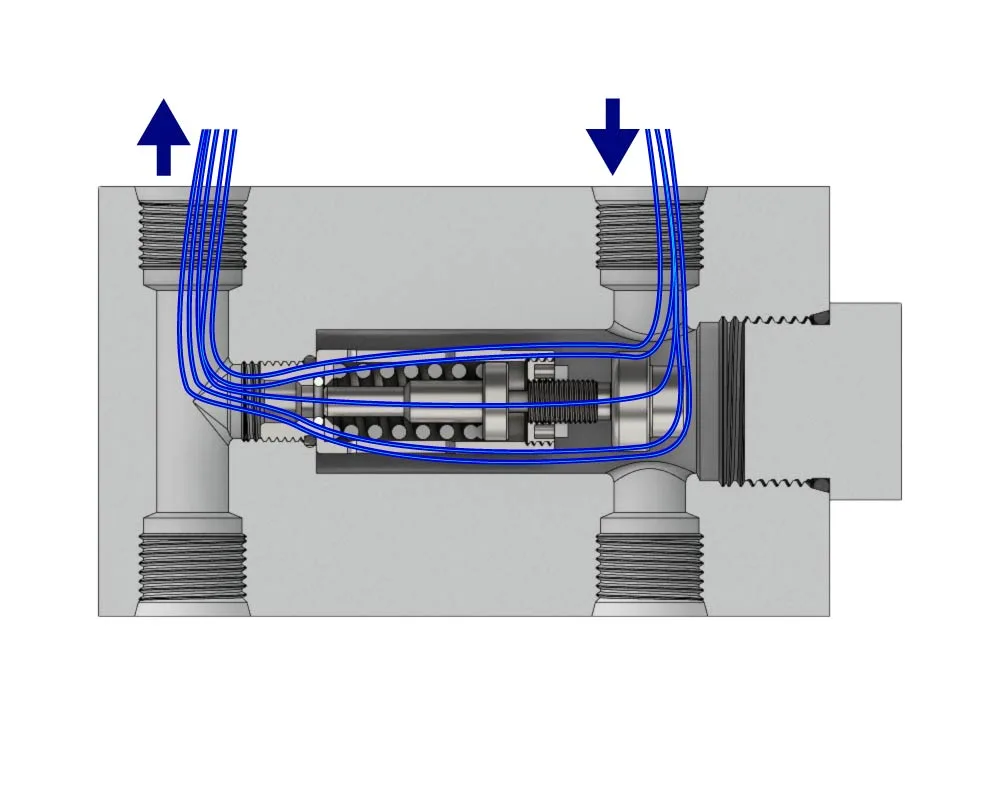
Image source: Bing (Web (fair-use with source credit))
Check valve stuck closed. The check valve inside the pump housing can also seize. Years of use, scale buildup, or debris can lock it in the closed position. The pump runs, but the check valve won't let water pass.
To test this, isolate the pump first. Shut off the water supply to the heater. Drain some water from the system.
Remove the motor cartridge from the pump housing. Look inside. The check valve is a small brass or plastic flap or spring-loaded mechanism.
Try to move it with a small screwdriver. If it's stuck, you can try to free it with a bit of force, but replacement is usually the better option. Watts sells replacement check valve assemblies for most models.
Pipe runs exceeding pump capacity. This one is less common but worth mentioning. A single Watts 500800 pump is designed to handle roughly 100 to 150 feet of pipe in a loop system. If your house has longer runs, the pump may not have enough head pressure to push water all the way to the farthest fixture.
You'll feel warm water at the closer sinks and cold at the far one. This isn't a failure. It's a design limitation.
The fix is either a larger pump or a second pump on the far end.
Symptom 2: Pump Won't Start (No Hum, No Power)
Silence is a different kind of problem. If the pump isn't making any sound at all, you're looking at an electrical or motor issue.
Tripped breaker or blown GFCI. This should be your first check. The pump is usually plugged into a standard 120V outlet. If that outlet is on a GFCI circuit, the GFCI may have tripped.
Go to your breaker panel. Check if the breaker for the pump circuit is tripped. Reset it.
Then check the GFCI outlet itself. Push the reset button. If it trips again immediately, you have a short in the pump motor or the wiring.
Do not keep resetting it.
Dead timer battery or failed control board. Many Watts pumps have an integrated timer. That timer has a small backup battery that keeps the clock running during power outages. If the battery dies and you lose power, the timer may not know when to turn the pump on.
The pump won't start. Remove the timer cover. Replace the battery.
It's usually a standard CR2032 coin cell. Reprogram the timer. Manufacturer specifications indicate that the battery should last about two to three years.
If the timer itself has failed, the entire control module may need replacement.
Failed motor cartridge. The motor inside the cartridge can burn out. It's usually a sealed unit with no user-serviceable parts. If you have power at the outlet and the pump still doesn't hum or spin, the motor cartridge is likely dead.
Unplug the pump. Remove the cartridge. You can test it with a multimeter, but the practical fix is replacement.
A new cartridge costs between $35 and $65 depending on the model. It's a five-minute swap.
Failed capacitor. Some Watts pumps use a start capacitor. If that capacitor fails, the motor may hum but not spin, or it may not start at all. This is less common on residential models, but it does happen.
The capacitor is a small cylindrical component attached to the motor. If it looks bulged or corroded, replace it. Capacitors are cheap, usually under $10.
How to test power safely at the pump connection. Unplug the pump. Use a non-contact voltage tester to confirm the outlet is live. If you're comfortable with a multimeter, you can test for 120V at the pump's terminal block inside the wiring compartment.
If you have voltage and the pump doesn't run, the cartridge is bad. If you don't have voltage, the problem is upstream in the wiring or the timer.
Symptom 3: Pump Makes Noise (Grinding, Squealing, Banging)
Noise is feedback. The pump is trying to tell you something. The type of noise tells you what's wrong.
Grinding: impeller binding on debris or scale. A grinding sound that changes with pump speed usually means something is physically obstructing the impeller. Sediment, scale, or small debris can get lodged between the impeller and the housing. The fix is to remove the motor cartridge and inspect the impeller.
Spin it by hand. It should spin freely. If it's tight, clean the impeller vanes with a toothbrush and water.
If the impeller is damaged, replace the cartridge.
Squealing: worn motor bearing or dry shaft seal. A high-pitched squeal that's constant or intermittent usually points to a bearing failure inside the motor. The shaft that spins the impeller rides on bearings. Over time, those bearings wear out.
The noise is metal on metal. This is a sign that the motor cartridge needs replacement. You can't lubricate sealed bearings.
Aggregate reviews report that this failure typically occurs after five to eight years of continuous use.
Banging / water hammer: check valve slamming or air in the line. A loud bang or series of bangs when the pump starts or stops is water hammer. The check valve inside the pump is slamming shut too quickly, or air pockets in the pipe are creating shock waves. The fix is to check the system pressure.
Most residential systems should have between 40 and 60 PSI. If the pressure is too high, you may need a pressure reducing valve. If the check valve is worn, replace it.
You can also try installing a water hammer arrestor near the pump.
How to isolate the noise to the pump vs. the pipes. Unplug the pump. If the noise stops immediately, it's the pump or the water moving through the pipes. If the noise continues, it's something else in the plumbing.
With the pump off, listen at the farthest sink. If you hear gurgling or banging, you may have air in the lines that isn't related to the pump.
Symptom 4: Leaks Around the Pump
Water where it shouldn't be. Leaks are usually straightforward to diagnose once you know where to look.
Weep hole leak equals motor seal failure. The small hole on the bottom or side of the motor housing is called the weep hole. If water is dripping from it, the internal shaft seal has failed. Water is getting past the seal and into the motor.
Replace the cartridge immediately. Running the pump with water in the motor can cause an electrical short or fire hazard.
Union connection leaks equal worn o-rings. The two large nuts that connect the pump to the plumbing are union fittings. Each one has an o-ring inside. Over time, those o-rings dry out, crack, or get deformed.
Water seeps out from between the nut and the pump housing. The fix is to replace the o-rings. Watts sells o-ring kits for about $5 to $10.
Turn off the water. Drain the system. Remove the unions.
Replace the o-rings. Reassemble. It's a 10-minute job.
Housing crack: replace the whole pump. If the bronze or brass housing itself is cracked, don't try to patch it. A cracked housing under pressure can burst. Replace the entire pump.
In our research, housing cracks are rare in residential applications. They're usually caused by freezing. If the pump was exposed to freezing temperatures, inspect the housing carefully for hairline cracks.
Step-by-Step: Bleeding Air and Cleaning the Impeller
This is the single most useful skill for Watts pump owners. Air locks and dirty impellers cause most performance problems. You can fix both in under 10 minutes.
Tools you need. Adjustable wrench. Bucket or large bowl. Old towel or rag.
Flathead screwdriver. Toothbrush (optional, for cleaning).
Step 1: Turn off the pump. Unplug it or flip the switch to the off position.
Step 2: Close the isolation valves. If your system has isolation valves on either side of the pump, close them. This keeps water from spraying everywhere.
Step 3: Loosen the top union nut. Place the bucket and towel under the pump. Use the adjustable wrench to loosen the larger union nut on top of the pump housing. Don't remove it completely.
Just loosen it until water starts to trickle out.
Step 4: Turn the pump back on. Plug it in or flip the switch. Water and air should spurt out of the loosened nut. Let it run for about 10 to 15 seconds.
Step 5: Tighten the nut. While the pump is running, tighten the union nut back down. Listen. The pump should sound different.
Quieter. Smoother.
Step 6: If the pump still doesn't move water, clean the impeller. Unplug the pump. Remove the motor cartridge. The cartridge is held in by four screws or a bayonet mount.
Once it's out, you can see the impeller. Spin it. If it's tight or stuck, use the toothbrush to clean any debris from between the vanes.
Rinse it with clean water. Reinstall the cartridge.
Step 7: Test the system. Plug the pump back in. Listen for normal operation. Check the farthest sink for hot water.
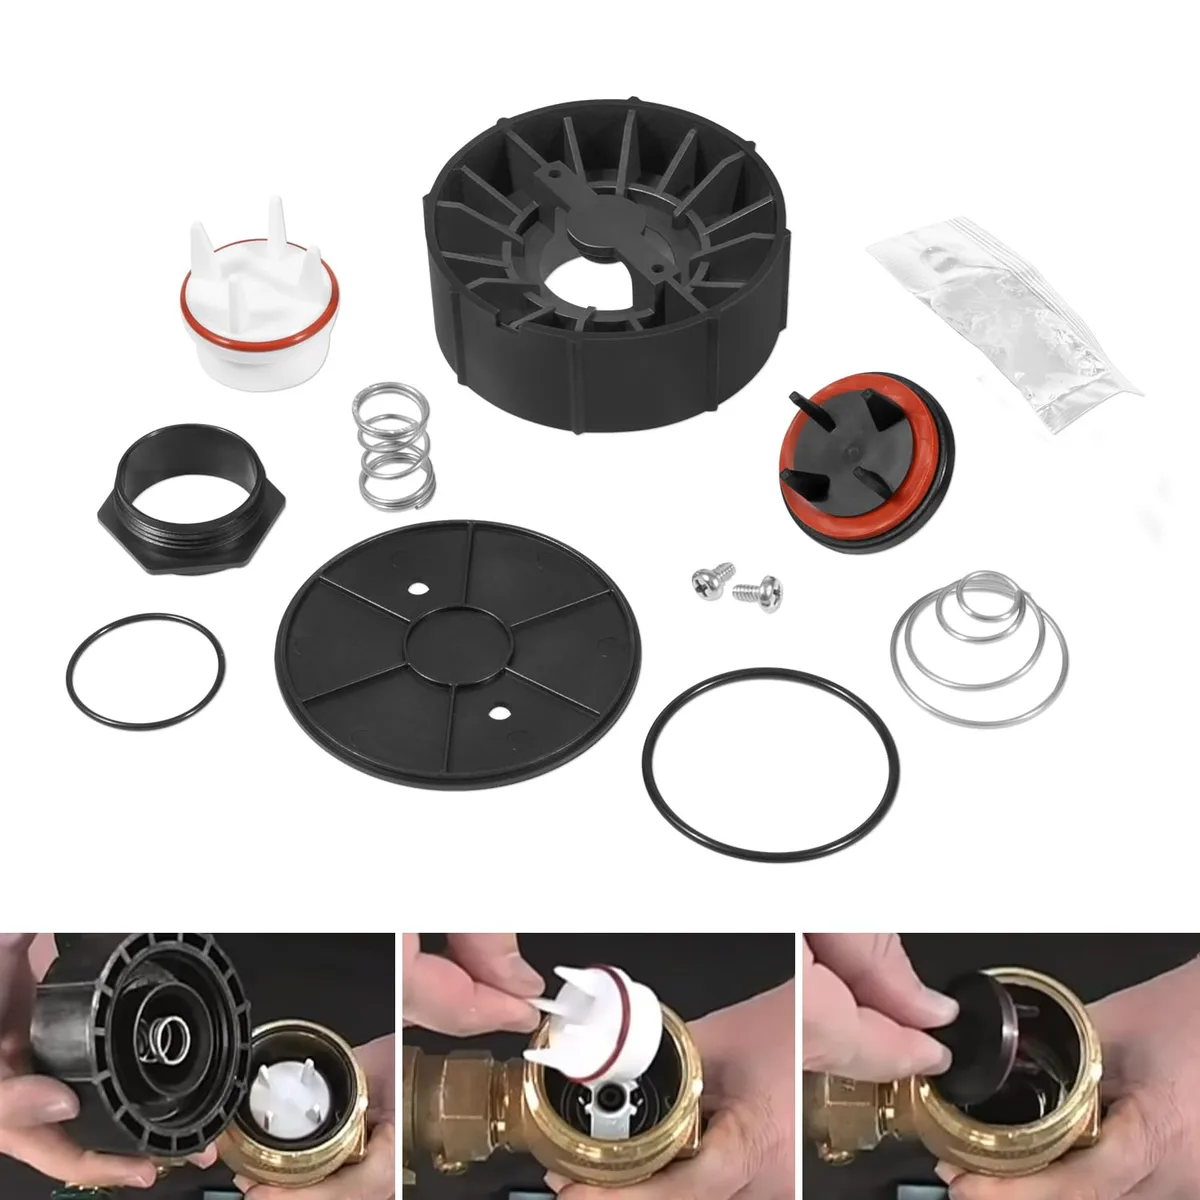
Image source: Bing (Web (fair-use with source credit))
Common Mistakes That Kill Watts Pumps
Installing the pump backwards. The flow arrow on the pump housing must point in the direction of water flow. Installing it backwards forces the internal check valve to work against the pressure. You'll get no flow, or worse, you'll put excessive strain on the motor.
Check the arrow before you tighten anything.
Running the pump dry during initial startup. A dry pump will destroy the shaft seal in under a minute. Before you power up a new pump, make sure the system is full of water and all air pockets are flushed out. Prime the pump housing if your model has a priming port.
Leaving the timer unprogrammed and running 24/7. A pump that never shuts off uses between $30 and $80 more per year in electricity than one on a timer. More importantly, constant running wears out the bearings and seal much faster. Set the timer to match your morning and evening hot water usage.
Ignoring a stuck thermal bypass valve. A stuck-open valve causes continuous flow through the cold line. Your pump will short cycle and your water heater will run more often. A stuck-closed valve makes the whole system useless.
Test the valve twice a year.
Using Teflon tape incorrectly on threaded connections. On a Watts pump, the union connections use o-rings, not threaded seals. Teflon tape belongs on the threaded nipples going into the pump body, not on the union nuts. Too much tape can actually prevent proper seating and cause leaks.
When to Replace vs. Repair
Replace the motor cartridge. If the pump hums but doesn't spin, if the weep hole is leaking, or if you hear grinding from the impeller, a new cartridge fixes it. Cost is $35 to $65. The job takes five minutes.
This handles about 70% of all Watts pump failures.
Replace the thermal bypass valve. If the valve at the farthest sink is stuck or won't respond to adjustment, replace it. Cost is usually $15 to $30. It threads into a standard 1/2-inch pipe tee.
Replace it twice a decade if you have hard water.
Replace the check valve. If the internal check valve is stuck or torn, replacement is a $10 to $20 part. You'll need to drain the system and remove the pump body to access it. It's a moderate DIY job.
Replace the whole pump. If the housing is cracked, the motor cartridge has failed twice in under a year, or the pump is over 15 years old and parts aren't available, buy a new pump. A replacement Watts 500800 runs about $120 to $250. At that price, it's often the smarter move.
Frequently Asked Questions
How long should a Watts recirculating pump last?
With normal water chemistry and a timer, expect 8 to 12 years. Hard water shortens that to as little as 5 years due to scale buildup on the impeller and check valve. Homes with soft water and consistent timer use report 15 years or more.
The motor cartridge is the first thing to fail. Replacing it extends the pump's total life significantly.
Is it normal for the pump to run constantly?
No. A properly set pump should cycle, not run non-stop. Constant running means either the timer is set incorrectly, the thermal bypass valve is stuck open, or the pump isn't strong enough for your pipe runs.
Check the thermal bypass valve first. It's the most common cause for residential systems. Also confirm the timer has a fresh battery.
Will the pump work without a dedicated return line?
Yes, but only with the thermal bypass valve setup. The pump installs on the hot water line near the heater. The valve goes under the farthest sink.
Water circulates through the cold pipe back to the heater. It's less efficient than a dedicated return line and uses more energy, but it works well for retrofits.
Does the pump waste electricity if left on?
A Watts pump draws about 25 to 45 watts while running. Left on 24/7, that adds roughly $30 to $80 per year to your electric bill. It also makes the water heater cycle more often because heat escapes through the piping.
A timer cuts that in half. If you're not using hot water at night, turn the pump off.
Why does my pump cycle on and off every few minutes?
This usually means the thermal bypass valve is short cycling. The valve opens when water cools below its set point. If the pump is oversized or the valve's temperature setting is too close to the water heater temperature, it will rapidly open and close.
Adjust the valve's set point slightly higher, or extend the pump's timer intervals. A stuck check valve can also cause this by restricting flow and triggering false temperature readings.

Similar Posts