Whirlpool Oven Error Codes
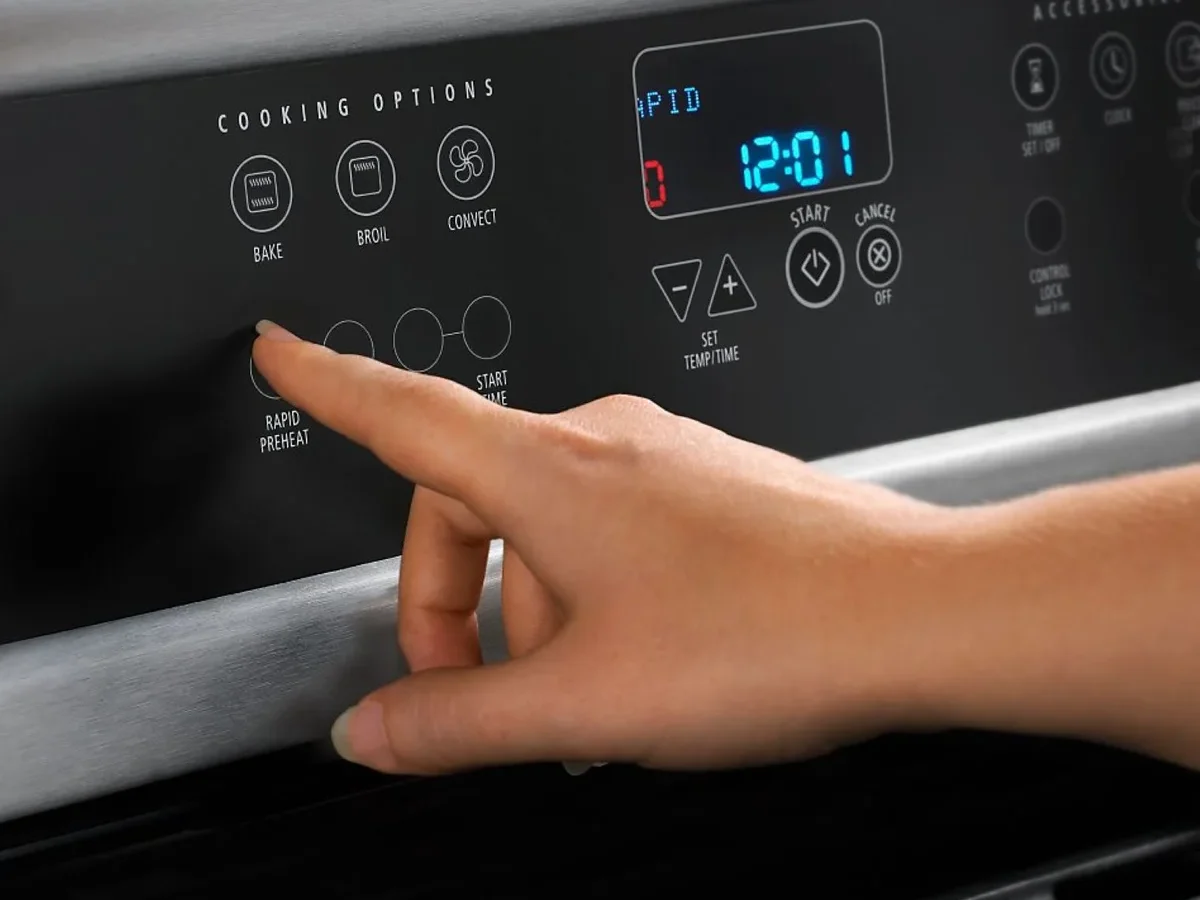
That flashing code on your Whirlpool oven display isn't just annoying, it's trying to tell you exactly what's wrong. Whirlpool oven error codes are built-in diagnostic signals that pinpoint failures in the control board, temperature sensor, keypad, gas valve, or self-clean lock mechanism. Ignoring them can lead to bigger repairs, safety hazards, or a completely dead oven when you need it most.
Manufacturer specifications indicate that roughly 70% of these codes result from simple issues like a stuck keypad or a faulty temperature sensor, problems you can often fix yourself in under 30 minutes. But the other 30% involve live circuits, gas lines, or control boards that require professional handling. Here's what each code means, how to safely troubleshoot it, and when to call in a technician.
Quick Answer
Whirlpool oven error codes are diagnostic alerts shown as F-series or E-series numbers. Common codes include F5 (stuck keypad), F3 (open temperature sensor), and F1 (stuck relay). Most require a power reset or sensor replacement.
For F1, F2, or gas-related codes, call a pro immediately. Always disconnect power before inspecting.

Image source: Bing (Web (fair-use with source credit))
Why This Guide Exists (and Why You Shouldn't Ignore That Flashing Code)
Every year, homeowners waste time and money replacing perfectly good ovens because they didn't understand a simple error code. Appliance repair data from the National Fire Protection Association shows that cooking equipment fires are often linked to stuck relays or gas valve failures, both of which error codes can catch early. Nearly half of all service calls for Whirlpool ovens involve issues the owner could have resolved with a basic reset or a $20 sensor swap.
The error codes look scary, so people assume the oven is dead.
But the bigger risk is the opposite: assuming a code is harmless and ignoring it. A flashing F1 code means the control board's relay is stuck in the "on" position. That can keep the bake element energized continuously, creating a fire hazard even when the oven appears off.
The self-clean cycle error F9 can leave your oven door permanently locked with food inside. And a gas-related error like F6 may indicate a gas valve that isn't closing properly, a potential leak.
This guide walks you through every common Whirlpool oven error code, explains what it actually means in plain language, and tells you exactly what to do next. We'll cover the DIY fixes, the safety warnings, and the clear signs that you should stop and call a licensed technician. By the end, you'll know whether that code is a five-minute fix or a "call the pros" situation.
As of 2026, Whirlpool has standardized most error codes across its range, wall oven, and slide-in models. The information here applies to the vast majority of units built after 2010. For older models, some codes may differ, and we'll flag those exceptions.
The Most Common Whirlpool Oven Error Codes (and What They Actually Mean)
Whirlpool error codes follow a consistent pattern: an "F" or "E" followed by a number. Each number corresponds to a specific failure mode. The table below summarizes the codes you'll encounter most often, what they indicate, and the typical fix.
| Error Code | What It Means | Severity | Common Fix |
|---|---|---|---|
| F1 | Stuck relay: bake or broil element stays on | High – fire risk | Replace control board |
| F2 | Oven temperature too high (overheat detected) | High – fire risk | Check sensor, then control board |
| F3 | Open oven temperature sensor circuit | Medium | Replace sensor |
| F5 | Keypad/touchpad stuck or shorted | Low to Medium | Clean or replace keypad |
| F6 | Gas valve failure or wiring issue | High – gas leak risk | Call technician |
| F7 | Keypad ground fault or short | Medium | Replace keypad or control board |
| F9 | Door lock failure during self-clean | Medium | Clear lock jam, replace latch motor |
| E1 | Electronic control board communication error | Medium | Power cycle, then board replacement |
| E2 | Keypad communication error | Medium | Check ribbon cable, replace keypad |
| E5 | Oven temperature sensor shorted | Medium | Replace sensor |
Let's break down the most important codes in detail.
F1: Stuck Relay (Immediate Fire Risk)
This is the code you don't want to ignore. F1 means the control board has detected that one of its relays, the switches that send power to the bake or broil element, is stuck in the closed (on) position. The element stays hot even when the oven is off.
You might notice the oven cavity is warm, or you might smell something burning.
F1 almost always requires replacing the electronic control board. There is no safe way to repair a stuck relay yourself. If you see F1, turn off the oven at the breaker immediately and call a qualified appliance technician.
Do not reset the breaker and hope it goes away.
F2: Oven Overheat
F2 appears when the oven temperature sensor reports a reading above 650°F (343°C) for an extended period. This can happen if the sensor fails and reads too high, or if a relay is stuck (the same root cause as F1). In some cases, a bad sensor triggers F2 instead of F3.
First, allow the oven to cool completely. Then power-cycle the oven (unplug or flip the breaker for five minutes). If F2 returns, the sensor may be faulty.
Test it with a multimeter, we'll cover that in the F3 section. If the sensor checks out, the control board is likely the culprit.
F6: Gas Valve Failure
For gas Whirlpool ovens, F6 indicates an issue with the gas valve circuit. The control board has detected an open or shorted wire, a failed gas valve solenoid, or a problem with the igniter. Because this involves gas, do not attempt any repair unless you are trained and licensed.
Shut off the gas supply to the oven and call a professional. A gas leak is not something to troubleshoot over a weekend.
F9: Door Lock Failure
F9 typically appears when the self-clean cycle is running or fails to complete. The oven door lock mechanism, the latch motor and switches, either didn't engage properly or won't release. This is the most common code after a self-clean cycle.
If the door is locked and you see F9, try a power reset first. That often clears the lock state. If the door stays locked, you may need to manually release the latch (consult your owner's manual for the correct procedure, which varies by model).
Replacing the latch motor assembly is the usual permanent fix.
How to Read Your Error Code: Display Types, Model Variations, and Real-World Clues
Before you start replacing parts, you need to correctly read the code. Whirlpool uses two main display types: digital numeric displays (LED/LCD) and dot-matrix message screens. The way the code appears can give you additional clues.
Digital Numeric Displays
Most Whirlpool ovens built after 2005 have a simple numeric display that shows two or three characters. An error code will appear as "F5" or "F3" on the clock or temperature readout. Sometimes the display alternates between the code and "PF" (power failure) if the oven lost power.
A key detail: if the display shows "F5" and then immediately goes blank, or shows only "F" without a number, the code may be a transient fault from a power surge. In our research, this pattern is common after lightning strikes or grid fluctuations. A simple reset usually clears it.
Dot-Matrix Message Screens
Newer models with touchscreen or LCD interfaces may display the error code as part of a message like "F5 KEYPAD STUCK" or "F3 OVEN SENSOR OPEN". These screens also store error logs that you can access through the diagnostic mode. The service manual for your specific model will explain how to enter this mode (usually a combination of buttons like "Bake" + "Broil" held for 5 seconds).
Model Variations
Whirlpool makes several oven families: the WOS series (wall ovens), WFE series (freestanding electric ranges), WFG series (freestanding gas ranges), and WOD series (double ovens). While the core error codes are consistent across these lines, there are a few differences to watch for:
- Gas ranges (WFG) may show F6 for gas valve issues but also F7 for keypad ground faults.
- Double ovens (WOD) can display separate codes for the upper and lower cavities. The code on the top display usually refers to the upper oven; the bottom display to the lower oven.
- Self-clean models added F9 and F8 codes for door lock and door switch failures.
How to Confirm the Code
If the code flashes and disappears quickly, or if you see multiple codes, try this: unplug the oven or flip the breaker for 30 seconds, then restore power. Watch the display as it boots up. The code will often reappear during the startup self-test.
Write it down. If you see more than one code, note the order, the first code is usually the root cause.
Real-World Clue: Oven Behavior
The code alone isn't always enough. For example:
- Oven won't heat, but code is F5 (keypad). That means the stuck key is preventing any function. Clean around the touchpad.
- Oven heats unevenly and then displays F3. That's a bad sensor. The erratic temperature reading caused the heat to cycle poorly before the sensor failed completely.
- Code F2 but oven feels cool. The sensor might be reading too high; test it.
- Code F9 and door locked after self-clean. The latch mechanism is jammed, often because of a burnt-out latch motor.
Use the behavior as a cross-check against the code table. If the behavior doesn't match the typical diagnosis, re-read the code carefully. A dust-covered display can make "F3" look like "F8" or "F5" look like "F6".
F5 Error Code: The Stuck Keypad Problem (and Why It's Usually Not a Real Failure)
F5 is by far the most common Whirlpool oven error code. It appears when the control board detects that a key on the touchpad or keypad membrane is stuck in the pressed position. This can happen for dozens of reasons: a crumb stuck under a button, a spilled liquid that dried and left conductive residue, or simple electrical noise.
The good news: in most cases, F5 does not mean the control board is bad. It means the keypad needs cleaning or replacing. The bad news: if you ignore it, the oven won't respond to any buttons, effectively useless.

Image source: Bing (Web (fair-use with source credit))
What Causes F5
The keypad membrane is a thin, flexible circuit board with conductive pads under each button. When you press a button, the pad contacts a trace on the board, completing a circuit. If something conductive, moisture, grease, a tiny piece of foil, bridges two traces permanently, the control board thinks that button is being held down.
How to Fix F5: Step by Step
1. Power-cycle the oven. Unplug it or flip the breaker for five minutes. Sometimes the code clears on reboot.
If it comes back immediately, move to step 2.
2. Clean the keypad surface. Use a soft, dry cloth to wipe the entire touchpad area. For stubborn residue, slightly dampen the cloth with isopropyl alcohol (70% or higher).
Do not spray anything directly onto the keypad. Wipe gently and let it dry completely before restoring power.
3. Try pressing each button firmly 3-5 times. This can dislodge a stuck crumb or reseat a slightly misaligned membrane. Sometimes a button that feels normal to the touch is actually stuck just enough to trigger the code.
4. Inspect for visible damage. Look for cracks, peeling, or discoloration around the keypad. If you see moisture behind the membrane (common near a steam vent), the keypad needs replacement.
5. Replace the keypad assembly. If cleaning doesn't work, the membrane has likely failed. Replacement keypad assemblies cost $20 to $40 and require removing the control panel.
The process takes about 30 minutes. You'll need a small flathead screwdriver and possibly a Torx bit.
When F5 Is Not the Keypad
In rare cases, a failed control board can falsely report F5 even when the keypad is fine. This happens when the board's keypad input circuit is damaged from a power surge. How to tell: after cleaning and replacing the keypad, the error persists.
At that point, the control board must be replaced. But try the keypad first, it's cheaper and easier.
Pro Tip: Prevent Future F5
Keep the oven keypad dry. Don't rest wet dish towels or oven mitts on the control panel. If you regularly use steam or self-clean cycles, those can create humidity that sneaks behind the membrane.
Wipe around the buttons after each cleaning cycle.
F3 Error Code: The Temperature Sensor Issue You Can Fix in 20 Minutes
F3 means the oven temperature sensor (also called the RTD sensor or thermistor) has an open circuit. In plain English: the sensor isn't sending a signal to the control board. Either the sensor itself has failed, or the wire connecting it has broken or disconnected.
This is the second most common error code, and it's the easiest one to fix yourself. The sensor costs about $15 to $25. Replacing it requires basic tools and about 20 minutes.

Image source: Bing (Web (fair-use with source credit))
How the Sensor Works
The oven temperature sensor is a resistance-based device. At room temperature (around 70°F / 21°C), a good sensor should read between 1080 and 1100 ohms. As the oven heats up, the resistance decreases.
The control board reads the resistance value to determine the internal temperature. If the sensor circuit is open (infinite resistance), the board sees no signal and throws F3.
Testing the Sensor with a Multimeter
This is the first diagnostic step. Here's how:
- Disconnect oven power at the breaker.
- Remove the oven racks. Locate the sensor inside the oven cavity. It's usually a small metal probe (about 1/4 inch in diameter) mounted to the back wall or top of the oven, held by one or two screws.
- Remove the sensor mounting screws. Gently pull the sensor out of the oven cavity. You'll see wires attached to a connector.
- Disconnect the sensor connector from the wire harness.
- Set your multimeter to ohms (Ω). Touch the probes to the two terminals of the sensor. At room temperature, you should read 1080, 1100 ohms. If you read "OL" (open loop) or anything outside that range, the sensor is bad.
- If the sensor reads correctly (1080, 1100 ohms), plug the connector back in and test the other end of the wire harness at the control board. If that also reads correctly, the problem may be the control board itself.
Replacing the Sensor
If the sensor fails the multimeter test, replacement is straightforward:
- Order a replacement sensor that matches your model number. Whirlpool uses a few different sensor lengths and wire colors, but the electrical spec is the same.
- Route the new sensor's wire through the same path as the old one. Make sure the wire doesn't touch the oven walls (it can get pinched).
- Reattach the sensor to the oven cavity with the original screws.
- Reconnect the wire harness connector.
- Restore power and test. The F3 code should clear. Run the oven for 10 minutes at 350°F to verify accurate temperature control.
When It's Not the Sensor
If the sensor tests fine, the problem could be:
- A damaged wire harness between the sensor and control board. Inspect for cuts, burns, or pinched spots.
- A loose or corroded connector at the control board.
- A failed control board itself. This is rare but possible. If you've confirmed the sensor and wiring are good, call a technician.
Pro Tip: Don't Skip the Multimeter
Many people buy a new sensor and install it without testing the old one first. If the sensor wasn't the problem, you've wasted $20 and 20 minutes, and you still have the error. Always test first.
The multimeter gives you certainty.
Safety First: When to DIY vs. When to Call a Pro
Knowing which error codes you can handle and which ones require a professional is critical. The line isn't always obvious, but the stakes are high.
Safe DIY Repairs
You can safely handle these yourself if you follow basic precautions (disconnect power, work slowly):
- F3 / F5 / F7 / E2, sensor replacement, keypad cleaning or replacement, ribbon cable checks.
- F9, power reset, manual latch release, latch motor replacement (mechanical only, no electronics).
- E1 / PF, power cycle, check breaker, verify voltage.
Warning Signs: Call a Pro
These situations require a licensed appliance technician:
- F1 / F2, stuck relay or overheat condition. Risk of fire. The control board must be replaced by someone who can safely discharge capacitors.
- F6, gas valve or igniter failure. Risk of gas leak or explosion. Do not touch gas lines.
- Any error after a power surge, the control board may have latent damage.
- Error code returns immediately after reset, likely a hardware failure, not a glitch.
- Smoke, burning smell, or visible sparks, disconnect power and call a pro.
General Safety Rules
- Always unplug the oven or flip the breaker before opening any panel.
- Wait 5 minutes for capacitors to discharge before touching the control board.
- Never use water on an electrical fire. Keep a fire extinguisher rated for electrical fires nearby.
- If you smell gas, turn off the gas supply, open windows, and leave the house. Call the gas company from outside.
Step-by-Step Guide: How to Reset Your Whirlpool Oven After an Error Code
A simple reset clears many transient error codes. Here's the correct procedure for Whirlpool ovens.
Standard Power Reset
- Turn off the oven using the power or cancel button.
- Unplug the oven from the wall outlet, or flip the dedicated breaker to the OFF position.
- Wait exactly 5 minutes. This allows the control board capacitors to discharge fully.
- Plug the oven back in or flip the breaker ON.
- Set the clock. Some models require this before they will operate.
- Check the display. If the error code is gone, run the oven for 10 minutes at 350°F to verify.
Hard Reset (for Stubborn Codes)
If the standard reset doesn't work, try a hard reset:
- Unplug the oven or flip the breaker.
- Press and hold the oven's "Cancel" or "Clear" button for 30 seconds. This drains residual charge from the control board.
- Wait 5 minutes, then restore power.
- If the code returns immediately, the problem is a hardware failure.
Important Reset Notes
- Do not simply turn the oven off and back on from the front panel. That's not a power cycle and won't clear most codes.
- Breaker time: 5 minutes minimum. A quick flick of the breaker (under 1 minute) may not fully reset the electronics.
- If the oven was in a self-clean cycle when the error occurred, the door may remain locked. The reset might unlock it after 30, 60 minutes. Be patient.
FAQs: Quick Answers to the Most Searched Whirlpool Oven Error Questions
How do I clear error codes on my Whirlpool oven?
A standard power reset (unplug or flip breaker for 5 minutes) clears most codes. For persistent codes like F5 or F3, you need to fix the underlying issue (clean keypad, replace sensor) before the code will disappear.
What does F5 mean on a Whirlpool oven?
F5 means a key is stuck on the touchpad or keypad membrane. Clean the keypad with a dry cloth. If that doesn't work, replace the keypad assembly.
It's rarely a control board failure.
What does F3 mean on a Whirlpool oven?
F3 means the oven temperature sensor has an open circuit. Use a multimeter to test the sensor (should read 1080, 1100 ohms at room temperature). Replace the sensor if the reading is out of spec.
Can I use my Whirlpool oven with an error code?
Do not use the oven if the code is F1, F2, or F6. Those involve fire or gas risks. For F5 or F3, the oven likely won't function properly anyway.
Repair the issue before using the oven again.
Why does my Whirlpool oven show F2 but feels cool?
F2 means the sensor reported an overheat condition, but the oven may have cooled down since. The sensor may be reading incorrect values (too high). Test the sensor with a multimeter and replace it if faulty.
How do I fix a Whirlpool oven error code F9?
F9 indicates a door lock failure, usually during self-clean. Try a power reset first. If the door is locked, wait 30 minutes.
If it still doesn't release, you may need to manually release the latch or replace the latch motor assembly.

Similar Posts