Whirlpool Upright Freezer Troubleshooting
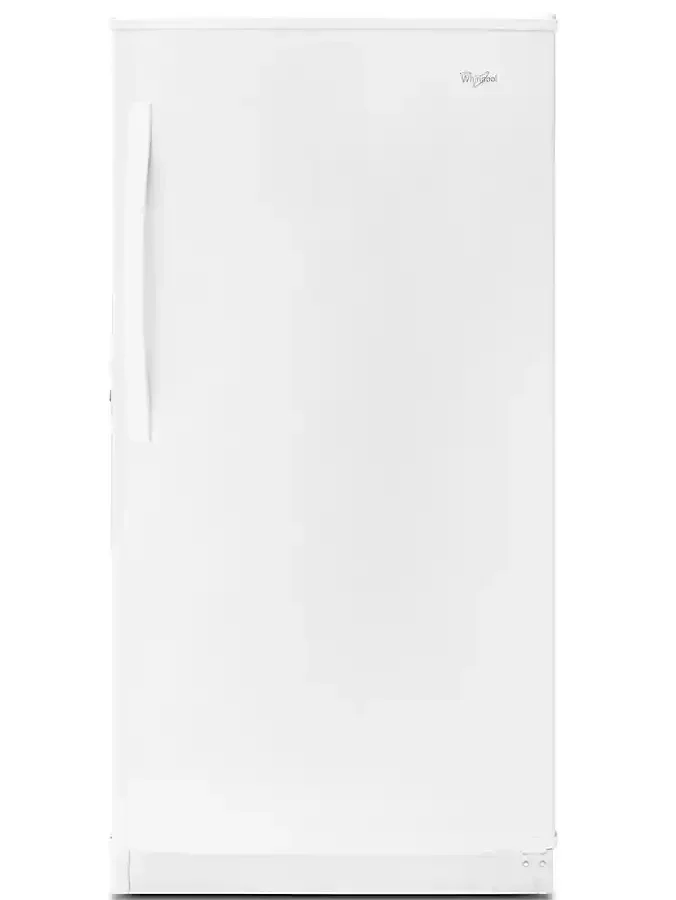
Your Whirlpool upright freezer is supposed to be the quiet workhorse of your kitchen or garage, keeping your frozen food solid and safe. So when it stops cooling, starts making noises you've never heard before, or builds up enough ice to rival a hockey rink, it's frustrating and honestly a little worrying. That's where Whirlpool upright freezer troubleshooting comes in, and the good news is, many of the most common problems can be diagnosed and fixed in under an hour without calling a technician.
Manufacturer specifications indicate that a properly functioning upright freezer should maintain a steady 0°F (-18°C) and cycle its compressor roughly 8 to 12 hours per day depending on ambient temperature and door openings. When things go wrong, the symptoms usually point to just a handful of components that are easy to test with a basic multimeter and a few common tools. Let's walk through what your freezer is telling you, step by step, so you can get it back to normal without the guesswork or the service-call bill.
Quick Answer
Start with the power. Check that the freezer is plugged in and the outlet works. Clean the condenser coils if they're dusty.
Listen for the compressor humming and the evaporator fan running. If neither runs, test the start relay. If the freezer runs but won't get cold, check the defrost system.
If ice builds up inside, clear the drain tube. Most issues boil down to a bad start relay, a frozen drain, or a failed defrost component.
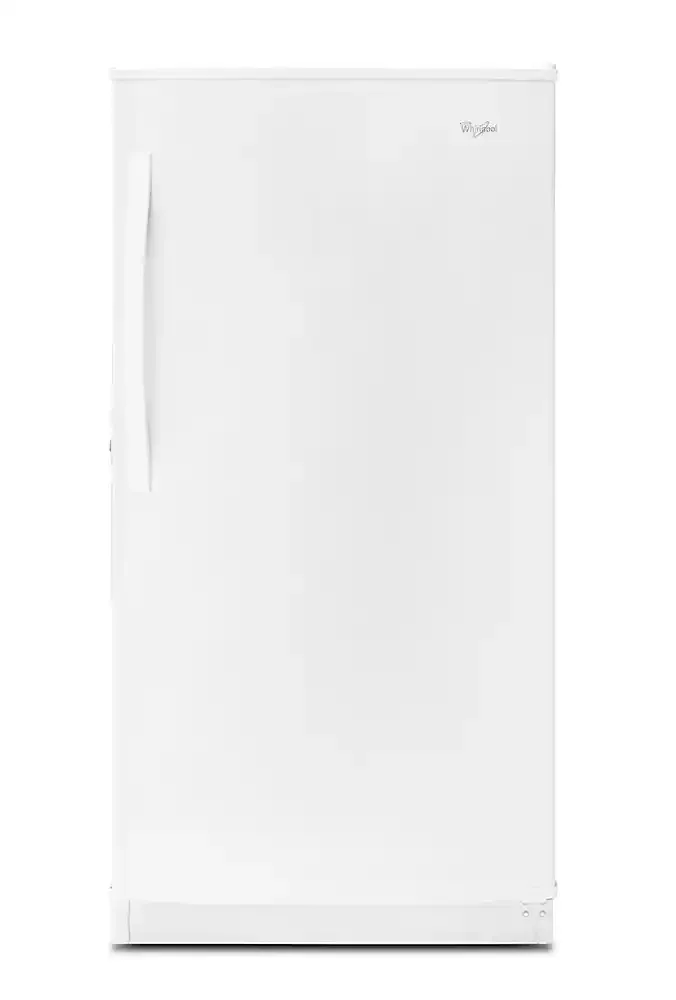
Image source: Bing (Web (fair-use with source credit))
Quick Symptom Checker – What Your Freezer Is Telling You
Before you start pulling panels and testing parts, take a minute to match what you're seeing and hearing to the most likely culprit. Whirlpool upright freezers tend to fail in predictable patterns, and the symptom alone often cuts the diagnostic time in half.
Freezer is warm but the light comes on and you hear a hum. This usually means the compressor is trying to start but can't. The start relay is the first thing to test. It's a small plastic component clipped onto the compressor.
It costs about $10 to $15 and takes two minutes to swap.
Freezer is completely silent, no hum, no fan, nothing. Check the outlet first. Plug a lamp or a phone charger into the same outlet. If that works, the issue is inside the freezer, either a blown control board fuse, a failed thermostat, or a bad defrost timer that's stuck in defrost mode.
Freezer is cold but you hear a clicking sound every few seconds. That click is the compressor attempting to start, failing, and the overload protector kicking it off. Almost always a bad start relay or overload protector. Sometimes both.
Loud buzzing or rattling noise. Could be a loose condenser fan blade hitting something, or a evaporator fan motor with worn bearings. Open the freezer door and press the door switch to see if the fan is noisy inside too.
Ice buildup on the back wall or around the bottom of the freezer. This is the defrost system failing. The defrost heater, defrost thermostat, or defrost timer has stopped working, so every cooling cycle adds frost that never melts.
Water pooling under the freezer. The defrost drain tube is clogged with debris or ice. Water from the defrost cycle can't escape and overflows the drain pan.
Freezer runs constantly and never shuts off. The thermostat or thermistor is likely reading the wrong temperature, so the compressor keeps running. Or the door isn't sealing and warm air keeps flooding in.
Error codes on the display. Consult your owner's manual for the specific code. On Whirlpool electronic models, E1 and E2 usually point to a failed thermistor. F1 can mean a control board issue.
One quick note before we dig deeper. As of 2026, many Whirlpool upright freezers still use the same basic mechanical components they did a decade ago, the start relay, overload protector, and defrost timer are largely interchangeable across model years. That's good news for DIY troubleshooting because the repair process barely changes even on newer units.
#1: Freezer Not Cooling – Is It the Compressor, the Start Relay, or Something Simpler?
This is the most common complaint and the one that sends people straight to the phone for a service technician. But stop and think before you call. The compressor itself almost never fails.
What fails is the tiny start relay that gives the compressor its initial kick to get running.
Start with the obvious stuff. Unplug the freezer for five minutes. Plug it back in. Sometimes a simple reset is enough if the control board has locked up.
While it's unplugged, check the power cord for damage and make sure the outlet isn't controlled by a switch that got turned off.
Listen for the compressor. Put your ear against the back lower panel. You should hear a low hum within 30 to 60 seconds of plugging the freezer in. If you hear a hum followed by a click after a few seconds, that's the overload protector tripping because the compressor can't spin up.
Your start relay is almost certainly bad.

Image source: Bing (Web (fair-use with source credit))
How to test the start relay. Unplug the freezer. Remove the back access panel (usually a 1/4-inch screwdriver). The relay is a small black or white plastic block clipped onto the side of the compressor with two or three wire terminals.
Wiggle it off. Give it a gentle shake. If you hear rattling inside like broken plastic or a loose piece, it's dead.
Even if it's silent, test it with a multimeter set to ohms. A working relay should show some resistance (typically 10 to 50 ohms) between the run and start terminals. An open circuit means it's blown.
If the relay tests fine, check the overload protector. It's the small metal or plastic disc mounted right next to the relay, usually held in place by a clip or a screw. Test it for continuity. Room temperature, it should show continuity (near zero ohms).
If it's open, the overload protector has failed, a cheap fix.
Still nothing? The compressor may be bad. This is rare, but it happens. If both the relay and overload protector test good and you've got proper voltage at the compressor terminals (120V in the US), the compressor windings may be open or the compressor may be seized.
Test the compressor terminals directly. Resistance between the common, start, and run terminals should be low (a few ohms) and consistent. Any infinite reading means a broken winding, and that means you need a new compressor, which usually costs more than the freezer is worth on a unit more than a few years old.
Don't forget the condenser coils. Dirty coils cause the compressor to work harder and can trip the overload protector. Pull the freezer away from the wall. Remove the kickplate at the bottom front.
Use a vacuum with a brush attachment or a coil cleaning brush to clean off all dust and pet hair. This alone can fix a freezer that's struggling to cool.
One more thing before you give up. If the freezer has an electronic control board, a power surge can blow a small fuse on the board. Accessing the board requires removing the back panel, but locating and testing that fuse is straightforward with a multimeter. If it's blown, replacing it costs pennies and takes one solder job (or a new board if the fuse is soldered in place).
Most "freezer not cooling" cases end with a new start relay. It's the cheapest and easiest fix you'll ever do on an appliance, and it saves you a service call that would run $150 to $250 just for the visit.
#2: Loud Noises – Humming, Clicking, Buzzing, and What Each Sound Means
Freezers make noise. That's normal. But when the noise changes or gets noticeably louder, something is wrong.
The key is identifying which part is making the racket.
Clicking every few seconds. You already know this one from the last section. It's the compressor trying to start and failing. The overload protector clicks it off after a few seconds of high current, then it tries again.
Fix the start relay.
A loud buzz or hum that stays constant. Unplug the freezer. Remove the back access panel. Spin the condenser fan blade by hand.
Does it spin freely without resistance? If it feels tight or makes a grinding sound, the fan motor bearings are shot. New condenser fan motors cost around $25 to $40 and take about 15 minutes to replace.
While you're back there, check nothing is hitting the fan blade, a wire or a piece of packaging can cause a buzzing noise.
Whistling or high-pitched whine. That's the evaporator fan inside the freezer. Open the door, press the door switch to turn the light off, and listen. If the noise stops when the fan stops, you've found it.
The evaporator fan motor has bearings that wear out over time. Replacement motors cost between $30 and $60 depending on your model. The job requires removing the back panel inside the freezer and unclipping the motor.
Rattling or knocking. Check for loose items inside the freezer first. A frozen bag of peas vibrating against the fan housing can sound exactly like a failing motor. If nothing is loose, the rattle might be a condenser fan blade that's cracked or loose on the motor shaft.
Tighten the set screw or replace the blade.
Gurgling or hissing. This is actually normal. It's refrigerant flowing through the evaporator coils. It happens during the defrost cycle or just after the compressor shuts off.
If it's accompanied by poor cooling, then you might have a refrigerant leak, but that's rare and requires a certified technician to diagnose and repair.
Banging or popping. This one sounds scarier than it is. The metal panels on the back of the freezer expand and contract as the compressor cycles on and off. If a screw has loosened or a panel has warped slightly, you'll get a loud pop or bang.
Tighten the back panel screws and see if it stops. If the sound happens during the defrost cycle, it's the defrost heater tube expanding, harmless, but you can dampen it by ensuring the tube is properly clipped in place.
Rumbling or vibration. The freezer may not be level. Grab the top and give it a gentle rock. If it wiggles, adjust the leveling feet or rollers until it sits solid.
An unlevel freezer can cause the compressor to vibrate against the floor, amplifying normal noise into a low rumble.
#3: Ice Buildup Inside – Frost-Free System Failure or a Clogged Drain?
Frost-free freezers have a defrost system that melts accumulated frost every 8 to 12 hours. When that system fails, frost builds up until you're scraping ice off the back wall with a spatula. This is a very common issue on Whirlpool uprights, and it's almost always one of three components.
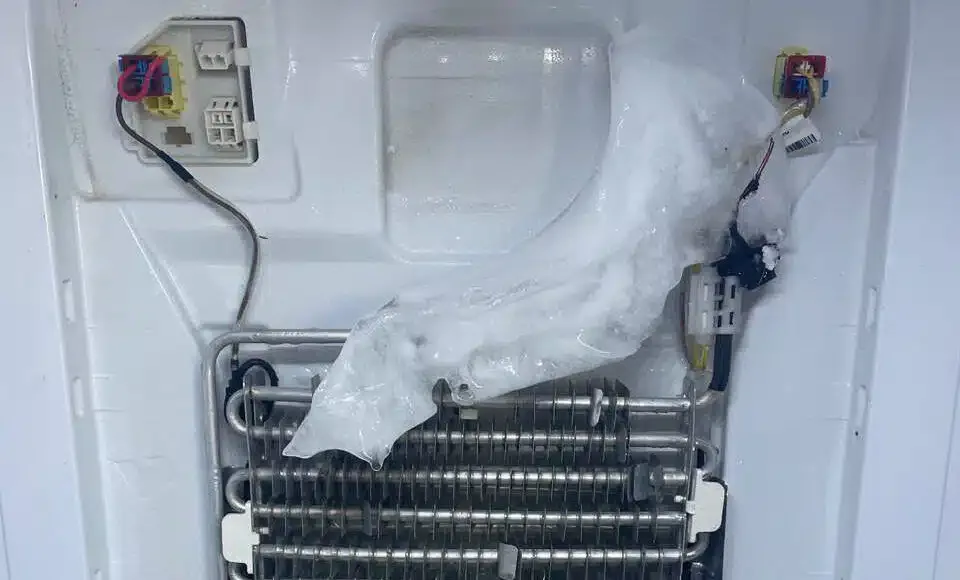
Image source: Bing (Web (fair-use with source credit))
First, check for a clogged drain tube. This is the most common cause and the easiest fix. Water from the defrost cycle flows down the back wall into a drain pan near the compressor. If that drain tube gets clogged with debris or ice, water backs up and freezes inside the freezer.
Remove everything from the freezer (or at least the bottom shelf). Look for a small drain hole in the bottom center of the freezer floor. Pour a cup of hot water down the drain.
If it backs up, you've got a clog. Use a turkey baster or a piece of stiff wire to clear the tube. A shop vac blowing through the drain from the back side works great too.
If the drain is clear but you have heavy ice on the back wall, the defrost system isn't running. You need to test three components.
Test the defrost heater. It's the glass tube or metal wire mounted behind the back panel inside the freezer. Remove the back panel screws. Unplug the heater wires and test with a multimeter set to ohms.
A good heater shows low resistance (usually 20 to 60 ohms). Infinite resistance means the heater is burned out and needs replacement. They cost around $15 to $25.
Test the defrost thermostat (bi-metal switch). It's a small metal disc clipped to the evaporator coils. It closes when the coils get cold (below about 28°F) and opens when they warm up during defrost. Test it with the freezer running.
It should show continuity (closed circuit). If it shows infinite resistance (open circuit), it's failed and needs replacement. Cost: about $10 to $15.
Test the defrost timer. On older mechanical Whirlpool models, the defrost timer is a small square box with a dial. Turn the dial slowly until you hear the timer click into defrost mode. The compressor should stop and the defrost heater should come on.
Let it run for 5 to 10 minutes, you should see the frost starting to melt. If nothing happens, the timer motor may be bad. Cost: about $15 to $20.
On newer electronic models, the defrost cycle is controlled by the main board and a thermistor. If those are the issue, you're looking at a board replacement, which is more involved.
How serious is this? A failed defrost system won't permanently damage your freezer, but it will make it unusable for frozen food storage because the ice takes up space and insulates the coils, making cooling less efficient. If you catch it early, you can manually defrost the freezer (unplug it, leave the door open, place towels to catch water) and then replace the faulty component while everything is thawed.
#4: Freezer Runs Constantly or Cycles Too Often – Thermostat, Thermistor, or Control Board?
A freezer that never shuts off is running up your electric bill and wearing out the compressor prematurely. A freezer that cycles on and off every few minutes is also a problem, it can't maintain a stable temperature.
First, check the door seal. This is the single most overlooked cause of a constantly running freezer. Open the door and inspect the magnetic gasket all the way around. Is it cracked, flattened, or missing magnetic pull?
Close the door on a dollar bill. Pull the bill out. If it slides out easily with no resistance, the seal is weak and warm air is entering the freezer.
The compressor has to run constantly to keep up. Replacement gaskets cost around $30 to $60 and take about 30 minutes to install. You soften the old gasket with a heat gun, pull it out of the channel, and press the new one in.
Check the temperature setting. Someone may have bumped the control dial. Factory recommendation is 0°F. If the dial is turned to a colder setting (like -10°F), the freezer will run longer to reach that temperature.
It's an easy fix.
Test the thermostat (mechanical models). If the freezer has a rotary dial control, the thermostat itself may be sticking closed. With the freezer running, turn the dial to the warmest setting. After a few seconds you should hear a click and the compressor should stop.
If it doesn't stop, the thermostat contacts are welded shut. Replace it. Cost: approximately $15 to $25.
Test the thermistor (electronic models). Whirlpool uprights with digital displays use a thermistor, a temperature-sensing probe, to tell the control board when to cycle the compressor. A failed thermistor can read the wrong temperature, causing the compressor to run too long or not long enough. Test it with a multimeter.
At room temperature (about 70°F), the thermistor should read around 10,000 to 12,000 ohms. Put it in a cup of ice water, the reading should jump to around 20,000 to 30,000 ohms. If the reading is stuck or wildly off, replace the thermistor.
Cost: $10 to $20.
Consider the control board. If the thermostat or thermistor tests good, the control board itself may be miscommunicating. This is rare but happens, especially on freezers that have survived a power surge. There's no easy DIY test for the board.
Your best bet is to observe whether the freezer responds correctly when you change settings. If it doesn't, and all other components check out, the board likely needs replacement. A new control board costs about $50 to $100 and usually requires simply unplugging the old one and plugging in the new one.
#5: Door Seal Issues – Leaks, Condensation, and Warm Air Getting In
The door seal (gasket) is the most underrated part of your freezer. A bad gasket lets warm, humid air seep inside. That forces the compressor to run longer, builds frost, and can make the outside of the freezer sweat with condensation.
You might not even notice it's bad until you spot water on the floor or ice forming near the door.
Check the gasket visually. Run your finger along the entire gasket. Feel for cracks, flattened spots, or areas where the magnet has lost its pull. Look for mold or dirt buildup, that can prevent a good seal too.
The dollar bill test. Close the door on a bill. Try to pull it out. It should meet resistance all the way around.
If it slides out easily in any spot, that part of the gasket is compromised. Do this at the top, bottom, both sides, and near the hinge.
What causes gasket failure. Age is the main factor. The rubber dries out and loses flexibility. Also, if the freezer door has been left open or overloaded, the hinges can sag slightly, pulling the gasket out of alignment.
For hinges, tightening the hinge screws can help. For the gasket itself, replacement is the only real fix.
How to replace the gasket. Buy a genuine Whirlpool gasket for your model (use the model number on the inside label). Unplug the freezer. Remove the old gasket, on most models it's held in by a channel under the inner door liner, held with screws or a retaining strip.
Soak the new gasket in warm water for a few minutes to soften it. Then press it into the channel, starting at the top and working around. Tighten the screws evenly.
Close the door and let it sit for 24 hours so the gasket forms to the frame.
A cheaper temporary fix. If you can't replace the gasket right away, clean it thoroughly with warm soapy water. Rinse and dry. Apply a thin layer of petroleum jelly (Vaseline) to the sealing surface.
This can temporarily improve the seal by softening the rubber. It's not a permanent solution, but it can buy you a week or two.
Condensation on the outside of the freezer. That's usually high humidity in the room, not the door seal. But if it's excessive or only near the door, double-check the gasket. A small leak can cause localized sweating.
Six Common Mistakes That Waste Your Time or Make Things Worse
When you're frustrated with a broken freezer, it's easy to make mistakes that cost you time or even cause more damage. Here are the most common ones and how to avoid them.
Mistake 1: Replacing the start relay without checking the overload protector. The start relay and overload protector work as a pair. If one fails from age, the other might be close behind. Replace both at the same time.
They cost less than $25 together, and you save yourself a second repair visit next month.
Mistake 2: Forgetting to unplug the freezer before testing components. This seems obvious, but people skip it. Electricity and metal parts in a damp environment are a bad mix. Always unplug the freezer before you touch any electrical component.
If you're testing voltage, carefully plug it back in just for the test and unplug again.
Mistake 3: Using a sharp tool to scrape ice off the evaporator coils. You might puncture the refrigerant lines. A single pinhole leak means the entire sealed system is compromised, and that repair costs more than the freezer is worth. Instead, unplug the freezer and let the ice melt naturally.
Use a hair dryer on low heat if you're impatient. Point it at the ice, not the coils directly.
Mistake 4: Ignoring the condenser coils. Dirty coils are the cause of maybe 10% of cooling problems. But they're also the easiest thing to clean. If you've already taken the back panel off to test the relay, spend two minutes cleaning the coils while you're there.
It's free insurance against an unnecessary service call.
Mistake 5: Overtightening screws on the back panel. The metal panels are thin and the screw holes strip easily. Just snug them up. If you hear a rattle and think a screw is loose, check the panel is fully seated before you crank on it.
Mistake 6: Assuming the control board is bad without testing everything else. Control boards are expensive and hard to test. The vast majority of "dead" freezers have a simple component failure, start relay, overload, defrost timer, or a blown fuse on the board itself. Test those first.
You'd be surprised how often a $10 part fixes a freezer that "looks" like a board issue.
When to Call a Technician – And When You Can Fix It Yourself
This guide covers about 90% of the problems you'll see on a Whirlpool upright freezer. But some issues are beyond the average DIYer. Here's how to decide.
Fix it yourself if:
- The freezer is not cooling but you hear the compressor humming or clicking
- There's ice buildup but the freezer still gets cold
- The freezer makes a loud noise and you can identify which fan is failing
- You have a multimeter and basic hand tools
- The freezer is out of warranty
Call a technician if:
- The compressor is silent and you've confirmed 120V at the terminals, but the relay and overload test good
- There's a suspected refrigerant leak (oil stains on the evaporator or compressor, poor cooling with hissing)
- The freezer has a sealed-system failure and is under 5 years old (some Whirlpool compressors have a 5-year warranty)
- You don't feel comfortable working with electrical components
Quick cost comparison:
- DIY start relay replacement: $10 to $15 plus 15 minutes
- Service call for a relay: $150 to $250 plus part cost
- DIY defrost heater replacement: $15 to $25 plus 30 minutes
- Service call for defrost: $150 to $250 plus part cost
- Professional compressor replacement: $400 to $800 (not worth it on most freezers)
A note on safety. Refrigerant (R-134a or R-600a in newer models) is under pressure and can cause frostbite or asphyxiation if released. If you suspect a leak, do not try to repair it yourself. It requires EPA-certified handling.
The same goes for any compressor replacement, the system must be evacuated and recharged with the proper equipment.
Frequently Asked Questions
Why is my Whirlpool upright freezer not freezing but the light is on?
The light works on a separate circuit from the compressor. A bad start relay, overload protector, or stuck defrost timer can keep the compressor from running. Test the start relay first, it's the most common cause.
How do I manually defrost my Whirlpool upright freezer?
Unplug the freezer. Remove all food. Open the door and place towels on the floor to catch water.
Let the ice melt naturally, which can take 6 to 12 hours. Speed it up with a hair dryer on low heat, never use a sharp tool to chip ice.
Why does my freezer keep tripping the breaker?
A shorted compressor, a failing fan motor drawing too many amps, or a damaged power cord can cause breaker trips. The overload protector may also be stuck. Check the fan motors for resistance and test the compressor windings.
If you're unsure, call a technician.
How often should I clean the condenser coils?
At least once a year. If the freezer is in a garage or basement where dust and pet hair accumulate, clean them every six months. Dirty coils make the compressor run longer and can cause premature failure.
Can I replace a Whirlpool freezer gasket myself?
Yes. It's a straightforward job that takes about 30 minutes. Use a genuine Whirlpool gasket matched to your model number.
Soak it in warm water before installation to make it pliable. Follow the steps in Section #5 above.
What do the error codes on my Whirlpool freezer mean?
E1 and E2 typically indicate a failed thermistor (temperature sensor). F1 can mean a control board fault. Check your owner's manual for the exact code.
You can find manuals for free on Whirlpool's official website using your model number.
Is it worth repairing an old Whirlpool upright freezer?
If the compressor is bad or the sealed system has a leak, it's usually not worth it, repair costs can exceed $400. But for a failed relay, defrost heater, or fan motor, repairs are cheap and the freezer can run for years more. As a rule of thumb, if the repair costs more than half the price of a new freezer, replace it.

Similar Posts