Dodge Caravan Climate Control Problems
If your Dodge Caravan's heat goes cold mid-winter or the A/C blows warm on a summer road trip, you're not alone. Dodge Caravan climate control problems are one of the most frequently reported issues across all generations of this minivan, from the 1996 models through the 2020 final year. The good news is that most of these failures follow predictable patterns, and knowing what you're dealing with before you start spending money can save you hundreds.
Manufacturer service bulletins from FCA document that blend door actuator failures alone account for roughly 40% of HVAC-related warranty claims on 2008, 2020 Grand Caravans. The rest break down into a handful of other repeat offenders. As of 2026, replacement parts are widely available and many repairs are doable at home if you know the right shortcuts.
Let's walk through exactly what goes wrong, how to diagnose it, and what each fix actually costs.
Quick Answer
Dodge Caravan climate control problems usually come from four main causes. Blend door actuators fail and strip their plastic gears. Heater cores clog or leak.
A/C compressors lose clutch engagement. Blower motor resistors burn out. Diagnose the symptom first.
Then match it to the right fix. Most repairs cost between 20 and 1200 dollars depending on labor.
Image source: Bing (Web (fair-use with source credit))
Why Getting the Diagnosis Right Matters More Than the Repair
Climate control problems on these vans all feel similar from the driver's seat. No heat, weak airflow, clicking sounds, or A/C that won't get cold. But what feels like the same problem can be four completely different failures.
If you throw parts at the wrong one, you're out money and still have a broken van.
Take a common example. Your Caravan blows cold air but won't switch to heat. Many people immediately suspect the heater core.
That's a 600 to 1200 dollar job because the dashboard has to come out. On 2008 and newer models, a clicking blend door actuator is far more likely. That replacement costs about 50 to 80 bucks for the part and a couple hours of your time.
No dash removal needed.
Misdiagnosis hurts in the other direction too. Your A/C blows warm. You grab a refrigerant can and top it off.
The system works for a week then stops. You wasted 40 dollars and masked a leak that's now contaminated with moisture. That leak could be in the evaporator, which means a dash pull.
Or it could be a 15 dollar O-ring at the compressor.
The stakes go beyond money. A heater that fails in January means fogged windows you can't clear. That's a safety issue, especially with kids in the back.
An A/C that dies in July makes the cabin dangerous in extreme heat. Getting the diagnosis right the first time keeps the van safe and drivable.
The Most Common Climate Control Failures (and How to Spot Them)
After digging through owner forums, service bulletins, and repair data, four failures make up the vast majority of Dodge Caravan climate control problems. Each one has a distinct set of symptoms.
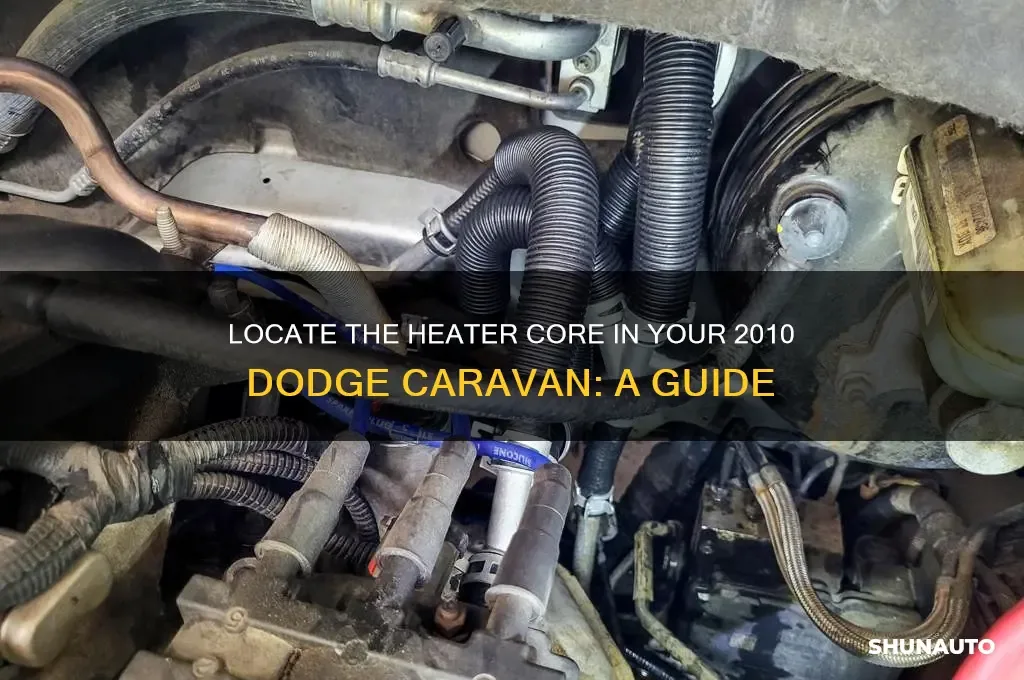
Image source: Bing (Web (fair-use with source credit))
Blend Door Actuator Failure
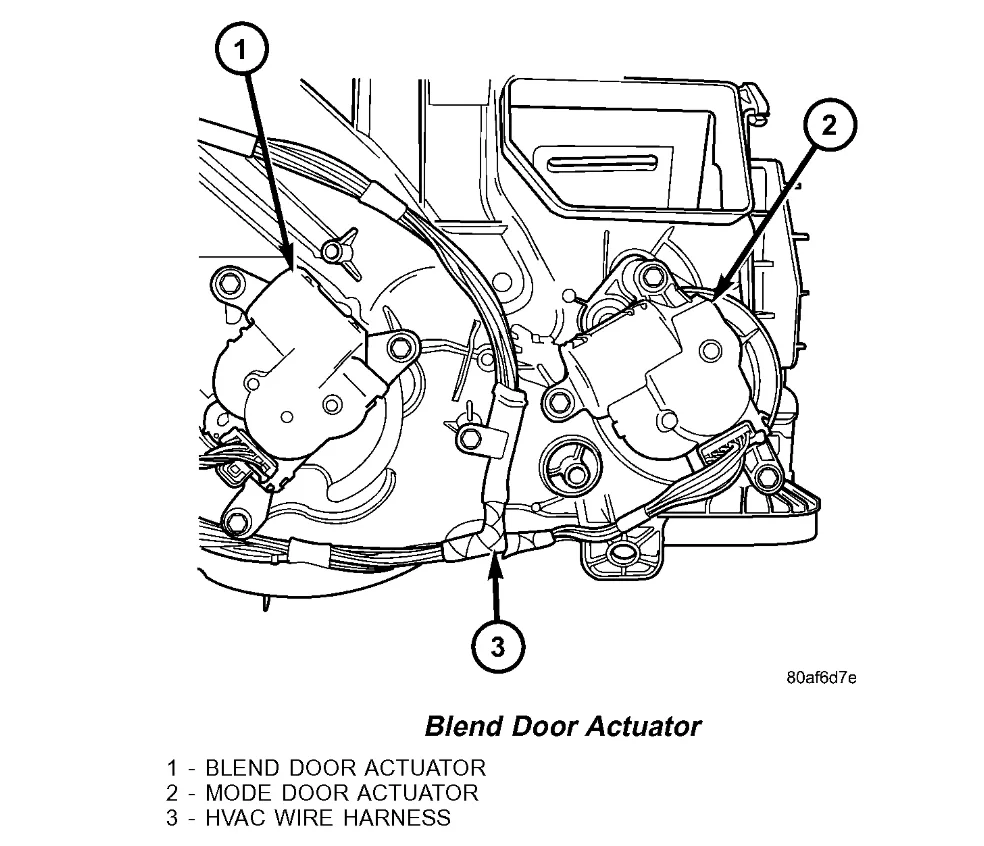
This is the most common Caravan HVAC problem. The blend door actuator is a small plastic motor behind the dashboard that controls whether air flows over the heater core or the A/C evaporator. The gears inside are made of plastic.
Under normal use they strip out somewhere between 80,000 and 120,000 miles.
Symptoms include a clicking or ratcheting sound behind the glovebox when you change temperature. Heat on one side and cold on the other on dual-zone models. Air blows hot when you set it to cold, or vice versa.
The temperature change never happens or happens slowly.
On 2008 to 2020 models, these actuators are relatively accessible. You can reach them from the passenger footwell after removing the glovebox and a trim panel. The driver side actuator on dual-zone vans is tighter but still doable without dash removal.
Heater Core Clog or Leak
The heater core is a small radiator inside the dashboard. Hot engine coolant flows through it, and the blower fan pushes air across it to warm the cabin. Over time, debris in the coolant can clog the core.
Corrosion can also create pinhole leaks.
Symptoms include weak or no heat even after the engine is fully warm. A sweet smell inside the cabin from coolant. Steam or fog on the windshield that doesn't clear.
A coolant puddle on the passenger floor mat. The engine running low on coolant with no external leak.
A clogged heater core can sometimes be flushed. A leaking core must be replaced. The dashboard has to come out.
Book time is 8 to 10 hours. At 100 to 150 dollars per hour, you're looking at 800 to 1500 in labor alone.
A/C Compressor Clutch Failure
The A/C compressor has an electromagnetic clutch that engages to spin the pump. On Dodge Caravans, the clutch gap can widen as the friction plate wears. Once the gap exceeds about 0.040 inches, the magnet can no longer pull the plate tight enough to engage.
Symptoms include A/C blowing warm or ambient temperature air. The engine idle changes slightly when you press the A/C button, or it doesn't. A clicking sound from the compressor area when A/C is requested.
Visual inspection shows the clutch plate not spinning when A/C is on.
This is commonly misdiagnosed. People replace a 400 dollar compressor when a 30 dollar clutch plate and a feeler gauge fix it in 20 minutes.
Blower Motor Resistor Failure
The blower motor resistor controls fan speed. On older Caravans, it's a simple resistor pack. On newer models, it's a solid-state controller.
Both fail when the blower motor draws too much current or when corrosion sets in.
Symptoms include the fan only working on the highest speed setting. The fan running at one speed only. The fan working intermittently or stopping entirely.
A burned smell from the vents.
The fix is straightforward. Replace the resistor or controller. It's usually behind the glovebox or under the passenger side of the dash.
The part costs 15 to 40 dollars. Labor is about 30 minutes.
How to Diagnose Your Caravan's Problem Without Wasting Money
You don't need a scan tool or a mechanic to narrow down which of those four failures you're dealing with. Most of the time, the symptom itself tells you everything.
Step 1: Listen first, touch second. Turn the ignition to ON without starting the engine. Change the temperature from cold to hot and listen. If you hear clicking from behind the dash, you've found your blend door actuator.
No clicking? Move on.
Step 2: Check the heat with the engine fully warm. Drive the van for at least 15 minutes. Set the temperature to max heat, fan on high. Put your hand over the vent.
Hot air should feel uncomfortable to hold after about 10 seconds. If it's warm but not hot, suspect a clogged heater core or air in the system. If it's cold, the blend door is stuck on the cold side or the heater core is fully blocked.
Step 3: Check the A/C the same way. With the engine running and A/C set to max cold and recirculation, use a thermometer in the vent. On an 80 degree day, vent temperature should drop to 40 to 50 degrees. Anything above 55 degrees means the system isn't working properly.
Step 4: Visual check on the compressor. Open the hood and locate the A/C compressor on the passenger side of the engine. Have someone turn the A/C on and off while you watch. The clutch plate should spin when A/C is on and stop when it's off.
If the plate doesn't engage, check the clutch gap with a feeler gauge. 0.020 to 0.040 inches is normal. Wider than that and the clutch won't grab.
Step 5: Use the ATC self-diagnostic mode if you have automatic climate control. This trick works on 2008 to 2020 models with the digital temperature display. Press and hold the AUTO and RECIRC buttons simultaneously. Turn the ignition to ON while still holding both buttons.
After about 5 seconds, the display will show a code.

Image source: Bing (Web (fair-use with source credit))
Common codes include 00 or 01 for no fault detected. Codes 10 through 19 indicate blend door actuator issues. Code 17 or 18 usually means stripped gears.
Codes 20 through 29 point to mode door actuator issues. Codes 30 through 39 are temperature sensor faults. Codes 40 through 49 are sun sensor or ambient sensor faults.
This diagnostic mode is free and takes 30 seconds. If you see code 17 or 18, you're replacing a blend door actuator. Don't waste time looking at heater cores.
The Real Cost of Fixing Each Problem (Parts + Labor)
Here's the honest breakdown. Prices are as of early 2026 and reflect quality aftermarket parts. Shop labor rates assume 100 to 150 dollars per hour.
| Problem | Part Cost | DIY Labor Time | Shop Labor Cost | Total at Shop |
|---|---|---|---|---|
| Blend door actuator | $30–80 | 1–3 hours | $150–450 | $180–530 |
| Heater core (replace) | $50–150 | 6–10 hours | $800–1,500 | $850–1,650 |
| Heater core flush (clog only) | $10–20 flush kit | 1 hour | $100–150 | $110–170 |
| A/C compressor (full replacement) | $200–400 | 3–4 hours | $400–600 | $600–1,000 |
| A/C clutch plate only | $20–40 | 20 minutes | $50–100 | $70–140 |
| Blower motor resistor | $15–40 | 30 minutes | $50–100 | $65–140 |
| Blower motor (if resistor was symptom) | $40–90 | 1 hour | $100–150 | $140–240 |
| A/C recharge (no leak) | $30–60 (DIY) | 30 minutes | $100–150 | $130–210 |
| Vacuum line repair (old models) | $5–15 (hose) | 30–60 minutes | $50–100 | $55–115 |
Those heater core labor numbers are not a typo. The dashboard has to come completely out. That's why some owners choose to bypass the heater core in winter.
It's not a permanent fix. You lose defrost capability, which is a safety issue. But it buys time.
Rear climate system repairs add another layer. The rear actuator and blower motor are in the cargo area trim. Labor is less because no dashboard removal is needed.
Parts availability for rear HVAC components can be spotty on older models.
When to DIY vs. When to Call a Pro
Not every repair on a Dodge Caravan is equally accessible. Some jobs are straightforward. Others will eat your weekend.
Do these yourself if you have basic tools and patience:
Blend door actuator replacement, especially the passenger side. You can reach it from the footwell with a screwdriver and a socket set. Hardest part is getting your arm into position.
Look for metal-gear replacement options from Dorman on some models. Worth the small price premium.
Blower motor resistor replacement. It's right there behind the glovebox. Unplug the old one, plug in the new one.
Done.
A/C clutch plate replacement. A belt tool and a feeler gauge are all you need. Don't replace the entire compressor if the clutch is the only problem.
Heater core flush. If the core is clogged but not leaking, a garden hose and a flush kit can clear it. Works about 40 percent of the time.
No risk of making things worse.
Call a pro for these:
Heater core replacement. The dash removal is tedious. Plastic clips break easily and are no longer manufactured.
One broken clip and your dash rattles forever. The service manual says 8 hours. First-timers take 12 to 16 and sometimes never get everything back right.
A/C compressor replacement. You need to flush the entire system, replace the receiver drier or accumulator, and pull a vacuum for at least 30 minutes. Most DIYers skip the vacuum step or don't pull long enough.
That traps moisture and kills the new compressor in months.
Evaporator replacement. Same dash removal as the heater core. Same labor cost.
Same warning about broken clips.
Any repair involving refrigerant. EPA regulations require a certified recovery machine. The machine alone costs more than having a shop do the job.
The cans at auto parts stores are a workaround, not a real solution for a leaking system.
The honest rule of thumb is simple. If the repair is above the dash and visible from the footwell or under the hood, you can probably do it yourself. If it requires removing the dashboard, the savings isn't worth the headache for most people.
Safety Warnings and Legal Gotchas You Can't Afford to Ignore
Working on your Caravan's climate system involves real hazards. The first is refrigerant. Under EPA regulations, it's illegal to vent R134a or R1234yf into the atmosphere.
You need a certified recovery machine to service the system legally. The small DIY refrigerant cans are a workaround at best. They're only meant for topping off a known-good system.
Overcharging can blow the compressor relief valve.
Coolant is another danger. Ethylene glycol is sweet-tasting and highly toxic. Spilled antifreeze can kill pets or attract children.
Clean spills immediately with absorbent pads or kitty litter.
If you're pulling the dashboard for a heater core or evaporator, respect the airbag system. Disconnect the negative battery cable and wait at least two minutes for the capacitor to discharge. Never run the A/C in recirculation mode inside a closed garage.
Carbon monoxide can build up and poison you in minutes. Use jackstands whenever you're climbing under the van. And know that most states require a functioning defroster to pass safety inspection.
Frequently Asked Questions
Why does my Caravan blow cold air but no heat?
Most often a blend door actuator has failed. The door stays stuck on the cold side and never opens. Listen for clicking behind the dash.
If there's no clicking, suspect a clogged heater core or low coolant.
Can I temporarily bypass the heater core?
Yes. Connect the two heater hoses together in the engine bay with a union fitting. You'll lose cabin heat and defrost, so it's only for emergencies in warm weather.
Bypassing keeps you driving while you save up for the core replacement.
Why does my A/C work sometimes and then stop?
The compressor clutch gap likely widened. As the clutch heats up, the gap grows past what the magnet can pull. When it cools, it engages again.
Check the gap with a feeler gauge. A clutch plate is a 30 dollar fix.
Is the ATC self-diagnostic mode reliable?
Very reliable for actuator faults. Codes like 17 or 18 point straight to blend door problems. Sensor codes are also trustworthy.
The mode won't catch mechanical failures like a seized compressor or refrigerant leaks, so pair it with a physical inspection.

Similar Posts
































