Dse 1049 Troubleshooting
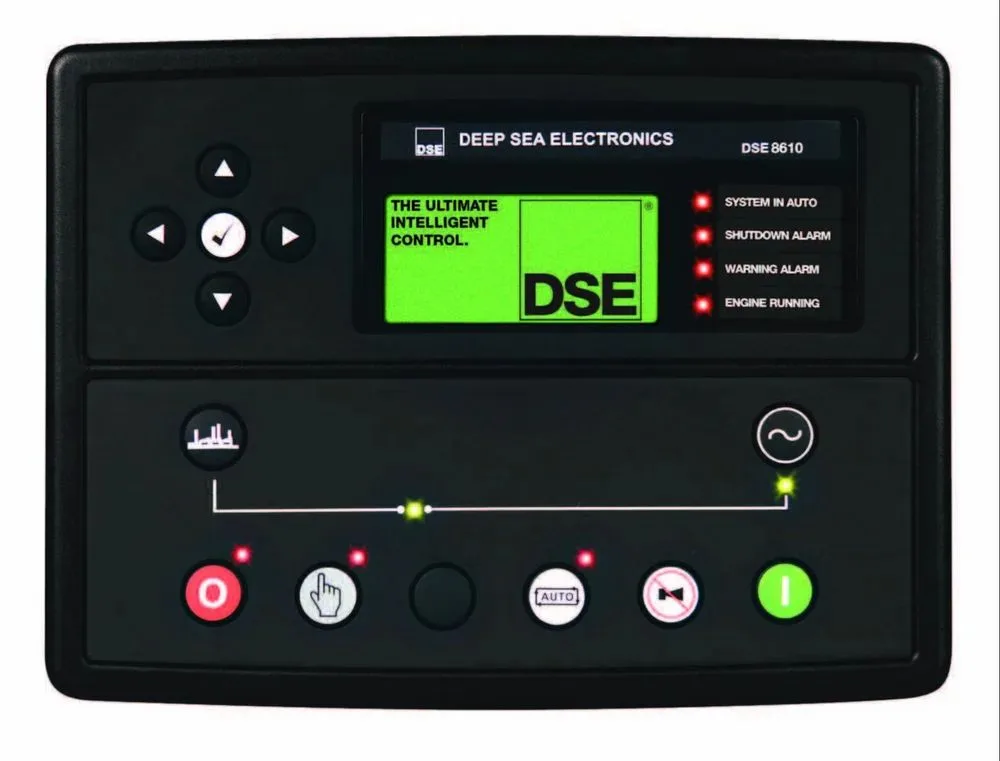
Image source: Bing (Web (fair-use with source credit))
When your generator's control module goes dark or throws a fault code, it's easy to assume the worst. But the DSE 1049 is a straightforward unit, and most problems trace back to a handful of common causes. This guide walks you through the process step by step, so you can diagnose the issue quickly and get back online.
What the DSE 1049 Does
The DSE 1049 is an auto-start module for single generator sets. It monitors the mains supply, starts the engine when power fails, and transfers the load to the generator once the alternator is producing stable voltage. When the mains return, it shuts the generator down after a cooling period.
The module runs off the generator's starter battery, not the mains supply. That's the first thing to understand, because it means the controller can be completely dead even when the grid is fine. If the battery is flat or a fuse is blown, the module simply has no power to operate.
The 1049 has specific terminals for DC supply, ignition, fuel solenoid, crank output, and inputs for oil pressure, coolant temperature, and emergency stop. Each one plays a role in the start sequence. When something stops working, the fault is almost always on one of these lines.
First Checks: Before You Open Anything
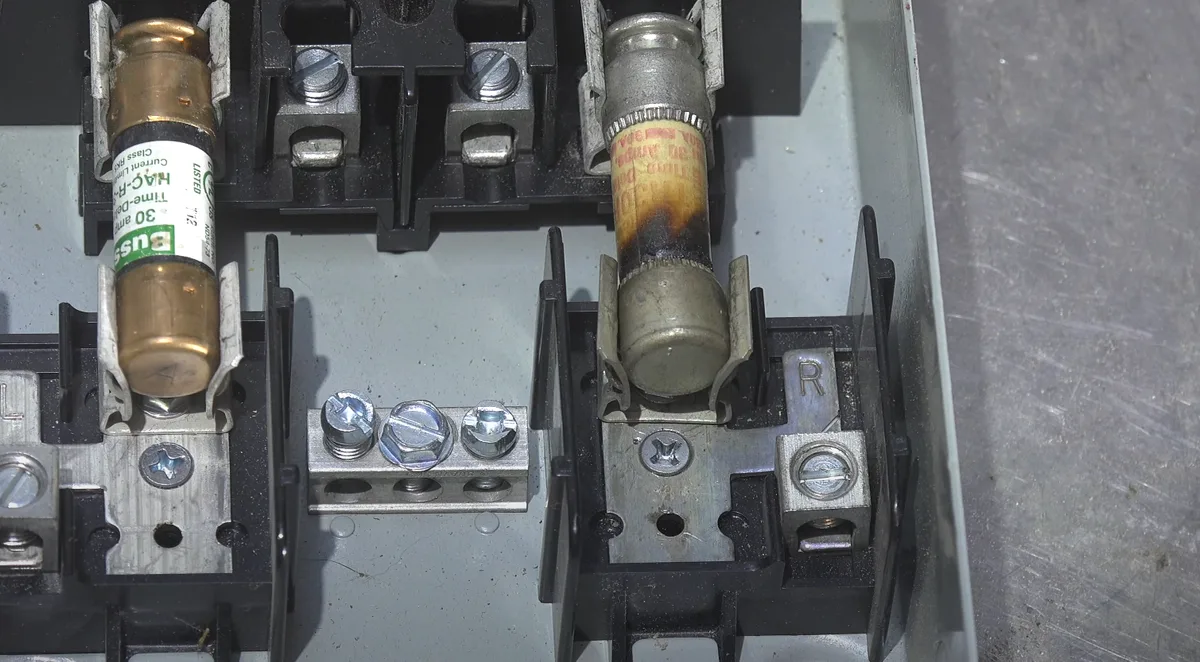
Image source: Bing (Web (fair-use with source credit))
You're staring at a dead controller. Before you start unscrewing things, run through these five checks. They take about ten minutes and will save you a lot of grief.
1. Check Battery Voltage
Measure the voltage directly at the battery terminals with a multimeter. A fully charged 12V battery reads around 12.7 volts. Anything under 12.2 volts is suspect.
Under load, the voltage will drop further. If the battery is weak, the controller may latch into a low-voltage fault.
2. Check the Battery Isolation Switch
If your generator has a master switch on the negative or positive line, make sure it's actually on. I've lost track of how many "dead" generators were just sitting with the isolation switch off. A simple continuity test across the switch terminals will tell you if it's passing current.
3. Check DC Supply at the Module
Don't assume the battery is good just because it has voltage. Trace the positive and negative wires to the controller terminals and measure voltage right there. If you have battery voltage at the battery but nothing at the module, you have a wiring fault, a corroded connection, or a blown fuse in between.
4. Check the Internal Fuse F1
This is the hidden gotcha. The fuse is on the back of the module, so you won't see it with the controller mounted in the panel. You'll need to partially pull the module or access the rear panel.
The most common failure point is this internal blade fuse. If someone crosses the battery leads, shorts an output, or the alternator back-feeds the panel, that fuse blows. When it blows, the module goes completely dead.
Pull F1 and check continuity with your multimeter. If it's blown, replace it with the correct amperage blade fuse. A huge percentage of "dead controller" calls end up being nothing more than a blown fuse.
It's a 15-minute fix and a 50-cent part. Before you spend hundreds on a replacement module, pull the fuse and check it.
5. Check the Front Panel LED State
The 1049 has a red LED and an LCD screen. In a healthy state with no fault, the LCD shows system information. If the LCD is completely blank, the module isn't powered.
If the LCD has characters but they're garbled or frozen, the module has an internal fault or a corrupted display.
When It Won't Crank
The engine doesn't turn over. The control panel is lit, so the module has power. Now you need to work through the crank circuit in a logical order.
Here's the decision tree for a no-crank condition.
Check for a Crank Command
When the module is in Auto mode and the mains fail, or when you hit the Manual Start button, the crank output terminal should go high, sending power to the starter relay. Place one multimeter lead on the crank output terminal and the other on ground. When you press start, you should see battery voltage appear.
If you do, the module is doing its job.
Check the Start Relay
If you have voltage at the crank output but the engine isn't cranking, the issue is downstream. Find the start relay, usually a standard automotive-style relay in the control panel. Listen for a click when the start command is sent.
No click means the relay coil isn't energized or the relay is faulty. Check for voltage at the relay coil terminals and, if present, replace the relay.
Check the Starter Solenoid and Motor
If the relay clicks and you still get nothing, the problem is the high-current circuit. This includes the wiring from the relay to the starter solenoid and the starter motor itself. Check for voltage at the solenoid's small terminal during a crank attempt.
If voltage is present but the starter doesn't spin, the solenoid or the starter motor is likely dead.
Check for Mechanical Issues
Sometimes the engine won't crank because it physically can't. A seized engine, a stuck starter bendix, or a hydraulic lock in a cylinder will stop everything. Try turning the engine over by hand with a wrench on the crankshaft pulley.
If it won't turn, no amount of relay swapping will fix it.
The Sneaky One: Weak Battery Under Load
You checked the battery static voltage and it looked fine. But when the starter draws 150 amps, the voltage may collapse. Re-check the battery voltage while someone is pressing the start button.
If it drops below 10 volts on a 12V system, the battery is failing under load, even if it reads 12.4 volts at rest.
Decoding DSE 1049 Fault Codes
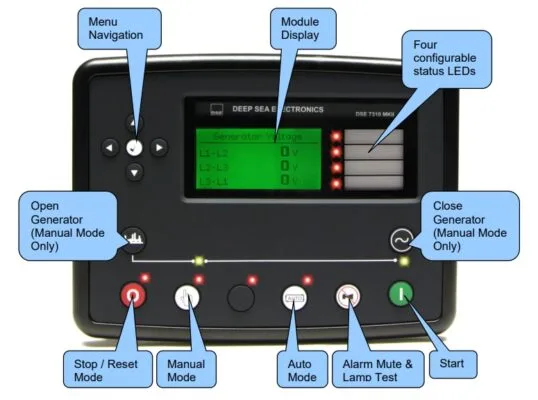
Image source: Bing (Web (fair-use with source credit))
The DSE 1049 displays fault codes on its LCD screen. Each code points to a specific problem area. You don't need the full manual to decode the common ones.
Here's what you'll actually see in the field.
Fault Code 1.1 — Low Engine Speed
The module is sending a start signal, but the engine isn't turning fast enough. This usually means the starter isn't cranking the engine with enough speed, or the speed sensing signal is missing. Check the battery, the starter, and the magnetic pickup wiring.
Fault Code 1.2 — Overspeed
The engine is running way too fast. This happens when the governor fails, or when the speed sensing signal is corrupted. Immediately shut the generator down and check the governor linkage and the speed sensor, which is on the engine's flywheel housing.
Fault Code 3.1 — Low Charge
The module monitors the alternator's charging output. If the voltage drops below the threshold while the engine is running, you get this code. This means a faulty alternator, a broken belt, or a wiring issue in the charging circuit.
Fault Code 32.1 — Fail to Start
This is the big one. You'll see it when the module has made its allotted number of crank attempts and the engine still hasn't started. The fault code has to be reset before the module will try again.
This isn't the root cause, it's a symptom. You need to figure out why the engine isn't starting, which means checking fuel supply, fuel solenoid operation, and spark on gasoline engines.
Fault Code 41.1 — Low Oil Pressure
After the engine starts, the module waits a few seconds for oil pressure to build. If the pressure switch doesn't close, you get this fault. This could be a real low oil problem, or a faulty pressure switch.
Check the oil level first, then test the switch with a multimeter.
Other Shutdown Codes
You might also see shutdown codes like 31.1 (low coolant temperature, uncommon on a genset), 38.1 (high coolant temperature), and 39.1 (emergency stop). These all point to specific engine issues. If you see a code not on this list, refer to the DSE 1049 installation manual.
It lists every code and its meaning in detail.
Wiring Checks: The DSE 1049 Terminal Guide
Wiring faults are the number one cause of DSE 1049 issues. Corroded terminals, loose connections, and chafed wires all create intermittent problems that are hard to track down. Here's what to check on the main terminal blocks.
DC Supply Terminals
The positive and negative DC supply terminals are your starting point. These need clean, solid connections. Check for corrosion on the terminal lugs and ensure the wires aren't cracked or brittle.
A loose connection here will cause random resets and phantom faults.
Crank and Fuel Solenoid Outputs
These terminals send power to the starter relay and fuel solenoid. Check them for continuity and solid connections. If these terminals are loose, you'll get intermittent crank or fuel issues.
The module may start sometimes and fail others, depending on vibration and load.
Speed Sensing Input
The magnetic pickup wires connect here. These wires are sensitive and need to be shielded or twisted pair. If they run too close to high-current wiring, you'll get signal interference that causes speed faults.
Check the wiring routing and the connector condition.
Emergency Stop Circuit
The emergency stop input must be a closed circuit for the module to operate. If the circuit opens, the module shuts down and displays a fault. Test the emergency stop button for continuity in its reset position.
A faulty stop button is a common cause of unexpected shutdowns.
Replacing the DSE 1049: When It's Actually Necessary
You've gone through everything above and the module is still dead or misbehaving. At some point, you need to consider replacing the unit. But before you buy a new one, there's one more test you can do.
Dielectric Withstand Test
This is a test of the module's internal isolation. It checks whether the internal circuits can handle a high voltage surge without breaking down. This isn't a tool the average person has lying around, and it's often done by a qualified electrician.
If a module fails this test, it has an internal breakdown and needs replacing.
The Cost-Benefit Decision
A new DSE 1049 is a genuine investment. Compare that against the cost of your time spent chasing wiring issues. If the module shows physical damage, like burnt terminals, cracked casing, or signs of water ingress, replace it.
If it's been running for fifteen years and components on the board are showing heat damage, replace it. Diagnosis is valuable, but there's a point of diminishing returns.
What to Do Before Swapping
When you do replace the module, take photos of the existing wiring first. Tag all wires before you disconnect them. This saves you hours of confusion when connecting the new unit.
Double-check the supply voltage matches the replacement module. The DSE 1049 comes in 12V and 24V DC variants, and fitting the wrong one will ruin it immediately.
Practical Tips from the Field
Over the years, a few habits have made DSE troubleshooting dramatically faster. These aren't in the manual, but they're worth knowing.
Keep a spare fuse in the panel. The F1 fuse blows for a reason, but sometimes that reason is just old age. Having a spare on hand turns a 30-minute trip into a 5-minute fix.
Use a multimeter with a min/max setting. This lets you catch voltage drops that only last a fraction of a second. A standard multimeter might show a steady voltage while the actual crank voltage is collapsing.
Check earth grounds. The module and the engine need good ground connections. A poor engine ground can cause all sorts of bizarre behavior. Check the main ground strap from the battery to the engine block and the ground wire from the module to the panel chassis.
Don't forget the fuel solenoid. Just because the engine cranks doesn't mean it will start. The fuel solenoid must open to allow fuel flow. If the solenoid fails, the engine cranks but never catches.
Listen for the click of the fuel solenoid when you press start.
Inspect the wiring harness for chafing. Vibration wears through wire insulation over time. Look for spots where wires rub against the frame, sharp edges, or moving parts. A chafed wire can short out, blow fuses, or cause intermittent faults.
DSE 1049 vs. More Advanced Controllers
The 1049 is a basic but reliable module. It does its job well, but newer controllers offer more features. If you're considering an upgrade, here's what you should know.
| Feature | DSE 1049 | Newer Models (e.g., DSE 7310) |
|---|---|---|
| LCD Display | Basic text display | Full graphical screen |
| Remote Monitoring | Not supported | Supported via network |
| Fault Data Logging | Limited | Extensive history |
| USB Programming | Not available | Yes, via laptop |
| Price | Lower cost | Higher cost |
The 1049 is ideal if you need a simple, dependable auto-start module. Newer models make sense if you need remote monitoring or detailed fault logging. For most standard applications, the 1049 is still a solid choice, especially if you just need a like-for-like replacement.
When to Call a Professional
There's a limit to what you can safely do without depth of experience. If you've worked through this guide and still have a fault, or if you don't feel confident working on live generator controls, call a qualified electrician or generator technician. High-voltage alternators and mains switching carry real risk, and electrical faults can escalate into serious injury or equipment damage.
A professional will have access to diagnostic tools and schematics you don't. They can also verify the generator's safety systems are functioning correctly, which is critical for automatic start applications. Spending the money on a professional call is cheaper than repairing the damage from a misdiagnosed fault.
Final Checks Before You Give Up
Before you declare the module dead, run through this final quick list. It's amazing how many of these simple things get missed.
Is the module in Auto mode? If it's in Manual or Test mode, it will behave differently. Make sure the mode switch is in the correct position for what you're trying to do.
Is the mains supply present? The 1049 needs to detect the mains voltage to know when to start the generator. If the voltage sensing input isn't connected correctly, the module won't operate as expected. Check the mains wiring back to the module terminals.
Are the fuses in the control panel intact? The control panel itself usually has fuses for various circuits, not just the F1 on the module. Check all the panel fuses with a multimeter, not just visually. A fuse can look fine but be blown internally.
Is the emergency stop button reset? If the emergency stop circuit is open, the module won't start the engine. Trace the circuit and make sure the button is in its proper position.
Did you reset the alarms? After a shutdown fault, the module latches into a fault state. Press the stop/reset button to clear the fault and return to standby. The fault will re-trigger if the root cause isn't fixed, but clearing it is necessary to test again.
The Bottom Line
The DSE 1049 is a dependable controller that rarely fails on its own. When it does stop working, it's almost always a power supply issue, a blown fuse, or a wiring fault somewhere in the starting circuit. Work through the checks in order, battery, fuse, crank circuit, fault codes, and you'll find the root cause in most cases.
Replace the module only after you've ruled out everything else. A new controller won't fix a failed starter or dead battery. But with a systematic approach, you'll have your generator running reliably again.
If you're still stuck after this guide, there's no shame in calling a professional. Generator control systems carry real electrical risk, and a good technician will get you back online quickly and safely.

Similar Posts