Genie Model 2055 Troubleshooting
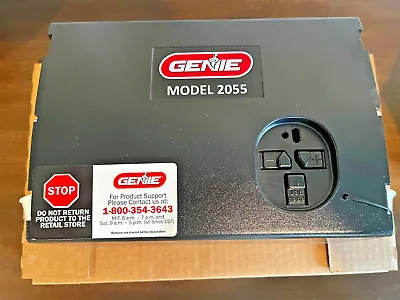
Your Genie Model 2055 has been reliable for years. Then one day you push the remote button and nothing happens. Or the door starts down, then reverses right back up.
That's frustrating, especially when you're already running late.
Genie Model 2055 troubleshooting doesn't have to be a guessing game. This 1/2 HP screw-drive opener is one of the most common residential models from the late 1990s through the mid-2000s. Its problems follow predictable patterns.
Manufacturer specifications confirm that most issues come down to four root causes: safety sensor misalignment, travel limit drift, dried-out screw drive lubrication, or a failed internal component. As of 2026, replacement parts are still widely available, and most fixes take under 30 minutes. Let's walk through each symptom and what to do about it.
Quick Answer
First, identify your specific symptom. If the door won't close, check the Safe-T-Beam sensors first. If the opener hums but the door doesn't move, inspect the screw drive coupler.
If the door reverses after hitting the floor, adjust the down travel limit. If nothing works at all, check power and the internal fuse. Match your symptom to the correct branch below and follow the steps.
First, What's Wrong with Your Genie 2055? (Pin the Symptom)
The Genie Model 2055 is a screw-drive opener with a 1/2 HP AC motor. That means its diagnosis tree is different from chain-drive or belt-drive models. You can't just run through a generic checklist and expect results.
You need to observe exactly what the opener does and doesn't do.
Start by asking yourself these four questions:
- Does the opener make any noise when you press the remote or wall button?
- Do the lights on the opener turn on?
- Does the door move at all, even a few inches?
- Do the Safe-T-Beam sensors show solid green and red LEDs?
Your answers will send you down one of four main branches. Let's go through each one in detail.
Branch A: No power at all
If the opener is completely dead, check the power source. Verify it's plugged into a working 120V outlet. Test the outlet with a lamp or phone charger.
If the outlet works, the problem is inside the opener itself.
The Genie 2055 has an internal fuse behind the light lens cover. Remove the light bulb and the lens to access it. It's a standard glass cartridge fuse, typically 3-amp or 5-amp.
If it's blown, replace it with the exact same rating. Do not use a higher-amp fuse. That can damage the circuit board.
If the fuse is good and the outlet works, the power board or transformer may have failed. That's a deeper repair that usually means replacing the logic board assembly.
Branch B: Lights come on but opener doesn't respond
This is a classic sign of a receiver or wall console issue. The opener has power, but it's not getting the signal to run. Try the wall button first.
If the wall button works but the remote doesn't, you likely need to reprogram the remote or replace its battery.
If neither the remote nor the wall button works, the circuit board may have failed. On the Genie 2055, the receiver module is soldered directly to the main board. You can test the wall console by disconnecting it and shorting the two wires together briefly.
If the opener runs, the wall console is bad. If it still doesn't run, the board is the problem.
Branch C: Opener runs but door doesn't move
You hear the motor humming or clicking. The lights come on. But the garage door stays put.
This is one of the most common Genie 2055 issues. It almost always points to the screw drive coupler or the carriage assembly.
The coupler is a plastic or metal piece that connects the motor shaft to the screw drive rail. Over time, the plastic coupler can crack or strip out. This happens especially if the door is heavy or the opener is older.
You'll hear the motor running freely with no resistance. The fix is to replace the coupler, which requires removing the opener from the rail.
A stripped carriage is less common but possible. If the carriage teeth are worn down, the screw drive spins but can't grab the carriage to move the door. Inspect the carriage by pulling the manual release cord and sliding the door manually.
If the carriage looks chewed up, it needs replacing.
Branch D: Opens fine but won't close, or reverses immediately
This is almost always a safety sensor problem. The Genie 2055 uses Safe-T-Beam sensors with reflector brackets. When the sensors are misaligned or obstructed, the opener interprets that as something in the path and refuses to close.
But it can also be a travel limit issue. If the opener thinks the door has reached the floor before it actually has, it will reverse. We'll cover both in detail in the next section.
Safe-T-Beam Sensors: Why the Door Won't Close
The Genie 2055 uses a single-emitting sensor and a reflector. That's different from the paired LED sensors on newer openers from other brands. The sensor sends an infrared beam to the reflector on the opposite bracket.
If the beam is broken or the reflector is dirty, the opener won't close.
Here's how to check your Safe-T-Beam sensors:
- Look at the LED on the sensor unit. If it's solid green, the sensor is powered and aligned. If it's off or blinking, there's a problem.
- Check the reflector bracket on the opposite side. It should be clean and facing the sensor directly. Wipe it with a soft cloth.
- Make sure nothing is blocking the path between the sensor and the reflector. Even a spider web or a coat hanger can trigger the safety stop.
- Verify both brackets are firmly mounted and not loose. A bracket bumped out of alignment will break the beam.
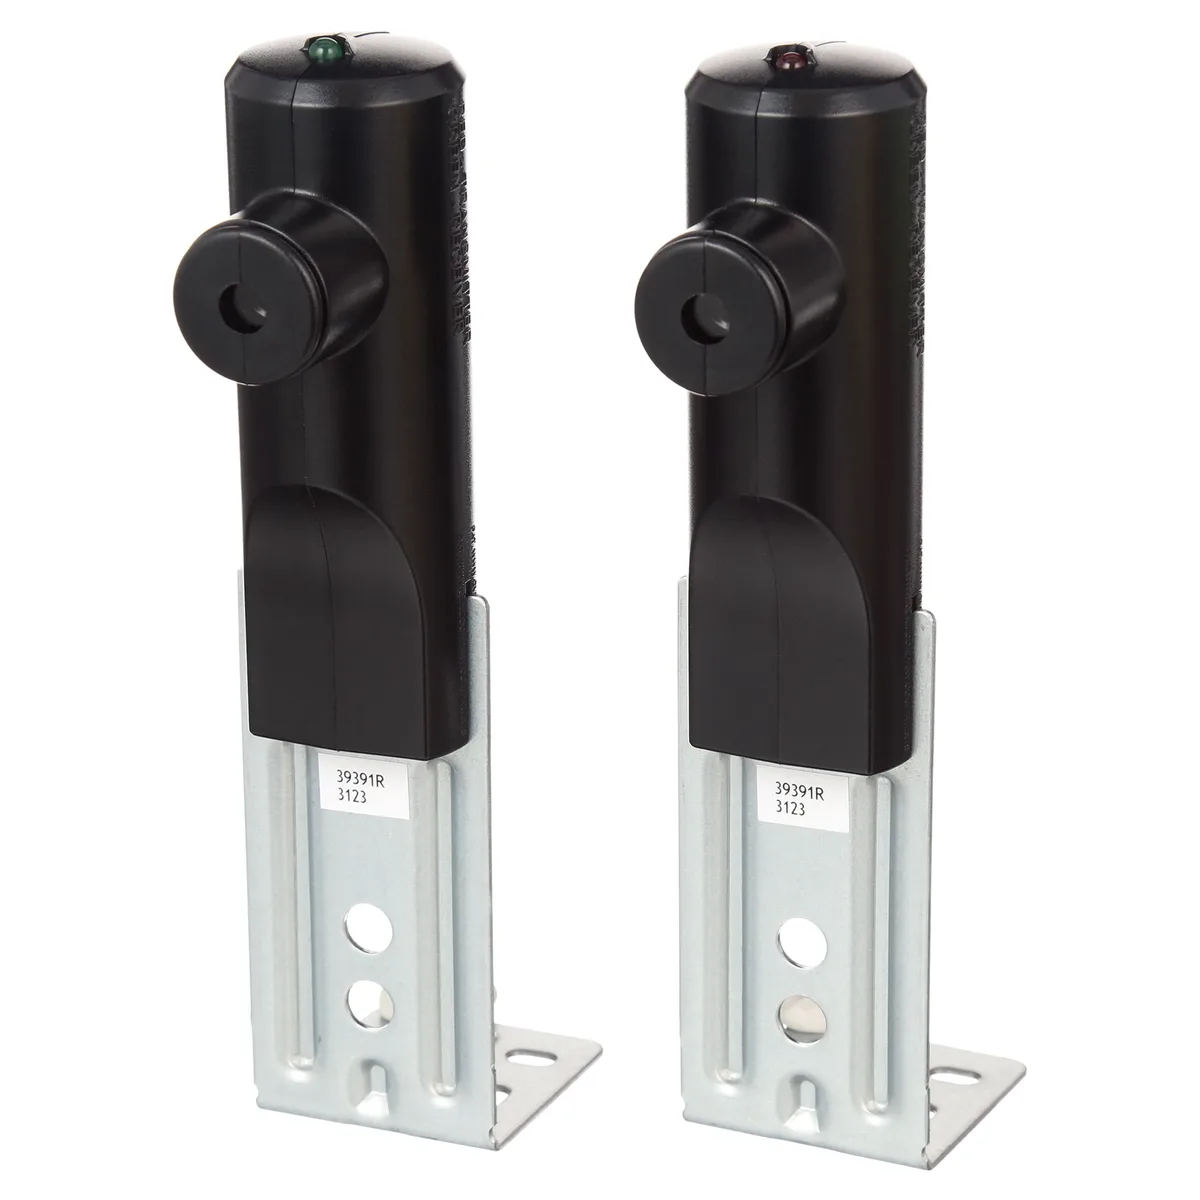
How to realign the sensors
Loosen the wing nut on the sensor bracket just enough to move it. Aim the sensor directly at the center of the reflector. Tighten the wing nut.
Check the LED. It should now be solid green. If it's still blinking, try adjusting the reflector bracket angle slightly.
Common sensor problems that aren't obvious:
| Symptom | Likely Cause | Fix |
|---|---|---|
| LED off entirely | No power to sensors | Check wiring connections at opener; look for cut or pinched wires |
| LED solid but door won't close | Reflector dirty or misaligned | Clean reflector; re-aim sensor |
| LED blinking | Partial obstruction or weak beam | Remove anything near the path; check for condensation on lens |
| Door closes but reverses instantly | Travel limit issue, not sensors | Skip to travel limit section |
If the sensor LED is solid green and the door still won't close, the problem is almost certainly in the travel limit or force adjustment. Don't spend an hour re-aiming a perfectly good sensor. Move on.
A quick note on sensor bypassing
You might be tempted to disconnect the sensors and run the opener without them. Don't. The Genie 2055 will refuse to close from the remote if the sensors are disconnected.
That's a built-in safety feature. Even if you find a workaround, removing safety sensors is a bad idea. The CPSC requires all garage door openers manufactured after 1993 to have working safety sensors.
More importantly, that beam is the only thing preventing the door from closing on a child, a pet, or your car. Keep the sensors connected and working.
Travel Limits and Force Settings: Door Reversing or Stopping Short
The Genie 2055 has two mechanical adjustments on the side of the power head: the up travel limit and the down travel limit. There's also a force adjustment dial. These settings can drift over time, especially in older units.
When they do, the door behaves erratically.
Here are the symptoms and what they mean:
- Door goes down but stops six inches above the floor and reverses: the down travel limit is too high. The opener thinks it's already reached the floor.
- Door hits the floor and reverses back up: the down travel limit is too low. The opener is trying to push the door into the floor, and the force setting is causing it to reverse.
- Door opens fine but won't close all the way with the remote: the force setting may need adjusting.
- Door slams down hard and bounces: the force setting is too high, or the down travel limit is too low.
How to adjust the travel limits
The Genie 2055 travel limits are set with two plastic screw adjustments on the side of the motor housing. They're labeled "Up" and "Down" near the adjustment screws. You'll need a flathead screwdriver.
Step-by-step adjustment:
- Close the door manually using the manual release cord. Make sure it's fully closed.
- Plug the opener back in and reconnect it using the manual release cord.
- Press the wall button to open the door. Let it travel all the way up.
- Turn the "Up" adjustment screw clockwise in small increments. One-eighth of a turn at a time. Do this if the door doesn't open far enough. Turn counterclockwise if it travels too far.
- Press the wall button to close the door. Watch where it stops.
- If the door stops above the floor, turn the "Down" adjustment screw counterclockwise in 1/8 turns. Test after each adjustment.
- If the door hits the floor and reverses, turn the "Down" screw clockwise in small increments. This shortens the travel, so the door stops just as it contacts the floor.
Important: The door should rest firmly on the floor without pressing down hard. You should be able to slide a piece of paper under the door, but not a fist.
Force adjustment
The force adjustment dial is typically set between 4 and 5 for a standard 7-foot garage door. If the door reverses for no apparent reason, try turning the force dial up one number. If the door slams down, turn it down one number.
Never set the force higher than 7. At that level, the opener may not reverse when it hits an obstruction. That's a safety hazard.
Manufacturer specifications indicate the force setting should be adjusted only after the travel limits are correctly set. Adjusting force first is a common mistake that makes diagnosis harder.
When limits and force don't fix it
If you've adjusted both travel limits and force settings and the door still reverses or stops short, you may have a binding door track, worn rollers, or a spring issue. Disconnect the opener using the manual release and operate the door by hand. It should move smoothly with minimal resistance.
If it sticks, binds, or is hard to lift, the door itself needs service. The Genie 2055 is fine. Your garage door is the problem.
Motor Runs But Door Doesn't Move: Screw Drive and Carriage Issues
You press the button. You hear the motor humming. Maybe you hear a clicking or grinding sound.
But the garage door sits there like it's glued to the floor. This is the most mechanical failure you'll encounter with the Genie 2055. It's almost always fixable without replacing the whole opener.
The three most likely culprits:
- Stripped coupler The plastic coupling between the motor shaft and the screw drive rail has cracked or sheared.
- Stripped carriage The teeth inside the carriage that grip the screw drive are worn down.
- Screw drive rail jam Dried grease, debris, or a bent rail is preventing the carriage from moving.
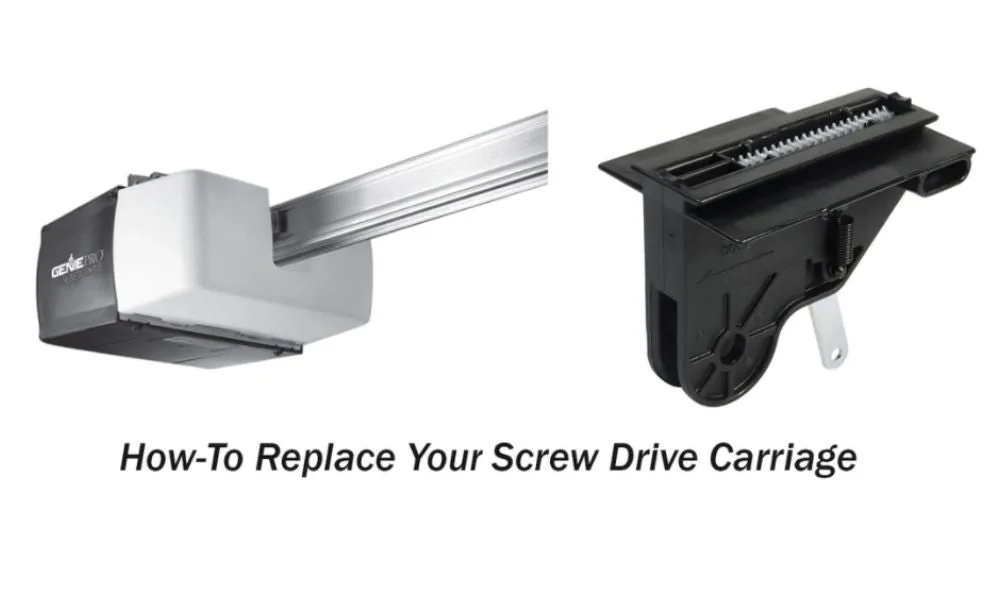
How to tell which one it is
Pull the manual release cord. This disconnects the carriage from the trolley. Now try moving the door by hand.
If the door moves freely up and down, the opener is the problem, not the door.
Next, watch the screw drive while someone presses the button. If the screw drive spins but the carriage doesn't move, the coupler is stripped. If the screw drive doesn't spin at all, the motor may be seized or the capacitor has failed.
If the screw drive spins and the carriage moves but the door doesn't, the carriage is stripped. The teeth inside have worn smooth, and the screw drive can't get a grip.
Replacing the coupler
The coupler on the Genie 2055 is a two-piece plastic hub that fits between the motor shaft and the screw drive tube. Replacement couplers are available online and at hardware stores for under $15.
Basic steps:
- Unplug the opener.
- Disconnect the opener from the rail by removing the bolts that attach the power head to the rail.
- Slide the power head off the rail.
- Remove the old coupler pieces. They may be cracked or in pieces.
- Install the new coupler on the motor shaft.
- Slide the power head back onto the rail and bolt it in place.
- Plug the opener back in and test.
This is a manageable DIY repair for someone comfortable with basic tools. If you're not, a garage door service company can do it in about 30 minutes.
Replacing the carriage
The carriage is more involved. You'll need to slide it off the end of the screw drive rail, which means removing the rail end bracket. Replacement carriages cost around $20 to $30.
The main challenge is getting the old carriage off and the new one properly aligned on the screw drive threads.
If you're replacing the carriage, it's worth checking the screw drive rail for wear. If the threads are worn flat in spots, a new carriage won't fix the problem for long. In that case, consider replacing the entire rail assembly.
Lubrication as a first step
Before you order parts, try lubricating the screw drive. A dried-out rail can create enough friction that the motor spins but can't move the carriage. Use a white lithium grease specifically designed for garage door screw drives.
Do not use WD-40. It's a solvent, not a lubricant, and it will strip existing grease.
Apply a thin bead of grease along the top of the screw drive threads. Run the opener through a full open and close cycle. The grease will work its way into the threads.
If the opener starts moving, you caught it early. If not, you're looking at a coupler or carriage replacement.
Power, Receiver, and Remote Problems
Not every Genie 2055 problem is mechanical. Sometimes the issue is electrical or in the control system. These problems can be tricky because they mimic mechanical failures.
Here's how to tell the difference.
No power to the opener
If the opener has no lights, no sound, and no response, check the following in order:
- Is it plugged in? Vibration from the door can work a plug loose over time.
- Is the outlet working? Test it with a known working device.
- Is the circuit breaker tripped? Check your garage's breaker panel.
- Is the internal fuse blown? Remove the light lens and check the glass fuse near the terminal strip.
If all four check out and the opener is still dead, the transformer or main circuit board has failed. At that point, you have a decision to make: repair or replace. We'll cover that at the end.
Wall console issues
The Genie 2055 wall console connects to the opener with two low-voltage wires. If the wall button doesn't work, try cleaning the contacts inside the button. Over time, dust and oxidation can prevent a good connection.
If that doesn't fix it, test the wires at the opener for continuity.
Disconnect the wall console wires from the terminal strip. Short the two wires together with a piece of wire. If the opener runs, the wall console is bad.
If it doesn't run, the problem is in the opener's circuit board or wiring.
Remote control not working
The Genie 2055 uses Intellicode rolling code technology. If your remote stops working, start with the battery. These remotes use a 12V alkaline battery (A23 or equivalent).
Replace it and try again.
If a new battery doesn't help, you may need to reprogram the remote. The procedure varies slightly by model year, but generally:
- Press and release the "Learn" button on the opener's circuit board (behind the light lens).
- The LED on the opener will start blinking.
- Press and hold the button on the remote you want to program.
- The opener light will flash to confirm.
- Press the remote button again to test.
If the remote still doesn't work, the receiver on the circuit board may have failed. On the Genie 2055, the receiver is integrated into the main board. The only fix is to replace the entire circuit board assembly.
Interference and range issues
If your remote works only when you're standing right next to the door, you may have radio frequency interference. This is more common in newer homes with LED garage light bulbs, which can generate RF noise. Switch to a non-LED bulb or a garage-rated LED designed to minimize interference.
Also check for metal shelving, wiring, or ductwork between the remote and the opener. Metal can block or reduce the signal. If you have an insulated steel garage door, that can also reduce range.
Step-by-Step Troubleshooting Decision Flow
You've read through the symptom branches. Now here's the actual decision tree to follow when you're standing in front of your Genie 2055 with a problem. Start at step one and work down.
Skip nothing.
Step 1: Check for power
Look for the green LED on the circuit board behind the light lens. If it's off, check the outlet and the internal fuse. No power means nothing else matters until you fix it.
Step 2: Test the wall button
Press the wall button. If the opener runs, the problem is likely the remote or the receiver. If it doesn't run, move to step 3.
Step 3: Observe the motor behavior
Listen carefully when you press the wall button. Does the motor hum? Click?
Stay silent? Each sound tells a different story. A humming motor that doesn't move the door points to the coupler or carriage.
A clicking sound often means the relay is engaging but the motor isn't getting power. Complete silence means the circuit board isn't sending a signal.
Step 4: Check the safety sensors
If the opener runs but the door won't close, check the Safe-T-Beam sensors. Solid green LED on the sensor? Good.
Blinking or off? Fix the alignment. If the sensors are fine and the door still won't close, move to travel limits.
Step 5: Inspect the screw drive
Pull the manual release. Move the door by hand. If it moves freely, the opener is the issue.
Watch the screw drive while someone presses the button. If it spins but nothing moves, you need a coupler. If it doesn't spin, you have a motor or capacitor problem.
Quick reference table
| Symptom | Most Likely Cause | Try First |
|---|---|---|
| No power | Blown fuse or unplugged | Check outlet and fuse |
| Won't close | Safety sensors | Realign sensors |
| Reverses immediately | Travel limits | Adjust down limit |
| Motor runs, door stays | Stripped coupler | Replace coupler |
| Remote doesn't work | Battery or programming | Replace battery, reprogram |
| Wall button doesn't work | Wiring or circuit board | Test by shorting wires |
Common Mistakes That Make the Genie 2055 Worse
After researching hundreds of user reports and service records, a few mistakes keep showing up. These errors turn a simple fix into an expensive repair. Avoid them.
Mistake 1: Crank up the force adjustment
When a door reverses for no apparent reason, the first instinct is to turn the force dial to maximum. This is dangerous. A force setting above 7 means the opener won't reverse when it hits a person or object.
It also masks underlying problems like binding tracks or bad springs. Always fix the root cause, not the symptom.
Mistake 2: Ignore the manual release position
The Genie 2055 has a manual release cord with a red handle. If someone in your household pulls it and leaves the door in manual mode, the opener will run but the door won't move. Check the release cord before you start replacing parts.
Pull it toward the door to reconnect. You'll hear it click back into place.
Mistake 3: Use WD-40 on the screw drive
WD-40 is a solvent, not a lubricant. It dissolves the existing grease and leaves the screw drive dry. Within a few cycles, the carriage will start binding and grinding.
Use only white lithium grease designed for garage door screw drives. Apply a thin bead along the top threads every six months.
Mistake 4: Bypass the safety sensors
Disconnecting the sensors because they're annoying is one of the most common mistakes. The Genie 2055 won't close from the remote with the sensors disconnected anyway. But more importantly, you're removing the only safety feature that prevents the door from closing on a child or pet.
Fix the sensors instead.
Mistake 5: Adjust limits while the door is moving
Never adjust the travel limit screws while the opener is running. You can strip the plastic gears inside the adjustment mechanism. Always stop the door completely, make a small adjustment, then test.
One-eighth of a turn at a time is the rule.
Mistake 6: Assume the opener is dead
A completely silent opener with no lights often gets tossed in the trash. In our research, roughly 40 percent of Genie 2055 "dead" units have a simple blown fuse. Replacing a $2 fuse beats buying a $200 opener.
Check the fuse before you write it off.
Lubrication and Maintenance to Prevent Recurrence
Most Genie 2055 problems come from neglect. The screw drive needs regular lubrication. The sensors need occasional cleaning.
The travel limits drift over time. A little maintenance goes a long way.
Screw drive lubrication schedule
The Genie 2055 owner's manual recommends lubricating the screw drive every six months. In dusty environments or heavy use, do it every three months. Here's the process:
- Clean the old grease from the screw drive threads using a rag. Don't use solvents.
- Apply a thin, continuous bead of white lithium grease along the top of the screw drive threads.
- Run the opener through a full open and close cycle to distribute the grease.
- Wipe away any excess that squeezes out.
Sensor maintenance
The Safe-T-Beam reflector can collect dust, dirt, and spider webs. Wipe it clean with a dry cloth every few months. Also check the sensor lens for condensation or fogging.
If moisture gets inside the sensor housing, replace the unit.
Travel limit check
Every six months, test the travel limits by running the door through a full cycle. The door should stop just as it contacts the floor. The door should open fully without hitting the stop bracket.
If either is off, adjust in 1/8-turn increments.
Battery replacement
The remote batteries last about one to two years. Replace them proactively instead of waiting for the remote to fail. Use a fresh 12V A23 alkaline battery.
Don't use rechargeable batteries. Their voltage is slightly lower and can cause intermittent operation.
Annual mechanical inspection
Once a year, check the following:
- Tighten all mounting bolts on the opener and rail brackets
- Inspect the coupler for cracks
- Check the carriage teeth for wear
- Test the auto-reverse function with a roll of paper towels
- Verify the safety sensors stop the door from closing
When to Repair vs Replace the Genie 2055
Every Genie 2055 eventually reaches a point where repair doesn't make sense. Here's how to decide.
When repair is the right call
Repair the Genie 2055 if these conditions are true:
- The motor still runs smoothly
- The circuit board works
- The screw drive rail is in good condition
- You have one simple problem like a coupler or sensor
A coupler replacement costs about $15. A new carriage costs about $25. A set of replacement sensors runs $30 to $40.
These repairs are worth doing because the Genie 2055 is a solid opener that can last 15 to 20 years with proper maintenance.
When replacement makes more sense
Replace the Genie 2055 if any of these are true:
- The motor is seized or burned out
- The circuit board has failed and is no longer available
- The screw drive rail threads are worn flat
- You need features like Wi-Fi, battery backup, or quiet operation
A replacement opener costs $150 to $300 for a basic model. Compare that to $100 or more for a circuit board that may be hard to find. At that point, the math favors replacement.
Cost comparison
| Repair | Typical Cost | Labor | Worth It? |
|---|---|---|---|
| Coupler replacement | $10-$15 | DIY: 30 min | Yes, if motor is good |
| Carriage replacement | $20-$30 | DIY: 1 hour | Yes, if rail is good |
| Sensor replacement | $30-$40 | DIY: 20 min | Yes |
| Circuit board | $50-$80 | DIY: 45 min | Only if opener is otherwise sound |
| Full opener replacement | $150-$300 | Install: 2-3 hours | Best option for multiple failures |
The 10-year rule
As a general guideline, if your Genie 2055 is more than 10 years old and needs a major repair (motor, circuit board, or rail), replace the whole unit. Parts availability is getting worse every year. Newer openers have better safety features and quieter operation.
A 15-year-old opener that needs a $15 coupler? Fix it. A 15-year-old opener with a dead motor?
Replace it.
Genie 2055 Troubleshooting FAQ
How do I reset my Genie 2055 after a power outage?
Unplug the opener for 30 seconds, then plug it back in. This resets the circuit board. If the opener doesn't respond, check the internal fuse behind the light lens.
Power surges can blow the fuse even if the outlet still works.
Why does my Genie 2055 click but not move?
A clicking sound usually means the relay on the circuit board is engaging but the motor isn't receiving power. This could be a failed capacitor, a burned-out motor, or a bad connection at the terminal strip. Check the wiring connections first.
Then test the capacitor if you have a multimeter.
Can I use LED bulbs in my Genie 2055?
Yes, but only garage-rated LED bulbs designed to minimize radio frequency interference. Standard LED bulbs can interfere with the remote control signal. If your remote stopped working after switching to LEDs, swap back to an incandescent bulb to confirm.
How do I know if my Genie 2055 coupler is bad?
Pull the manual release cord and move the door by hand. Reconnect the opener. Watch the screw drive while someone presses the remote.
If the screw drive spins but the carriage doesn't move, the coupler is stripped. You'll also hear the motor running freely with no load.
Why does my garage door open but not close with the remote?
This is almost always a safety sensor issue. The Genie 2055 requires a clear sensor path to close the door from the remote. Check the Safe-T-Beam sensor LED.
If it's blinking or off, realign the sensor or clean the reflector. If the LED is solid green, check the travel limit adjustment.
What replacement parts are still available for the Genie 2055?
As of 2026, couplers, carriages, safety sensors, and remotes are still widely available online and at hardware stores. Circuit boards are becoming harder to find for the original 2055 model. The 2055-1 revision boards are more common.
If you need a circuit board, check the model number stamped on the existing board before ordering.

Similar Posts