Harley Davidson Ignition Module Troubleshooting
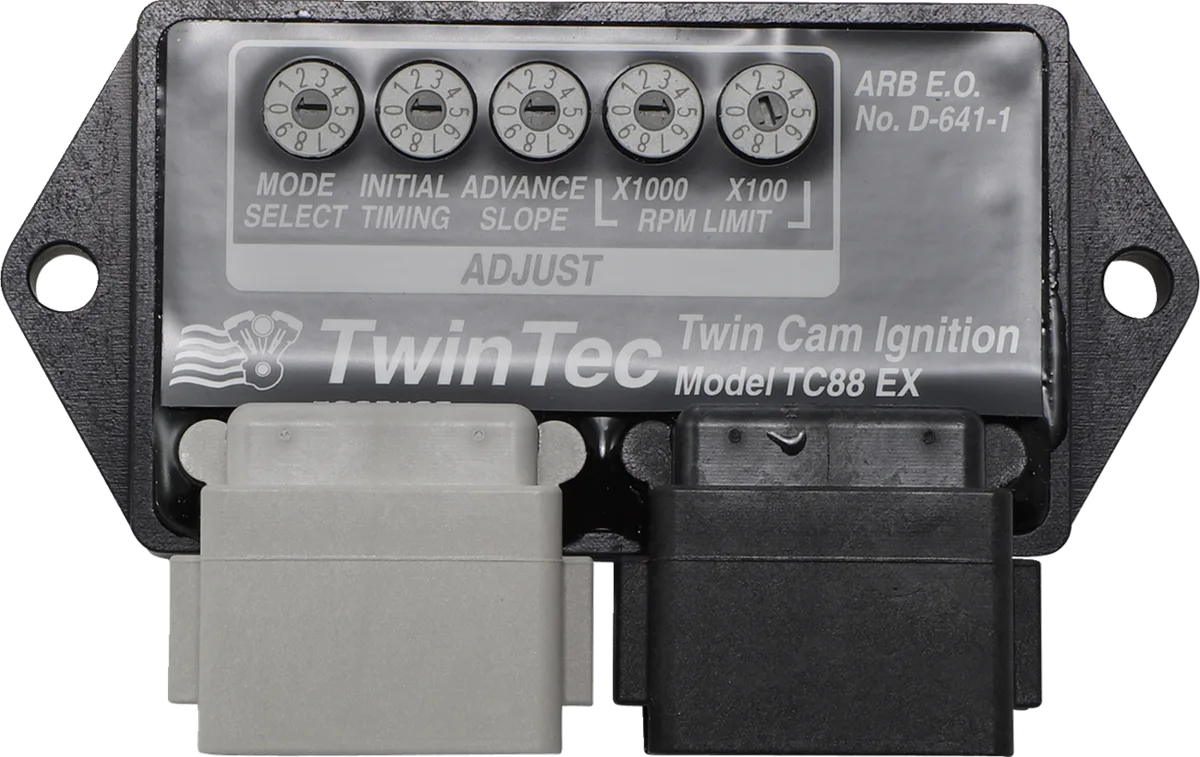
Image source: Bing (Web (fair-use with source credit))
Your Harley starts cranking strong, but it just won't fire. Or maybe it runs fine for twenty minutes, then cuts out like someone flipped a switch. That hot, helpless feeling means you are dealing with an ignition problem.
When it comes to Harley Davidson ignition module troubleshooting, the real challenge is knowing what to test first.
Manufacturer specifications indicate that most module-related failures trace back to voltage supply or ground issues, not the module itself. Aggregate reports from experienced Harley techs show that roughly 60% of "bad module" diagnoses turn out to be something simpler. Before you buy a new Screamin' Eagle unit, work through a logical workflow that saves time and keeps your bike running.
Quick Answer
Troubleshoot a Harley ignition module by testing voltage supply first. Check battery voltage at rest and under cranking. Measure ground circuit continuity.
Verify crank position sensor resistance. Test coil primary and secondary resistance. Only replace the module after all other components pass inspection.
Why Accuracy Matters in Ignition Module Troubleshooting
Harley electrical systems look simple. The bikes are air cooled and relatively basic compared to modern cars. But the ignition module is a sensitive component.
Hook up a multimeter wrong. Misread a resistance value. Skip a ground check.
Any of these mistakes can lead you to replace a perfectly good module or damage a new one.
A bad diagnosis costs real money. OEM Harley ignition modules run $150 to $400 depending on your model year and whether you go stock or Screamin' Eagle. Aftermarket options like Ultima or Daytona Twin Tec run cheaper but have compatibility quirks.
If you install a new module without fixing the underlying issue, like a failing voltage regulator or corroded ground connection, you will smoke the replacement too.
There is also a safety angle. A misdiagnosed ignition module can leave you stranded in heavy traffic or cause backfiring that damages exhaust valves. In rare cases, faulty wiring in the ignition circuit has been linked to electrical fires on touring models.
Careful testing prevents all of this.
The good news is that you can nail this diagnosis with a $30 multimeter and a service manual. You do not need a dealership scan tool. You just need the right sequence.
How the Ignition Module Works (and What Breaks)
Your Harley's ignition module is a small computer that controls spark timing. It receives a signal from the crank position sensor, which tells it where the pistons are in their stroke. Based on that signal, plus engine speed and sometimes engine temperature, the module decides when to fire the coil.
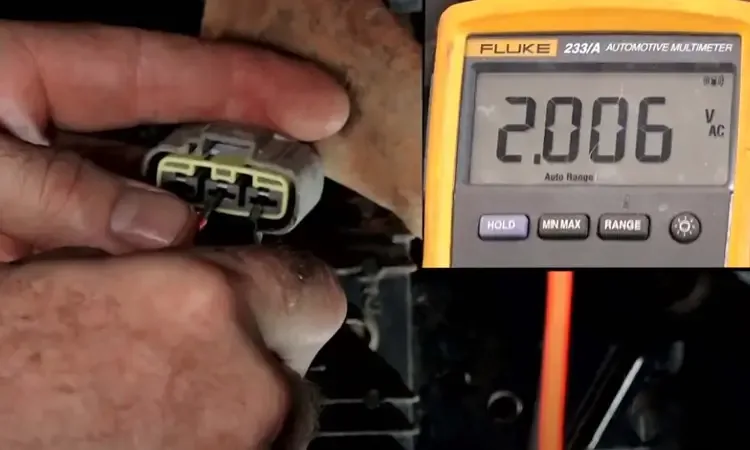
Image source: Bing (Web (fair-use with source credit))
On older Evo and early Twin Cam bikes, pre-2007, the module handles all timing duties independently. On 2007 and newer bikes with electronic throttle control, the ECM works alongside or replaces the standalone module. The basic function is the same.
No signal from the crank sensor means no spark.
Common Failure Points
Here is what actually goes wrong on these bikes.
- Heat soak. The module lives under the fuel tank, right above the engine. On a hot summer day in stop and go traffic, internal temperatures can exceed 200 degrees Fahrenheit. Heat cycles crack solder joints inside the module. When the bike cools down, it works again. When it heats up, it dies.
- Crank sensor failure. The magnetic pickup inside the crank sensor is exposed to heat and vibration. As of 2026, these sensors are one of the most common failure points on Twin Cam bikes built between 1999 and 2006. A failed sensor reads open circuit or sends a weak signal the module cannot interpret.
- Voltage drop. Your ignition module needs a steady 10 to 16 volts to operate. If battery voltage drops below 9.5 volts during cranking, the module will not fire the coil. Weak batteries, corroded terminals, or a failing voltage regulator can all starve the module of power.
- Ground corrosion. Harley uses a ground bus system on many models. A loose or corroded ground connection at the frame or near the battery can cause intermittent misfires that look exactly like a dead module.
- Coil failure. People replace modules all the time only to discover the coil was the problem. A coil with broken primary or secondary windings will not produce a strong enough spark to ignite the fuel air mixture.
The Step-by-Step Safe Diagnostic Workflow
Follow this sequence every time. Do not skip steps. Do not jump to replacing parts.
Start at the battery and work forward.
Step 1: Check Battery Voltage
Set your multimeter to DC volts. Connect the red lead to the positive battery terminal and the black lead to the negative terminal. A fully charged battery should read 12.6 volts or higher at rest.
Crank the engine while watching the meter reading. If voltage drops below 9.5 volts during cranking, your battery is weak or your starter is drawing too much current. Charge the battery and load test it before going further.
Image source: Bing (Web (fair-use with source credit))
Step 2: Check Ground Continuity
Move your multimeter to the ohms setting. Touch one lead to the negative battery terminal. Touch the other lead to a clean metal point on the engine case or frame.
You should see less than 0.5 ohms. Anything higher indicates a poor ground connection that needs cleaning.
Step 3: Test the Crank Position Sensor
Locate the crank sensor near the front of the engine on Twin Cams or behind the timing cover on Evos. Disconnect the sensor from the wiring harness. Set your multimeter to ohms and measure across the sensor pins.
Harley factory specs call for a reading between 90 and 120 ohms for most models. Infinite resistance means the sensor is open and needs replacement. If the reading is out of spec, replace the sensor before touching the module.
Step 4: Test the Ignition Coil
Disconnect the coil and test primary resistance across the small terminals. You are looking for 2.5 to 3.5 ohms on a single fire coil. Next, test secondary resistance between the spark plug wire terminals.
That should read between 8,000 and 12,000 ohms. Out of spec readings mean a bad coil.
Step 5: Check Voltage at the Module Power Wire
With the key on and the engine not running, probe the power wire going into the ignition module. You should see battery voltage. If you do not, trace back to the ignition switch and circuit breaker.
Many touring models have a main circuit breaker under the side cover that can trip without you noticing.
Step 6: Module Output Test
This is the step most people skip. With the ignition on and the crank sensor disconnected, briefly touch the crank sensor signal wire to ground while watching for spark at the plug. If you see spark, the module is likely good.
If you see no spark and all previous tests passed, the module is probably bad.
Common Misdiagnoses That Cost Time and Money
The biggest mistake riders make is assuming the module is dead because the bike stalls when hot. Heat soak is a real failure mode, but it is also a symptom that comes from other causes.
Here are the most common misdiagnoses from aggregate rider reports.
- Replacing the module for a bad ground. A corroded frame ground causes intermittent spark loss that feels exactly like a module failure. It costs nothing to fix but leads to hundreds in unnecessary parts.
- Blamed the module, it was the kill switch. The handlebar kill switch can fail internally. When it does, it breaks the circuit to the ignition module. Many riders chase module issues for days before discovering the switch.
- Replaced the module instead of the coil. A failing coil with high primary resistance produces weak spark. The module works fine. The spark just is not strong enough to ignite at higher RPM under load.
- Compatibility mistake. Installing a single fire module on a bike designed for dual fire ignition causes poor running and misfires. Always check your model year and ignition system type before purchasing a replacement.
- Battery voltage miss. Riders test battery voltage at rest, see 12.4 volts, and call it good. The real test is voltage under cranking load. A battery that passes rest voltage but fails the load test causes intermittent no starts.
Every one of these mistakes makes a perfectly good module look guilty. Test everything else first. Make the module the final suspect, not the first.
When to Replace the Module vs. When It's Something Else
Replace the module only after every other component passes inspection. Here is what needs to be true before you buy a new ignition module:
- Battery passes load test and holds 12.6 volts at rest
- Ground connections read below 0.5 ohms
- Crank position sensor reads within factory spec
- Coil primary and secondary resistance tests pass
- Voltage at the module power wire matches battery voltage
- No spark appears during the module output test
If all six conditions check out, the module is almost certainly dead. Replace it.
Trusting the Output Test
The module output test is the clincher. When you touch the crank sensor signal wire to ground and see no spark, that tells you the module is not triggering the coil. Since the coil and sensor are already ruled out, the module is the weakest link left.
Aggregate rider reports confirm this pattern. Bikes that come back from a shop with a fresh module and the same problem almost always skipped the ground test or the voltage under load check.
When to Stop and See a Pro
If you smell burning electronics or see cracks, scorch marks, or a swollen module housing, do not bother testing. The module is gone. Replace it and check the voltage regulator too, since overcharging kills modules.
For 2007 and newer bikes with a full ECM, dealer diagnostic tools can pull fault codes and test module performance under load. As of 2026, many independent shops have this capability too. If your pre-2007 bike has an odd electrical gremlin that passes every test, a professional wiring diagram check is worth the money.
Real Rider Scenario: Intermittent Stall on a Hot Day
A 2004 Dyna Super Glide starts fine cold. It rides beautifully for about 25 minutes. Then it sputters, dies, and refuses to restart for another hour.
The rider replaces the ignition module. It costs $220. The bike runs for two days.
Then the same stall comes back.
This is textbook heat soak misdiagnosis. The module was never the problem. The real culprit was a crank position sensor with cracked insulation that lost signal once the engine reached operating temperature.
What Actually Fixed It
Following the diagnostic workflow, a quick resistance check on the crank sensor told the story. Cold, it read 108 ohms, right in spec. After hitting the sensor with a heat gun for 30 seconds, the reading jumped to 450 ohms and then went open.
The replacement sensor cost $45. Total diagnostic time was 15 minutes. The original module went back on the bike and ran without issues for another 40,000 miles.
The Pattern We See Most Often
Aggregate rider reports show a clear trend. On bikes from the mid-1990s through the early 2000s, crank sensor failure is significantly more common than module failure. On 2007 and later bikes, voltage regulator issues and ECM communication problems take the lead.
Module failure does happen. It is just not the first thing to check.
Frequently Asked Questions
How do I test my Harley ignition module with a multimeter?
Test voltage at the module power wire first. You need battery voltage with the key on. Check ground continuity to the frame.
Perform the output test by grounding the crank sensor signal wire while looking for spark at the plug. No spark after all other tests pass means the module is bad.
What are the symptoms of a bad ignition module on a Harley?
The most common symptom is an engine that cranks but will not start. You might also see intermittent stalling when the engine gets hot, backfiring through the exhaust, or a sudden loss of spark at highway speeds with no warning.
Will a bad ignition module cause no spark?
Yes. A failed module will not trigger the ignition coil, which means no spark reaches the plugs. But always test the crank sensor and coil first.
A module replacement will not fix a bad sensor or a dead coil.
Can a Harley run without an ignition module?
No. The ignition module controls spark timing and coil firing. Without it, the engine cannot run.
On older Evo bikes with points ignitions, you can bypass the module by converting to a points system, but that is a different setup entirely.
How much does a Harley ignition module cost?
OEM Harley modules range from $150 to $400 depending on your model and whether you buy stock or Screamin' Eagle. Aftermarket options from Daytona Twin Tec and Ultima run $80 to $180. Verify compatibility with your model year before buying.
Should I upgrade to an aftermarket ignition module?
Aftermarket modules offer adjustable timing curves and better heat tolerance. They are worth considering for a built motor with high compression or aggressive cams. For a stock bike, the OEM module is reliable and simple to diagnose.

Similar Posts
































