Hobart Dishwasher Troubleshooting
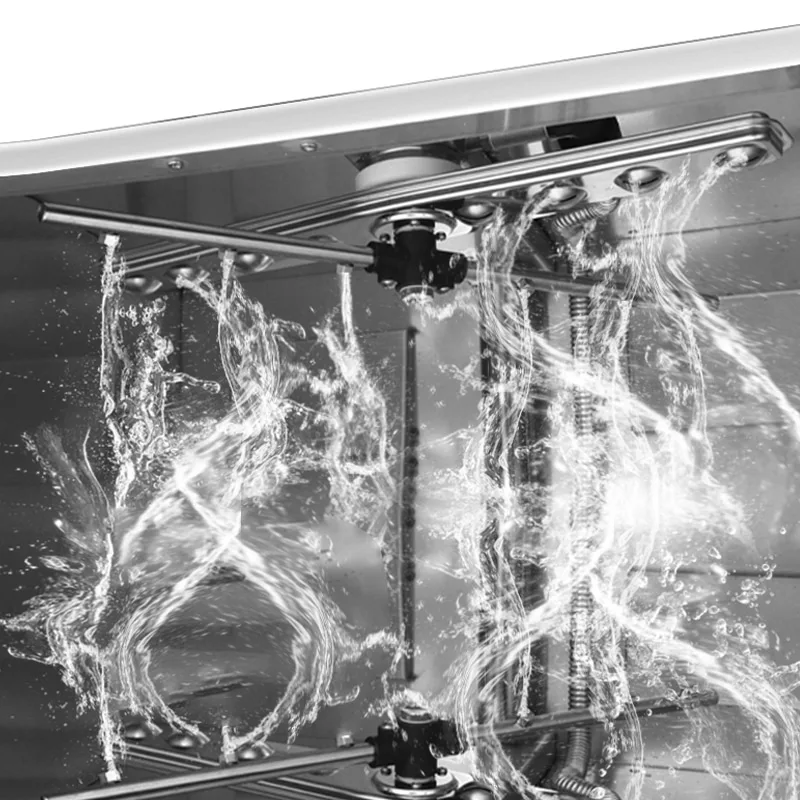
Image source: Bing (Web (fair-use with source credit))
Your Hobart just threw an error code in the middle of a rush. There's a growing stack of dirty dishes, the servers are looking at you with that panicked expression, and the machine is blinking like a slot machine that's about to pay out, except the payout is a hefty repair bill.
Take a breath. Most daily breakdowns come down to a handful of simple, repeatable causes you can fix in under fifteen minutes. You don't need to be a master mechanic.
You just need to understand how this machine thinks.
Commercial Hobart dishwashers run on water, heat, and pressure. That's it. When something fails, it's usually because one of those three elements is compromised.
The machine is smart enough to tell you exactly where to look. You just need to know how to listen.
Quick Answer
Check the fault code on the display first, it points to the failing zone. Then verify the wash arms spin freely and the strainer baskets are clean. Confirm the wash tank fills to the proper level and the final rinse hits 180°F.
If the machine trips on a high-limit switch, reset it once, but find the root cause before resetting again. Call a licensed technician if you suspect gas leaks or high-voltage electrical faults.
Why Your Hobart Stopped Mid-Cycle
Commercial dishwashers live a brutal life. They run through hundreds of cycles a day, get slammed with caustic chemicals, and get packed so tightly that spray arms can't rotate properly. When your machine quits during a rush, it's not just frustrating, it's a full operational crisis.
You can't plate food, you can't sanitize silverware, and every table in the dining room is waiting on clean glasses.
The first thing to do is stop pressing buttons randomly. Hitting "reset" on a machine that's tripped a safety switch doesn't fix the underlying problem. It just buys you twenty minutes before the same fault returns.
You're not troubleshooting; you're delaying the inevitable.
Here's the truth about commercial equipment: the machine wants to run. It wants to clean dishes because that's what it was built to do. When it stops, it's not being difficult, it's hit a safety threshold or lost a critical component.
Treat the error code as a clue, not a verdict.
The most frustrating part for most operators is feeling held hostage by a machine they don't understand. A diagnostic fee alone can run $150, and parts may take a week to arrive. But here's a number worth remembering: industry data consistently shows that roughly 60% of commercial dishwasher service calls stem from issues that could have been fixed in-house with basic cleaning and minor part swaps.
The 80/20 Rule of Hobart Breakdowns
Skip the engineering manual. The daily nuisance calls almost always trace back to one of four culprits:
Clogged wash arms. These spray arms rotate to blast water through tiny nozzles at your dishes. They get jammed with toothpicks, berry seeds, and stubborn food chunks. If the arms don't spin, water pools in the bottom, you get dirty dishes, and the machine sounds like it's grinding rocks.
Dirty strainer baskets. These baskets catch food debris so it doesn't recirculate and clog the pump. If you don't dump them every couple of hours during a rush, they clog up, the water turns into gray soup, and the machine throws a pressure error. That's not a mechanical failure, that's a sanitation failure.
Tripped high-limit switch. This is a safety device that cuts power to the heater if the tank water gets dangerously hot. It's your best friend when it works. But hard water scale buildup can cause it to trip prematurely. The machine goes into alarm mode, refuses to heat, and you're left with lukewarm water and a blinking code. Many operators assume the heater is dead when it's actually just a small disc that popped.
Chemical feed issues. Dish machines don't clean with hot water alone. They need detergent and rinse aid. If the chemical pumps are clogged, have an airlock, or the pickup tubes fell out of the drums, the machine washes with water only. Over time you get greasy film on glassware, and the machine logs low-temperature faults because the rinse aid isn't helping water shed off the dishes.
These four issues account for roughly 80% of everyday breakdowns. When you get an error code, don't assume a $500 circuit board died. Assume it's a $5 nozzle with a piece of lettuce stuck in it.
Start with the cheap fix, clean it, and see what the machine does.
Understanding Error Codes Like a Technician
The display panel is your first informant. That blinking number isn't random, it's a diagnostic code that narrows down the failure zone. Different models use different code systems, but most Hobart units (particularly the AM and CL series) use a combination of numbers and letters.
Here's what the most common codes mean on typical models:
| Error Code | Likely Meaning | Most Common Cause |
|---|---|---|
| 1 | High limit trip | Heater scaling, failed high-limit thermostat |
| 2 | Drain or low-temp fault | Failed drain solenoid, clogged drain line |
| 3 | Pump overload | Jammed impeller, failing pump motor bearing |
| 4 | Fill issue | Low water pressure, clogged fill valve screen |
| 5 | Heater stuck on | Shorted contactor, stuck relay |
But codes have a nuance most people miss: live faults versus logged faults. A live fault means the machine is currently sitting in that error state. A logged fault is history, it tells you what happened before the machine finally gave up.
Here's the trick: many Hobart models store the last ten error codes in memory. You can access them through a service mode, usually by holding specific button combinations (like "Start" and "Drain" together for five seconds). This is gold.
If the machine shows a code for "pump overload" from three days ago, and now it won't start at all, you're likely looking at a pump motor that's been struggling and finally seized. That saved history points you to the real suspect.
Don't assume a blank screen means a dead machine. If the power is on but the display is dark, check the main breaker first. Verify you have power at the machine's disconnect.
If you have voltage but no screen, you have an internal control issue that needs a licensed technician.
The 15-Minute Diagnostic Walkthrough
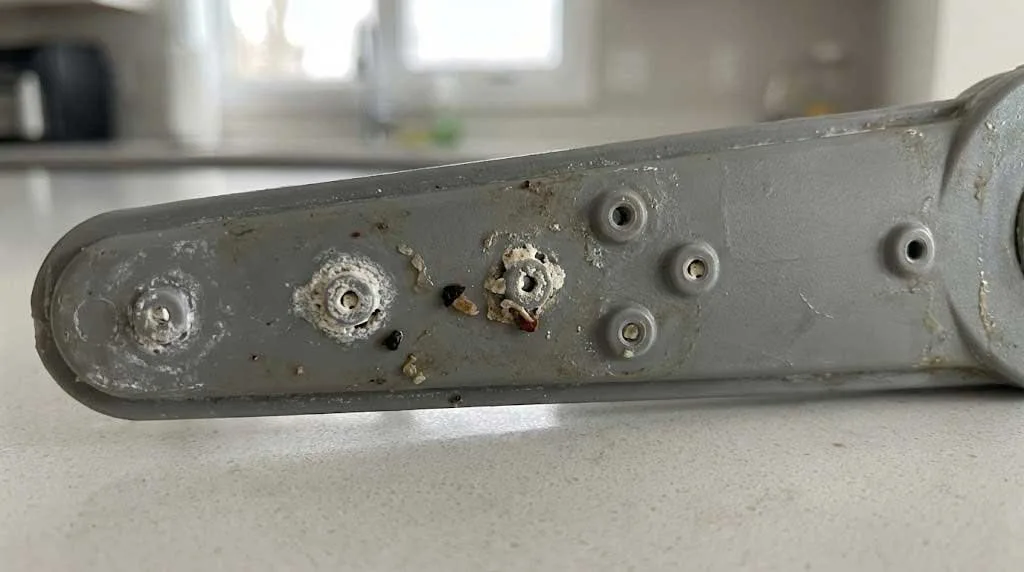
Image source: Bing (Web (fair-use with source credit))
Before you call a tech, run through this checklist. You'll need a flathead screwdriver, pliers, a bucket, and a flashlight. Work systematically, move in order, and don't skip steps.
Step 1: Kill the Power
Locate the circuit breaker and flip it off. Lock it out with a lockout tagout kit if you have one; otherwise, tape a note over the breaker so nobody flips it back on while you're working. Wait at least five minutes for the heating element to cool down.
Crack the tank drain valve slowly to relieve pressure. Hot water can burn you badly, so vent the tank before opening any panels.
Step 2: Check the Wash Arms
Open the front door and pull out the lower wash arm. Look at the spray nozzles. Poke out any debris with a screwdriver.
Do the same for the upper arm. Then pull out the strainer baskets and scrape them clean. If those screens are clogged with food scraps, your water pressure will never reach the level needed for proper cleaning.
You'd be surprised how many "dead" machines just had a twisted napkin wrapped around the spray arm hub.
Step 3: Verify the Water Level
Close the tank drain valve. Look at the sight glass on the side of the wash tank, there's usually a fill line marked. If the water level is too low, the heating element can burn out or the machine trips on a low-water safety.
If the water level is overflowing the internal standpipe, your float or pressure switch is stuck. This is a simple check that prevents a $400 circuit board replacement.
Step 4: Confirm Water Intake
Open the machine's front panel and locate the fill valve. It's usually a brass body with a screen basket where the supply line connects. Turn the water supply back on briefly.
You should feel water flowing through quickly. If it's just a trickle, the screen is clogged with sediment or the solenoid coil is weak. Clean the screen and test again.
If the fill valve doesn't open at all, check the voltage at the solenoid coil with a multimeter. You should see 120V or 24V depending on your model, check the wiring diagram on the inside of the panel. If you have voltage but no water flow, the valve is bad.
If you have no voltage, the float switch or the timer logic board isn't sending the signal.
Step 5: Test the Temperature
Run a drain and fill cycle, then put a digital probe into the wash tank. Don't trust the machine's internal gauge. A high-temp machine should hold around 160°F in the wash tank, and the final rinse should hit 180°F to meet NSF Standard 3 sanitization requirements.
If the water sits at 140°F and climbs slowly, you likely have a failing heating element. If it heats quickly but the machine still shows a temperature error, the thermostat may be sending bad readings to the controller.
Step 6: Check the Pressure
Find the manifold pressure gauge port on the wash manifold. If your machine has one, check the PSI during a wash cycle. It should read between 20 and 30 PSI depending on the model.
If the pump sounds like it's churning but you have no pressure, you have a clogged pump inlet or a missing impeller key, a small metal piece that connects the motor shaft to the impeller. That key shears off occasionally, and the motor spins freely while the impeller sits still.
Step 7: Inspect the Chemical Feed Lines
Follow the detergent and rinse aid tubes from the machine to the chemical drums. Look for kinks, air bubbles, or tubes sitting in a thick layer of congealed chemical. If the tubes are clogged, the pumps can't draw chemical.
Clear an airlock by pinching the tube and working the chemical upward until it reaches the pump head. Bucket testing is simple: put the pickup tube in a bucket of water, run the machine, and see if the pump pulls water. If not, you've got a bad chemical pump or a kinked line.
Mistakes That Cost Real Money
Some mistakes are expensive. Here's what to avoid.
Resetting the high-limit switch repeatedly. If code "1" keeps appearing, reset it once and watch. If it trips again within half an hour, you have a real problem: failed thermostat, stuck contactor, or a shorted heating element. Resetting it three times just keeps ruining parts.
Find the cause.
Assuming the breaker trip is random. If the main breaker trips, the machine is drawing too many amps. The cause could be a grounded heating element, a failing pump motor, or loose wiring connections. Resetting the breaker without investigation risks a fire.
Check the amp draw with a clamp meter against the manufacturer's spec. If it's climbing slowly, the motor bearings are wearing out.
Running descaler with a plugged drain line. This is how machines end up with shorts on the control panel. You pour a gallon of deliming chemical into a machine with a clogged drain, it foams up, backs over the edge, and drips down into the electronics. Always clear physical blockages first, then run chemical treatments.
Otherwise you're creating a caustic geyser.
Fixing the wrong part. Certain codes look worse than they are. A fill error that keeps coming back is often just a clogged pressure switch hose, a small plastic tube running from the bottom of the wash tank to the pressure switch. It gets plugged with mineral scale and lint, fooling the switch into thinking the tank is empty.
Operators replace the pressure switch itself (wasting $150), when the real fix was unclogging a piece of clear tubing worth eight dollars.
When to Call a Professional
Some things are worth paying for. Know when to stop.
Call a licensed technician if you see or suspect any of the following:
Gas leaks. If your machine runs on natural gas, detect a gas smell, or you see a yellow flame in the heater box, shut off the gas valve immediately and call a professional. Gas work is dangerous and heavily regulated.
High-voltage wiring issues. Open a panel and you find burned wires, melted insulation, or a smell like burning plastic. That's a fire risk.
Refrigerated parts. Hobart machines with integrated scrap disposal or cold plates use refrigerant. Handling refrigerant requires EPA certification; don't touch those lines.
Faults that return after multiple resets. If you've cleaned everything, verified water levels and temperatures, and the machine still throws the same code, you likely have a failing logic board or a wiring harness issue.
Major component replacement. Replacing a wash pump motor or a heating element is not a "screwdriver job" unless you're comfortable working with three-phase power and reading wiring diagrams. Mistakes here can destroy the new part instantly or create electrical hazards.
Preventive Maintenance That Pays Off
The best "troubleshooting" is the kind you never need. A simple, consistent maintenance routine prevents most breakdowns.
Do these daily:
- Drain the tank and clean the strainer baskets at the end of every service period
- Scrape food off plates before loading
- Check spray arms for clogs while the wash arms spin freely
- Shut down the machine properly using the drain cycle
Do these weekly:
- Deep-clean the spray arms by removing and soaking them in warm, soapy water
- Wipe down the door gaskets and check for tears
- Verify the chemical feed pumps are drawing correctly using the bucket test
- Check the wash tank temperature with a digital probe
Do these monthly:
- Inspect the fill valve screen for sediment buildup
- Check the pressure switch hose for clogs and clear it if needed
- Test the high-limit switch by pressing the manual reset button
- Look for water leaks around the pump seals and hoses
- Check the gas burner flame for a proper blue color (gas models)
Do these annually:
- Replace the door gaskets
- Replace the fill valve and drain solenoid seals
- Pull the wash pump and check the impeller and seals
- Have a technician verify the heating element resistance and amp draw
- Clean scale from the tank with an approved deliming chemical
The Bottom Line
Hobart dishwashers are workhorses, but they're still machines. They need water, heat, pressure, and chemicals to do their job. When something fails, the machine gives you a clue.
Learn to read the clues, check the cheap stuff first, and don't ignore a code that keeps coming back.
You'll save hundreds of dollars in unnecessary service calls, and you'll keep the machine running through service without a breakdown. And when a problem truly needs a professional, gas, high voltage, or refrigerant, you'll know that too, and you'll get them in faster because you've already ruled out the simple stuff.
A little routine maintenance goes a long way. Treat the machine well, and it'll keep pushing clean, sanitized dishes out when the dining room is full and the clock is ticking.

Similar Posts