How to Activate Trail Camera Cellular Service
So you just unboxed a cellular trail camera and now you're staring at it like it's a puzzle. You know it can send photos straight to your phone, but the fine print says you need to activate the cellular service first. That's the part that trips up a lot of people, and it's exactly why you're here.
The truth is, knowing how to activate trail camera cellular service is simpler than most folks expect. Manufacturer specifications indicate the entire process takes about 5 to 15 minutes if you have a strong signal where you plan to mount the camera. What trips people up is the order of steps and which plan fits their setup.
Let's walk through it so you get it right the first time.
Image source: Bing (Web (fair-use with source credit))
Quick Answer
Insert the SIM card. Turn on the camera. Download the brand's app.
Create an account. Purchase a data plan. Confirm the connection.
That's the whole flow in six steps. The exact order varies slightly by brand, but the core logic stays the same. Most cameras activate within 10 minutes of buying the plan.
How Cellular Trail Camera Activation Actually Works
A cellular trail camera is a digital camera with a built-in LTE modem. When it snaps a photo, it compresses the image and sends it through the cellular network to the company's cloud server. From there, the app on your phone pulls it down.
No Wi-Fi or Bluetooth pairing is required.
The magic happens through a SIM card. Some cameras come with one pre-installed. Others require you to pop one in yourself.
That SIM card ties the camera to a specific carrier. As of 2026, the three main networks used in the US are Verizon, AT&T, and T-Mobile. Most camera brands lock their devices to one carrier, so you cannot swap in a random SIM from your phone provider.
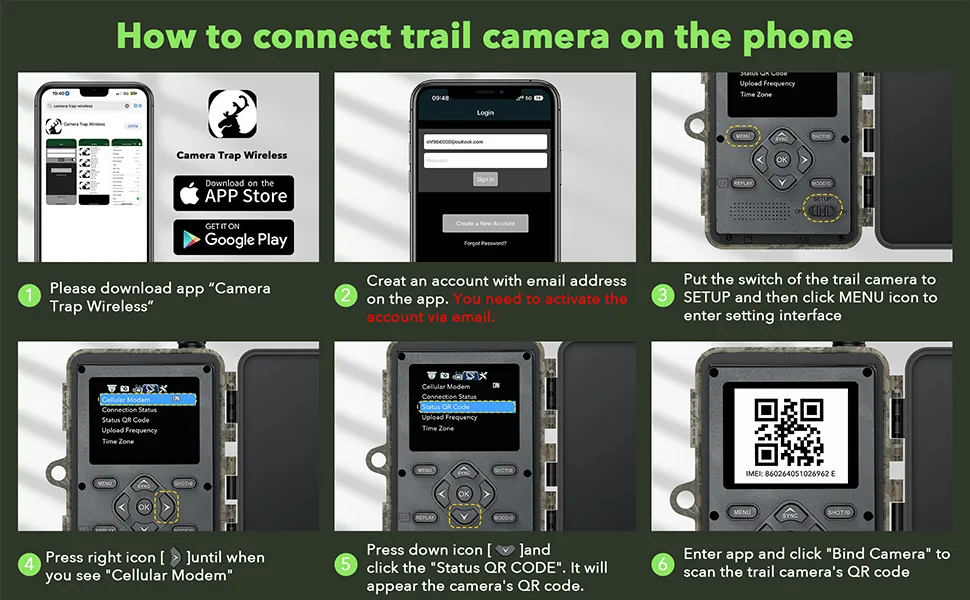
Image source: Bing (Web (fair-use with source credit))
The app is where you manage everything. Each major brand has its own platform. Spypoint uses the Spypoint app.
Moultrie uses Moultrie Mobile. Tactacam uses the Tactacam Reveal app. Browning uses the Browning Trail Cameras app.
You download the app, create a user profile, and register the camera using its serial number or IMEI.
The IMEI is the camera's unique identifier. Think of it like a fingerprint. The app reads it, links it to your account, and lets you choose a data plan.
Once you pay for the plan, the carrier activates the SIM remotely. That is the moment your camera becomes a full cellular device. Picking the right wildlife camera model matters here too, because some brands have better carrier coverage in rural areas.
Matching the Right Plan to Your Camera and Situation
Not all data plans are the same. You have to pick one that fits your usage pattern. The wrong choice can leave you with no photos mid-season or paying for a pile of data you never use.
Here is a breakdown of the common plan types:
| Plan Type | Typical Cost per Month | Photo Limit | Best For |
|---|---|---|---|
| Basic | $5 to $10 | 100 to 250 photos | Low traffic areas, gate checks |
| Standard | $15 to $20 | 500 to 1,000 photos | Active hunting properties |
| Premium | $25 to $30 | 2,000 to 10,000+ photos | High traffic areas, research |
| Annual | $80 to $200 | Varies by tier | Long-term monitoring, cost savings |
The first decision point is whether you want prepaid or postpaid. Prepaid plans let you pay upfront for a specific number of photos. When they run out, the camera stops sending until you buy more.
Postpaid plans bill you monthly and often include a photo cap with overage charges.
The second decision is single camera versus multi-camera plans. If you have more than one camera, look for a plan that bundles them. Most brands offer a discount for two or more devices on the same account.
That can cut your per-camera cost by 20 to 30 percent.
Here is how to choose based on your situation:
- If you check the property weekly and only need a few photos for confirmation, go with a basic plan.
- If you hunt a specific area and want to see every buck that walks by, a standard plan is your sweet spot.
- If you run a research project or monitor a food plot, the premium plan gives you the headroom you need.
- If you plan to leave the camera out for months without touching it, the annual plan saves you money and hassle.
Step-by-Step Activation Workflow (Follow Your Path)
The exact path depends on your camera brand and carrier. Here is the universal workflow with condition branches for the common scenarios.
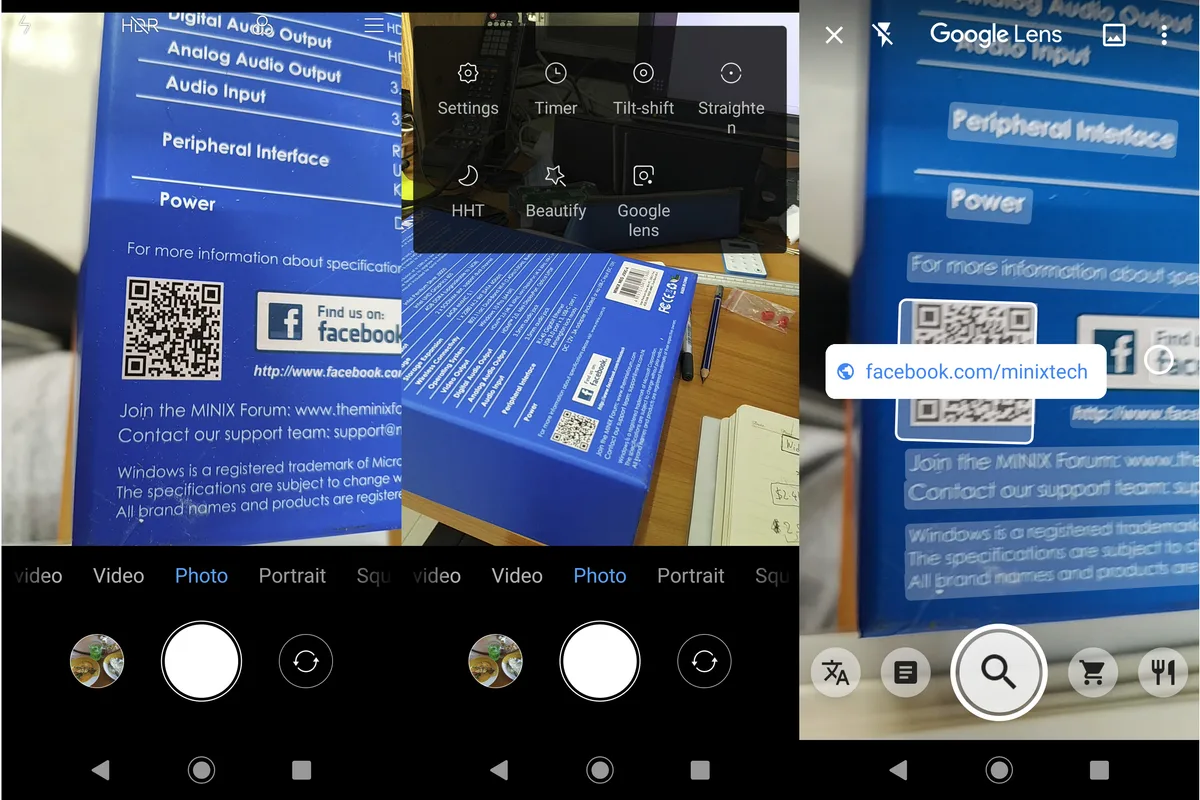
Image source: Web (Bing) / cnx-software.com (Web image (fair-use with source credit))
Step 1: Power Up
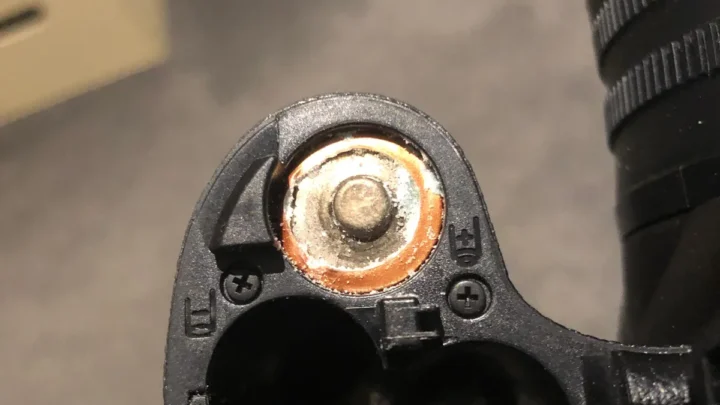
Insert fresh batteries. Lithium ion batteries are recommended for cold weather use. They hold voltage better than alkaline and last longer with cellular transmission.
Insert an SD card too. Some cameras require it for local storage even if you plan to use cellular only.
Step 2: Install the SIM Card
If the camera has a pre-installed SIM, skip this step and move to Step 3. If the SIM comes separate, open the SIM slot and insert it with the gold contacts facing down. Push until it clicks. Close the seal properly.
Water intrusion is a real risk if the gasket is not seated right.
Step 3: Turn On and Set to Cellular Mode
Power on the camera. Most models have a dial or menu option for "Cellular", "LTE", or "On". Set it to that mode.
The camera will search for the network. A green or blue LED usually indicates a successful connection.
Step 4: Download the App and Create an Account
Go to your app store and download the brand's app. Create an account with your email address and a strong password. You will need to verify your email before you can proceed.
Step 5: Add the Camera to Your Account
If the camera has a QR code on the unit, scan it with the app. This automatically enters the serial number and IMEI. If there is no QR code, manually type the serial number and IMEI from the sticker inside the battery compartment or on the box.
Step 6: Purchase and Activate a Plan
The app will show you available plans. Select the one that matches your usage. Enter your payment information.
The plan activates within a few minutes. Some brands send a confirmation email with an activation code. If yours does, enter that code in the app.
Step 7: Verify the Connection
The app will display a signal strength indicator. If it shows one bar or more, the camera is connected to the cellular network. Take a test photo by walking in front of the camera.
Within 30 seconds to 2 minutes, that photo should appear in your app.
Step 8: Adjust Settings
Now that the camera is live, adjust the photo interval, sensitivity, and time-lapse settings. You can do this remotely through the app. No need to walk back to the camera.
Mistakes That Kill Activation (And How to Avoid Them)
The most common failure point is skipping the signal check. People install the camera in a perfect spot for game but forget to verify cellular coverage first. Always check the carrier's coverage map before you buy the camera.
If you are in a dead zone, no amount of activation wizardry will help.
The second mistake is inserting the SIM card incorrectly. The contacts are delicate. If you force it or put it in the wrong orientation, the camera will not recognize it.
Follow the diagram in the manual. If it does not click, do not push harder.
The third mistake is forgetting to update the firmware. Many cameras ship with outdated firmware. The app will prompt you to update before activation.
Do not skip it. An outdated firmware can cause the camera to fail to connect to the network or eat through batteries faster than it should.
The fourth mistake is choosing the wrong plan. If you buy a basic plan and then set the camera to take photos every 30 seconds, you will run out of data in a day. Match the plan to the expected photo volume.
If you are unsure, start with a monthly standard plan and adjust after the first month.
The fifth mistake is ignoring the billing cycle. Most plans auto-renew. If your credit card expires or the payment fails, the camera stops sending photos.
Set a reminder a few days before the renewal date. That way you can update your payment info before the service drops.
Real Scenarios: What Different Users Actually Did
Scenario 1: The Weekend Hunter
A hunter in central Texas set up a Spypoint Link-Micro on a 20-acre lease. He chose the basic plan at $8 per month. The camera sat near a feeder with moderate deer traffic.
Over the first month, it sent 87 photos. That left plenty of room in his 250-photo limit.
His mistake was not checking the signal beforehand. The camera showed two bars at the feeder. But after a cold front, the leaves dampened the signal.
Photos stopped arriving for three days. He moved the camera 15 feet higher on the tree. The signal returned to three bars.
The lesson is that tree cover and weather both affect signal strength. You may need to test different mounting heights.
Scenario 2: The Property Manager
A land manager in Georgia ran four Tactacam Reveal X cameras across 300 acres. He bought the multi-camera annual plan at $180 per year. That covered all four devices on one account.
The per-camera cost dropped to $45 per year.
He set the cameras to take photos every 10 minutes during daylight. That generated about 900 photos per month per camera. The standard plan handled it without issue.
He used the app to check for trespassers and monitor fence lines. The battery life lasted about three months with lithium cells. He replaced them all at once during the quarterly visit.
Scenario 3: The First-Time User
A first-time buyer in Michigan purchased a Moultrie Mobile Edge. He followed the app instructions but hit a snag. The camera would not connect to the network.
He had inserted the SIM card upside down. The contacts were not touching the pins.
He fixed it by removing the SIM, checking the orientation diagram in the manual, and reinserting it correctly. The camera connected within two minutes. He then selected the standard plan at $15 per month.
The first photo arrived in his app 45 seconds after he triggered the test. He said the hardest part was the SIM orientation. The rest was straightforward.
Frequently Asked Questions
How long does it take to activate a cellular trail camera?
Most cameras activate within 5 to 15 minutes of purchasing the plan. The SIM card activates remotely through the carrier. Signal strength can affect this timing.
If the camera does not connect within 30 minutes, restart it and check the signal.
Can I use any SIM card in a cellular trail camera?
No. Most trail cameras are locked to a specific carrier. You cannot use a SIM card from your phone.
The camera's SIM is tied to the brand's partnership with a carrier. Some brands offer unlocked models, but they are less common.
What happens if I run out of data mid-month?
The camera stops sending photos until you buy more data. Most apps let you purchase a top-up plan directly. Some brands offer automatic top-up features.
You can also switch to a higher tier plan for the next billing cycle.
Do I need an SD card if I use cellular service?
Yes. The SD card stores photos locally as a backup. If the cellular signal drops, the camera saves the photos to the card.
You can retrieve them when you visit the camera. Some cameras will not even activate without an SD card inserted.
Can I change my plan after activation?
Yes. You can upgrade or downgrade your plan through the app. Most brands let you switch at the start of the next billing cycle.
Some allow immediate upgrades. Downgrades usually take effect at the next renewal date.
How do I cancel my cellular trail camera plan?
Open the app and go to the account or subscription settings. Select the plan cancellation option. The service stops at the end of the current billing cycle.
You can also contact customer support for the brand. Save your photos before the service ends.

Similar Posts