How to Clean a DSLR Camera Sensor
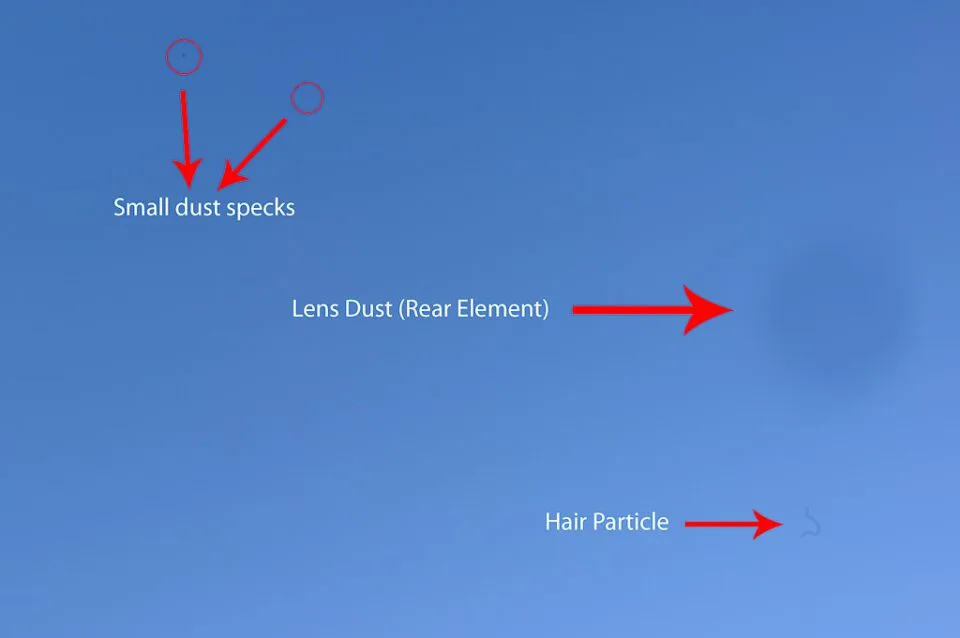
If you have ever seen those dark little specks in the same spot on every blue sky shot, you already know the problem. A dirty sensor makes every lens change feel like a gamble. Learning how to clean a DSLR camera sensor is a skill that saves you money and hours of cloning out dust in post production.
Manufacturer specs indicate that most sensors need cleaning every 5,000 to 10,000 shots. The frequency depends on how often you swap lenses. As of 2026, the basic approach has not changed.
The tools are better, but the risks are the same. Here is what you need to know before you touch anything near that shutter.
Quick Answer
Charge your battery fully. Turn on the camera cleaning mode to lock the mirror up. Use a rocket blower first to dislodge loose dust.
If spots remain, use a sensor swab with one or two drops of cleaning fluid. Wipe once in one smooth direction. Use a fresh swab for each pass.
Test at f/22 to confirm it is clean.
Image source: Bing (Web (fair-use with source credit))
The Problem (and Why You Should Not Panic)
Sensor dust looks worse than it actually is. Those little blobs sit on the protective cover glass, not on the sensor itself. The glass sits right in front of the imaging chip.
You can clean it without touching the electronics.
Dust becomes visible at small apertures like f/16 or f/22. At wide apertures, the same spot is usually invisible. If you shoot mostly portraits at f/2.8, you might not even notice.
But landscape photographers or anyone using a dedicated landscape camera will see every speck in a clear sky.
Most dust is loose. It sits on the surface and can be blown off with a puff of air. You only need a wet cleaning for stubborn oil or sticky residue.
Either way, this is routine maintenance. Many people do it at home without issues.
What You Actually Need to Do It Safely
You only need a few items. Do not use a Q-tip or canned air. That is how sensors get scratched or gummed up.
The essential tools:
- A rocket blower (bulb type, no brush on the tip)
- Sensor cleaning swabs in the correct size for your sensor (full frame, APS-C, or Micro Four Thirds)
- Sensor cleaning fluid (methanol or isopropyl alcohol based)
- A sensor loupe or a bright light to inspect the surface
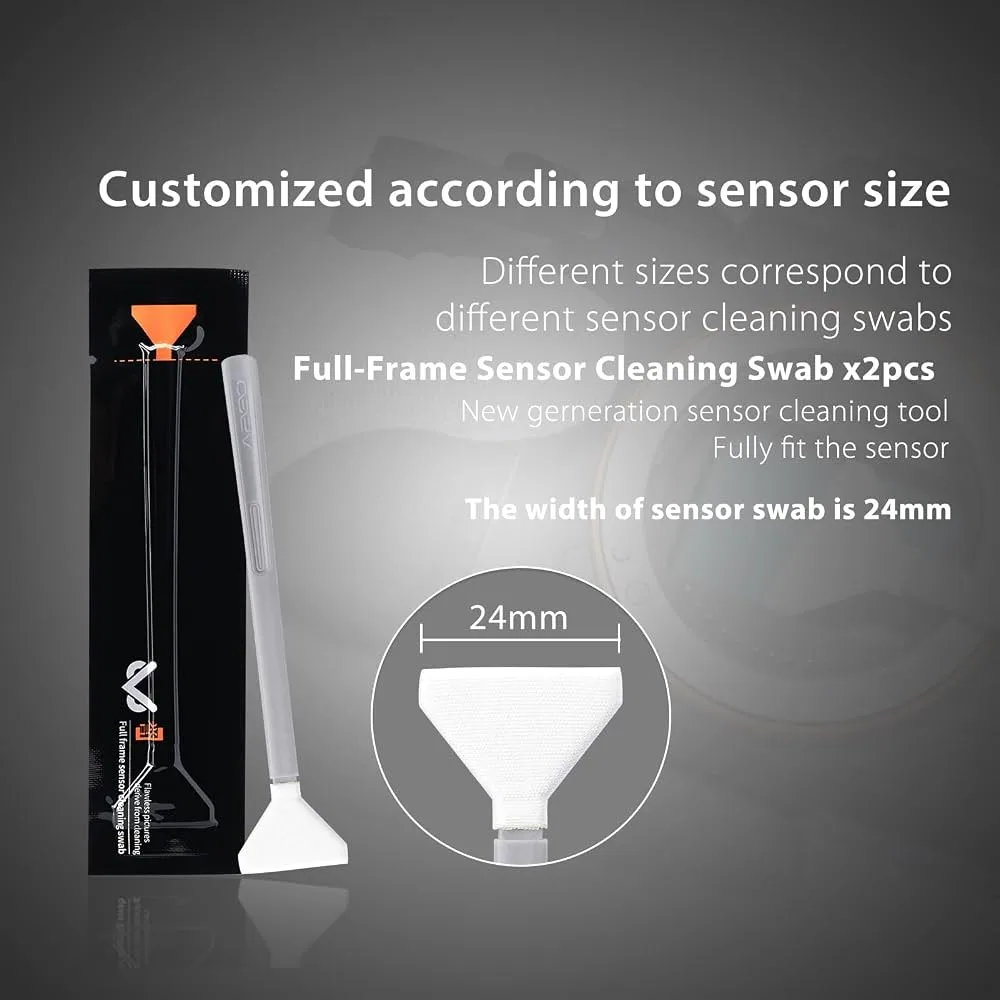
Image source: Bing (Web (fair-use with source credit))
Swab size matters more than brand. A full frame sensor is 36mm wide. You need a 24mm swab that covers most of the width in one pass.
An APS-C sensor needs a 16mm swab. Using the wrong size forces you to drag dust across the surface.
The fluid should evaporate cleanly without leaving residue. High purity isopropyl alcohol (99% or higher) works well. Some proprietary fluids add a static inhibitor.
Either is fine as long as it is designed for sensor cleaning.
Your battery must be fully charged. The cleaning mode keeps the shutter open. If the battery dies mid cleaning, the shutter slams shut.
That can damage the shutter blades.
The Step-by-Step: From Dust to Clean
Start with the least invasive method. Only move to wet cleaning if the blower fails.
Step 1: The test shot
Set your camera to aperture priority mode at f/22. Take a photo of a plain white wall or a bright sky. Review the image at 100% zoom.
You will see any dust spots clearly.
Step 2: Blower method
Hold the camera with the lens mount facing downward. Activate the sensor cleaning mode (sometimes called mirror lock up). Use the rocket blower to puff air into the chamber.
Never touch the sensor with the tip. Keep the camera face down so dust falls out.
Take another test shot. If the spots are gone, you are done. If not, move to wet cleaning.
Step 3: Wet cleaning
Open a fresh swab. Add one or two drops of cleaning fluid to the pad. Do not soak it.
Attach the swab to the handle. Place the swab at the left edge of the sensor. Drag it gently across to the right side in one smooth motion.
Do not stop mid way. Do not press hard.
Turn the swab over to the dry side. Drag it back across from right to left. Use a fresh swab if you need another pass.
Never reuse a swab.
Step 4: Final inspection
Take another test shot at f/22. Check for remaining spots. If you see new streaks, you used too much fluid.
Let the sensor dry for 30 seconds and try again with a dry swab.
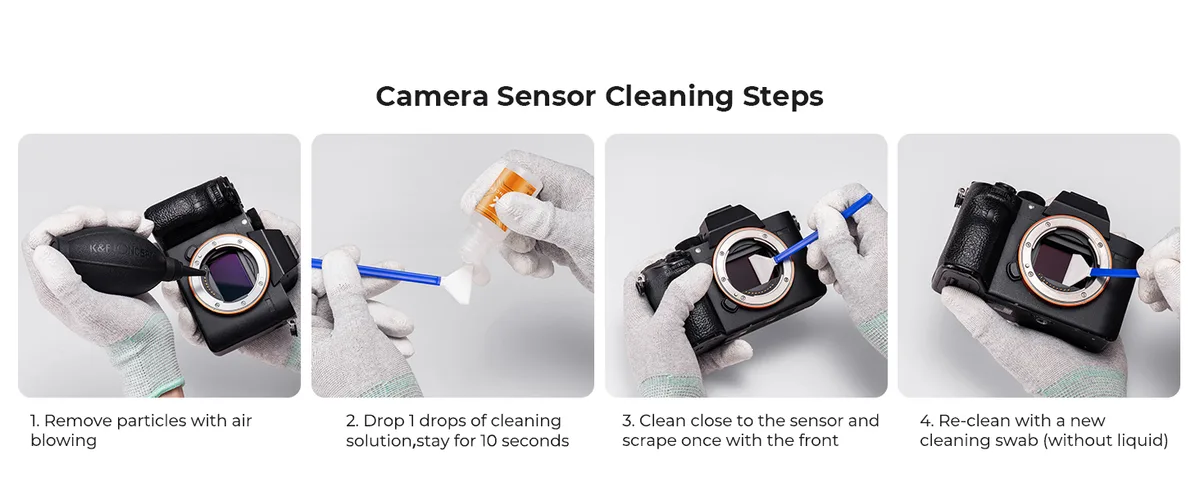
Image source: Web (Bing) / amazon.co.uk (Web image (fair-use with source credit))
When to DIY vs. When to Send It Out
DIY cleaning is safe for most people. But it is not right for every situation.
DIY is fine when:
- You have the right tools
- You are comfortable following the steps
- The dust is on the surface and visible
- Your camera is out of warranty or you accept the risk
Send it out when:
- You see oil spots or sticky residue that will not budge
- The sensor appears scratched or damaged
- You are nervous about touching the interior
- The camera is still under warranty
Canon's official support documentation recommends using only approved methods and tools. Most manufacturers offer a cleaning service for a flat fee. Professional cleaning usually costs between $30 and $80.
That is a fair price if you want peace of mind.
If you regularly swap lenses in dusty environments, you might clean your sensor more often. That is normal. Keep a blower in your bag and check for dust before every important shoot.
Street photographers who shoot in urban conditions tend to see more dust buildup. The same goes for anyone shooting in dry, windy locations.

Similar Posts
































