How to Check Trail Camera Battery
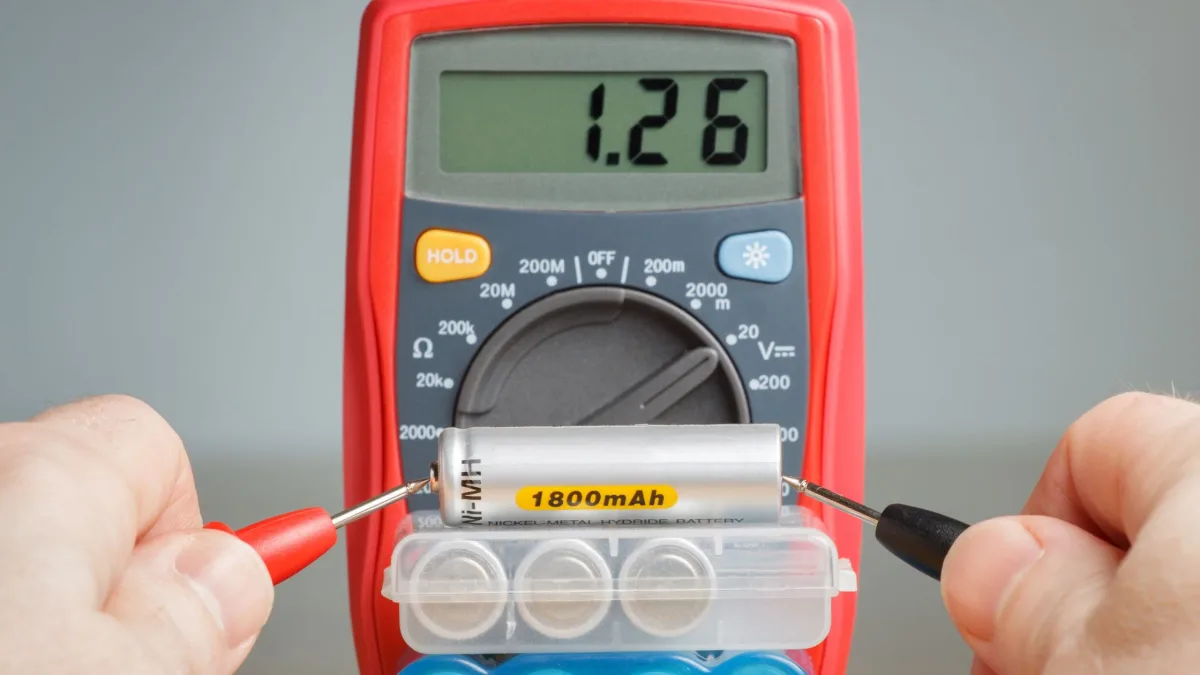
Image source: Web (Bing) / multimeterworld.com (Web image (fair-use with source credit))
How to Check Trail Camera Battery: The Complete Guide
If you've ever wondered how to check trail camera battery without walking miles to a dead camera, you're not alone. The battery indicator on most trail cameras is notoriously unreliable, often showing full bars when the cells are nearly empty. That's a real problem when you're trying to capture that buck at 2 AM and your camera goes dark.
Manufacturer specifications indicate that a standard alkaline AA battery drops from 1.5V to about 1.2V under load before the camera cuts off. As of 2026, most modern trail cameras still use a simple voltage threshold for their low-battery warning, not a true capacity test. That means your camera can say "full" and still fail in cold weather.
Let's look at why that happens and how to fix it.
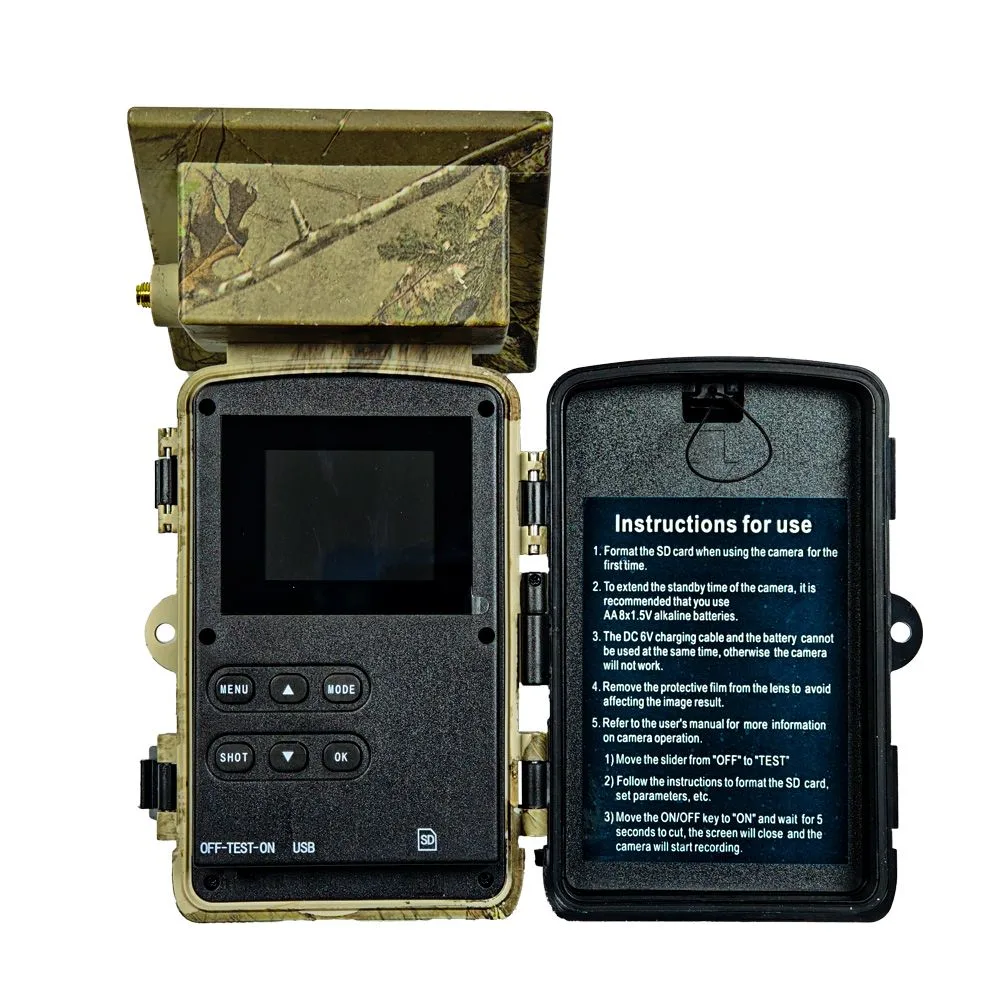
Image source: Web (Bing) / foreseenoptics.com (Web image (fair-use with source credit))
Why Your Camera's Battery Indicator Is Probably Lying to You
The built-in battery icon on most trail cameras measures voltage at rest, not under load. A battery that reads 1.4V with no draw can instantly drop to 1.0V when the camera triggers its infrared LEDs and takes a photo. That's why you can have a "full" indicator one day and a dead camera the next.
Temperature makes this worse. Alkaline batteries lose up to 60 percent of their usable capacity at 0°F. Your camera's indicator doesn't compensate for that.
It just reads the resting voltage, which stays artificially high in cold weather until the battery fails completely.
Lithium AA batteries handle cold much better. They maintain voltage under load down to -20°F. But even lithium cells can give a false reading if the camera's firmware is glitching.
A factory reset can sometimes fix that issue, especially on older models.
The bottom line? Don't trust the battery icon alone. It's a rough guide at best.
Use it to get a general idea, but always verify with a multimeter or a load test before you hike out to your camera.
Quick Answer
Check your trail camera battery with a digital multimeter. Set it to DC voltage. Touch the probes to the battery terminals.
A good alkaline AA reads 1.4V to 1.5V at rest. Replace it below 1.2V. For lithium AA, replace below 1.3V.
Test under load by pressing the camera's test button while reading voltage.
The Two Ways to Test a Trail Camera Battery: Voltage vs. Load
There are two main methods for checking trail camera battery health. Each tells you something different.
Voltage testing measures the electrical potential difference between the battery's terminals. It's quick and easy. You just touch the probes to the battery and read the number.
But it only tells you the resting voltage, not how the battery performs under stress.
Load testing applies a small electrical draw to the battery while measuring voltage. This mimics what the camera does when it takes a photo or sends a cellular signal. A battery that passes a voltage test can fail a load test, especially if it's old or cold.
Here's a quick comparison:
| Method | What It Measures | Tools Needed | Accuracy |
|---|---|---|---|
| Voltage test | Resting electrical potential | Multimeter | Moderate |
| Load test | Performance under draw | Multimeter + camera test button | High |
| Camera indicator | Internal voltage threshold | None | Low |
For most users, a voltage test with a good multimeter is enough. But if you're running critical cameras in remote areas, invest in a load tester or use the camera's own test function.
Quick Decision Tree: Which Test Method Should You Use?
Your situation determines the best approach.
If you have a digital multimeter: Test resting voltage first. If voltage is above 1.4V for alkaline or 1.5V for lithium, the battery is likely good. If voltage is below 1.2V for alkaline or 1.3V for lithium, replace it.
For a more accurate check, test under load by pressing the camera's test button while reading voltage.
If you only have the camera's built-in indicator: Use it as a rough guide only. If the indicator shows half or less, replace the batteries before your next trip. If the indicator shows full but the camera has been in cold weather, test with a multimeter anyway.
If you have a cellular camera with an app: Check the app's battery percentage. Most apps are more accurate than the on-camera indicator. But still verify with a multimeter if the app shows below 30 percent.
If you have no tools at all: Replace batteries at a set interval. Every 4 to 6 weeks for alkaline. Every 8 to 12 weeks for lithium.
Label batteries with the date you installed them. This is the least accurate method but better than guessing.
How to Check Trail Camera Battery: Step-by-Step for Every Situation
Using a Multimeter (The Gold Standard)
- Set the multimeter to DC voltage. Choose the 20V range if it's not auto-ranging.
- Remove the battery from the camera. Testing in the compartment can give inaccurate readings due to contact resistance.
- Touch the red probe to the positive terminal. Touch the black probe to the negative terminal.
- Read the voltage. Write it down if you're testing multiple batteries.
- Compare to the threshold. For alkaline AA, replace below 1.2V. For lithium AA, replace below 1.3V. For NiMH rechargeable, replace below 1.1V.
- Test under load (optional). Put the battery back in the camera. Press the test button or trigger the camera manually. Read the voltage while the camera is active. If it drops below 1.0V for alkaline or 1.1V for lithium, replace it.
Using the Camera's Built-in Indicator
- Turn on the camera and navigate to the battery status screen. This is usually in the settings menu.
- Look for the battery icon. Some cameras show a percentage. Others show bars.
- Interpret the reading. If the icon shows less than half, replace the batteries. If it shows full but the camera has been in use for more than 4 weeks, be suspicious.
- Check the contacts. If the indicator flashes or shows inconsistent readings, clean the camera components with isopropyl alcohol. Corrosion is a common culprit.
Using the App (For Cellular Cameras)
- Open the camera's app on your phone. Wait for it to sync with the camera.
- Find the battery status section. This is usually on the main dashboard or device settings.
- Read the percentage. Most apps show a more accurate reading than the on-camera indicator because they measure voltage under load during the cellular transmission.
- Replace when below 20 to 30 percent. Some cameras will shut off at 10 percent to save the last bit of power for the cellular module.
- If the app shows a different reading than the camera's indicator, trust the app. The camera's indicator is often a simple voltage check while the app uses a more sophisticated algorithm.
If you're troubleshooting a camera that won't turn on at all, the battery might be completely dead. But it could also be a firmware issue. Troubleshooting the electronics can sometimes resolve that, especially if the batteries are known good.
Common Mistakes Most People Make (And How to Avoid Them)
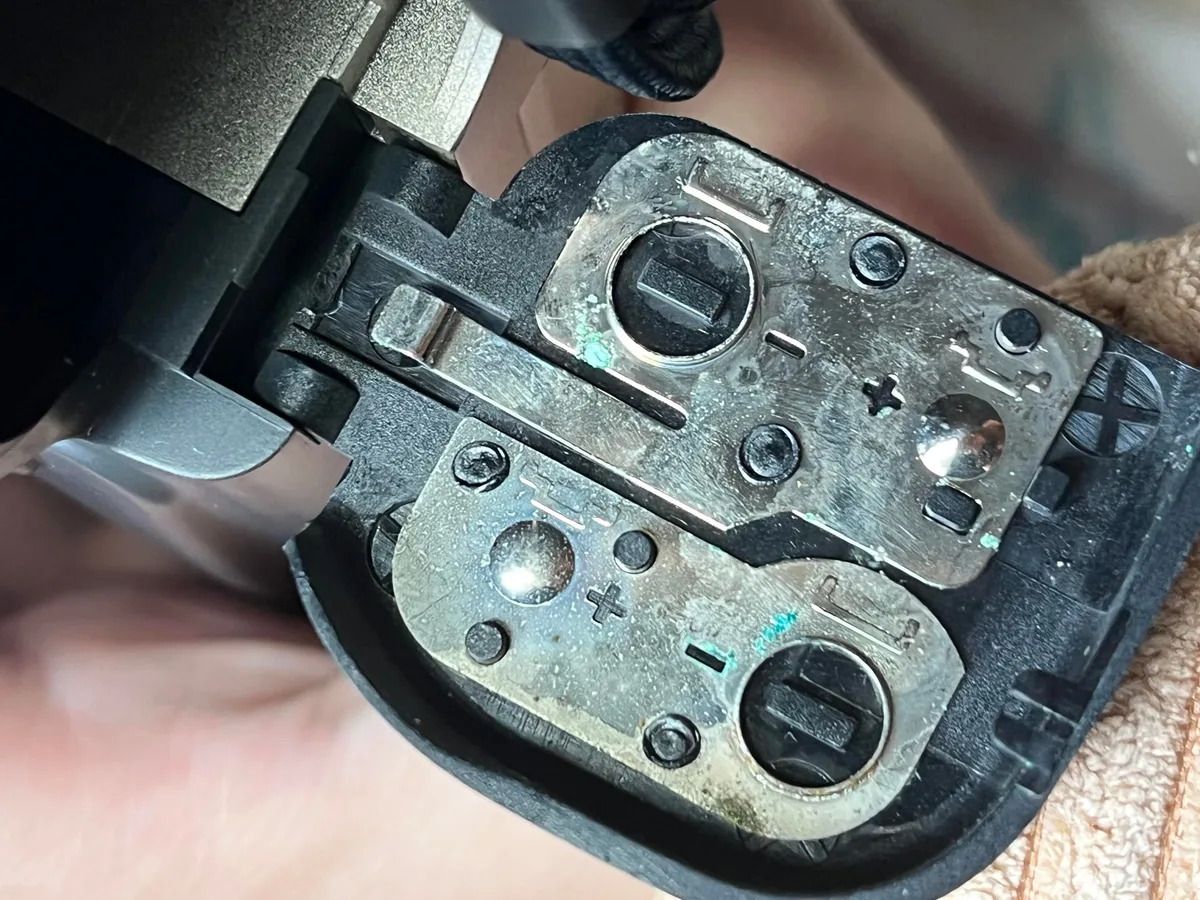
Image source: Bing (Web (fair-use with source credit))
Mistake 1: Trusting the battery icon without verifying. We've covered this already. But it's worth repeating. The icon lies.
Always cross-check with a multimeter or a load test before you drive 20 miles to your camera site.
Mistake 2: Mixing old and new batteries. This is one of the fastest ways to kill a set. A weak battery pulls down the voltage of the whole pack. Replace all batteries at the same time.
Label them with a Sharpie so you know when they went in.
Mistake 3: Using alkalines in freezing weather. Alkaline batteries lose capacity rapidly below 32°F. If you're running a camera through a northern winter, switch to lithium AA. They cost more but they work.
Per manufacturer testing, lithium AA lasts 3 to 4 times longer than alkaline in sub-zero conditions.
Mistake 4: Ignoring battery contact corrosion. White or green crust on the springs and terminals creates resistance. That resistance shows up as a low voltage reading even if the battery is good. Clean contacts with a cotton swab and isopropyl alcohol.
Do it every time you swap batteries. The same approach works for keeping the housing clean on other gear.
Mistake 5: Testing batteries at rest and calling it good. Resting voltage is useful but not definitive. A battery can read 1.4V at rest and drop to 0.9V under the camera's load. That's why load testing is the gold standard.
If you can't load test, at least test the voltage after the camera has been sitting for a few hours.
Mistake 6: Not accounting for the camera's parasitic draw. Some cameras drain batteries even when they're not taking photos. This is more common in cellular models that ping towers every few minutes. If your camera is draining batteries faster than expected, check the manufacturer's specs for standby current draw.
A camera with high parasitic draw needs better batteries or an external power pack.
Pro Tips: Getting the Most Out of Every Battery Set
Use lithium AA for critical cameras. They handle cold weather, have a higher energy density, and last longer. The upfront cost is higher, but the cost per photo is lower when you factor in fewer trips to replace them.
Store spare batteries in a cool, dry place. Heat accelerates self-discharge. Don't leave extra batteries in your truck in summer. Keep them in a ziplock bag in your pack or at home.
Proper storage conditions apply to battery-powered gear in general.
Label batteries with the installation date. Use a permanent marker. Write the month and year on the side of each battery. When you pull them out, you'll know exactly how long they lasted.
Use rechargeable NiMH for low-priority cameras. If you're running a camera on your own property and checking it weekly, NiMH batteries are a great choice. They cost less per cycle and perform well in mild weather. Just make sure your camera supports the lower voltage of NiMH (1.2V vs 1.5V for alkaline).
Most modern cameras do, but older models might not.
Consider an external battery pack for high-use cameras. If a camera is taking hundreds of photos per day or sending cellular images, internal AA batteries won't last long. An external 6V or 12V battery pack with a solar panel can keep the camera running for months. The initial investment is higher, but the reduced maintenance is worth it.
Test batteries before you leave home. Don't wait until you're standing in front of the camera to find out the batteries are dead. Test each cell with a multimeter before you go. Replace any that are below threshold.
This simple step saves hours of frustration.
Frequently Asked Questions About Trail Camera Battery Testing
How often should I check my trail camera batteries?
Check batteries every 4 to 6 weeks for alkaline cells and every 8 to 12 weeks for lithium. If your camera is in a high-traffic area taking lots of photos, check more often. Cellular cameras with frequent transmissions may need checking every 2 to 3 weeks.
Can I use rechargeable batteries in my trail camera?
Yes, but check your camera's manual first. Some cameras require a minimum voltage of 1.3V to operate. NiMH rechargeables output 1.2V, which can cause the camera to show a low battery warning or shut off prematurely.
Use high-capacity NiMH batteries (2000mAh or more) for best results.
What voltage is too low for a trail camera battery?
For alkaline AA, replace below 1.2V at rest. For lithium AA, replace below 1.3V at rest. For NiMH rechargeable, replace below 1.1V at rest.
Under load, replace any battery that drops below 1.0V (alkaline) or 1.1V (lithium).
Why does my trail camera drain batteries so fast?
Several factors cause fast drain: high trigger frequency, cold weather, cellular transmission, poor battery quality, and parasitic draw from the camera's electronics. Check the camera's standby current in the manual. If it's above 0.5mA, the camera is drawing power even when idle.
Is it safe to leave batteries in the camera during winter?
Yes, but use lithium AA. Alkaline batteries can leak and corrode the contacts when left in cold weather for extended periods. Lithium batteries handle cold much better and are less likely to leak.
If you're storing the camera for months, remove the batteries entirely.
How do I clean corroded battery contacts?
Remove the batteries. Mix a small amount of baking soda with water to make a paste. Apply it to the corrosion with a cotton swab.
Let it sit for a few minutes. Wipe it off with a clean cloth. Rinse with isopropyl alcohol.
Dry thoroughly before inserting new batteries. If the corrosion is severe, use a small wire brush or fine sandpaper.
What's the best battery for a trail camera in cold weather?
Lithium AA is the best choice for cold weather. They maintain voltage down to -20°F and last 3 to 4 times longer than alkaline in sub-zero conditions. They cost more, but they're worth it for reliable winter operation.
Should I use a multimeter or a battery tester?
A digital multimeter is more versatile. You can use it for other electronics projects. A dedicated battery tester with a load function is easier to use but less flexible.
If you already own a multimeter, stick with it. If you're buying something new, get a multimeter with a load test feature.

Similar Posts