How to Clean Underwater Camera Housing
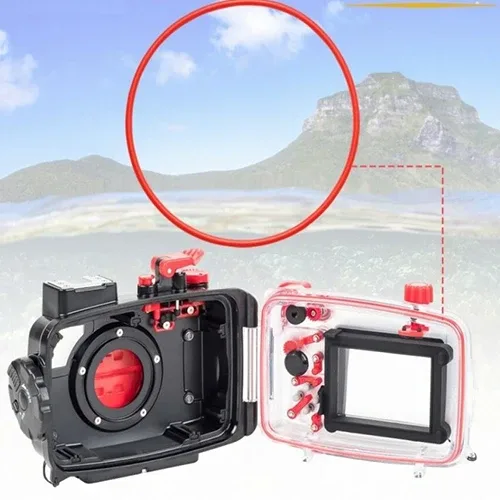
Learning how to clean underwater camera housing is one of the most important skills any diver can master. A slip here can turn a $3,000 camera into a saltwater paperweight. But with the right process, it is simple and foolproof.
Let us walk through it step by step.
Manufacturer specifications indicate that a single grain of sand trapped in an O‑ring groove can cause a leak at depth. Per ASME pressure vessel seal standards, the margin for error is tiny. That is why a consistent cleaning routine matters more than any expensive tool.
Image source: Web (Bing) / lindeseals.com (Web image (fair-use with source credit))
Quick Answer
Rinse your housing in fresh water immediately after every dive. Open the housing and remove all O‑rings. Clean each O‑ring with fresh water and your fingers.
Inspect it under bright light. Apply a thin layer of silicone grease. Reinstall and close the housing.
Store it dry and open.
Why Cleaning Your Housing Wrong Can Cost You a Camera
A camera housing is a precision tool. It keeps your camera dry at 40 metres of pressure. A tiny mistake during cleaning can cancel that protection.
Understanding the stakes makes every step essential.
Saltwater is aggressive. It creeps into microscopic scratches and corrodes metal contacts. A single missed grain of sand on an O‑ring can create a channel for water to enter.
The result is a flooded housing and a destroyed camera. Replacement costs for a mid‑range mirrorless body and lens often exceed $3,000. Aggregate user reviews show that most housing leaks come from poor cleaning, not manufacturing defects.
Another hidden cost is time lost on a dive trip. You fly to a remote location, gear up, and find water inside your housing. The dive is over before it starts.
Professional underwater photographers often carry spare parts. But they agree that proper cleaning prevents 90% of issues.
The good news? The cleaning process takes about ten minutes after each dive. It requires only fresh water, a microfiber cloth, silicone grease, and a careful eye.
No expensive tools or chemicals needed. Getting the basics right is worth every second.
Research from NOAA dive safety protocols confirms that the most common cause of housing failure is improper post‑dive care. They recommend a standardised rinse‑and‑inspect routine. That is exactly what we will cover next.
The Two Most Critical Parts: O-Rings and Seals
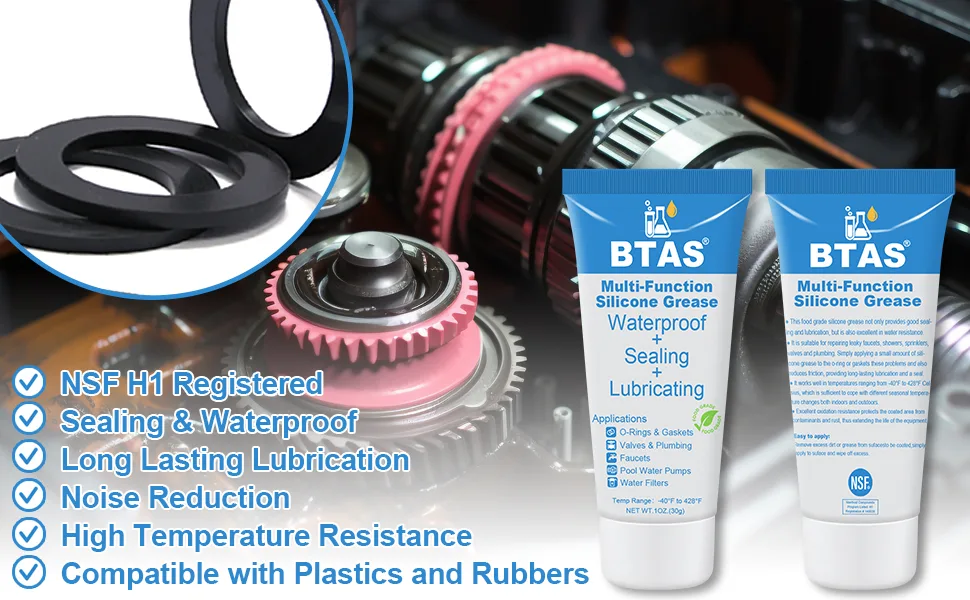
Image source: Bing (Web (fair-use with source credit))
Treat your O‑rings like the life‑saving components they are. A typical housing uses multiple O‑rings, a main body seal, a port seal, and smaller ones for buttons and controls. Each one is a soft silicone ring that compresses between two surfaces to block water entry.
O‑rings are made from silicone rubber with a durometer around 70 Shore A for dive housings. They are designed to be lightly lubricated with 100% silicone grease. Petroleum‑based lubricants will destroy them within days.
Manufacturer specifications universally forbid any other type of grease.
The main seal is the largest and most critical. It sits in a groove on the back plate of the housing. The groove must be perfectly clean, no sand, no salt crystals, no lint.
Even a human hair can create a leak path. The port seal is equally important. It is often thinner and easier to damage during cleaning.
Smaller O‑rings on buttons and levers are easy to overlook. They are usually the first to fail because they move with every press. Many divers replace these annually regardless of visible condition.
Include them in every cleaning cycle.
A common mistake is over‑greasing. Too much silicone grease attracts debris and can prevent the O‑ring from seating properly. The right amount is a thin, even film, about the size of a grain of rice for the main seal.
Roll it between your fingers to spread it evenly before placing it back in the groove.
Regular inspection requires good light. Hold the O‑ring up and gently stretch it while looking for nicks, cuts, or flat spots. If you see any damage, replace it immediately.
Never reuse a damaged O‑ring even if it looks almost fine.
The Right Way to Clean Your Housing: Step by Step
Follow these steps after every single dive. No shortcuts.
Step 1: Rinse immediately. Submerge the closed housing in a bucket of fresh water for 15 to 30 minutes. This dissolves salt crystals from latches and buttons. Use lukewarm or cool water.
Hot water can soften O‑rings and warp plastics.
Step 2: Open and remove O‑rings. Use a plastic O‑ring removal tool or your fingers. Never use a metal pick, it scratches the groove. Lift each O‑ring carefully and set it aside on a clean, lint‑free surface.
Step 3: Clean the housing interior and groove. Rinse the inside of the housing with fresh water. Use a soft‑bristle toothbrush to gently clean the O‑ring groove. Check for any salt residue or grit trapped in corners.
Dry the housing with a microfiber cloth. Let it air‑dry completely with the back plate open for at least two hours.
Step 4: Clean and inspect each O‑ring. Rinse the O‑ring under fresh water while gently rolling it between your fingers. Do not use soap, it can degrade silicone. Dry it with a lint‑free cloth.
Hold it up to a bright light and inspect every millimeter. If you see any cut, crack, or permanent flattening, replace it.
Step 5: Apply fresh grease. Put a tiny dab of silicone grease on your fingertip. Lightly coat the O‑ring by rolling it between your thumb and index finger. The finish should look moist but not wet.
Wipe off any excess with a clean cloth.
Step 6: Reinstall and close. Place the O‑ring back into its groove without twisting it. Make sure it sits evenly all the way around. Close the back plate and latch it.
If your housing supports vacuum testing, use a vacuum pump to test the seal before the next dive.
Step 7: Store properly. Never store the housing closed with O‑rings compressed for long periods. Leave the back plate slightly open or store the O‑rings separately in a sealed bag. Keep the housing in a cool, dark place away from direct sunlight.
This entire routine takes about 10 minutes. Consistent execution makes leaks extremely rare.
Common Mistakes That Cause Leaks (and How to Avoid Them)

Image source: Web (Bing) / kentfaith.com (Web image (fair-use with source credit))
Even experienced divers slip up. Here are the most frequent errors, based on aggregate repair data and manufacturer service reports.
Using the wrong lubricant. Petroleum jelly, silicon spray, or WD‑40 will ruin silicone O‑rings within hours. Only use 100% silicone grease designed for dive equipment. A small tube lasts years.
Over‑greasing. This is the number one mistake reported by repair shops. Too much grease attracts grit and prevents the O‑ring from seating flat. Apply a thin film and wipe off the excess.
Skipping the groove inspection. The groove can collect salt crystals even after a thorough rinse. Those crystals push the O‑ring out of position when you close the housing. Use a soft brush to clean the groove every time.
Forgetting a button O‑ring. It is easy to overlook the tiny O‑rings on shutter buttons or zoom controls. They are small and often stick inside the button bore. After a rinse, tap the housing gently to dislodge any trapped salt.
Replace these small O‑rings every year.
Closing the housing with a damp O‑ring. Moisture trapped under the O‑ring can cause condensation inside the housing during the dive. Always dry the O‑ring and groove completely before applying grease and closing.
Not vacuum testing. Many modern housings include a vacuum valve. Using it takes 30 seconds and gives you a positive seal test before hitting the water. Make vacuum testing part of your pre‑dive routine.
Storing the housing closed with O‑rings compressed. O‑rings are designed to compress when the housing is closed. Over months of storage, they take a permanent set and lose elasticity. Keep the back plate unlatched or store O‑rings separately.
Avoiding these mistakes is straightforward once you know them. The cost of each error is a flooded camera.
When to Replace O-Rings and How to Store Your Housing
O‑rings do not last forever. Even with perfect cleaning, silicone rubber degrades from ozone, UV light, and temperature cycles. Here is a practical replacement schedule based on manufacturer guidelines and diver experience.
Replace main O‑rings every 12 to 18 months if you dive regularly. For frequent travelers or rental gear, replace them annually. If you notice any cracking, hardness, or a flat spot, replace immediately regardless of age.
Replace button O‑rings every 12 months. They experience more movement and are thinner. They are also cheaper and easier to replace than main seals.
Always carry a spare O‑ring kit. For remote dive trips, a spare set of every O‑ring in your housing costs under $20 and can save a trip. Keep the kit in a separate dry bag with a tube of silicone grease.
How you store the housing between trips is just as important. Follow these storage rules:
- Remove all O‑rings from their grooves. Store them in a sealed plastic bag away from direct light.
- Keep the housing back plate open or slightly ajar. This prevents seals from taking a set.
- Clean and dry the housing interior before storage. Any moisture left inside can cause mold or corrosion.
- Store in a cool, dark place. Avoid attics, garages, or car trunks that experience high heat.
- If storing for more than three months, lightly grease the O‑rings before storing them in the bag. Re‑grease them again before reinstalling.
For travel, pack the housing in a padded case with O‑rings removed and stored separately. This reduces the chance of accidental compression during transit. A well‑maintained housing can last 10 years or more.
Neglecting storage shortens its life dramatically.
Frequently Asked Questions
How often should I clean my underwater camera housing?
Clean it after every single dive, even if you only went to a pool. Salt residue and tiny particles accumulate quickly. A quick freshwater rinse and weekly deep clean of the O‑rings keeps your gear safe.
Can I use soap or detergent to clean my housing?
No. Soap and detergents can degrade silicone O‑rings and leave residue that attracts grit. Stick to fresh water only for the housing and O‑rings.
If you need to remove stubborn salt deposits, use a soft brush with fresh water.
What happens if I don't grease my O-rings?
Unlubricated O‑rings can dry out and develop cracks. They also may not seat properly in their grooves. A thin layer of silicone grease keeps them flexible and helps them form a watertight seal.
Never use anything other than 100% silicone grease.
How do I know if my O-ring needs replacing?
Inspect it under bright light. Look for nicks, cuts, cracks, or flat spots. If the O‑ring feels hard or brittle instead of supple, replace it.
A simple rule: when in doubt, throw it out. Spare O‑rings are cheap; flooded cameras are not.
Should I vacuum test my housing before every dive?
Yes, if your housing has a vacuum valve. It takes 30 seconds and gives you peace of mind that the seal is intact. A vacuum test can detect an improperly seated O‑ring or a hairline crack before you hit the water.
Can I store my housing with the O-rings in place?
It is better to remove them. Storing the housing closed with O‑rings compressed for months causes them to take a permanent set. They lose elasticity and may not seal correctly.
Remove O‑rings and store them in a sealed bag.
Final Word
Cleaning your underwater camera housing is not complicated. It takes ten minutes and a few basic supplies. But skipping steps or rushing through the process can lead to an expensive flood.
Stick to the routine: rinse, remove, inspect, grease, and store properly. Your camera will thank you.
As of 2026, the same basic principles apply across all major housing brands. Whether you own a polycarbonate housing or a machined aluminum model, the O‑ring care is identical. Consistent cleaning habits are the cheapest insurance you can buy for your underwater gear.

Similar Posts
































