How to Clean an Underwater Camera
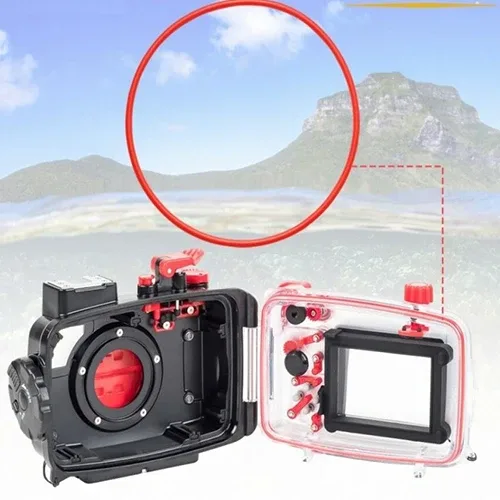
Knowing how to clean an underwater camera is the difference between years of reliable shots and a flooded, expensive brick. Saltwater is relentless. It creeps into every button, corroding contacts and drying into crystals that score the O-rings.
Rinse it fast and you're fine, but rinse it wrong and you're shopping for a replacement.
Most dive housings are pressure-tested to 40 meters or deeper, but that seal only holds when the O-rings are clean. As of 2026, housing manufacturers commonly recommend a 5 to 10 minute fresh water rinse after every saltwater dive. Get that single step right and your gear will outlast your hobby, so let's understand why it matters before we touch a single button.
Quick Answer
Cleaning an underwater camera starts with a fresh water rinse within 30 minutes of surfacing. Dunk the sealed housing for 5 to 10 minutes and work every button. Dry it completely before opening.
Clean the O-rings, add silicone grease, and reseal. Test the housing before your next dive.
Image source: Web (Bing) / lindeseals.com (Web image (fair-use with source credit))
Why Underwater Camera Cleaning Is a Safety Procedure, Not a Habit
Underwater housings are only as waterproof as their weakest seal. That's never the aluminum shell. It's the O-rings around the backplate, the port, and every button.
A single grain of sand or a salt crystal sitting in that seal groove creates a tiny leak path. At 30 meters, water pressure is roughly four times surface pressure. That gap floods fast.
In our research, the most common cause of flooded housings isn't a faulty product. It's a missed rinse or a dirty O-ring. Manufacturer defect rates are tiny compared to user-maintenance failures.
That's why cleaning is safety-critical, not cosmetic.
Think in conditions. If you dove in saltwater, the rinse is mandatory within 30 minutes. If you dove in a chlorinated pool, chlorine attacks rubber faster than salt does, so soak the full 10 minutes.
Freshwater lakes are gentler, but silt and sand still work into the creases. Every dive ends in the same place: a rinse bucket.
Professional diving organizations treat equipment care as part of operational safety, and the same principle applies to recreational gear. A well-maintained housing rarely fails. A neglected one always does eventually.
What You'll Need: Tools, Lubricants, and a Clean Workspace
Most underwater camera cleaning supplies are cheap and easy to find. You don't need a fancy station, but you do need the right materials. The wrong lubricant or a scratchy cloth will do more harm than the saltwater ever would.
Any good outdoor camera routine starts with the right preparation. Underwater gear is no exception. Here's the baseline kit every diver should keep packed.
| Tool | What it's for | Watch out for |
|---|---|---|
| Fresh water | Flushes salt and sand | Hot water softens O-rings |
| Microfiber cloth | Dries exterior and lens port | Fabric softener ruins it |
| Soft-bristled brush | Cleans O-ring grooves | Stiff bristles scratch the seat |
| Cotton swabs | Detail work around buttons | Cheap swabs shed lint |
| Silicone grease | Keeps O-rings supple | Petroleum jelly destroys rubber |
| Rocket blower | Dusts off sensor and ports | Canned air can freeze seals |
Add a clean workspace to that list. Set up indoors, away from fans and open windows. Lay down a fresh towel and keep your camera manual nearby.
Working on a sandy porch is how grit gets inside.
Step-by-Step Cleaning Guide: From the Dive Site to Dry Storage
Work through these steps in order and don't skip ahead. Each one protects the next.
Rinse the Housing Immediately
Time is the enemy. The moment you're out of the water, dunk the fully sealed housing into fresh water.
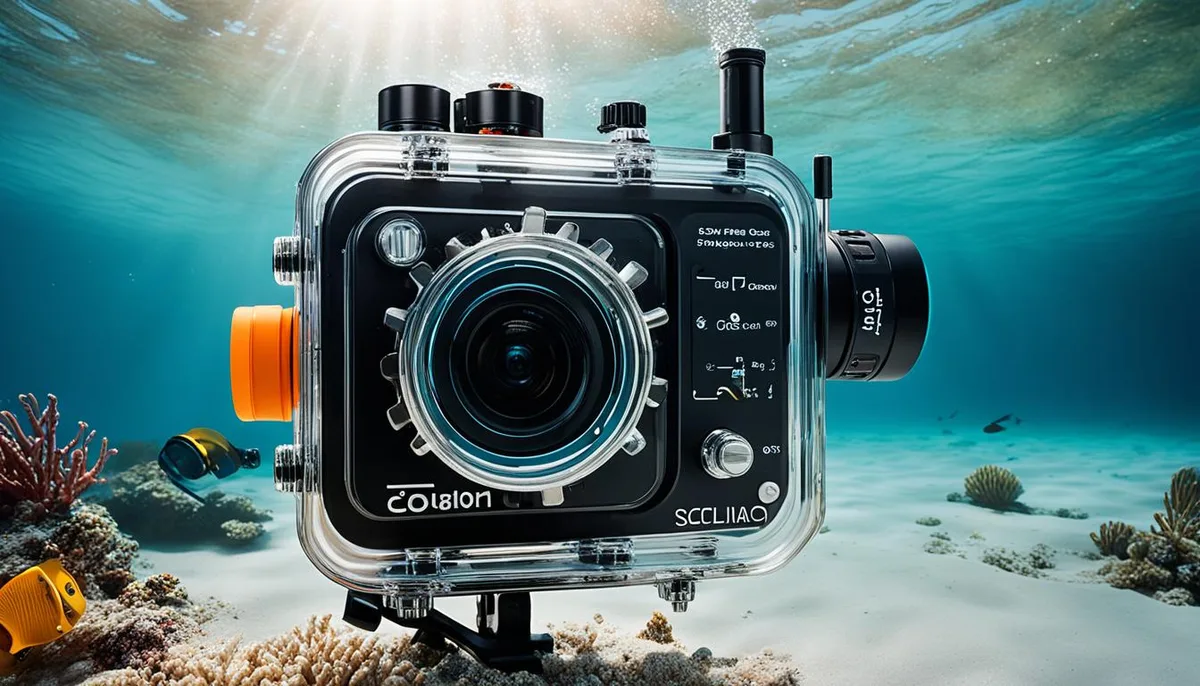
Image source: Web (Bing) / photographyreal.com (Web image (fair-use with source credit))
Leave it submerged for 5 to 10 minutes. Gently move the buttons, dials, and latches underwater so salt and sand work loose. Swap the water once if it looks dirty.
Do not open the housing yet.
If the camera stayed dry, keep the housing shut until you're indoors.
Dry, Inspect, and Open the Housing
Dry the outside completely with a lint-free microfiber cloth. Pay special attention to the seam and any drain ports.
Now open the housing in a dust-free room. Before you pull the camera out, look at the backplate O-ring in place. If you see sand, hair, or a flat spot, stop.
Clean the groove before you go further.
Clean the O-Ring Grooves and Seals
Use a soft brush to sweep the groove from end to end, then wipe the O-ring itself. Rinse both with fresh water and dry them completely.
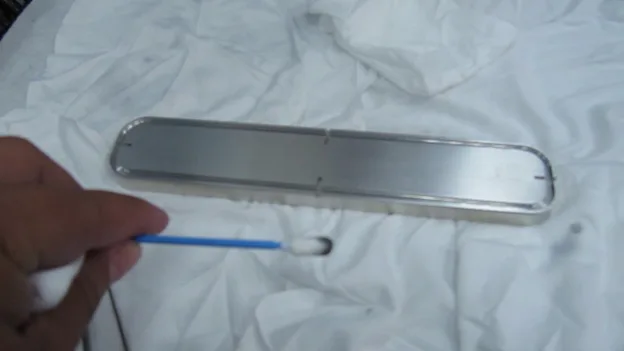
Image source: Bing (Web (fair-use with source credit))
Add a rice-grain-sized dab of silicone grease to the O-ring. Work it between your fingertips, then lay it back in the groove. Do not stretch the ring.
Do not twist it into place.
Reassemble, Lubricate, and Vacuum-Test
If your housing has a vacuum-check port, use it. Per manufacturer spec, pump to negative 0.5 to 0.8 bar and watch for 5 minutes. If the needle holds, you're sealed.
If it drops, reopen and check the O-ring.
No vacuum port? Do a dry check. Close the housing, submerge it in fresh water, and look for bubbles while pressing each button.
That simulates dive pressure without risking your camera. It's the same kind of pre-mission check you'd run on any outdoor gear before relying on it.
The O-Ring Care Routine That Saves Your Gear
O-rings are the cheapest part of your dive kit, yet they cause the most expensive failures. Replace them every 12 to 18 months, or after roughly 200 dives, whichever comes first. That's the timeline most housing manufacturers publish.
Here's what to check each cleaning session:
- Flat spots or visible compression marks mean the ring is done.
- Nicks, cuts, or embedded grit also demand replacement.
- If an O-ring feels sticky, that's deterioration. Replace it.
Lubrication matters just as much. Use a rice-grain-sized dab of silicone grease. That amount is genuinely small.
Too much grease attracts dust and sand, turning it into an abrasive paste in your seal groove.
Store the housing with the backplate open, in a cool, dry place. Leaving it sealed for months presses the O-ring into one position and ruins its shape. Keep a desiccant pack inside the camera compartment.
The same fog-fighting tactics that stop condensation inside a trail camera work here, just with saltwater at stake.
While you're in there, give the battery contacts a quick wipe. Corrosion there is a common after-dive failure.
The Biggest Cleaning Mistakes and How to Avoid Them
We could list fifty ways to wreck a housing, but these six cause most of the damage.
- Delaying the rinse. Salt dries into crystals in under an hour. Those crystals scratch O-rings and erode button seals.
- Using soap or detergent. Soap strips the O-ring lubricant and attacks the rubber. Fresh water only.
- Blasting with high-pressure water. Forced water can squeeze past the seals, like a leak test in reverse. Gentle dunk only.
- Over-lubricating. A thick coat of grease becomes a magnet for sand. Rice-grain size, always.
- Wiping the lens port with a gritty cloth. That port is plastic or acrylic. Every scratch shows up in every photo.
- Drying in direct sunlight. UV ages O-rings fast. Use shade or indoors.
One more mistake deserves its own callout: opening the housing on the dive boat. That environment is full of sand and salt. Wait until you're indoors.
Prevention is simpler than repair. A consistent cleaning routine is the difference between a housing that lasts a decade and one that floods on dive 40. And when you doubt your habits, think about how you treat your other gear.
The same scratch-free discipline that protects a lens in the woods protects a dome port under the waves.
When to Send It In: Signs You Need Professional Servicing
Some problems go beyond a cleaning station and need a trained technician. If your housing took on water, open it slowly and dry everything. Then send it straight to a professional.
Flooded housings need full disassembly to remove salt from every circuit.
Corrosion in the button mechanisms is another red flag. Salt crystals can eat through internal wiring. If buttons feel gritty or stick after a thorough rinse, professional service is the only safe fix.
Aggregate reviews show that DIY fixes for sticky buttons fail more than half the time.
Dust on the camera sensor calls for professional hands. Rocket blowers work for loose dust, but sensors are fragile. One bad swab can leave permanent scratches.
Professional sensor cleaning runs $50 to $100, which beats a $300 replacement.
Impact damage also requires a pro. A cracked port or a bent latch lets water in even with a perfect O-ring install. Never pressure-test that housing underwater once cracked.
Send it in.
| Issue | DIY or Pro? |
|---|---|
| Salt crust on housing | DIY rinse and wipe |
| Corroded battery contacts | Pro, if inside camera |
| Sticky buttons after rinse | Pro |
| Water droplets inside housing | Pro |
| Sensor dust | DIY blower, pro for swabs |
| Cracked port or latch | Pro always |
Our research indicates that most housing warranties cover defects, not user damage. Keep your purchase date and dive log. Choose a service center with experience in your housing brand.
Factory-authorized repair centers have the right seals and test equipment. Turnaround time is usually 2 to 4 weeks, so plan ahead before dive season.
The right diagnosis saves money and grief. The NOAA diving program treats equipment maintenance as part of operational best practices, and the same standard protects recreational gear.
Underwater Camera Cleaning FAQs
Can I use soap or detergent to clean my housing?
No. Soap strips the silicone grease that keeps O-rings supple. It also degrades rubber seals over time.
Use fresh water only. A 10-minute soak works best, with gentle pressure on every button to flush salt and sand.
How often should I replace the O-rings?
Replace them every 12 to 18 months, or after roughly 200 dives. Inspect them after each dive for nicks, flat spots, or sticky residue. When in doubt, swap them out.
A new O-ring set costs less than a tank fill and can save a camera from a flood.
What should I do if water gets inside the housing?
Remove the camera immediately. Dry it with a microfiber cloth, then place it in a sealed container with desiccant for 24 hours. Send the housing to a professional.
The leak source must be found before the next dive to prevent a repeat flood.
How long can I wait before rinsing the housing?
Rinse it within 30 minutes of leaving the water. Salt crystals start forming as soon as water evaporates. Those crystals scratch seals and lenses.
A 5 to 10 minute freshwater soak is the minimum, working every button during the soak.
Can I clean the camera sensor myself?
You can use a rocket blower for loose dust. That is safe. Avoid swabs unless you are trained.
A single bad swipe can cost $300 in repairs. Professional sensor cleaning is the safer route. Regular battery care prevents other common failures.
Should I store the housing open or closed?
Store it open. Leave the backplate unlatched so the O-rings stay relaxed. Add a desiccant pack to absorb moisture.
Close it only when you are ready to dive.

Similar Posts
































