How To Fix Uneven Paint
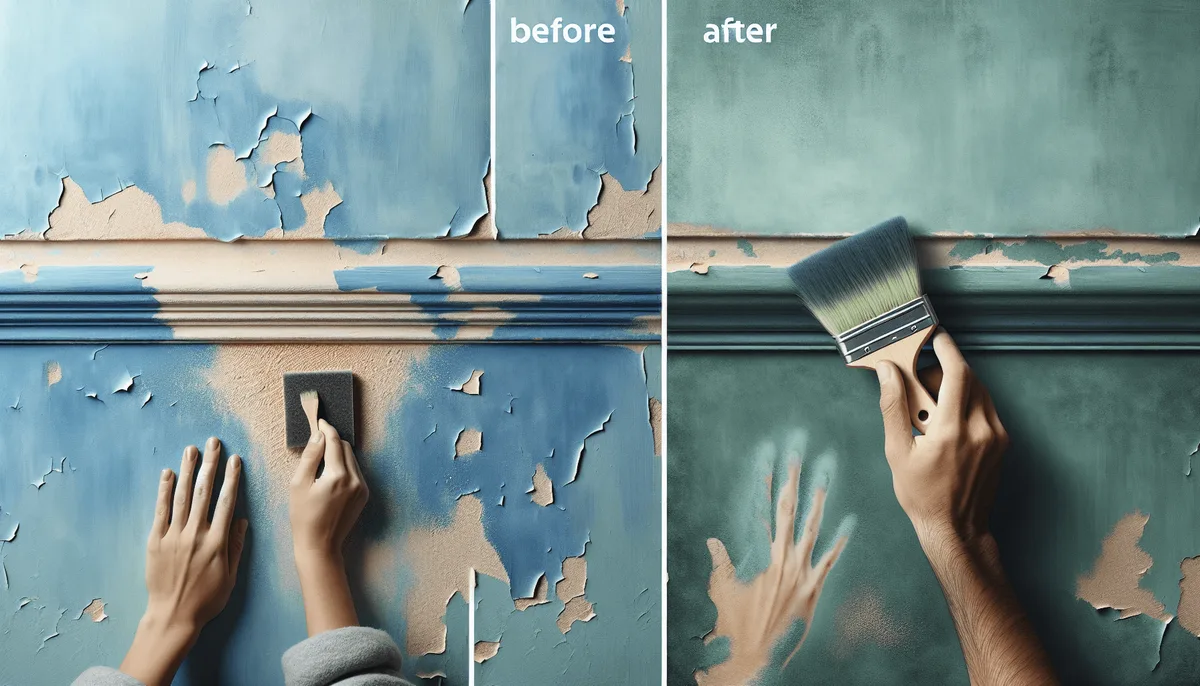
You've just painted a room. You step back, expecting that smooth, uniform finish you saw in the inspiration photos. Instead, your wall looks patchy, streaky, or oddly shiny in some spots.
It's frustrating, and honestly, it makes you wonder if you wasted an entire weekend.
The good news is that learning how to fix uneven paint is usually straightforward once you understand what you're actually looking at. Over 80% of uneven paint issues come down to just four visual patterns. Spot the pattern, and you're most of the way to a fix.
Let's walk through what each one looks like and what to do about it.
Quick Answer
Fix uneven paint by identifying the visual pattern first. Lap marks need wet-edging and paint conditioner. Sheen flashing requires a full recoat with primer.
Texture mismatch needs roller nap matching or skimming. Thin spots just need another coat with proper loading. Always sand lightly between coats.
Never spot-touch a finished wall.
First, Let's Look at Your Wall — What You're Seeing Matters
Most people grab a roller and start repainting the second they see unevenness. That's usually a mistake. Uneven paint isn't one single problem.
It's a handful of different issues that all look similar at first glance, but each needs a completely different fix.
Grab a bright work light or even a phone flashlight. Hold it parallel to the wall, just a few inches away. Shine it across the surface at a low angle.
This raking light technique is the fastest way to diagnose what's going on. It reveals texture differences, sheen variations, and roller marks that regular overhead lighting completely hides.
Here are the four most common visual patterns you'll see:
- Lap marks, Visible stripes, usually vertical or horizontal, where one section of paint dried before you rolled the next section. They look like darker or lighter bands running across the wall.
- Flashing, Shiny or dull patches that catch light differently than the surrounding paint. These often show up around patched spots or areas you touched up after the main coat dried.
- Texture mismatch, The wall feels rough in some spots and smooth in others. You might see it where you patched drywall or where a different roller nap was used.
- Patchiness or thin spots, Uneven color coverage where the primer or previous color shows through. This usually happens when you didn't load the roller enough or tried to stretch one coat too far.
The fix changes entirely depending on which pattern you see. Sanding a sheen mismatch won't help. Adding a coat over lap marks without changing your technique will just give you another set of lap marks.
Take 30 seconds to look first.
Image source: Bing (Web (fair-use with source credit))
The image above shows a classic example of uneven paint under raking light. Notice how the darker bands and lighter patches are only visible from an angle. That's your clue about what's happening on the surface.
The Most Common Culprit: Lap Marks (and How to Fix Them)
Lap marks are the number one reason people search for how to fix uneven paint. They happen when you roll a section of paint next to a section that has already started drying. The overlapping edge creates a visible ridge or color shift.
What lap marks actually look like:
Under raking light, lap marks appear as darker or lighter stripes that follow the edge of your roller passes. They're most visible on large, uninterrupted wall sections. Ceilings are especially prone because you're rolling across a wide area and the edges dry faster.
Why they happen:
Flat and matte paints are the worst offenders. They dry quickly, sometimes within 30 to 60 seconds in warm, dry conditions. If you're rolling a four-foot-wide section and then rolling the next four-foot section, the edge of the first section is already setting up.
The fresh paint from the second pass doesn't blend in smoothly. It sits on top of the drying edge, creating a visible stripe.
If the paint is still wet (within 5 to 10 minutes of application):
Stop what you're doing. Reload your roller and immediately roll over the area where the lap mark is forming. Work from the wet edge outward into the dry area.
Keep a wet edge at all times. This means you always roll back into paint that hasn't dried yet.
If the paint is already dry (you let it cure overnight or longer):
You can't just paint over lap marks with a regular coat. The ridge will still show through. Here's the proper fix:
- Lightly sand the entire affected wall section with 220-grit sandpaper. Don't press hard. You just want to knock down any raised edges from the lap marks.
- Wipe the wall with a damp cloth to remove sanding dust. Let it dry completely.
- Add a paint conditioner like Floetrol to your paint. This slows drying time and gives you more working window. Add about 8 ounces per gallon, or follow the label directions.
- Apply your new coat using consistent, overlapping passes. Always roll into a wet edge. Work from the top of the wall down, one section at a time, without stopping in the middle.
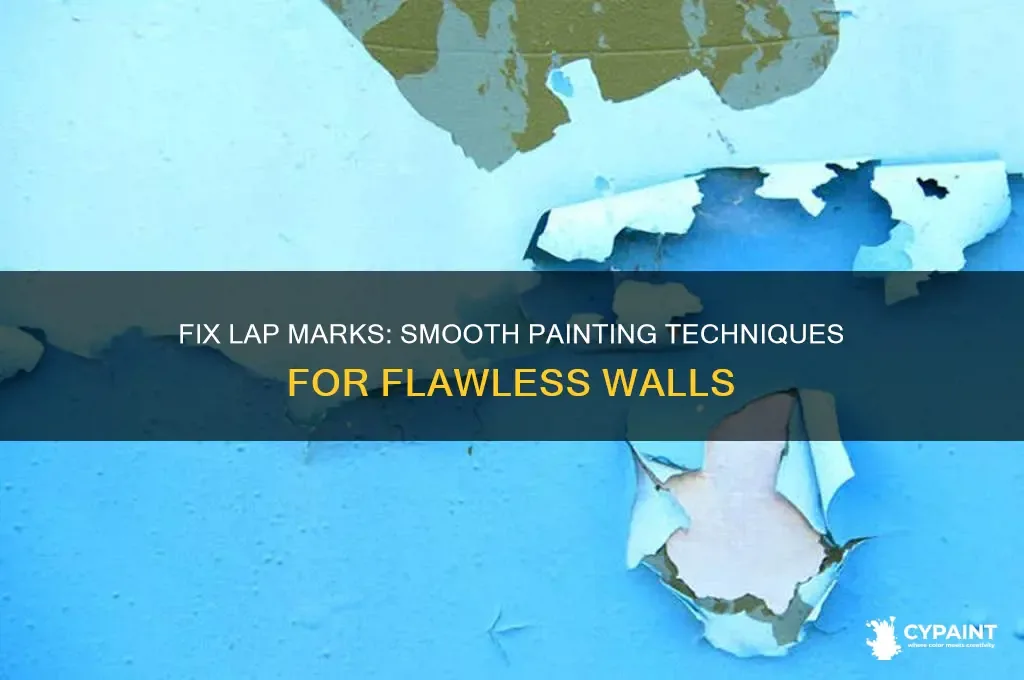
Image source: Bing (Web (fair-use with source credit))
The photo above shows the characteristic vertical striping of lap marks. Notice how the bands align with the roller passes. This pattern is a dead giveaway that the paint was applied in sections that dried before the next section was rolled.
A quick note on technique:
Most lap marks come from rolling too fast or too slow. Roll at a steady, moderate pace. Load the roller fully but not dripping.
Use a 3/8-inch nap for smooth walls and a 1/2-inch nap for light texture. And never let your roller run dry on the wall. If you hear a sticky sound, you're too dry.
Reload.
Manufacturer specifications from major paint brands confirm that the ideal drying temperature for even application is between 50 and 70 degrees Fahrenheit with humidity between 40 and 70 percent. If you're painting in conditions outside that range, you're fighting physics. Use a paint conditioner to buy yourself more time.
The Second Big One: Flashing and Sheen Inconsistency
Flashing is a different beast. Your wall might look perfectly uniform in color but have shiny or dull patches that catch light differently. This is a sheen problem, not a color problem.
Why flat paint touch-ups can look shiny:
Flat paint has a matte finish because the pigments and binders create a microscopic texture that scatters light. When you touch up a flat-painted wall, even with the exact same paint, the new paint sits on top of the old layer. It doesn't have the same underlying texture.
As it dries, the binders concentrate at the surface, creating a slightly smoother, shinier patch.
This is why "spot fixing" almost never works on finished walls. The sheen mismatch is baked into the way the paint dries.
How to match finish across patched drywall and spackle:
Patched areas are even worse. Joint compound and spackle are porous. They soak up paint differently than the surrounding wallboard.
If you paint over a patch without priming it first, the paint dries flat and dull compared to the rest of the wall. You get a visible patch that looks like a matte spot on an otherwise uniform wall.
Here's what actually works:
| Problem | Fix |
|---|---|
| Patch looks duller than wall | Prime the patch first with a high-hide PVA primer, then paint the full wall |
| Touch-up spot looks shinier | Lightly sand the spot with 220-grit, degloss the whole wall, prime, and recoat the entire surface |
| Sheen varies across wall | The wall has uneven porosity. Degloss the whole surface, apply one coat of primer, then one coat of paint |
The rule you need to remember:
You cannot spot-fix sheen. If the sheen is inconsistent across a wall, you need to recoat the entire wall from corner to corner. Painting just the bad spot will leave you with a different sheen on that spot than the rest of the wall.
A full wall recoat is the only way to get a uniform finish.
When to prime the whole wall vs. spot-prime only:
Spot-prime if you're fixing a small patched area (less than a square foot) and the rest of the wall is in good condition with consistent sheen. Use a stain-blocking primer and let it dry fully before painting.
Prime the whole wall if you have multiple patches, if the existing paint is glossy or semi-gloss, or if you're changing from a dark color to a light one. A full-wall primer coat fixes porosity differences and gives you a uniform base for the topcoat.
The Problem Nobody Talks About: Texture Mismatch
Texture mismatch is the silent killer of good paint jobs. You might not notice it under normal lighting, but the moment sunlight hits the wall at an angle, you see it. Some spots are smooth.
Others are rough. It looks like the wall was painted by two different people using two different tools.
Roller nap matters more than you think:
The nap of your roller cover determines the texture of the finished paint. A 3/8-inch nap leaves a very fine, almost smooth texture. A 3/4-inch nap leaves a pronounced stipple, like orange peel.
If you used a 3/8-inch nap on a wall that was previously painted with a 1/2-inch nap, your new paint won't match the texture of the old paint. You'll see the difference.
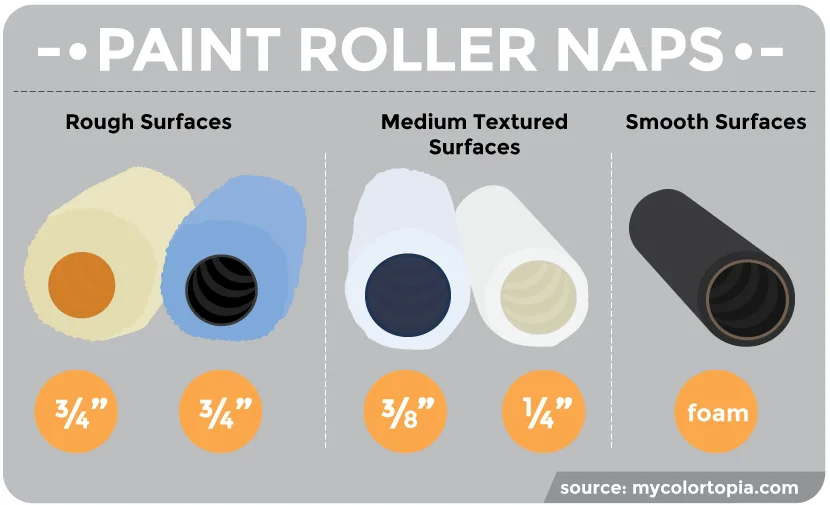
Image source: Bing (Web (fair-use with source credit))
The image above shows how different naps produce different textures. From left to right, you can see the progression from smooth to heavy stipple. If your wall has a mix of these textures, the paint will look uneven even if the color is perfect.
How to tell if your roller left a different texture than the previous one:
Run your hand flat across the wall. If you feel a change in roughness between sections, that's texture mismatch. You can also hold a straightedge or ruler against the wall and look for gaps where the surface dips or rises.
Fixing orange peel, stipple, and smooth-wall mismatches:
The fix depends on how severe the mismatch is.
- Minor mismatch (slightly different stipple): Lightly sand the rougher section with 150-grit sandpaper to knock down the texture. Wipe clean. Apply a new coat with a roller nap that matches the smoother section.
- Moderate mismatch (visible ridge between texture types): You need a skim coat. Apply a thin layer of joint compound over the mismatched area using a 12-inch drywall knife. Let it dry, sand smooth, prime, and repaint.
- Severe mismatch (entire wall has inconsistent texture): The most reliable fix is to skim coat the entire wall. It's messy work, but it produces a perfectly smooth surface. Then prime and paint with a consistent roller nap.
Which is realistic for DIY:
Sanding and repainting is 100 percent doable for a weekend DIYer. A skim coat over a small area is also manageable. But skim coating an entire wall or ceiling is a skill that takes practice.
If you've never used a drywall knife before, you're better off calling a professional for that step. Trying to skim coat an entire wall without experience usually results in an uneven mess that's harder to fix than the original texture mismatch.
As of 2026, most paint manufacturers recommend matching your roller nap to the wall texture rather than trying to change the texture with paint alone. Paint is not a texture fixer. If the wall surface is rough, paint will only make it look more rough.
Sand or skim first, then paint.
The Fix Process: Step-by-Step for Each Type
Here's a practical breakdown of exactly what to do for each of the four common uneven paint patterns. Follow the one that matches what you see on your wall.
For lap marks (dried and cured):
- Sand the entire affected section with 220-grit sandpaper. Light pressure. You're knocking down ridges, not removing the paint.
- Wipe the wall with a damp microfiber cloth. Let it dry completely, about 30 to 60 minutes.
- Mix a paint conditioner into your paint according to the label. This is non-negotiable for lap mark repairs.
- Apply the new coat using a 3/8-inch or 1/2-inch roller nap. Roll in one direction, then cross-roll at a 90-degree angle to even out the texture.
- Maintain a wet edge at all times. Work in sections that you can complete in under two minutes. Stop, inspect, and keep going.
For flashing (sheen inconsistency):
- Lightly sand the entire wall with 220-grit sandpaper. This deglosses the surface so the new paint can bond uniformly.
- Wipe the wall clean. Apply a thin coat of high-hide primer. Let it dry per the label instructions, usually two to four hours.
- Apply one coat of paint to the full wall. Do not just touch up the flashing spots. The sheen will match only if the entire wall gets the same coating thickness.
- If the flashing is still visible after one coat, apply a second coat. Sheen fixes often need two coats to fully even out.
For texture mismatch (roller nap or patch-related):
- Identify the mismatched area. If it's a small patch, sand the patch smooth and apply a skim coat of joint compound.
- Let the compound dry, sand with 150-grit, and wipe clean.
- Prime the skim-coated area. Let it dry.
- Select a roller nap that matches the surrounding wall. For smooth walls, use 3/8-inch. For light orange peel, use 1/2-inch. For heavy texture, use 3/4-inch.
- Paint the entire wall from corner to corner. A full wall recoat ensures the texture and sheen are uniform.
For thin spots or patchy coverage:
- Sand the thin spots lightly with 220-grit. This helps the next coat bond.
- Wipe the wall clean.
- Apply a second coat using a fully loaded roller. Do not stretch the paint. If you see the primer or old color showing through, you need more paint on the roller.
- Let the coat dry fully, then inspect. If the coverage is still uneven, a third coat may be needed. Thin spots are usually a coverage issue, not a technique issue. More paint solves it.
What to Do If You've Already Painted and It's Drying Uneven
If the paint is still tacky, you can fix it immediately. Reload your roller and roll over the uneven area before it dries fully. Work from the wet edge outward.
Do not stop in the middle of a wall section.
If the paint is dry to the touch but hasn't fully cured (less than 24 hours), stop. Do not apply another coat. Let it cure for a full 24 to 48 hours.
Paint can look uneven while it's still drying. Binders need time to settle and level. Premature recoating can trap solvents and create bubbles or adhesion problems.
If the paint is fully cured (48 hours or more) and still looks uneven, follow the fix process for your specific pattern above. Do not skip the diagnosis step. Applying the wrong fix wastes time and paint.
The Mistakes That Guarantee Uneven Paint (Even on a Second Try)
Not boxing your paint gallons together. If you bought multiple gallons of the same color, mix them all into one large bucket. Small batch-to-batch color variations exist. Boxed paint ensures uniform color across the whole job.
Rolling onto a dry edge. This is the number one cause of lap marks. Always roll into paint that is still wet. Work in sections you can complete in under two minutes.
Using the wrong nap for your wall texture. A 3/4-inch nap on a smooth wall leaves an orange peel texture. A 3/8-inch nap on a textured wall won't load enough paint. Match the nap to the surface.
Painting in direct sunlight or with a fan blowing on the wall. Sunlight and fans accelerate drying. They create dry edges before you can blend them. Paint in indirect light with no direct airflow on the surface.
Trusting "one-coat" paint claims without a primer underneath. One-coat paints work only over a properly primed surface. On bare drywall, old dark colors, or porous patches, they usually need two coats. Always prime first.
When It's Time to Call a Professional (and When It's Not)
You can fix it yourself if:
- You see lap marks on a single wall
- The sheen is slightly off in one area
- You have thin spots after one coat
- The texture mismatch is small or localized
Call a professional if:
- The entire room has inconsistent texture across all walls
- The paint is peeling or bubbling, which indicates moisture or adhesion problems
- The drywall itself is damaged or uneven
- You've tried the fix process twice and the problem is still visible
A pro will skim coat the walls, prime, and spray the finish for a perfectly uniform result. Expect to pay $1.50 to $3.00 per square foot for a skim coat and repaint, depending on your location and the condition of the walls.
Quick-Reference Fix Guide
| What You See | What's Happening | The Fix |
|---|---|---|
| Darker or lighter bands across the wall | Lap marks | Sand, add conditioner, recoat with wet edge |
| Shiny or dull patches | Sheen flashing | Degloss, prime, recoat entire wall |
| Rough and smooth sections | Texture mismatch | Sand or skim, match roller nap, recoat |
| Primer or old color showing through | Thin coverage | Sand lightly, apply second coat with full roller load |
Frequently Asked Questions
Can I paint over uneven paint?
Yes, but only after you fix the underlying issue. Painting over lap marks without sanding or a conditioner will just create new lap marks. Fix the cause first, then paint.
Why does my paint look patchy after two coats?
Patchy coverage after two coats usually means the paint wasn't applied thick enough, the wall wasn't primed, or the roller wasn't fully loaded. Sand lightly and apply a third coat with a properly loaded roller.
Will a third coat fix uneven paint?
It depends on the cause. For thin spots, yes. For lap marks or sheen flashing, no.
A third coat over lap marks without changing your technique will just produce more lap marks.
How do I fix paint that dried with roller marks?
Sand the entire section with 220-grit sandpaper to smooth the ridges. Wipe clean. Add a paint conditioner to slow drying time.
Apply a fresh coat using a fully loaded roller and maintain a wet edge.
Should I sand the whole wall or just the bad spots?
Sand the whole wall if you're fixing sheen flashing or texture mismatch. Sand just the affected section if you're fixing lap marks or thin spots. Feather the edges of sanded areas to blend them into the surrounding paint.

Similar Posts