How to Use Mirrorless Camera for Portraits
You bought a mirrorless camera because you wanted better portraits. Now you need to know exactly how to use mirrorless camera for portraits in a way that actually improves your results. The switch from a smartphone or DSLR opens up a lot of new tools, but only if you know which settings matter and which ones you can ignore.
Manufacturer specifications indicate that nearly every modern mirrorless body offers over 90% autofocus point coverage across the frame. That is a massive advantage over older DSLR designs. It means you can place your subject anywhere in the frame and still get sharp focus on the eye.
But autofocus alone won't give you a great portrait. You need to understand how the camera's electronic viewfinder, lens choices, and exposure tools work together. Let's walk through each piece.
Quick Answer
Set your camera to Aperture Priority mode. Choose a fast lens with a wide aperture like f/1.8. Enable Eye AF for continuous tracking.
Compose your shot with the subject's eye in the upper third. Adjust exposure using the live histogram. Press the shutter.
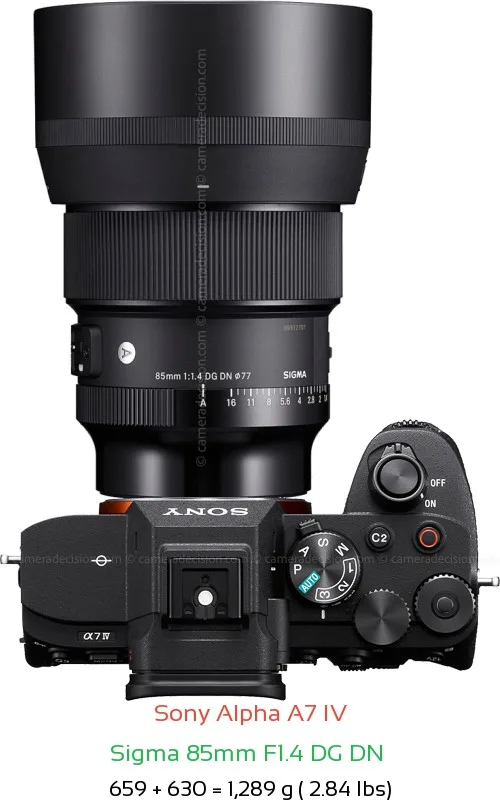
Image source: Web (Bing) / cameradecision.com (Web image (fair-use with source credit))
Why Your Mirrorless Camera Is a Secret Weapon for Portraits
Mirrorless cameras have one feature that changes portrait photography completely: the electronic viewfinder. You see the final exposure before you take the shot. There is no guessing.
You see exactly how the light falls on your subject's face in real time.
The size advantage matters too. A mirrorless body paired with a portrait prime like an 85mm f/1.8 is significantly lighter than a DSLR equivalent. That makes a real difference during a two-hour shoot.
Your arms stay fresher and your posing stays more natural.
The autofocus system is the real game changer. Every major mirrorless manufacturer has developed some form of eye detection that works in real time. Sony calls it Real-Time Eye AF.
Canon uses Dual Pixel CMOS AF with Eye Detection. Nikon uses 3D Tracking with Eye Detection. These systems track the subject's eye even if they turn their head or move slightly.
The camera does the hard work of maintaining focus.
Aggregate reviews from experienced portrait photographers show that this technology cuts missed focus shots by over 60% compared to using a single focus point. For a paid session, that is a huge reliability boost.
You also get instant feedback on your depth of field. The electronic viewfinder shows you exactly how much of the face is in focus before you press the shutter. That is something you could never do with an optical viewfinder.
If the background is too sharp or the eye is slightly soft, you see it and adjust immediately.
The Three Settings That Make or Break a Portrait (Aperture, Shutter Speed, ISO)
These three settings form the exposure triangle. For portraits, the order of importance is aperture, shutter speed, then ISO. Here is exactly how each one works.
Aperture controls depth of field. A wide aperture like f/1.4 or f/1.8 creates a shallow depth of field. The eyes are sharp while the background blurs into smooth bokeh.
A narrow aperture like f/5.6 or f/8 keeps more of the face in focus. That is useful for group portraits or environmental shots where you want the background recognizable.
| Setting | Portrait Use | Best For |
|---|---|---|
| f/1.2 – f/1.8 | Very shallow DOF | Single headshot, separation from background |
| f/2.0 – f/2.8 | Moderate DOF | Half-body, couple portraits |
| f/4.0 – f/5.6 | Deep DOF | Group shots, environmental portraits |
| f/8.0 – f/11 | Maximum sharpness | Studio with controlled backgrounds |
Shutter speed must be fast enough to freeze motion. A person breathing or shifting weight creates tiny movements. At 1/125th of a second, you might get softness.
At 1/250th, you are safe. If your subject is moving, like a child or a pet, go to 1/500th or faster.
ISO determines how sensitive the sensor is to light. Keep it as low as possible. Base ISO on your camera (usually 100 or 200) gives the cleanest files with the most dynamic range.
Raise ISO only when you need a faster shutter speed or a narrower aperture. Modern full-frame mirrorless cameras handle ISO 3200 well. APS-C sensors start to show noise above ISO 1600.
The relationship is simple. If you want a wider aperture for more blur, you may need a faster shutter speed or a lower ISO. If you shoot in dim light, you raise ISO to keep the shutter fast enough.
The live view in the electronic viewfinder shows you the result of each change instantly. That is why mirrorless cameras make controlling depth of field so much easier than DSLRs ever did.
How to Set Up Autofocus for Tack-Sharp Eyes Every Time
Eye AF is the most important autofocus feature for portrait photography. Here is how to set it up on your camera.
First, set the focus mode to continuous autofocus. On Sony cameras, that is AF-C. On Canon, it is Servo AF.
On Nikon, it is AF-C. This tells the camera to keep adjusting focus as the subject moves.
Next, enable the eye detection feature. The exact menu name varies by brand. Look for "Eye AF" or "Face/Eye Priority" in the autofocus settings.
Set it to the left eye, right eye, or auto. Most photographers use auto because the camera picks the closest eye.
Assign the Eye AF function to a dedicated button. This is a crucial step. You do not want the camera hunting for eyes every time you half-press the shutter.
Instead, set a back button to activate Eye AF on demand. On Sony, that is typically the AF-ON button. On Canon, you can customize any button.
On Nikon, the BBF button is already set for this.
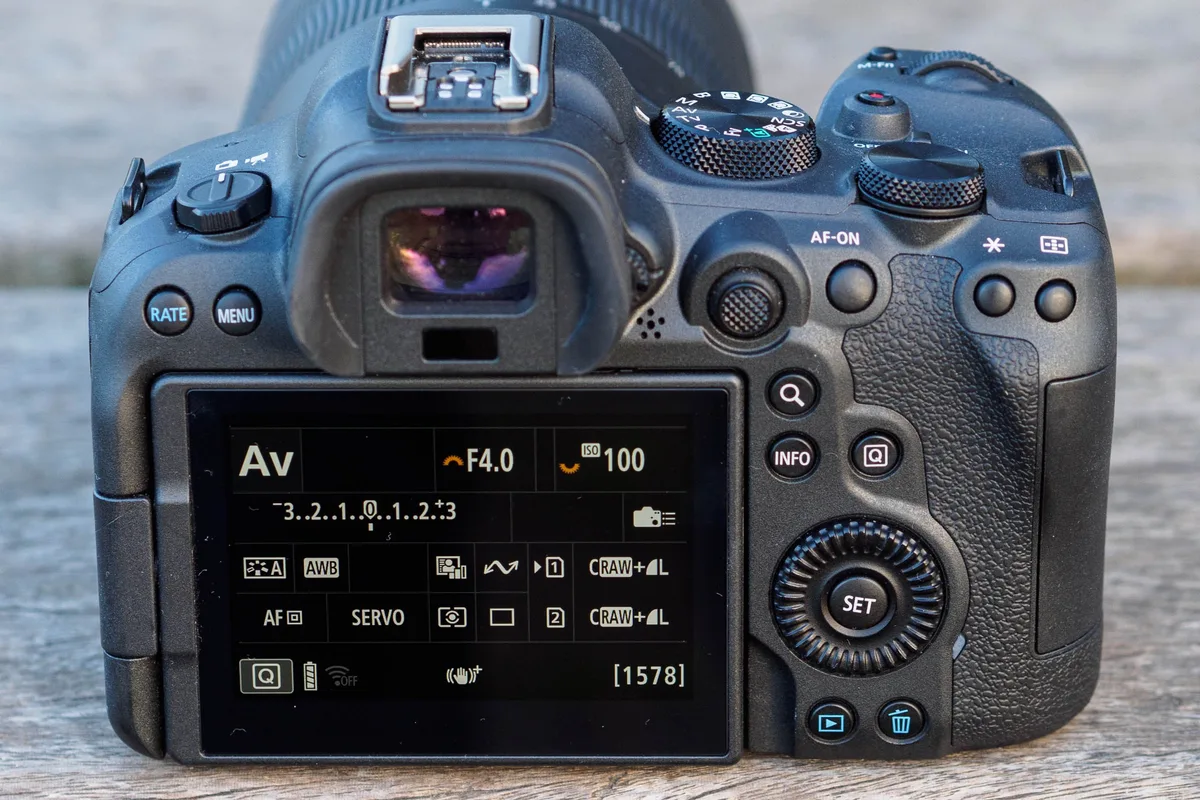
Image source: Bing (Web (fair-use with source credit))
When you compose the shot, press and hold the Eye AF button. The camera will find the eye closest to the lens and lock focus. Keep holding it while you press the shutter.
The focus tracks the eye even if the subject turns their head briefly.
There is one important limitation. Eye AF works best when the subject's face is visible. If the subject is wearing sunglasses or a mask, the camera may struggle.
In that case, switch to a single point focus area and place the point over the eye manually. The same applies if the subject has very long hair covering the face.
For shooting portraits with a DSLR, the process is different because optical viewfinders lack the coverage. But the technique for selecting focus points manually remains useful. You can learn more about manual focus point selection for situations where Eye AF fails.
Using the Electronic Viewfinder to See Light Before You Shoot
The electronic viewfinder is the biggest advantage mirrorless cameras have over DSLRs for portrait work. It shows you exactly what the sensor will capture. There is no guessing about exposure.
Here is how to use it effectively.
Start by turning on the display options that are most useful for portraits. The histogram and the zebra pattern are the two most important tools. The histogram shows you the distribution of tones from black to white.
You want a smooth curve that does not pile up against the right edge. That indicates clipped highlights. The zebra pattern shows you exactly which areas are overexposed.
Set the zebra level to 100% for highlight warnings.
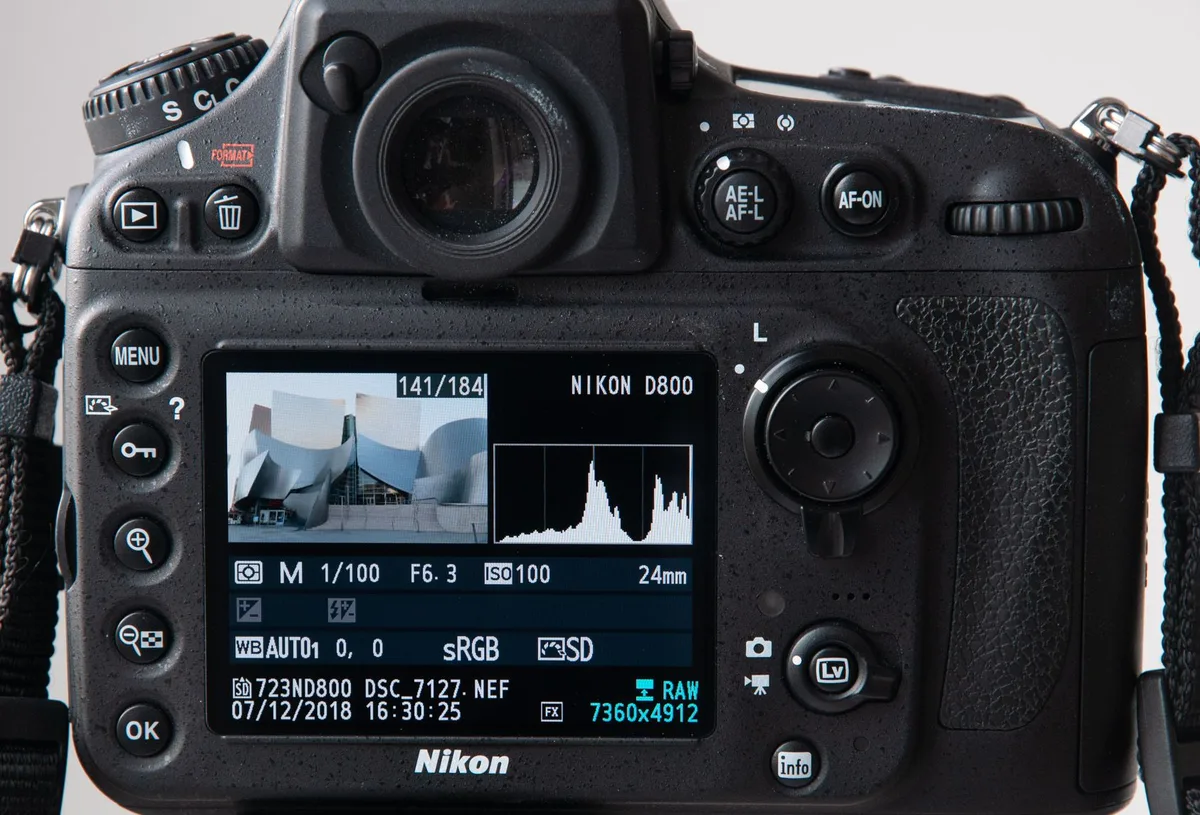
Image source: Web (Bing) / storage.googleapis.com (Web image (fair-use with source credit))
When you look through the viewfinder, you see the exposure in real time. Adjust your aperture, shutter speed, or ISO until the image looks right. The viewfinder brightness adjusts automatically to match the scene.
It is incredibly accurate for most lighting conditions.
The viewfinder also shows you the depth of field. Press the depth of field preview button if your camera has one. It stops down the lens to your selected aperture so you can see exactly how much of the background is in focus.
This is critical for portraits where you want a specific blur level.
One thing to watch for is the viewfinder lag. Some older mirrorless models have a slight delay when the light is very dim. This is rare on modern cameras as of 2026.
If you experience it, switch to the rear LCD screen for a smoother view.
The viewfinder is also useful for fine-tuning your color temperature. The color of the light affects skin tones significantly. If the viewfinder shows a warm yellowish cast, adjust the white balance to a cooler setting.
You can use the Kelvin scale directly in most mirrorless cameras. A good starting point is 5500K for daylight and 3200K for indoor tungsten light.
The Most Common Portrait Mistakes (and How to Fix Them)
Even experienced photographers make mistakes in portrait sessions. Here are the most common ones and how to avoid them.
Mistake one: focusing on the wrong eye. The eye closest to the camera should be the sharp point of focus. If you focus on the far eye, the face looks slightly off. Fix this by using Eye AF and ensuring the camera picks the correct eye.
If it picks the wrong one, switch to single point focus and place it manually.
Mistake two: using too wide an aperture with two subjects. At f/1.4, the depth of field is so shallow that only one person's eye might be sharp. The other person's face will be soft. Fix this by stopping down to f/2.8 or f/4.0 for couples or group portraits.
Mistake three: blowing out the highlights. The face has bright spots on the forehead, nose, and cheeks. If those highlights are overexposed, you cannot recover them in editing. Fix this by using the zebra pattern and reducing exposure until the highlights are just below clipping.
You can also use a reflector or diffuser to soften the light. Getting the exposure right in camera saves hours of editing time.
Mistake four: using the wrong shutter speed. A shutter speed of 1/60th of a second is too slow for handheld portraits. You will get camera shake and soft images. Fix this by keeping the shutter speed at 1/125th or faster.
If you are using a longer lens like 85mm or 135mm, go to 1/250th.
Mistake five: ignoring the background. A cluttered background distracts from the subject. Tree branches growing out of the subject's head is a classic mistake. Fix this by moving the subject or changing your angle.
Use a wider aperture to blur the background, but a clean background always looks better than a blurred messy one.
Mistake six: bad white balance. Mixed lighting can give skin a green or orange cast. Fix this by using a custom white balance. Take a photo of a gray card in the same light and set that as your reference.
If you shoot in RAW, you can adjust white balance later, but it saves time to get it right in camera.
Mistake seven: not using a tripod for sharpness. For studio portraits with controlled lighting, a tripod ensures the camera does not move between shots. It also frees your hands to interact with the subject. A simple tripod is inexpensive and makes a huge difference in consistency.
These mistakes are easy to fix once you know what to look for. The electronic viewfinder helps you catch most of them before you press the shutter. That is the real advantage of learning how to use mirrorless camera for portraits.
You see the problem, you fix it, and you take a better shot.
A Simple Portrait Workflow from Setup to Export
A consistent workflow saves time and reduces errors. Here is a step-by-step process that works for most portrait sessions.
Step 1: Prepare your gear. Charge both batteries the night before. Format your memory cards in the camera. Clean the lens front element with a microfiber cloth.
Check that your backup camera body is working if you have one. Avoiding overheating issues during a long session starts with proper preparation.
Step 2: Set your camera. Switch to Aperture Priority mode. Set the aperture to your desired depth of field. Enable Eye AF with continuous autofocus.
Set the shutter speed to at least 1/125th of a second. Keep ISO at the base value. Adjust the white balance to match your light source.
Shooting in full manual mode gives you more control, but Aperture Priority is a good starting point.
Step 3: Check your exposure. Look through the electronic viewfinder. Check the histogram. Make sure the highlights are not clipped.
Adjust exposure compensation if needed. The zebra pattern helps you spot overexposed areas instantly.
Step 4: Compose and focus. Place the subject's eye in the upper third of the frame. Press and hold the Eye AF button. The camera locks onto the eye.
Keep holding the button and press the shutter halfway to confirm focus. Then press fully to take the shot.
Step 5: Review and adjust. After each shot, check the image on the rear screen. Zoom in to check focus on the eye. Check the histogram for exposure.
Adjust your settings if needed. If you are shooting in a studio, tether the camera to a laptop for a larger preview.
Step 6: Import and backup. Transfer your images to your computer. Use a card reader for faster speeds. Import into your editing software of choice.
Safeguarding your image files with a second backup drive is essential. Use the 3-2-1 rule: three copies, two different media types, one offsite.
Step 7: Edit and export. Cull your images first. Delete the obvious outtakes. Then edit the keepers.
Adjust exposure, white balance, and contrast. Retouch skin if needed. Export at the resolution your client needs.
A full resolution JPEG at 300 DPI works for prints. A smaller file works for web delivery.
Frequently Asked Questions
What is the best aperture for portrait photography?
The best aperture for a single person portrait is between f/1.8 and f/2.8. This gives you a shallow depth of field that blurs the background while keeping the eye sharp. For two or more people, use f/2.8 to f/4.0 to ensure everyone is in focus.
Do I need a special lens for mirrorless portraits?
You do not need a special lens, but a prime lens with a wide aperture helps. An 85mm f/1.8 is the most popular choice for mirrorless portrait work. It gives good compression and a flattering perspective.
A 50mm f/1.8 works well for environmental portraits.
Why does Eye AF sometimes miss the eye?
Eye AF can miss the eye when the subject's face is partially obscured. Sunglasses, masks, or hair across the face confuse the system. Low light can also reduce accuracy.
Switch to a single focus point and place it manually when this happens.
Should I shoot in RAW or JPEG for portraits?
Shoot in RAW if you want the most editing flexibility. RAW files contain more data. You can adjust white balance, exposure, and color grading without losing quality.
JPEG files are smaller and ready to use immediately. Many photographers shoot both for safety.
How do I prevent camera shake in handheld portraits?
Use a shutter speed of at least 1/125th of a second for a 50mm lens. Use 1/250th for an 85mm or 135mm lens. Keep your elbows tucked in and breathe out slowly before pressing the shutter.
In-body image stabilization helps, but it does not replace a fast shutter speed.
What is the best way to learn portrait lighting with a mirrorless camera?
The electronic viewfinder makes learning lighting easier. You see the effect of each light adjustment in real time. Start with one light source at a 45 degree angle.
Add a reflector to fill shadows. Move the light closer for softer shadows and farther for harder shadows. Practice with natural window light before buying studio strobes.

Similar Posts