How to Use Solar Panel With Trail Camera
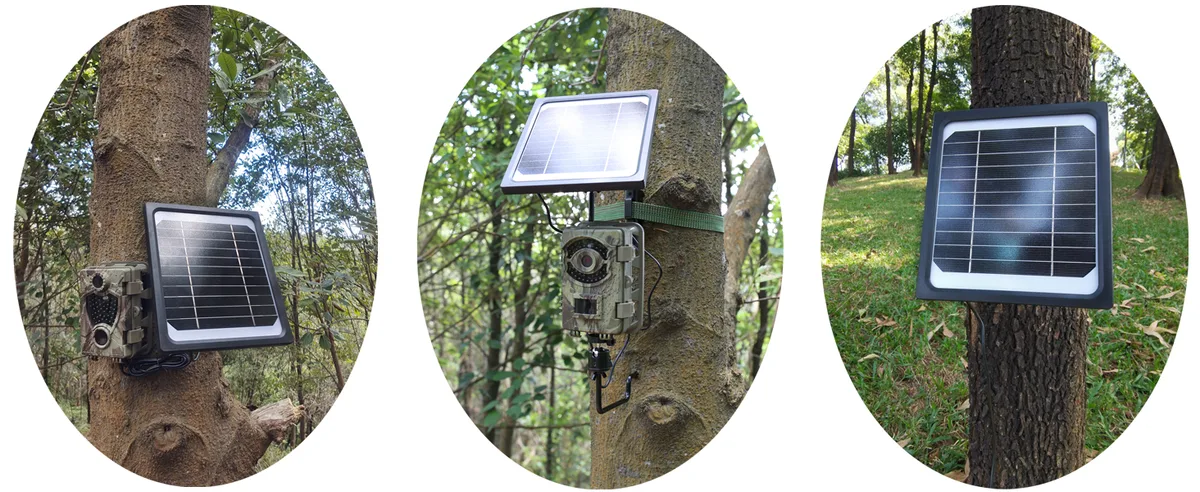
You're tired of hiking out to your trail camera only to find it's been dead for a week. You missed the buck you were tracking, and you're out another set of lithium batteries. That's exactly why learning how to use solar panel with trail camera setups is worth your time.
The good news is that it's not complicated once you understand the basics.
In our research, a properly sized solar setup can keep a non-cellular trail camera running for months without a single visit. Even cellular cameras, which draw more power, can run indefinitely with the right panel and battery. As of 2026, the technology has become reliable enough that many manufacturers now offer all-in-one solar kits.
Let's walk through what you actually need and how to set it up right the first time.
Quick Answer
Connect a solar panel to a charge controller. Then connect the controller to a rechargeable battery. Finally connect the battery to your trail camera's external power port.
Match the voltage of every component. Size the panel to your camera's draw and your local sun hours.
Image source: Web (Bing) / amazon.com (Web image (fair-use with source credit))
1. Why Bother with Solar? The Real Problem with Trail Camera Batteries
Standard alkaline batteries in a trail camera last anywhere from a few weeks to a couple of months. That depends on trigger frequency, night-time IR usage, and whether you're running a cellular model. For a cellular camera uploading photos, you're lucky to get three weeks from a fresh set of lithium cells.
The math gets expensive fast. A pack of eight lithium AA batteries costs around $15 to $20. If you're swapping them every month across multiple cameras, you're looking at $200 to $400 a year just in batteries.
That's before you factor in the gas and time spent driving to each location.
There's a deeper problem too. You miss data. The camera goes dark, and you have no idea what moved through that spot while it was dead.
For hunters and wildlife researchers, those gaps can mean losing the intel you need for the entire season.
Solar solves both problems. A one-time investment of $60 to $150 gives you a setup that runs for years. You visit the camera to swap memory cards, not to resurrect a dead unit.
That's the real promise of solar: set it, forget it, and never wonder what you missed.
But here's the catch. You can't just strap any solar panel to any camera and hope for the best. Voltage mismatches fry cameras.
Undersized panels leave you with a dead battery anyway. You need to match the components to your specific camera and location. That's what we're covering next.
2. How a Solar Trail Camera Setup Actually Works
A solar trail camera system has three main parts. The solar panel collects sunlight and turns it into electricity. The battery stores that electricity for night-time use and cloudy days.
The charge controller regulates the voltage so the battery doesn't overcharge.
Most beginners skip the charge controller. That's a mistake. A 12-volt solar panel can put out 18 to 22 volts in direct sunlight.
Plug that straight into a battery without a controller, and you'll cook it in a few sunny afternoons. Lithium batteries are especially sensitive to overcharging and can become a fire risk.
The flow is simple. Sunlight hits the panel. The panel sends electricity to the charge controller.
The controller sends the right voltage to the battery. The battery powers the camera. The camera never knows the difference between solar power and disposable batteries.
Some cameras have a built-in battery compartment that accepts a solar panel directly. These cameras usually have a barrel jack or USB port labelled "DC IN" or "External Power." You plug the panel into the camera, and the camera handles the charging internally. Those are the easiest setups.
Other cameras have no external power port at all. They run on internal AA batteries only. For those, you need an external battery pack that feeds power into the camera through a dummy battery or a wired adapter.
The type of panel matters too. Monocrystalline panels are more efficient than polycrystalline, which matters when you're mounting in a partially shaded area. Flexible panels are lighter and easier to strap to a tree, but they produce less power per square foot.
Rigid panels are more durable and efficient but harder to mount.
3. The First Decision Tree: What's Your Camera's Power Setup?
This is the first real fork in the road. Your camera's power port determines everything else you buy. Look at the bottom or side of your camera for a port labelled "DC IN," "EXT," "6V," or "12V." Some cameras also have a USB port for power.
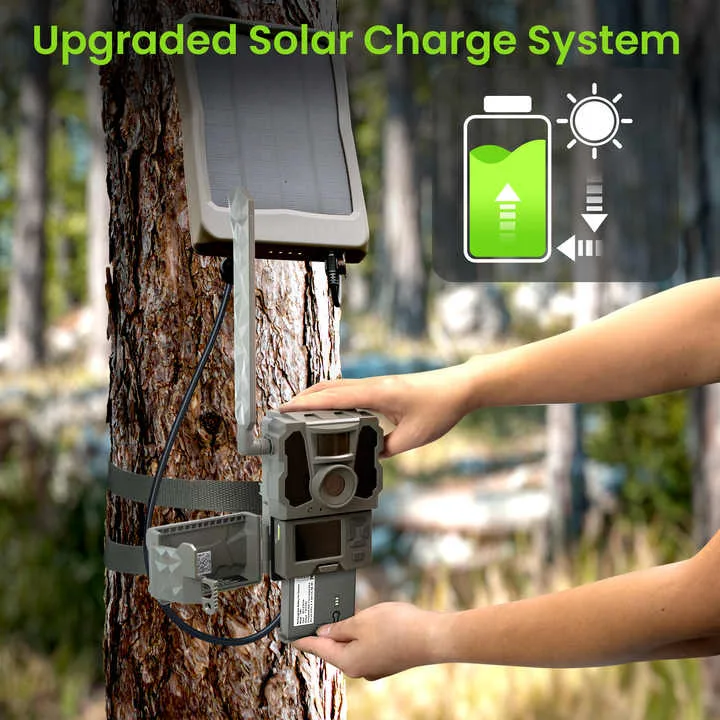
Image source: Web (Bing) / trailcamvalley.com (Web image (fair-use with source credit))
Branch 1: Your camera has an external power port.
This is the easiest path. You just need a solar panel that matches your camera's voltage. Most trail cameras run on 6 volts or 12 volts.
Some newer cellular models run on 5 volts through a USB port.
If your camera is 6 volts, buy a 6-volt solar panel. If it's 12 volts, buy a 12-volt panel. If it's 5 volts USB, buy a 5-volt USB solar panel.
Plug it in, and you're done. The camera's internal circuitry handles the rest.
But there's a nuance. Some cameras have a built-in charge controller that expects a panel voltage higher than the battery voltage. For example, a 12-volt camera might accept a 12-volt or 18-volt panel.
Check your camera manual or manufacturer specs to be sure.
Branch 2: Your camera has no external power port.
This is more common than you'd think. Many budget cameras and older models only take AA batteries. You can still use solar, but you need an external battery pack.
The battery pack connects to the camera through a dummy battery or a wired adapter. The dummy battery looks like a set of AA batteries with wires coming out. You put it in the battery compartment, and the wires connect to the external battery.
The solar panel charges the external battery.
This setup requires a bit more wiring. You need to keep the battery pack dry and secure. A small waterproof box works well.
You also need to make sure the dummy battery matches your camera's polarity. Reversing the polarity can damage the camera instantly.
Branch 3: Your camera is a cellular model.
Cellular cameras draw more power because they upload photos over the cellular network. A standard 5-watt panel might not be enough. You'll likely need a 10-watt or 20-watt panel with a larger battery, especially if your location gets less than four hours of direct sun per day.
The good news is that most cellular cameras have a dedicated external power port. You just need a bigger panel and a bigger battery. Some manufacturers even sell all-in-one solar kits specifically for their cellular cameras.
Those are worth considering if you want a guaranteed fit.
4. The Second Decision Tree: Sizing Your Panel and Battery
Once you know your camera's power port, you need to size the panel and battery correctly. This is where most people go wrong. They buy a 5-watt panel for a cellular camera and wonder why the battery dies in two days.
Start with your camera's power draw. A typical non-cellular trail camera uses about 0.1 to 0.5 milliamps in standby mode. When it takes a photo, it jumps to 300 to 1000 milliamps for a few seconds.
If it uses IR LEDs at night, that adds another 200 to 500 milliamps.
A cellular camera uses 500 to 2000 milliamps during uploads. Those uploads can last 30 seconds to several minutes. Multiply that by the number of uploads per day, and you see why cellular cameras need more power.
The table below shows typical panel sizes for different camera types.
| Camera Type | Typical Panel | Battery Size | Notes |
|---|---|---|---|
| Non-cellular, low traffic | 5W to 10W | 6V 4Ah to 7Ah | Works for most setups |
| Non-cellular, high traffic | 10W to 15W | 6V 7Ah to 12Ah | More photos equals more draw |
| Cellular, low traffic | 10W to 15W | 12V 7Ah to 12Ah | 1-2 uploads per day |
| Cellular, high traffic | 20W to 30W | 12V 12Ah to 20Ah | 10 or more uploads per day |
Now factor in your location's sun hours. The National Renewable Energy Laboratory provides solar insolation data for every region in the US. A location in Arizona gets 5 to 6 peak sun hours per day.
A location in Washington state gets 2 to 4 hours. Northern states get even less in winter.
A simple formula works. Take your camera's daily energy use in watt-hours. Divide that by your location's peak sun hours.
That gives you the minimum panel wattage you need. Add 30 percent for cloudy days and battery charging inefficiency.
For example, a camera that uses 5 watt-hours per day in a location with 3 peak sun hours needs a panel of at least 2.2 watts with the 30 percent buffer. That's safe. But a cellular camera using 15 watt-hours per day in the same location needs a 6.5 watt panel minimum.
In practice, you'd buy a 10-watt panel to have headroom.
The battery needs to hold enough charge for overnight use and cloudy days. A good rule is to size the battery for three to five days of camera operation without sun. For a camera using 5 watt-hours per day, a 12-volt battery with 2 amp-hours of usable capacity is enough.
But you'll rarely find batteries that small, so a 7 amp-hour battery is a safe buy.
5. Step-by-Step: How to Connect and Mount Everything
You have your panel, your battery, your charge controller, and your camera. Now it's time to put it all together. The order matters.
Connect the panel to the charge controller first, then the battery to the controller, then the camera to the battery.
Step 1: Mount the solar panel.
Find a spot with direct sun for most of the day. South-facing exposure is best in the northern hemisphere. The panel should be free of tree branches, tall grass, and other obstructions.
Even partial shade can cut power output by 50 percent or more.
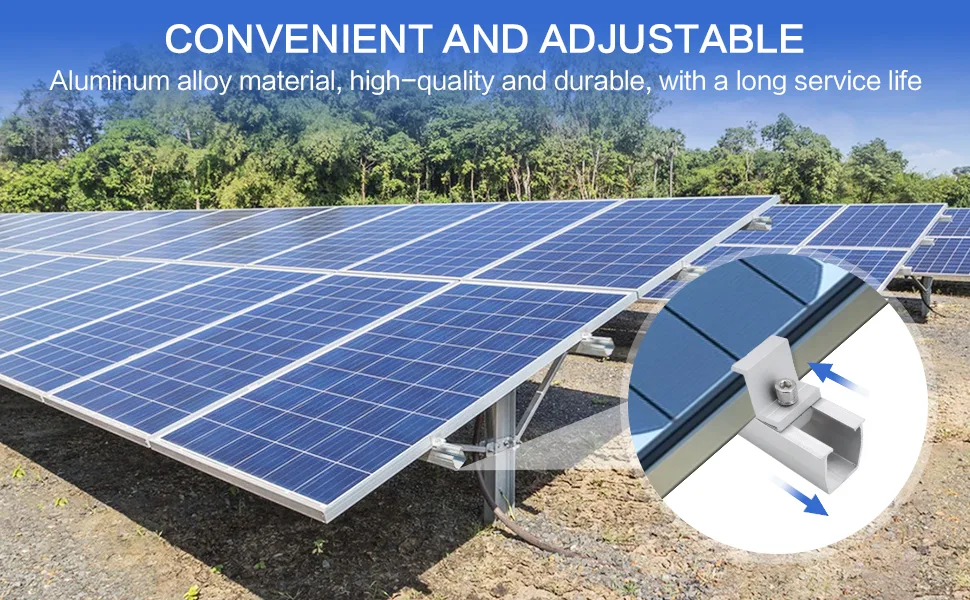
Image source: Bing (Web (fair-use with source credit))
Secure the panel with a mounting bracket, tree strap, or pole mount. Most panels come with mounting hardware. If you're mounting on a tree, use a bracket that allows you to adjust the angle.
The panel should be tilted at an angle equal to your latitude for maximum year-round production. In winter, add 15 degrees. In summer, subtract 15 degrees.
Step 2: Connect the charge controller.
Connect the panel to the charge controller first. The controller has terminals labelled "Solar In" or "Panel." Match the positive and negative wires. Then connect the battery to the controller terminals labelled "Battery." The controller will power on and show the battery voltage.
Step 3: Connect the battery to the camera.
The camera needs a power cable that matches its port. Most trail cameras use a 2.1mm or 2.5mm barrel jack. Some use USB.
The cable runs from the battery to the camera. If you're using a charge controller, the camera connects to the "Load" terminals on the controller.
Step 4: Weatherproof the connections.
This is where setups fail. Exposed connectors corrode quickly in rain and humidity. Use dielectric grease on all connections.
Wrap them in electrical tape or heat shrink tubing. Put the charge controller and battery in a waterproof box with a small hole for the cables.
Step 5: Test the system.
Leave the camera in your backyard for a day or two before deploying it to a remote location. Check that the battery voltage stays above 12 volts (or 6 volts for a 6-volt system) overnight. Check that the camera is receiving power and functioning normally.
Make sure the panel is charging the battery during the day.
Step 6: Secure everything.
Theft is a real problem with trail cameras. Use a steel cable lock to secure the camera to the tree. Use a lock box for the battery and controller.
Mount the panel high enough that it's not easily reachable from the ground. Some people mount the panel 10 to 15 feet up a tree.
6. Common Mistakes That Kill Your Setup
Most solar trail camera failures come from the same handful of errors. Avoid these, and you'll save time, money, and frustration.
Voltage mismatch. This is the number one killer. A 12-volt panel plugged into a 6-volt camera can fry the camera's internal electronics. Always check your camera's voltage rating before buying a panel.
The information is usually printed near the power port or in the manual.
Undersized panel for cellular cameras. A 5-watt panel works fine for a basic trail camera. It will not keep a cellular camera alive. Cellular cameras need 10 to 20 watts minimum, depending on upload frequency.
If you're running a cellular model, don't skimp on the panel.
No charge controller on a 12-volt panel. A 12-volt solar panel can output 18 to 22 volts in full sun. Without a charge controller, that voltage will overcharge and damage your battery. Lithium batteries can swell, leak, or catch fire.
Always use a charge controller with panels rated above 6 volts.
Battery connections exposed to weather. Moisture is the enemy. Corroded connectors cause voltage drops that make the camera think the battery is dead. Use dielectric grease, heat shrink tubing, and a waterproof enclosure for all connections.
Panel mounted in the shade. A panel in partial shade can lose 50 to 80 percent of its output. That's often the difference between a system that works and one that slowly drains. Before you mount the panel, check the spot at different times of the day to confirm it gets full sun.
Skipping the overnight test. Many people deploy a solar setup directly to the woods without testing it first. They come back a week later to find a dead camera. Always test the system in your backyard or near a power source for at least 24 hours before taking it remote.
7. Frequently Asked Questions
How do I know if my camera has an external power port?
Look at the bottom or side of the camera for a round barrel jack, a USB port, or a two-pin connector. It's often labelled "DC IN," "EXT," "6V," or "12V." If you don't see one, check the camera's manual. Some cameras hide the port under a rubber cover.
Can I use a solar panel without a battery?
No. A solar panel only produces power when the sun is shining. Your camera needs power at night and on cloudy days.
A battery stores the energy for those times. Without a battery, the camera will shut down every evening.
Will a 5-watt panel work for a cellular camera?
Probably not. A 5-watt panel produces about 15 to 20 watt-hours per day in good sun. A cellular camera uploading regularly can use 15 to 30 watt-hours per day.
You'll be running a deficit. A 10-watt or 20-watt panel is much safer for cellular models.
What happens in winter or cloudy weather?
Solar production drops in winter because the sun is lower and days are shorter. A panel that works fine in summer may not keep up in December. If you run cameras year-round, oversize your panel by 50 percent to account for winter conditions.
Cloudy weather can reduce output by 60 to 80 percent, which is another reason to oversize.
How do I connect a solar panel to a camera with no external power port?
You need an external battery pack and a dummy battery adapter. The dummy battery replaces the AA batteries in the compartment and connects to the external battery. The solar panel charges the external battery.
Make sure the dummy battery matches your camera's polarity.
How long does a solar trail camera setup last?
With proper care, a good solar panel can last 10 to 15 years. A sealed lead-acid battery lasts 2 to 5 years. A lithium battery lasts 3 to 7 years.
The charge controller typically lasts 5 to 10 years. Check connections once or twice a year and replace batteries when they stop holding a full charge.
8. The Final Decision Guide: Which Setup Is Right for You?
Your choice comes down to three variables: camera type, local sun hours, and budget. Here's a quick guide to match your situation.
Low-drain setup (non-cellular, low traffic, 4+ sun hours).
Buy a 5-watt or 6-volt panel with a built-in charge controller. Use a 6-volt 4Ah battery. This setup costs $40 to $60 and runs for months.
It's ideal for budget cameras in sunny locations.
Medium-drain setup (non-cellular, high traffic, 3 to 4 sun hours).
Buy a 10-watt panel with an external charge controller. Use a 6-volt 7Ah or 12-volt 7Ah battery. This costs $60 to $90 and handles high trigger rates and night photography.
It's the most common setup for serious users.
High-drain setup (cellular camera, any traffic, 2 to 4 sun hours).
Buy a 20-watt panel with a PWM charge controller. Use a 12-volt 12Ah lithium battery. This costs $100 to $150 and keeps a cellular camera running through cloudy weeks.
It's the only reliable option for cellular cameras in northern climates.
Our recommendation. Start with the medium-drain setup. It's affordable, reliable, and works for most scenarios. If you find your battery is draining faster than expected, upgrade to the high-drain setup.
If you have plenty of sun and a basic camera, save money with the low-drain setup.
Whichever path you choose, test the system before deploying it. A day of testing in your backyard can save you a week of lost data in the field. Solar trail cameras are a fantastic tool when set up correctly.
Get the sizing right, weatherproof your connections, and you'll never change batteries again.

Similar Posts
































