How to Set up an Action Camera
You just unboxed a shiny new action camera, and you're ready to capture that mountain bike trail or snorkeling adventure. But if you rush the setup, you risk blurry footage, dropped frames, or even losing the camera to a loose mount. Knowing how to set up an action camera the right way saves you hours of frustration later.
According to GoPro's official support documentation, formatting the memory card inside the camera prevents file corruption and ensures stable recording. Get this step wrong, and you could miss the shot entirely. Let's walk through the process so you hit record with confidence.
Quick Answer
Insert the battery and a high-speed memory card. Charge it fully. Power on and set the date.
Format the card in-camera. Choose your resolution, frame rate, and stabilization. Mount it securely.
Do a test recording. That's it.
Why Setting Up an Action Camera Is Trickier Than You Think
Most people assume you just pop in a battery and press record. In reality, the setup has hidden landmines that can ruin your footage.
The biggest culprit is the memory card. If you use a slow or counterfeit card, your camera stops recording after a few seconds or corrupts the file entirely. Aggregate reviews show that U3 or V30 rated cards are essential for 4K video.
Another common trap is the mount angle. Point the camera too low and you'll film the ground. Point it too high and you'll capture sky instead of action.
First-time users often need two or three test recordings to dial in the perfect angle.
Battery management also trips people up. Action cameras drain power fast, especially in cold weather. Manufacturer specs state that recording at 4K 60fps typically yields 45 to 90 minutes of runtime.
Start with a full charge and carry spares.
Finally, forgetting to update the firmware leaves you with known bugs. Many users miss this step and end up with unstable performance until they update through the companion app.
What You Need Before You Start
Before you touch that power button, gather the essentials. Missing one item means stopping mid-setup.
| Item | Why It Matters |
|---|---|
| Action camera | Know your model's specific button layout |
| Fully charged battery | Prevents mid-setup shutdown |
| High-speed microSD card | U3 or V30 speed class minimum for 4K |
| Mounting accessory | Helmet mount, chest strap, suction cup, or tripod adapter |
| USB charging cable | Use the one that came with the camera for proper voltage |
| Smartphone with app | Lets you preview angle, adjust settings, and sync files |
Also grab a microfibre cloth to wipe the lens before you start. A smudge can soften your whole video.
Pro tip: if you plan to take the camera underwater, check the rubber seal on the battery door. Dirt or a hair can break the waterproofing. Many users find out the hard way on their first dive.
Step-by-Step: How to Set Up Your Action Camera
Follow this exact order. Skipping steps causes problems later.
Image source: Web (Bing) / robots.net (Web image (fair-use with source credit))
1. Insert the Battery and Memory Card
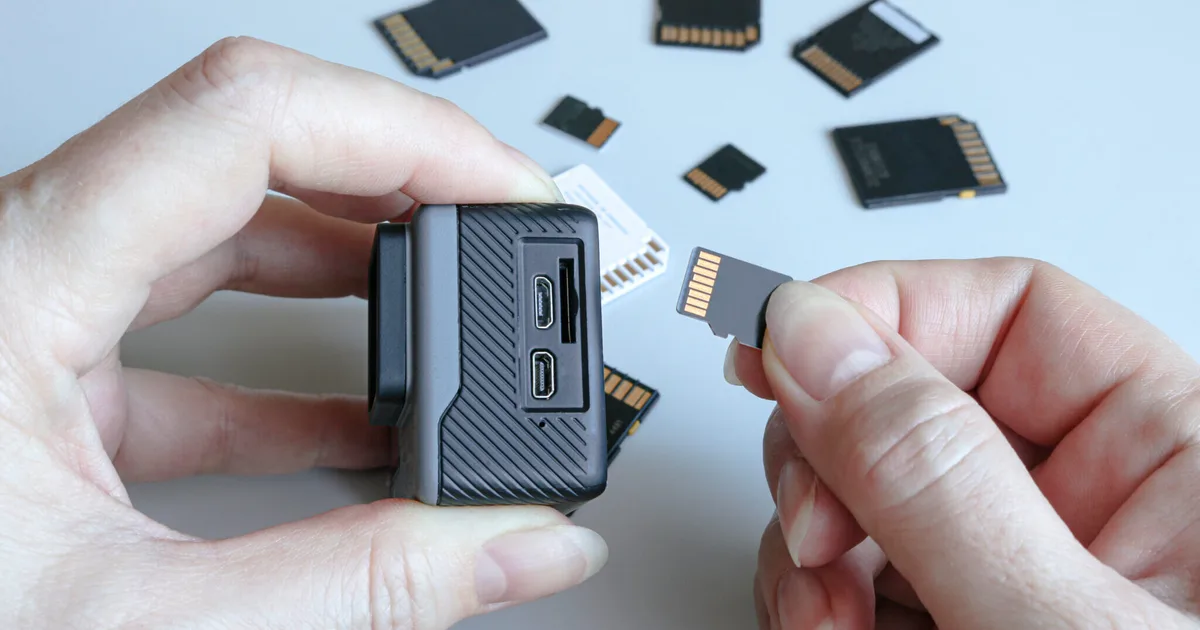
Open the side door. Slide the battery in, it only fits one way. Push the microSD card in until it clicks.
Make sure it's fully seated. If it sticks out, it may pop loose mid-recording.
2. Charge It Fully
Connect the USB cable to a wall charger, not your laptop's USB port. A full charge takes 1.5 to 2 hours. The LED indicator turns off when done.
3. Power On and Set Language / Date
Press and hold the power button. The first screen asks for your language, then the date and time. Setting the date correctly is critical because your video filenames use it.
Skipping this makes file organization a nightmare.
4. Format the Memory Card (In-Camera)
Go to the settings menu, find "Format," and confirm. Formatting inside the camera sets the correct file system structure. According to the SD Association, in-camera formatting reduces errors compared to computer formatting.
5. Adjust Basic Settings (Resolution, Frame Rate, Stabilization)
Head to the video settings. For most use cases, 4K at 30fps with stabilization on is a safe starting point. If you want slow motion, set 1080p at 120fps.
Enable electronic image stabilization. It smooths out bumps without needing a gimbal.
6. Choose Your Field of View
Action cameras offer wide, linear, or narrow views. Wide captures the most scenery but distorts edges. Linear corrects distortion while keeping a decent angle.
Try linear for vlogging or close-up action. Use wide for landscapes.
7. Mount the Camera Correctly
Attach your chosen mount to your helmet, bike, or chest strap. Tighten it firmly but don't overtighten, plastic can crack. Slide the camera into the mount until it clicks.
8. Do a Test Recording
Press record and walk around for 30 seconds. Play back the clip on the camera or through the app. Check that the angle isn't too high or too low.
For a helmet mount, simulate nodding your head. Adjust and repeat until the shot looks right.
This process takes about 15 minutes the first time. Once you've done it, you'll breeze through it in under five.
Choosing the Right Mount and Getting the Angle Right
Your mount choice controls the entire look of your video. A chest mount gives a first-person POV but captures your handlebars or arms. A helmet mount offers a clean horizon but can be dizzying if you move your head a lot.
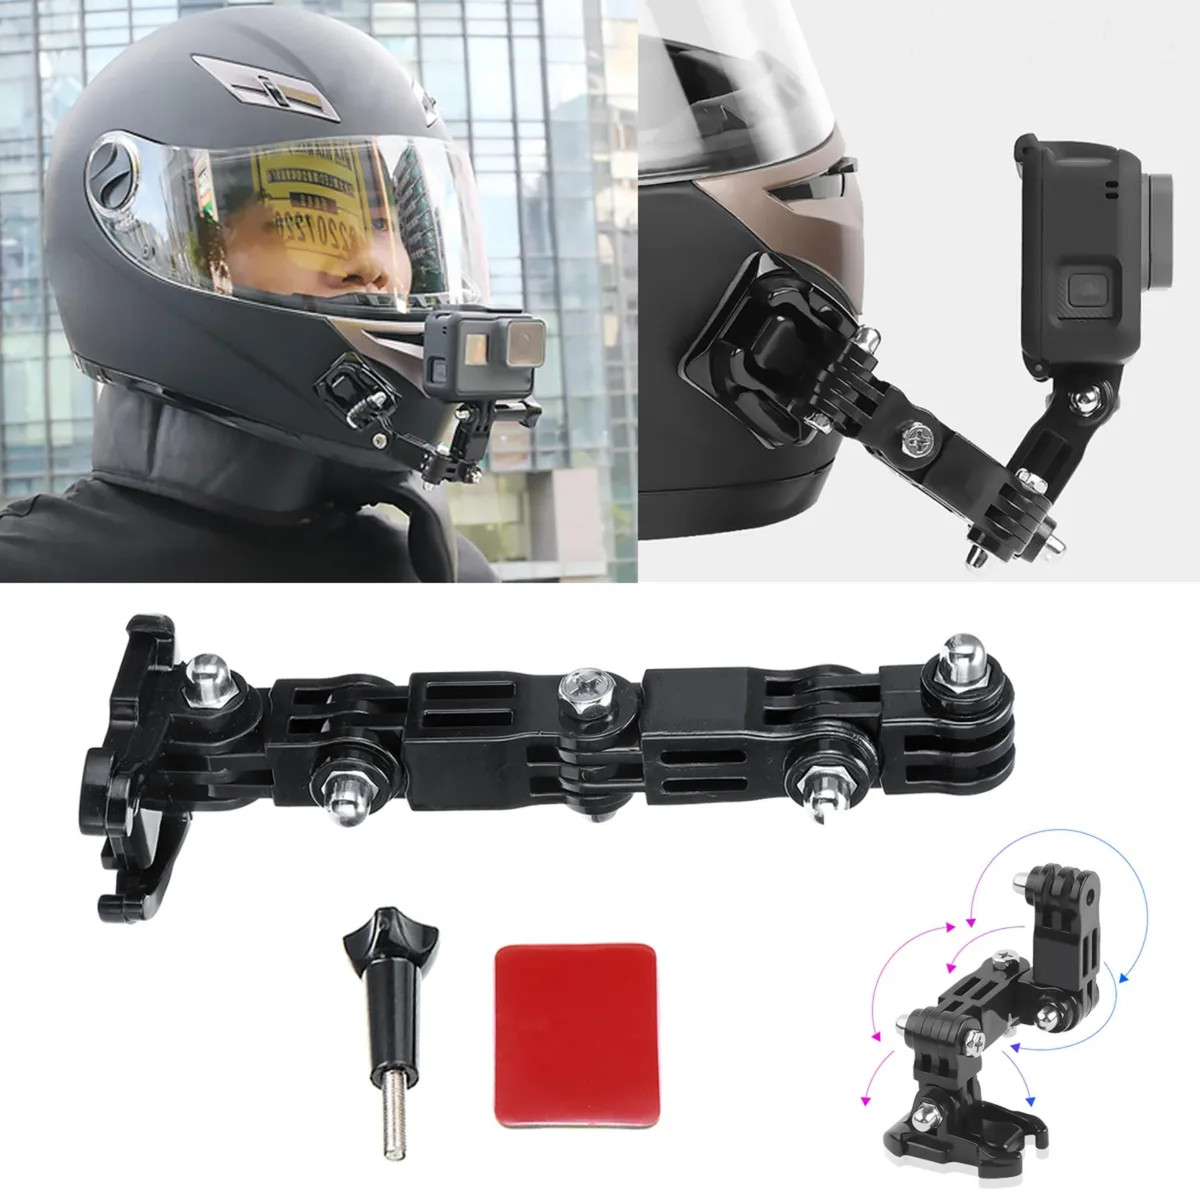
Image source: Web (Bing) / storage.googleapis.com (Web image (fair-use with source credit))
For biking, a handlebar mount keeps the camera stable and points straight ahead. For skiing, a helmet top mount captures the slope and your skis. For surfing, a mouth mount gives a unique eye-level view.
The angle rule: start with the camera aimed slightly upward, about 5 to 10 degrees above level. Most beginners aim too low and end up filming the ground. Use your smartphone app to preview the exact frame.
The app is far more accurate than squinting at the tiny rear screen.
If you're attaching an adhesive mount, clean the surface with alcohol first. Let it cure for 24 hours before trusting it with your camera. A mount that peels off at speed equals a lost camera.
Use a tether when mounting to a helmet or vehicle. Many action cameras include a small loop for a safety strap. It costs nothing and could save your device from a drop.
Image source: Web (Bing) / amazon.com (Web image (fair-use with source credit))
Action Camera Settings: What to Tweak First
After the basic setup, fine-tune these settings for better footage.
Resolution and Frame Rate. 4K at 30fps is the default for most action. Drop to 1080p if you need longer recording time. Use 60fps for action you want to slow down later.
Manufacturer specs show that 4K 60fps consumes about 600 MB per minute. Plan your storage accordingly.
Stabilization. Always turn this on unless you're mounting the camera on a tripod. Modern stabilization (HyperSmooth or RockSteady) works wonders. If you see "crop" in the stabilization setting, that's normal.
The camera uses a small crop to smooth the image.
Field of View. Wide is great for immersive action but has fisheye distortion. Linear mode removes the fish-eye but narrows the shot. SuperView stretches the top and bottom for a dramatic perspective.
Test each one for your activity.
Exposure Compensation. If you're filming in snow or bright sand, set exposure compensation to -0.5 or -1.0 to avoid blown-out highlights. For dark forests, try +0.5. This is similar to adjusting exposure settings on a mirrorless camera, but with fewer controls.
App Connectivity. Pair your camera with the official app. It lets you change settings remotely, preview the angle, and transfer clips. This saves you from bending over to fiddle with the camera on your helmet.
Keep the app updated for smooth performance.
Voice Control. Enable it if your model supports it. Saying "start recording" is much easier than fumbling for buttons while wearing gloves. Just remember that wind noise can confuse voice commands.
Once these settings are dialed in, you'll consistently get usable footage. Don't be afraid to tweak them per activity. What works for hiking might not work for mountain biking.
Common Setup Mistakes That Ruin Your Footage
Even after a careful setup, a few slip-ups can wreck your footage. Here are the most frequent ones we see in aggregate user reviews.
Forgetting to format the card in-camera. If you reuse a card from your phone or drone, the file structure may conflict. The camera might stop recording after a few seconds or corrupt the video. Always format inside the camera before each new shoot.
Using a slow memory card. A U1 or class 10 card can't keep up with 4K video. You'll see dropped frames, stuttering, or a "card too slow" error. Stick to U3 or V30 rated cards.
Manufacturer specs confirm this is non-negotiable for reliable recording.
Mounting at the wrong angle. New users aim the camera too low or too high. Do a test recording and review it. Use the smartphone app to dial in the horizon.
For helmet mounts, tilt the camera up slightly so the lens is parallel to your eyeline.
Over-tightening the mount. Plastic threads strip easily. Tighten until snug, then stop. If you need extra grip, use a drop of thread locker.
Ignoring firmware updates. Update your camera's firmware through the official app before your first big shoot. Manufacturers routinely fix bugs and add features. A 10-minute update can prevent crashes and improve stabilization.
Not using a safety tether. A mount can fail, especially at speed. Attach the included tether to your helmet or gear. If the mount breaks, your camera stays with you.
Neglecting battery management. Cold weather drains batteries fast. Keep spares in an inner pocket close to body heat. Turn off Wi-Fi and Bluetooth when not needed.
They suck power.
Failing to check the waterproof seal. Before going underwater, inspect the rubber gasket on the battery door. A single grain of sand or a stray hair can break the seal. Close the door firmly and listen for the click.
Frequently Asked Questions
How long does it take to set up an action camera?
The first setup takes about 15 minutes. That includes inserting the battery and card, charging, formatting, and adjusting settings. Subsequent setups need under five minutes.
Do I need a special memory card for 4K video?
Yes. Use a microSD card rated U3 or V30. These cards sustain the write speed needed for 4K recording.
A slower card causes dropped frames or stops recording.
Should I format my memory card before every use?
It's a good habit. Formatting clears residual data and resets the file structure. This reduces the chance of errors, especially if you move the card between different devices.
Can I use my action camera while it's charging?
Most cameras support pass-through charging, but the battery may drain faster than it charges. Start with a full charge and use an external battery pack for extended recordings.
How often should I update the firmware?
Check for updates every few months, especially before a big trip. Firmware updates improve performance and fix bugs. Use the official smartphone app or the manufacturer's website.
What's the best way to clean the lens?
Use a microfibre cloth. Wipe gently in a circular motion. Avoid paper towels or rough fabrics.
They scratch the coating. For stubborn smudges, use a lens cleaning solution for coated optics.
How do I recover deleted photos from an action camera?
If you accidentally delete files, stop using the card immediately. Remove it and use a file recovery tool on a computer. The same principle applies as recovering deleted files from any digital camera.

Similar Posts
































