Husqvarna Sewing Machine Troubleshooting
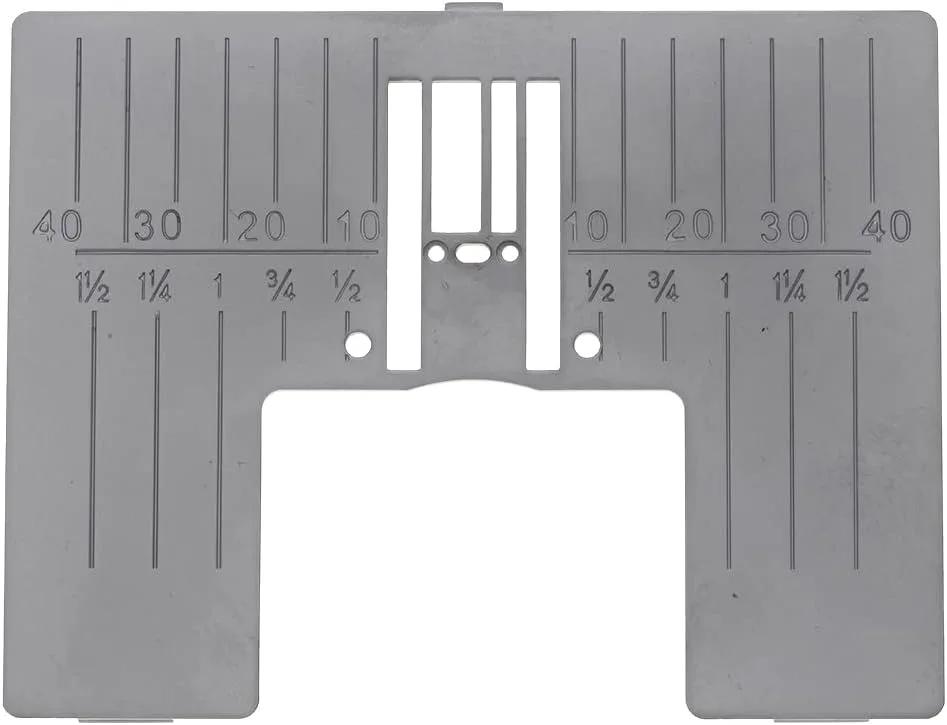
Your Husqvarna just made that weird clicking noise, and now the thread is nesting under the fabric. You don't need to panic or plan a trip to the repair shop. Husqvarna Sewing Machine Troubleshooting is usually a matter of checking a few likely causes in the right order.
Manufacturer documentation and repair records point the same way. Most tension issues on Husqvarna Viking machines are threading errors, not broken parts. Per ISO 4915, proper stitch formation depends on balanced tension between the needle thread and bobbin thread.
The fix is often a clean, a rethread, or a fresh needle.
Quick Answer
Husqvarna Sewing Machine Troubleshooting starts with four simple fixes. Rethread with the presser foot up. Change the needle.
Clean the bobbin area. Check for lint and thread scraps. Those steps solve most problems.
If not, use the decision tree below.
Image source: Bing (Web (fair-use with source credit))
The Real Cost of Guessing Wrong
Troubleshooting a sewing machine feels like detective work. You try one thing, then another, hoping something sticks. That approach costs you time and sometimes real money.
Every wrong guess adds risk.
Force the handwheel when the needle is jammed, and you can bend the timing hook. That repair runs $100 to $200 at a shop. A simple bobbin case burr, a $15 part, can turn into a full timing adjustment if you keep sewing over it.
Your frustration grows, and your wallet takes the hit.
The better path is simple. Test the likely causes first. Rule out the cheap fixes before touching anything expensive.
That logic drives the decision tree below.
Before Touching Anything: The 60-Second Safety and Setup Check
Run this quick check every time, even if you think you know the problem. It eliminates about half of all issues. It also keeps your fingers safe.
Safety first: Unplug the machine before cleaning, oiling, or inspecting the needle area. The foot pedal is a live switch. You don't want it bumping while your hands are inside.
Now check four things in order.
| Step | What to Do | Why It Matters |
|---|---|---|
| 1 | Remove the needle and bobbin | Lets you see the needle plate and hook clearly |
| 2 | Inspect the needle for bends, burrs, or a dull tip | A bad needle causes skipped stitches and breakage |
| 3 | Look under the throat plate for lint and thread scraps | Buildup throws off tension and feed |
| 4 | Confirm the presser foot is down when sewing | Many models won't engage tension properly with the foot up |
Do this in ten seconds. If you see lint, remove it with a soft brush. Don't use metal tools near the hook.
If the needle looks damaged, replace it with the correct size for your fabric.
Then rethread both top and bobbin. Make sure the presser foot is up during top threading. That is the most common cause of thread nests.
Still acting up? Move to the decision tree.
The Husqvarna Troubleshooting Decision Tree
Each branch covers one specific symptom. Start with the branch that matches your machine. Follow the steps in order.
Don't skip ahead.
Branch A: Thread Bunching or Nesting Underneath
Symptom: The top thread looks fine, but underneath the fabric is a tangled nest of loops.
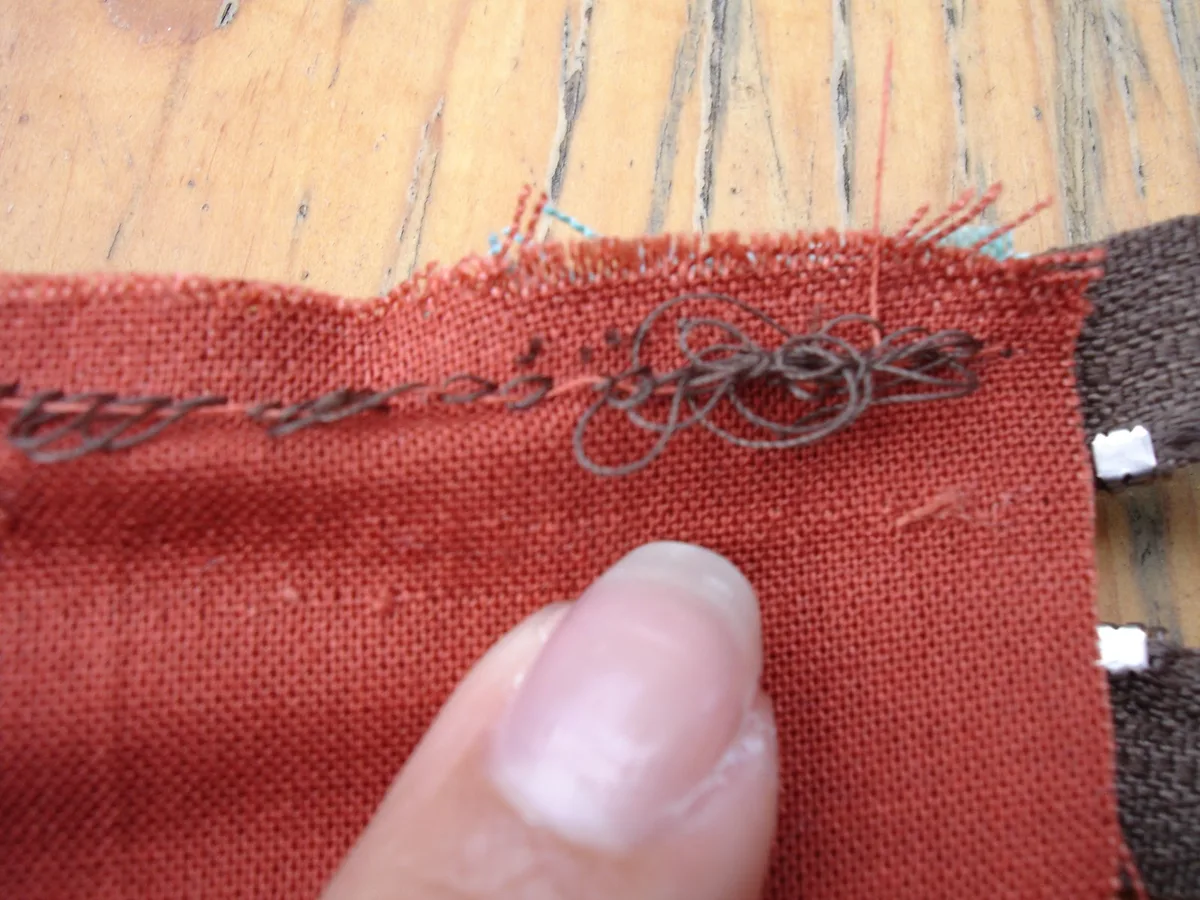
Image source: Bing (Web (fair-use with source credit))
First step: Pull the fabric out gently. Do not keep sewing over the nest. That can jam the machine.
Second step: Remove the bobbin case and check that the bobbin is wound evenly. Some Husqvarna models, especially older Emerald series machines, are sensitive to uneven winding. Rewind the bobbin if you see loose loops.
Third step: Rethread the top thread with the presser foot up. The foot lifts the tension discs so the thread slides between them. If you thread with the foot down, the thread sits on top of the discs.
That creates loose loops underneath.
Fourth step: Test on a scrap of the same fabric folded in half. Still nesting? Lower the top tension by one number, toward 0.
If that fixes it, the tension was too tight. If it gets worse, return to the default, usually 4, and check the bobbin tension.
Bobbin tension check: Hold the bobbin case by the thread tail and give it a gentle tug. It should drop slowly when you bounce it lightly. If it drops too fast, tighten the tiny screw on the case.
Too tight means it won't drop at all. Adjust in quarter turns.
If the problem persists: Inspect the bobbin case lip for a burr or nick. Run your fingernail along the smooth edge. If it catches, replace the case with an OEM part.
Aftermarket bobbins and cases often have inconsistent quality that causes nesting.
Branch B: Skipped Stitches or Irregular Stitch Length
Symptom: Stitches look good for a few inches, then one or two go missing. Or the stitch length changes without you adjusting it.
Most likely cause: A bent, dull, or wrong type of needle. Husqvarna machines are picky about needle quality. Use a fresh needle in the correct size for your fabric.
Second cause: The needle isn't inserted fully, or the flat side faces the wrong direction. On most Husqvarna models, the flat side goes toward the back. Check your manual.
A needle installed even a millimeter too high will skip stitches.
Third cause: Tension is too tight or too loose. Reset the top tension to 4 and the bobbin tension to the default. Test again.
If the problem follows the needle position: Say it only skips when the needle is in the far-left. That points to timing. The hook isn't meeting the needle at the right moment.
That is a professional repair.
For knit fabrics: Switch to a ballpoint or stretch needle. A sharp needle pierces the fabric instead of passing between the fibers, which causes skipped stitches.
Branch C: Machine Jams or Needle Won't Move
Symptom: The handwheel locks up, or the machine makes a grinding sound. The needle might be stuck in the fabric.
Stop immediately. Do not force the handwheel. Forcing it can bend the needle bar or break the timing hook.
Step 1: Remove the fabric by turning the handwheel gently backward, toward you, to release the needle. If that doesn't work, cut the fabric close to the needle plate and lift the presser foot.
Step 2: Check for a needle strike. That happens when the needle hits the metal throat plate or hook. Common causes are a bent needle, too-wide needle for the throat plate, or improper insertion.
Remove the needle and inspect the plate for a burr. Smooth it with fine sandpaper or replace the plate.
Step 3: Clear thread tangles under the needle plate. Use tweezers to pull out loose thread ends.
Step 4: If the machine still won't turn, check the hook assembly. Hand turn the handwheel slowly backward while watching the bobbin area. If you see a thread tail caught in the hook, remove it with tweezers.
Don't oil a jam. Oil doesn't fix mechanical obstruction. It just makes a mess. Clear the jam first, then add oil only if needed.
If the handwheel turns but the needle doesn't move: That is a belt or gear issue. The timing belt may have slipped or broken. That's a shop job.
Branch D: Machine Runs but Won't Stitch (No Thread Catch)
Symptom: The needle goes up and down, but no stitches form. The thread just pulls out.
Step 1: Check that the bobbin case is fully seated. On drop-in models, it should snap into place. On front-loading machines, the case must click into the hook assembly.
A loose case means the thread won't catch.
Step 2: Look at the hook. Remove the needle plate and turn the handwheel slowly. The tip of the hook should pass close behind the needle's eye, about 1.5 mm.
If it's far away, the timing is off. That's a professional fix.
Step 3: Try a new needle. A bent needle can push the thread out of the hook's range.
Step 4: On computerized models, reset the machine. Unplug it for two minutes. Plug it back in.
Sometimes a glitch in the stitch selection or tension setting prevents the hook from engaging.
Needle type matters: If you switched to a different needle type, like a jeans needle from a universal, the scarf shape might not align with the hook. Go back to the recommended needle for your model.
Branch E: Bobbin Problems (Won't Wind, Uneven Tension, Won't Catch)
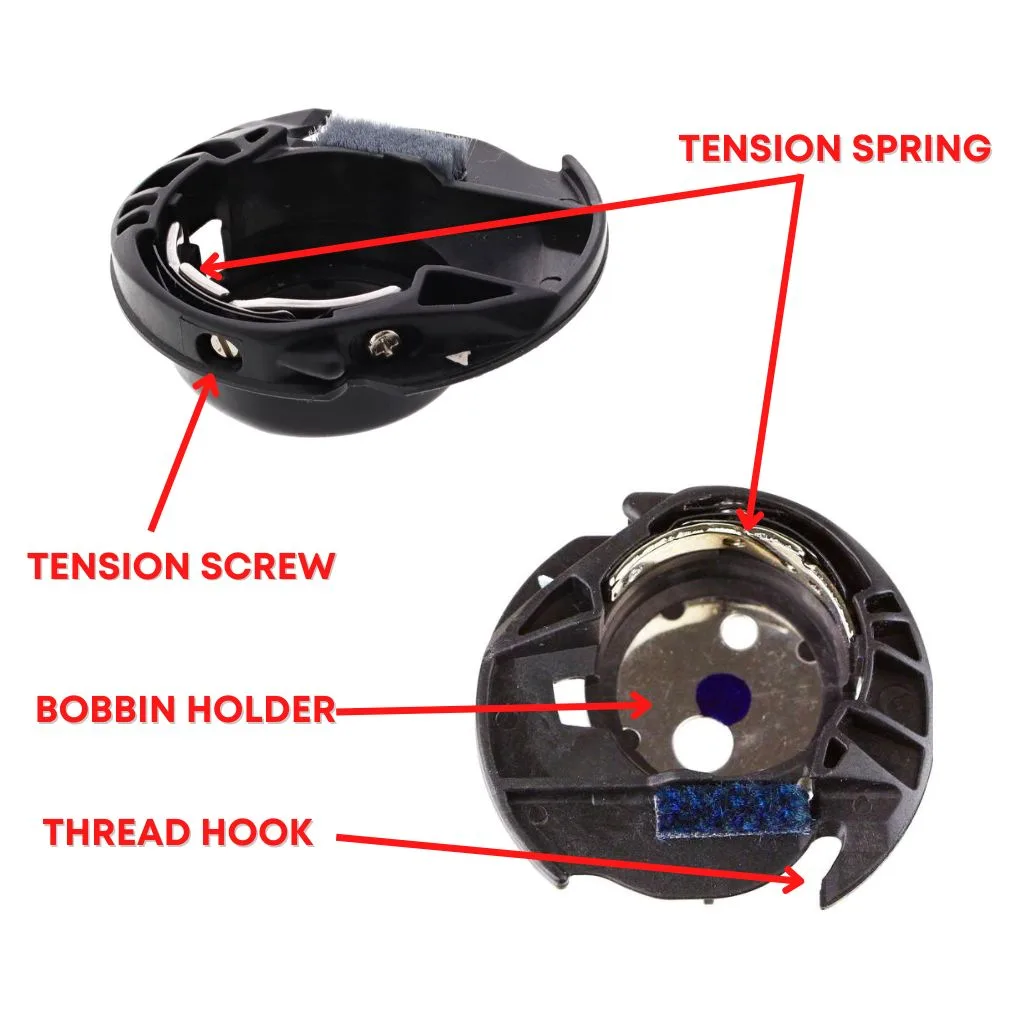
Image source: Bing (Web (fair-use with source credit))
Symptom: The bobbin won't wind. Or the thread on it is loose and uneven. Or the machine won't pick up the bobbin thread.
Bobbin won't wind: Make sure the bobbin winder is engaged. On many Husqvarna models, you push the winder spindle to the left or pull the handwheel out slightly. Check your manual.
If the winder spins but the bobbin stays empty, the rubber tire on the winder spindle could be worn out.
Uneven bobbin tension: Usually a dirty bobbin case track. Remove the case, lift out the small tension spring, and wipe the area with a dry cloth. Lint here creates inconsistent drag.
That causes loops on top of the fabric.
Bobbin won't catch: The needle might be too low, or the bobbin timing is off. First, confirm you're using the correct bobbin. Husqvarna Viking machines require specific bobbins, either class 15 or the smaller plastic drop-in type.
A generic bobbin that is a hair too tall will fight the mechanism.
Tension screw: If the bobbin case screw is too loose, thread spills out and tangles. If too tight, the thread cuts. Adjust in small increments until the thread pulls smoothly under slight fingertip pressure.
Branch F: Computerized Model Glitches (Screen, Settings, Memory)
Symptom: The screen flickers, buttons don't respond, or the machine loses its stitch selection mid-sewing.
First step: Unplug the machine for two minutes. That resets the control board. Many glitches come from static buildup or a power spike.
Second step: Check the foot pedal connection. On some Designer models, the pedal plugs into the machine with a round connector. A loose fit can cause intermittent operation.
Third step: Try a hard reset. Press and hold the start/stop button while turning the machine on. Some models also have a factory reset in the menu.
Fourth step: Clean the sensor under the needle plate. Many computerized models use a sensor to detect the bobbin thread. Lint can block it and cause false warnings.
Firmware: If your model supports updates, check the official Husqvarna Viking site. A current firmware version can fix known glitches.
Mistakes That Turn a $5 Fix Into a $200 Repair
These errors get mentioned over and over in repair shop stories. Avoid them.
- Forcing the handwheel when the machine is jammed. This bends the needle bar, misaligns the hook, or cracks plastic gears. Remove the fabric first, then rock the handwheel gently backward.
- Using WD-40 or 3-in-1 oil on the hook assembly. Those oils gum up over time and attract lint. Use only sewing machine oil, one small drop on the hook race.
- Using aftermarket bobbins. Husqvarna machines are built to tight tolerances. Cheap bobbins are often a millimeter off. They cause tension issues and can damage the bobbin case.
- Sewing over a jam. Grinding sounds should stop you instantly. Running the machine through a jam can snap the needle or break the timing belt.
- Ignoring a burr on the needle plate. A tiny nick from a needle strike will shred thread indefinitely. Sand it smooth with fine grit or replace the plate.
- Oiling the bobbin case. The bobbin case area should stay dry. Oil belongs on the hook race and needle bar only. Oiling the case attracts lint and ruins tension.
When to Call a Pro (and How to Know You're Past DIY)
Not every problem is fixable at home. Here are the clear boundaries.
| Problem | DIY Possible? | Why |
|---|---|---|
| Bent or dull needle | Yes | Replacement costs a few dollars |
| Thread nesting | Usually yes | Rethread, clean, adjust tension |
| Bobbin case burr | Yes | Replace the case, $15 to $30 |
| Timing is off | No | Requires precise adjustment |
| Broken timing belt | No | Needs full disassembly |
| Control board failure | No | Needs diagnostic equipment |
| Bent needle bar | No | Requires alignment jigs |
Cost threshold: If the part costs more than $50 and requires opening the casing, get an estimate first. A shop diagnostic fee, usually $40 to $75, often includes a basic cleaning.
Time threshold: If you've spent over an hour following the branches and still haven't found the issue, stop. A professional can likely fix it in 15 minutes.
Safety threshold: If you see smoke, smell burning, or hear electrical buzzing, unplug the machine immediately. Take it to a service center. Don't attempt electrical repairs yourself.
Warranty consideration: If your machine is still under warranty, do not open it. DIY work can void coverage. Contact an authorized Husqvarna Viking dealer.
Final rule: When the decision tree says professional fix, believe it. A shop visit is cheaper than destroying a $1,000 machine by guessing.
Quick Reference: Parts, Prices, and What to Keep on Hand
As of 2026, typical replacement parts for Husqvarna Viking machines cost less than you'd expect. Keep a small stash and most repairs take minutes.
| Part | Typical Price | Notes |
|---|---|---|
| Needles (pack of 5) | $6 to $12 | Use Schmetz or Organ |
| OEM bobbins (pack of 4) | $8 to $15 | Class 15 or drop-in, check model |
| Bobbin case | $15 to $30 | Buy genuine Husqvarna Viking only |
| Throat plate | $20 to $40 | Replace if burred or bent |
| Sewing machine oil | $8 to $15 | A small bottle lasts years |
Tools to keep nearby: A soft brush, tweezers, a small screwdriver, and fine-grit sandpaper. That's enough for 90 percent of DIY fixes.
Your best resource: The owner's manual for your exact model. Husqvarna publishes them as free downloads on the official Husqvarna Viking website. The manual includes the correct needle type, bobbin class, and tension defaults.
Print the relevant pages if you want quick access.
Frequently Asked Questions
Why is my Husqvarna thread bunching underneath?
The top thread is likely threaded wrong. Rethread with the presser foot up so the thread slides between the tension discs. Then check that the bobbin is wound evenly and seated correctly.
Clean the bobbin area if you see lint. Those steps solve most nesting issues.
Why is my Husqvarna sewing machine skipping stitches?
Start with a fresh needle. A bent or dull needle is the top cause. Make sure it's the right type and inserted fully with the flat side facing the back.
If the problem continues, reset the tension to 4 and test on a fabric scrap. Knits usually need a ballpoint or stretch needle.
How do I fix the tension on my Husqvarna Viking?
Reset to the defaults first. Top tension at 4 and bobbin tension at the factory setting. Test on a scrap.
If the top thread shows on the bottom, loosen the top tension. If the bobbin thread shows on top, tighten it. Adjust one number at a time.
When should I take my Husqvarna to a repair shop?
Call a pro if the timing is off, the needle bar is bent, the belt is broken, or the control board fails. Also take it in if you've spent over an hour troubleshooting without success. Forcing the machine can cause expensive damage, so stop before you make things worse.
Why won't my Husqvarna pick up the bobbin thread?
Check that the bobbin is inserted in the correct direction. Most Husqvarna drop-in machines want the thread pulling from the left. If the bobbin case doesn't click into place, the thread won't catch.
Also try a new needle. A bent needle can push the top thread away from the hook.

Similar Posts