Kangaroo Joey Pump Troubleshooting
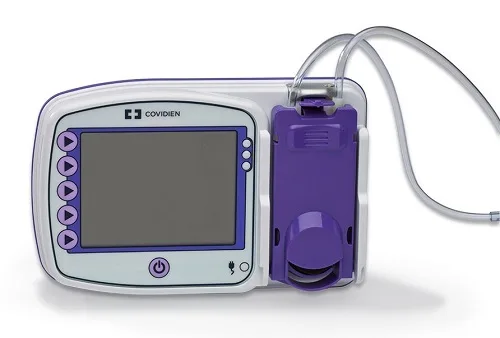
Your Kangaroo Joey pump beeping at 2 a.m. with no error code you recognize is the kind of frustration that makes tube-feeding feel harder than it needs to be. Kangaroo Joey Pump Troubleshooting doesn't have to be a guessing game, though. Most problems follow a predictable pattern, and once you know the steps, you can usually get back up and running in under five minutes.
Manufacturer documentation for the Kangaroo Joey (models 5520, 5720, and 7720) identifies seven distinct error codes plus several non-code failure modes like battery drain and door latch misalignment. Per FDA Class II medical device standards, these pumps are designed to shut down and alert you at the first sign of trouble, which is good for safety but bad for convenience. Let's walk through exactly what each signal means and what to do about it.
Image source: Bing (Web (fair-use with source credit))
Quick Answer
The Kangaroo Joey pump stops feeding and beeps when it detects a problem. Check the error code on the display first. Most issues are caused by kinked tubing or improper cassette loading.
Clear the occlusion or reseat the tubing set. If the pump shows a system error (E-6 or higher), it needs professional service. Battery problems often require a new battery from your DME provider.
A hard reset fixes a frozen pump.
Problem / Pain Point – Why Your Joey Pump Is Acting Up
If you have ever sat there watching the pump display flash while your patient waits for their feed, you know the sinking feeling. The Joey pump is a solid piece of equipment, but it is also a medical device with built-in fail-safes that trigger alarms for conditions you might not even notice. The pump does not know the difference between a real occlusion and a tubing set loaded slightly crooked.
It just knows flow stopped.
The most common frustrations we hear from caregivers and home-health nurses include:
- The pump starts beeping within minutes of starting a feed
- The error code disappears when you unplug the pump but comes right back
- The pump runs but no formula actually moves through the line
- The battery dies mid-feed even though it showed a charge
- The pump will not turn on at all, even when plugged in
- The display is frozen and no buttons respond
Each of these has a specific root cause. The trick is knowing which branch of the troubleshooting tree to follow. As of 2026, the Kangaroo Joey remains one of the most widely distributed home enteral feeding pumps in the United States.
That means there is a well-established body of knowledge about its common failure points.
The good news is that roughly 90% of Joey pump problems are user-correctable. You do not need a biomedical technician for kinked tubing. You do not need to send the pump back for a door that was not latched properly.
What you need is a systematic approach, and that is what this guide provides.
Quick Reference – Joey Pump Error Codes at a Glance
Before we dive into the step-by-step workflow, here is the complete list of error codes your Joey pump can display. Bookmark this table. It will save you time.
| Error Code | What It Means | Typical Cause | Can You Fix It? |
|---|---|---|---|
| E-1 | Occlusion downstream (patient side) | Kinked tubing, clamped tubing, or blockage in feeding tube | Usually yes |
| E-2 | Occlusion upstream (bag side) | Kinked tubing, closed clamp, or empty bag | Usually yes |
| E-3 | Air in line | Air trapped in tubing after bag change or improper priming | Usually yes |
| E-4 | Low battery | Battery charge is critically low | Charge or replace |
| E-5 | Battery depleted | Battery is completely dead | Charge or replace |
| E-6 | System error | Internal pump mechanism failure | No — call DME |
| E-7 | System error | Motor or sensor issue | No — call DME |
| E-8 | Battery failure | Battery will no longer hold a charge | Replace battery |
| E-9 | System error | Pump head or logic board issue | No — call DME |
| E-10 | Cassette error | Tubing cassette not detected or improperly loaded | Usually yes |
This table is your first diagnostic tool. If you see E-1 through E-3 or E-10, you almost certainly can fix it yourself in under two minutes. If you see E-6 through E-9, stop troubleshooting and call your durable medical equipment (DME) provider.
The internal components of the Joey pump are not user-serviceable per FDA guidelines.
Step-by-Step Diagnostic Workflow – What to Do First
Here is the exact sequence to follow when your Joey pump alarms. Do not skip steps. The order matters because later steps rely on ruling out the simpler causes first.
Step 1: Identify the Error Code or Symptom
Look at the display. Write down the error code before you touch anything. This is critical because the code disappears once you clear the alarm, and you might need to reference it later.
If there is no code but the pump is beeping, check whether the display is frozen, blank, or showing unusual characters.
What you see determines your next move:
- A specific error code (E-1 through E-10), Proceed to Step 2 or refer to the error code table above
- A blank screen, Check the power connection and battery
- A frozen display, Perform a hard reset (covered in the Pump Frozen section)
- Beeping with no display, Unplug the pump and plug it back in
- The pump runs but delivers no formula, Check for a detached tubing set or a crack in the cassette
Step 2: The Check the Tubing Branch (90% of problems)
If you see E-1, E-2, or E-3, nine times out of ten the tubing set is the culprit. The Kangaroo Joey pump uses a peristaltic mechanism that squeezes formula through a silicone pump segment. If that segment is pinched, twisted, or not seated flat, the pump cannot move fluid.
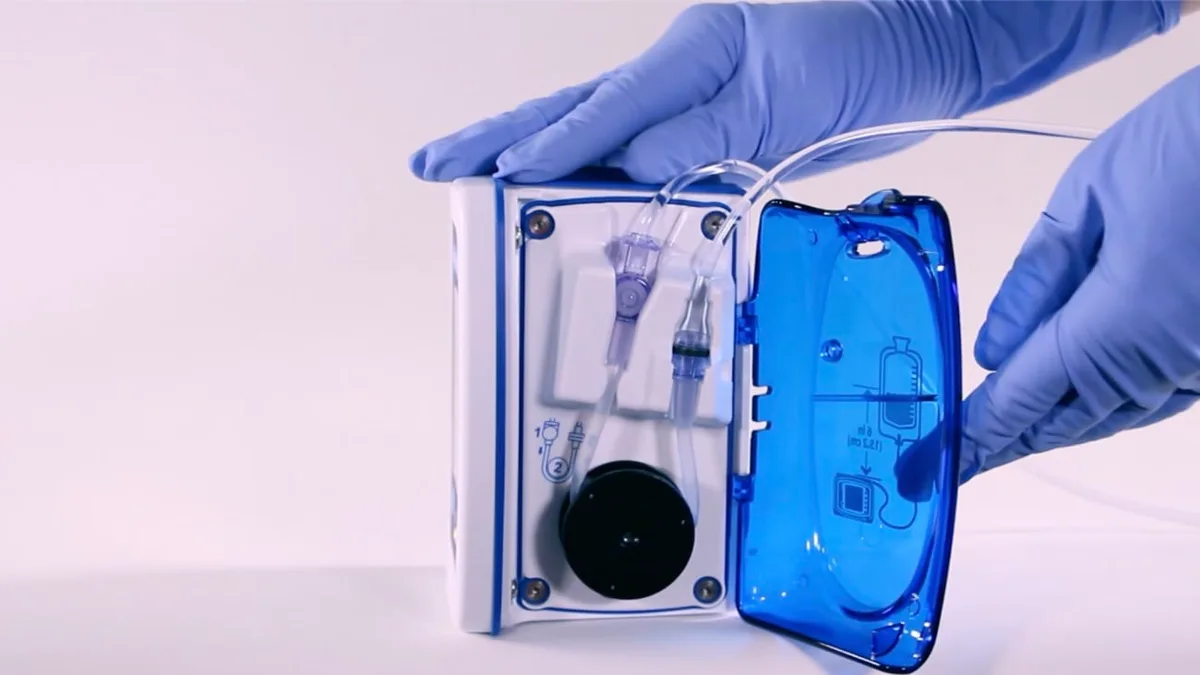
Image source: Bing (Web (fair-use with source credit))
Here is what to check in order:
Follow the tubing from the bag to the patient. Look for any kinks, bends, or pinches. Pay extra attention where the tubing passes under the pump door, around the IV pole clamp, and near the patient's clothing or bedding.
Check all clamps. The tubing set has a roller clamp and sometimes a slide clamp. Make sure both are fully open. A closed clamp is the most common cause of E-2.
Verify the bag is not empty. If the formula bag is running low, the pump may sense air or loss of upstream pressure. Hold the bag up to the light. If you see less than an inch of formula, replace the bag.
Inspect the cassette (the pump segment inside the door). Open the pump door and look at the silicone tubing segment. It should be lying flat across the metal pump fingers with no twists. If it looks crooked, remove the tubing set and reload it from scratch.
Check for formula leaks. A wet spot on the tubing or around the cassette can indicate a crack or a poor connection. If you find one, replace the tubing set immediately.
Step 3: The Check the Door and Cassette Branch
If the tubing looks fine but the pump still alarms, the cassette placement is your next suspect. The Kangaroo Joey pump door has a specific latch mechanism that must close securely for the pump to detect the cassette. If the door is even slightly ajar, the pump will show E-10 or will start feeding and immediately stop.
Open the pump door fully. Inspect the metal pump fingers (the moving parts that squeeze the tubing). They should be clean and free of debris.
Dried formula residue is a common cause of sticking pump fingers.
Remove the tubing set completely. Examine the silicone pump segment. It should be straight and free of cracks.
Reload the tubing set according to these steps:
- Slide the cassette into the door slot with the tubing exiting toward the bottom
- Press the cassette firmly until it clicks into place
- Close the door and push firmly on the latch until you hear a distinct click
- Gently tug on the tubing to confirm the cassette is held securely
A common mistake is pushing the cassette in upside down or backward. The Joey tubing set is keyed, so it should only fit one way. If you have to force it, you likely have it wrong.
Step 4: The Check the Battery and Power Branch
If the pump shows E-4, E-5, or E-8, or if the pump simply will not turn on, the battery or power supply is the issue. The Kangaroo Joey uses a rechargeable NiMH or Lithium-ion battery pack depending on the model revision. As batteries age, they lose capacity.
A battery that holds a charge for only 30 minutes instead of the standard 30 hours needs replacement.
Start with the AC adapter. Plug the pump into a wall outlet using the original power cord. If the pump turns on, the battery is the problem.
If the pump does not turn on, try a different wall outlet. If still nothing, inspect the power cord for damage. A chewed or frayed cord from the AC adapter is a known issue in homes with pets.
If the pump powers on when plugged in but dies shortly after unplugging, the battery needs replacement. Battery replacement is not a user-serviceable item on the Joey pump per FDA classification. You need to contact your DME provider to arrange a battery swap.
Attempting to open the pump case yourself voids the medical device certification and can be dangerous due to the internal lithium cells.
For the battery error codes:
- E-4, Plug the pump in and let it charge for at least four hours. The battery may have been deeply discharged
- E-5, Similar to E-4 but requires a longer charge cycle. Leave it plugged in overnight
- E-8, The battery is worn out. You need a replacement from your DME provider
Step 5: The System Error Branch (E-6, E-7, E-9)
If you see E-6, E-7, or E-9, stop troubleshooting and call your DME provider. These codes indicate a hardware failure inside the pump. The most common causes are a worn pump head (the mechanism that rotates and squeezes the tubing), a failed sensor, or a logic board issue.
There is nothing you can do at home for these errors. Do not attempt to open the pump. Do not shake it or tap it to try to get it working.
These actions can cause further damage or create a safety hazard.
When you call your DME provider, have the following information ready:
- The exact error code displayed
- The pump model number (found on the back label)
- The pump serial number
- How long you have had the pump
- Whether the pump was dropped or exposed to liquid recently
Most DME providers will send a replacement pump within 24 to 48 hours. In the meantime, you can use gravity feeding as a temporary alternative if your care team approves. Do not attempt to bypass the pump or modify the tubing set to continue feeding without the pump.
That creates a serious risk of uncontrolled flow rate, which can cause aspiration or formula intolerance.
How to Properly Load Tubing Into the Pump Door
Correct tubing loading prevents more than half of all Joey pump errors. The process takes about 30 seconds once you know the right technique.
Start with a fresh tubing set. Remove it from the packaging and uncoil it gently. Do not pull the tubing taut.
That can stretch the silicone pump segment and cause inaccurate flow rates.
Locate the cassette. It is the rigid plastic piece that snaps into the pump door. The tubing passes through it.
The cassette has a flat side and a curved side. The flat side faces the pump door hinge. The curved side faces the latch.
Open the pump door completely. It swings open to about 90 degrees. Insert the cassette into the slot at the top of the door.
The tubing should exit the bottom of the cassette and hang downward. Press the cassette in until you hear a soft click.
Close the door. Push firmly on the center of the door until you hear a loud click. That is the latch engaging.
Tug gently on the tubing near the door to verify it is held securely. If the tubing slides, the cassette is not seated correctly.
Prime the tubing. Press the prime button on the pump. The pump runs at 300 mL per hour for about 30 seconds.
Watch the tubing as it fills. Air bubbles should move toward the patient connection. Stop priming when formula reaches the end of the tubing.
Do not let formula drip out. That wastes nutrition and creates a mess.
If the pump does not recognize the cassette after loading, try these fixes:
- Remove the cassette and reinsert it. Sometimes it seats at an angle
- Check for debris on the pump fingers. Wipe them with a dry cloth
- Verify you are using the correct tubing set. The Joey pump requires Kangaroo Spiral Tubing Sets
- Try a different tubing set if available. A defective cassette is rare but possible
The Complete Guide to Clearing Occlusion Errors (E-1 and E-2)
Occlusion errors are the most common Joey pump alarms. E-1 means the blockage is on the patient side of the pump. E-2 means it is on the bag side.
The fix is the same: find the blockage and remove it.
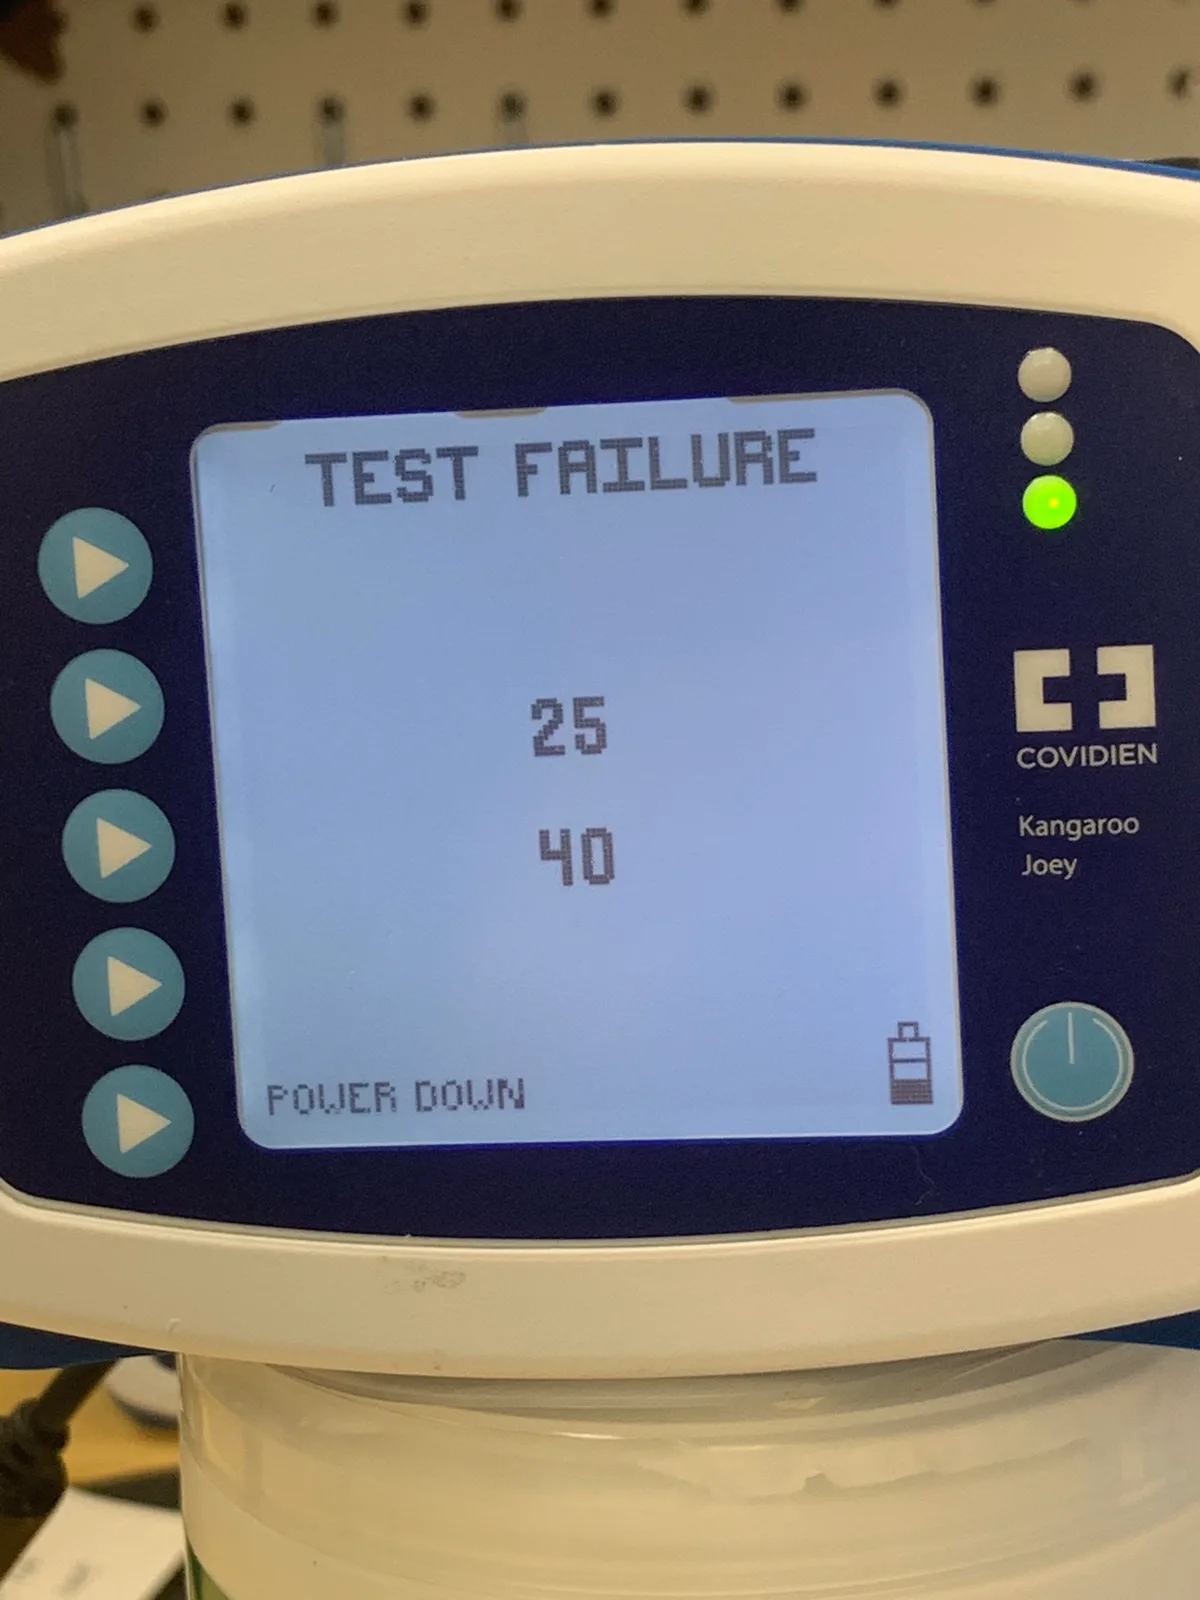
Image source: Bing (Web (fair-use with source credit))
For E-1 (Downstream Occlusion)
Start at the patient. Check the feeding tube. Is it kinked where it enters the patient's body?
Is it taped too tightly? Is the tube itself clogged? A clogged feeding tube requires flushing with warm water per your care plan.
Do not use force. That can rupture the tube.
Work backward along the tubing. Look for sharp bends. Look for spots where the tubing is pinched between the bed rail and the mattress.
Look for the patient lying on the tubing. Reposition the tubing so it has a clear path.
Check the pump door. Sometimes the cassette is loaded too tight and pinches the tubing inside the pump. Open the door and reseat the cassette.
For E-2 (Upstream Occlusion)
Start at the formula bag. Make sure the bag is not empty. If it has formula, check the bag spike.
Is it fully inserted? Is the drip chamber filled to the correct level? The drip chamber should be about half full.
Follow the tubing to the pump. The most common cause of E-2 is a closed roller clamp. Open it fully.
Also check for kinks right where the tubing enters the pump door.
After Clearing the Occlusion
Press the start button to resume feeding. If the pump alarms again within a few minutes, the occlusion was not fully cleared. Repeat the checks.
If the pump still alarms after three attempts, replace the tubing set. A damaged or stretched tubing segment can cause recurrent occlusions.
Battery Problems – When Your Pump Won't Charge or Hold Power
Battery issues are the second most common reason for Joey pump replacement calls. The pump uses a rechargeable battery pack that typically lasts two to three years with regular use. After that, capacity drops noticeably.
Signs of a failing battery include:
- The pump dies after 10 to 15 minutes on battery
- The battery indicator shows full charge but drops to empty quickly
- The pump takes longer than six hours to charge
- The pump shows E-8 even after charging overnight
If you experience any of these, try a full charge cycle first. Plug the pump in and let it charge for at least 12 hours without interruption. Do not run the pump during charging.
After 12 hours, unplug it and run the pump on battery. If it lasts less than an hour, the battery needs replacement.
Contact your DME provider for a battery replacement. They will either send a replacement pump or have you mail in the pump for service. Battery replacement typically takes three to five business days.
Some providers offer emergency replacement for critical patients.
While waiting for a replacement, keep the pump plugged into AC power whenever possible. Use it as a stationary pump until the battery is replaced.
Common Mistakes Even Nurses Make With Joey Pumps
Even experienced healthcare professionals make these errors. Here are the most common ones to watch for.
Mistake 1: Closing the Clamp Before Opening the Door
When you open the pump door, the tubing relaxes. If the roller clamp is closed, the weight of the formula bag pulls the tubing out of position. Always open the clamp before opening the door.
This keeps the tubing seated properly.
Mistake 2: Not Priming After Every Bag Change
Air in the tubing triggers E-3. Always prime after changing the formula bag, even if you are just topping off a partially full bag. A few seconds of priming prevents minutes of troubleshooting.
Mistake 3: Overlooking the Drip Chamber
The drip chamber should stay half full. If it is completely full, the pump may sense continuous flow and not alarm when it should. If it is empty, air can enter the line and trigger E-3.
Adjust the drip chamber by squeezing the bag or tilting it.
Mistake 4: Using the Wrong Tubing Set
The Joey pump only works with Kangaroo Spiral Tubing Sets. Using a different brand or an older Kangaroo model (like the 540 tubing set) will not fit correctly. Check the packaging before opening a new set.
Mistake 5: Ignoring the Pump Head
The metal pump fingers inside the door need occasional cleaning. Dried formula builds up over time and causes the fingers to stick. Wipe them with a dry cloth after each tubing change.
Do not use water or cleaning solutions inside the pump.
Pump Frozen or Unresponsive – The Hard Reset Process
A frozen display is rare but frustrating. The pump is powered on but no buttons respond. The screen shows a static image.
The pump does not beep or alarm.
Perform a hard reset. This clears the pump's temporary memory without erasing settings.
- Unplug the pump from the wall outlet
- Remove the tubing set from the pump door
- Wait 30 seconds
- Press and hold the power button for 10 seconds
- Release the power button
- Plug the pump back in
- Press the power button to turn it on
The pump should boot up normally. If the screen remains frozen after the hard reset, the logic board may be damaged. Call your DME provider for a replacement.
When to Call for Help – Problems You Cannot Fix at Home
Some problems require professional service. Call your DME provider in these situations:
- The pump displays E-6, E-7, or E-9
- The pump has been dropped and now shows erratic behavior
- The pump was exposed to liquid (water, formula, or cleaning solutions)
- The pump case is cracked or damaged
- The pump makes grinding or scraping noises during operation
- The pump shows incorrect volume readings (for example, it says it infused 500 mL but the bag is still full)
- The pump will not power on even with a known-good AC adapter and a fresh battery
When in doubt, call. It is better to have a replacement pump sent out than to risk a feeding interruption in the middle of the night.
Maintenance and Long-Term Care for Your Joey Pump
Regular maintenance extends the life of your Joey pump and reduces troubleshooting incidents.
Keep the pump clean. Wipe the exterior with a damp cloth weekly. Do not use alcohol, bleach, or abrasive cleaners.
These can damage the plastic and the screen.
Store the pump in a dry place. Avoid direct sunlight and extreme temperatures. Do not leave the pump in a hot car or near a radiator.
Charge the battery regularly. Even if you use the pump plugged in, run it on battery for a few hours each week. This keeps the battery healthy.
Replace the tubing set every time you change the formula bag. Never reuse a tubing set. Single-use sets are sterile and designed for one patient only.
Check the pump door latch periodically. If it feels loose or does not click firmly, contact your DME provider. A worn latch can cause intermittent E-10 errors.
Frequently Asked Questions
Why does my Joey pump keep beeping with no error code?
The pump may be in alarm mode but the display is frozen. Try a hard reset. If the beeping continues after reset, the speaker or logic board may be faulty.
Call your DME provider.
Can I use the Joey pump while it is charging?
Yes. The pump operates normally while plugged into AC power. The battery charges during use, though it takes longer.
How long does a Joey pump battery last on a full charge?
A new battery lasts approximately 30 hours at a low flow rate (50 mL per hour). High flow rates drain the battery faster. After two years, expect 10 to 15 hours.
What does E-10 mean on a Kangaroo Joey pump?
E-10 means the pump does not detect the tubing cassette. Open the door and reseat the cassette. Make sure it clicks into place.
If the error persists, try a different tubing set.
Can I use a Kangaroo 540 tubing set on a Joey pump?
No. The 540 and Joey use different cassette designs. The Joey pump requires Kangaroo Spiral Tubing Sets.
Using the wrong set can cause inaccurate flow and error codes.
How do I get a replacement Kangaroo Joey pump?
Contact your DME provider. They will verify the issue and ship a replacement. Keep your pump model number and serial number handy for faster service.
Decision Guide – Quick Troubleshooting Flow Summary
Use this flow chart as a quick reference when your pump alarms.
- Check the error code. Write it down.
- E-1, E-2, or E-3? Check tubing for kinks, clamps, and air. Clear the problem and restart.
- E-4 or E-5? Plug in the pump and charge. If it works plugged in, the battery is low.
- E-8? Charge overnight. If it still shows E-8, replace the battery through your DME provider.
- E-10? Open the door and reseat the cassette. Try a different tubing set.
- E-6, E-7, or E-9? Stop troubleshooting. Call your DME provider for a replacement.
- No error code but pump is beeping? Hard reset the pump.
- Pump runs but no formula flows? Check for leaks, detached tubing, or a cracked cassette.
Keep this guide near your pump. Share it with anyone who might need to troubleshoot while you are away. A few minutes of systematic checking saves hours of frustration and keeps your patient on schedule.

Similar Posts