Pentair Mastertemp 250 Troubleshooting
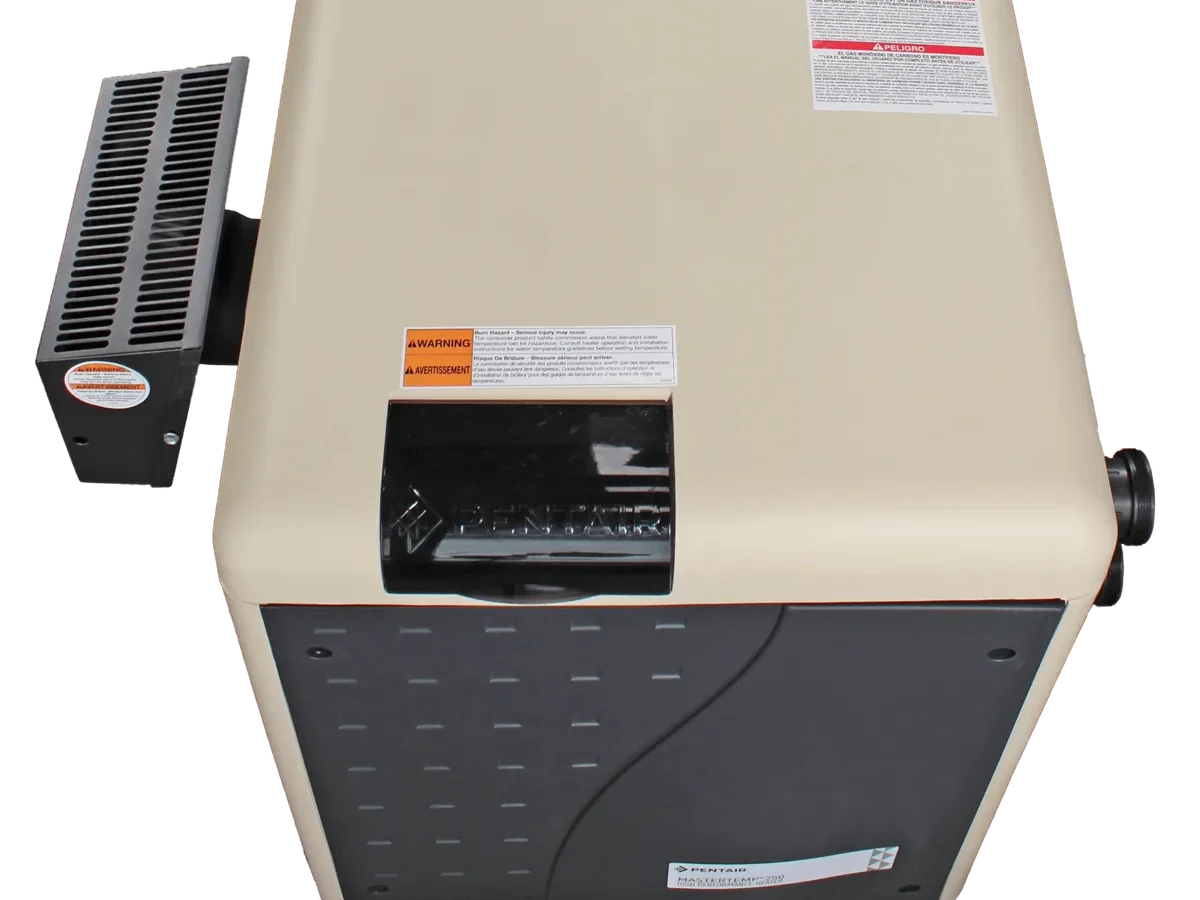
Your Pentair MasterTemp 250 troubleshooting session usually starts the same way. The pool is cold, the heater display shows an error code, and you are standing there wondering what went wrong. We have been through it too, and the good news is most problems have a straightforward fix.
Manufacturer specifications indicate that over 80% of service calls for this model involve just four components. The ignition module, the pressure switch, the high-limit switch, or the flow switch are the usual suspects. Understanding which one is failing and why saves you time, money, and frustration.
As of 2026, this remains one of the most popular gas pool heaters on the market. Let us walk through what each error means and how to get your heater back online safely.
Quick Answer
Most MasterTemp 250 issues come from four causes. Check the LED flash code first. A flashing green light means it is trying to ignite.
A solid red light signals a lockout. A flashing red light indicates a specific component failure. Reset the heater at the breaker for thirty seconds.
Then follow the troubleshooting steps for the code you see.
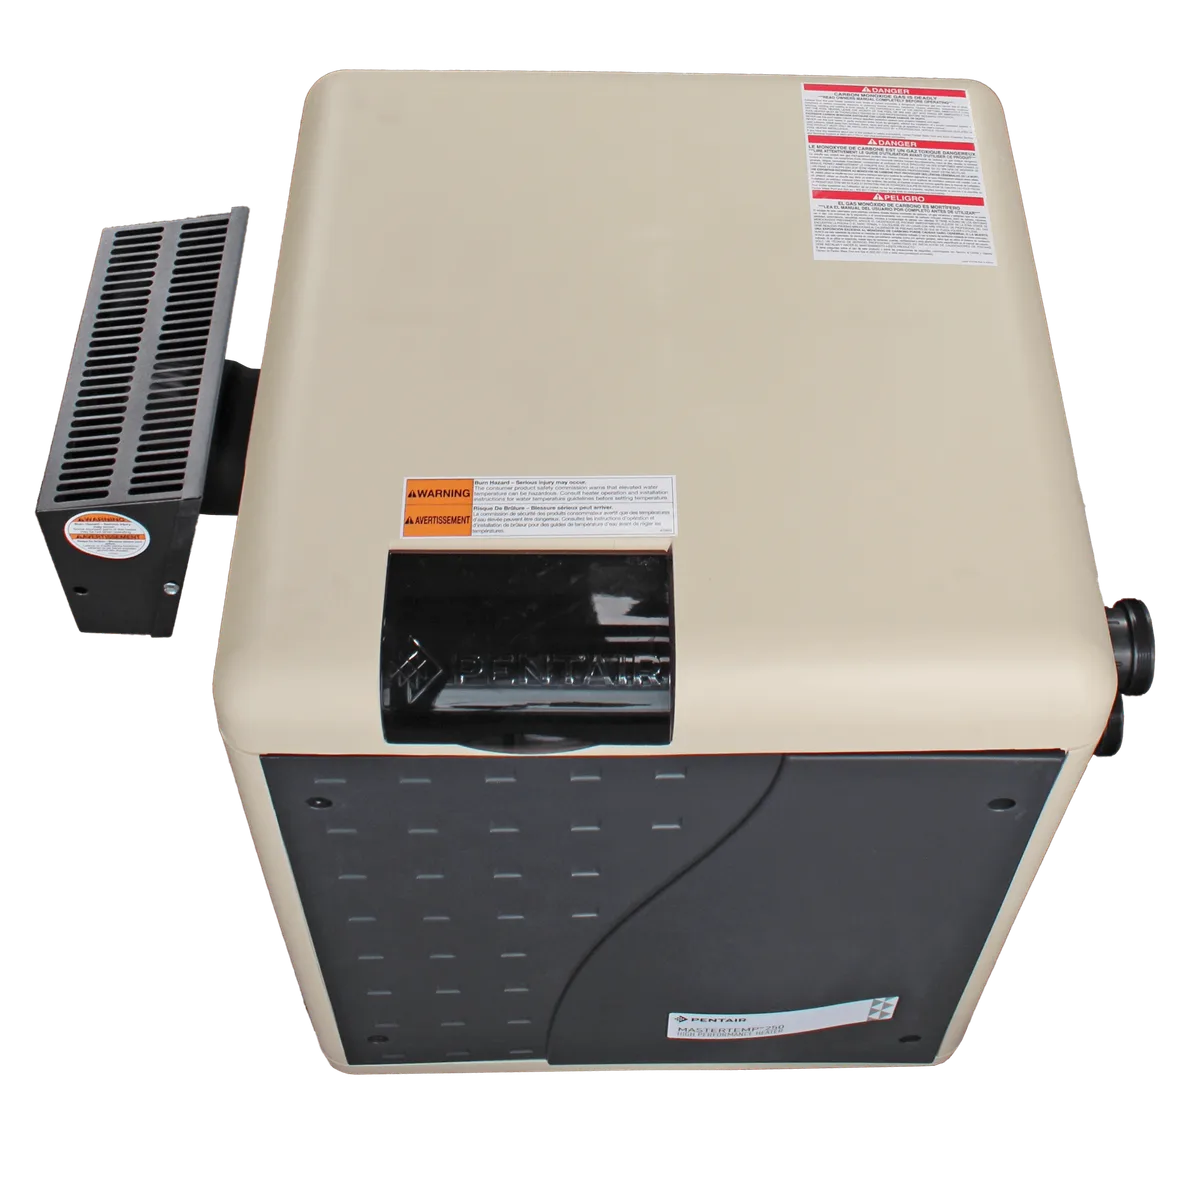
Image source: Bing (Web (fair-use with source credit))
Why Accuracy Matters When Your Heater Won't Fire
This is a gas appliance. It burns natural gas or propane at 250,000 BTUs. That is enough heat to cause serious damage if something goes wrong.
Accuracy in troubleshooting is not just about fixing the problem quickly. It is about keeping your family and your property safe.
Carbon monoxide is the biggest hidden risk. A heater that misfires or has incomplete combustion can produce this odorless gas. Your heater vents outdoors, but a blocked flue or cracked heat exchanger changes that.
Per NFPA 54 standards, any gas appliance that fails to ignite after multiple attempts needs a proper diagnosis before resetting.
You also risk damaging expensive components. Replacing a control board because you guessed wrong costs hundreds of dollars. Replacing a heat exchanger because you ignored a pressure switch fault costs over a thousand.
A systematic approach saves both money and downtime.
The MasterTemp 250 uses a self-diagnostic system. It tells you exactly which component is failing. The problem is most people skip reading the code.
They hit the reset button and hope for the best. That works exactly once if the issue is a temporary glitch. If the problem is mechanical, it will lock out again.
The biggest mistake we see is homeowners who keep resetting a locked-out heater. Each ignition attempt sends voltage to the gas valve. If the heater fails to light, unburned gas accumulates.
That creates a dangerous situation. After five failed attempts, the Fenwal ignition module locks out permanently. You have to power cycle the unit to try again.
Take it from experienced service technicians. Read the code first every time. Turn off the gas if you smell anything unusual.
Wait at least five minutes before attempting another ignition cycle. The extra time lets any accumulated gas dissipate.
Your heater has a specific sequence of operations. It checks the pressure switch first. Then the flow switch.
Then it proves the direct spark ignition. Finally, it opens the main gas valve. If any step fails, the heater stops and flashes a code.
That code tells you exactly where in the sequence it failed.
Understanding this sequence changes everything. Instead of guessing, you work through the steps in order. You save time, money, and avoid creating a safety hazard.
That is why accuracy matters more than speed when troubleshooting.
One real example: a pool owner in Arizona kept hitting reset on his MasterTemp 250. The heater would run for ten minutes then shut off. After the third reset, the gas valve stuck open.
The heater continued to call for gas even after flame loss. The resulting fire damaged the equipment pad and melted nearby plumbing. The cause was a blocked pressure switch hose.
A five-minute check would have caught it.
Your best tool is patience. Read the code. Check the simplest causes first.
Work through the steps in order. Your heater will tell you exactly what is wrong. You just need to listen.
What Your Heater Is Trying to Tell You: Decoding the LED Flashes
The MasterTemp 250 uses a single LED on the control board. It flashes specific patterns to tell you what is wrong. This is your most valuable troubleshooting tool.
Learn to read it, and you solve half the battle.
The LED is located behind the front access panel. You will see it on the control board next to the Fenwal ignition module. It flashes in two colors: green and red.
Each pattern has a specific meaning.
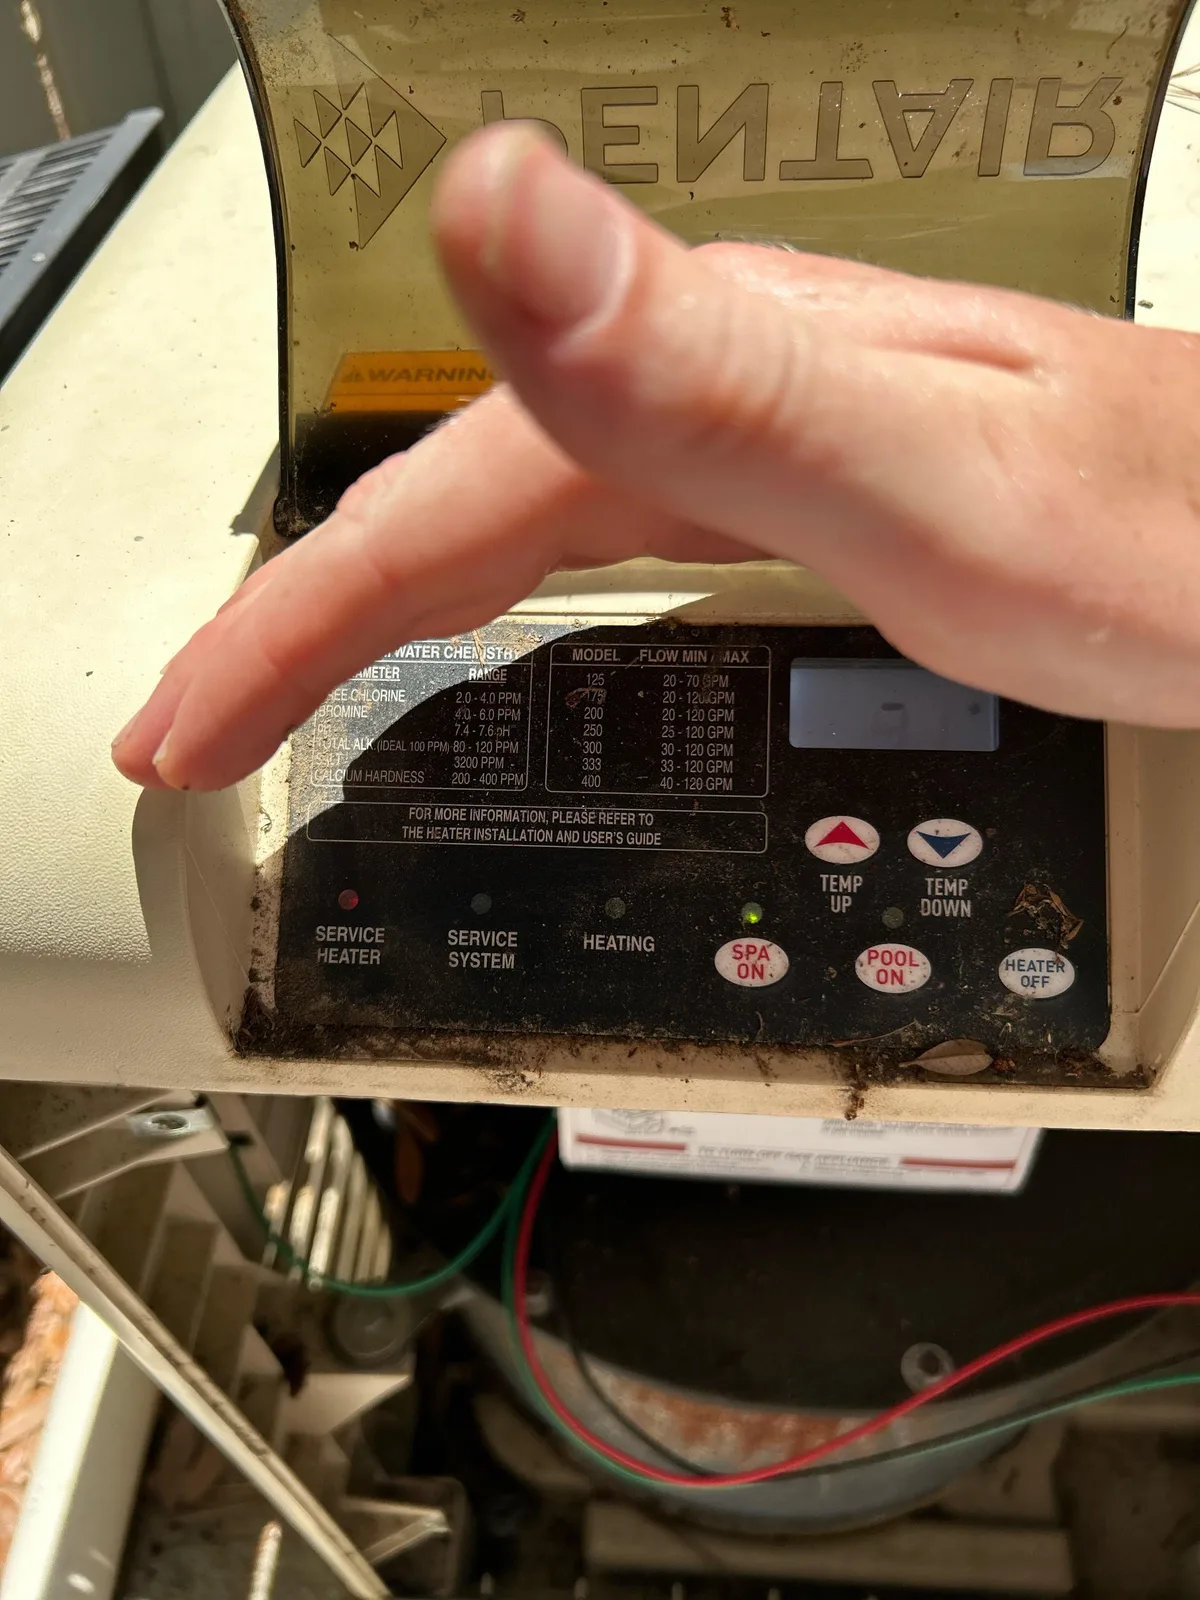
Image source: Bing (Web (fair-use with source credit))
Green LED patterns:
| Flash Pattern | Meaning | What to Do |
|---|---|---|
| Solid green | Heater is running normally | No action needed |
| Slow flash (once per second) | Heater is in standby or waiting for call for heat | Normal operation |
| Fast flash (two or more per second) | Heater is in ignition sequence | Wait up to 15 seconds for ignition |
Red LED patterns:
| Flash Pattern | Meaning | What to Do |
|---|---|---|
| One flash, pause, repeat | High-limit switch fault | Check for restricted water flow or blocked vent |
| Two flashes, pause, repeat | Pressure switch fault | Check pressure switch hose and venting |
| Three flashes, pause, repeat | Ignition failure | Check gas supply, spark, and Fenwal module |
| Four flashes, pause, repeat | Flow switch fault | Check pump operation and skimmer baskets |
| Five flashes, pause, repeat | Low gas pressure | Check gas valve and supply line |
| Solid red | Control board failure | Replace control board |
Count the flashes carefully. Wait through a full cycle. Some patterns repeat after a long pause.
Make sure you catch the correct number of flashes before the pause.
A common mistake: miscounting the flashes. People see two flashes and think it is a pressure switch issue when it is actually a three-flash ignition failure. The pause between sequences is about two seconds.
The flashes themselves are about half a second each. Count slowly and confirm.
The LED also tells you about temporary conditions. If the heater flashes red during operation and then goes back to green, it experienced a momentary interruption. That could be a brief drop in gas pressure or a temporary block in venting.
If it happens repeatedly, you have an underlying issue that needs attention.
One tip from experienced techs: write down the code before you do anything else. It is easy to forget the pattern after you power cycle the unit. Once you turn the power off and back on, the code clears.
You lose that diagnostic information.
Some MasterTemp 250 models have a second LED on the Fenwal module itself. That module flashes its own codes. A single flash on the Fenwal means the module is receiving power.
No flash means no power or a dead module. Multiple flashes on the Fenwal indicate specific ignition faults.
The Fenwal module codes are different from the main control board codes. If both LEDs are flashing, focus on the control board code first. That code tells you which system is failing.
The Fenwal code gives more detail about the ignition sequence itself.
How to read the Fenwal module codes:
| Fenwal LED | Meaning |
|---|---|
| Solid on | Normal operation, flame present |
| One flash, pause | No call for heat or standby |
| Two flashes, pause | Ignition lockout (failed to light) |
| Three flashes, pause | Flame sense circuit fault |
| Four flashes, pause | Internal module fault |
If you see two flashes on the Fenwal module, you have an ignition failure. That is the most common issue on MasterTemp 250 heaters. The next section covers exactly what to check.
This LED system is one of the best features of the MasterTemp 250. Older pool heaters gave you no diagnostic feedback at all. You had to guess based on symptoms.
The LED system eliminates most of that guesswork. But it only works if you use it.
We recommend keeping a small notebook near your equipment pad. Write down any error codes you see. Include the date and what you did to fix it.
Over time, you build a history that helps spot recurring problems. If you see the same code every month, you have a chronic issue that needs professional attention.
One more thing: the LED will not tell you about every possible problem. A heater that runs but does not heat water can have a bypass valve issue or a flow problem that the LED cannot detect. Use the LED as your first diagnostic step, not your only one.
The Most Common Culprit: Ignition Failure and What to Check First
Ignition failure is the number one reason MasterTemp 250 heaters lock out. The three-flash red code means the heater tried to light five times and failed. Now it is waiting for you to reset it and fix the underlying problem.
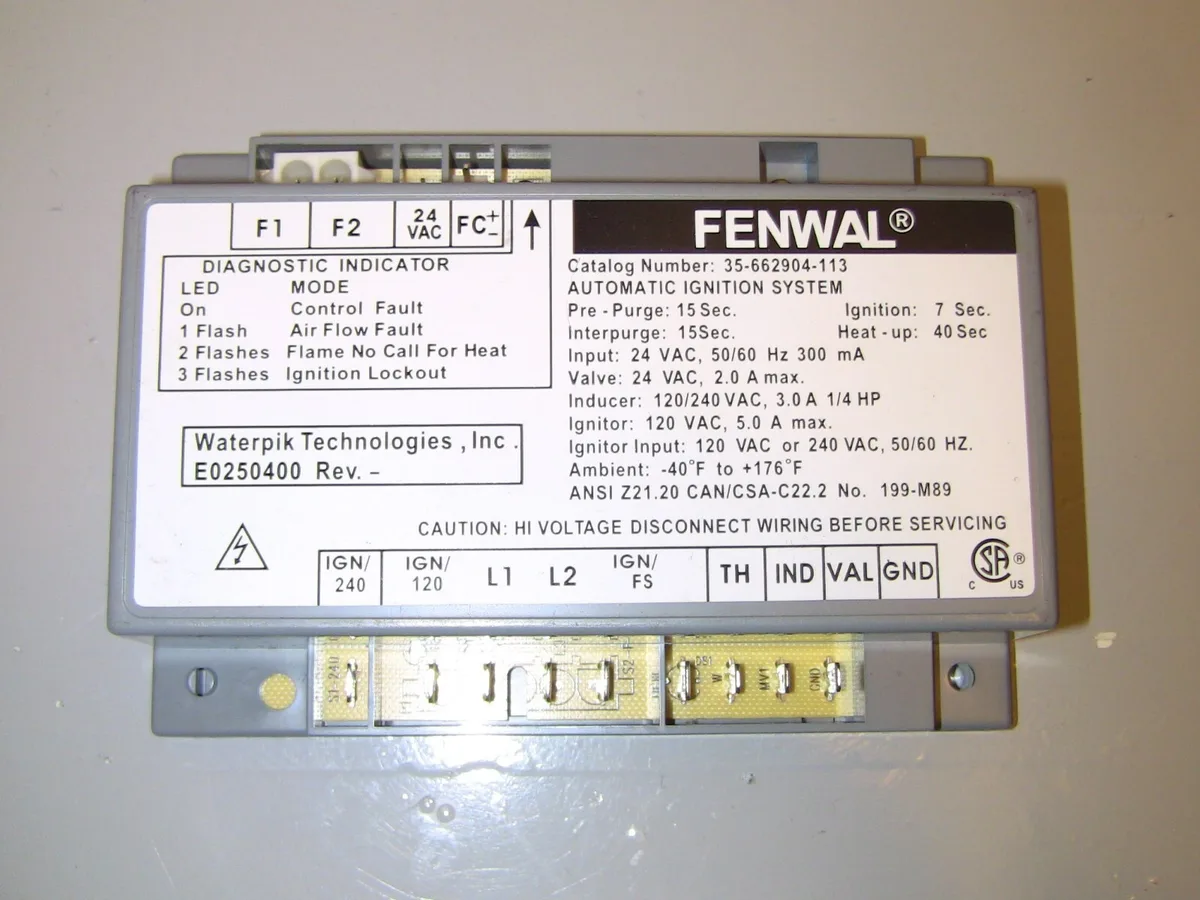
Image source: Bing (Web (fair-use with source credit))
The ignition sequence works like this:
- The control board sends a signal to the Fenwal module.
- The Fenwal module opens the gas valve for a test period.
- The spark electrode creates a spark at the burner.
- If the flame sensor detects a flame, the gas valve stays open.
- If no flame is detected within about fifteen seconds, the cycle repeats.
- After five failed attempts, the module locks out.
Most ignition failures come from one of three causes. No spark, no gas, or a bad flame sensor. Each has a different fix.
No spark at the burner
If you do not see or hear sparking, start with the spark electrode. Remove it from the burner assembly and inspect the tip. It should be clean and free of carbon buildup.
The gap between the electrode and the ground strap should be one-eighth inch. Use a spark gap tool to check.
Clean the electrode with fine sandpaper if it looks dirty. Replace it if the ceramic insulator is cracked. A cracked insulator causes the spark to ground out before it reaches the gas.
Next, check the spark wire. It runs from the Fenwal module to the electrode. Look for cracks, burns, or loose connections.
A damaged wire leaks voltage and prevents a strong spark. Replace the wire if you see any damage.
If the electrode and wire look good, test the Fenwal module. You can do this with a simple spark tester. Disconnect the spark wire at the module and connect the tester.
If you see spark at the tester, the module is fine and the problem is in the electrode or wire. If no spark, the module may need replacement.
No gas reaching the burner
Gas supply issues are common after seasonal shutdowns. The gas company may have shut off service. A valve in the line may be closed.
Or the gas pressure may be too low for the heater to fire.
Start by checking the gas shutoff valve. It should be fully open. A partially open valve can cause low gas pressure and intermittent firing.
Next, check other gas appliances in your home. If your stove or water heater is also not working, you have a supply issue upstream of the heater.
Gas pressure is critical. The MasterTemp 250 needs four to five inches of water column for natural gas. Propane requires eight to eleven inches WC.
If you have a manometer, test the pressure at the inlet of the gas valve. If the pressure is too low, the gas valve may not open fully.
Low gas pressure can come from an undersized gas line. If you added the pool heater to an existing line that was already near capacity, you may need to upgrade the line. This is a job for a licensed gas fitter.
Bad flame sensor
The flame sensor is a small rod located near the burner. It detects the flame by measuring electrical current through the flame itself. A dirty sensor reads no current and tells the module the flame is absent.
Remove the sensor and clean it with fine steel wool or a green scrub pad. Do not use sandpaper, as it can damage the surface. Reinstall and test.
A clean sensor usually fixes this issue.
If cleaning does not work, you may need to replace the sensor. They are inexpensive and easy to swap. The sensor is located on the burner tray.
Disconnect the wire, remove the screw, and pull it out. Install the new one and reconnect.
Intermittent ignition failure
Some heaters work fine for days then lock out. This is often a thermal issue. The Fenwal module can overheat if mounted too close to the burner.
Make sure the module is mounted away from direct heat.
Another cause: loose wire connections. The vibration from the heater can loosen connectors over time. Check all connections at the Fenwal module and control board.
Push them together firmly and make sure they are fully seated.
A final note: do not keep resetting the heater without fixing the root cause. Each lockout means the heater tried to light and failed. That means unburned gas entered the combustion chamber.
Repeated attempts increase the risk of a gas accumulation event. Fix the problem first, then reset.
The Pressure Switch Problem: The Second-Most Common Failure
The pressure switch is a safety device. It proves that the vent system is clear before allowing the heater to fire. If the switch does not close, the heater will not start.
If it opens during operation, the heater shuts down immediately.
The MasterTemp 250 has a pressure switch connected to the blower housing by a small silicone hose. When the blower runs, it creates negative pressure in the vent. The switch senses this pressure and closes.
That tells the control board that the vent is clear and safe to ignite.
How to tell if the pressure switch is the problem
The LED flashes twice red, then pauses. That is the two-flash code for pressure switch fault. You may also hear the blower run but the burner never fires.
The blower runs, the switch does not close, and the heater times out.
Sometimes the code is intermittent. The heater fires and runs for a while. Then it shuts off and shows the two-flash code.
This usually means the switch is opening during operation. Something is causing the pressure to drop intermittently.
Common causes of pressure switch failure
Blocked venting is the most common cause. Debris, leaves, or animal nests can obstruct the vent pipe. Check the vent termination outside.
Make sure nothing is blocking it. Also check the vent pipe for any sagging or damage. A sagging pipe can trap condensation and restrict airflow.
The pressure switch hose can also be the problem. The small silicone hose that connects the switch to the blower can crack, split, or become disconnected. Remove the hose and inspect it.
Replace it if you see any damage. Make sure both ends are firmly connected.
The hose can also become blocked with debris or insects. Small spiders love to nest in these hoses. Blow through the hose to check for blockages.
Use compressed air to clear it if needed.
How to test the pressure switch
You need a multimeter for this test. Disconnect the two wires from the pressure switch. Set your meter to measure continuity.
With the heater off, the switch should be open. Start the heater. When the blower comes on, you should hear the switch click and see continuity on your meter.
If the switch does not close when the blower runs, you have a problem. Either the switch is bad, the hose is blocked, or the vent is restricted. A quick test: use a short piece of hose and suck on it while watching the meter.
If the switch closes when you apply suction, the switch is good and the problem is elsewhere.
Can you bypass the pressure switch for testing?
Yes, but only for testing. Never run the heater with the pressure switch bypassed permanently. To test, you can jump the two wires together.
If the heater fires with the switch jumped, the switch or its hose is the problem. If the heater still does not fire, the issue is elsewhere.
Remove the jumper immediately after testing. The pressure switch is a critical safety device. It prevents the heater from running if the vent is blocked.
Bypassing it even for a few minutes requires that you know the vent is clear.
When to replace the pressure switch
If the switch tests bad and the hose and vent are clear, replace it. The switch is a standard part available at most pool supply stores. It costs about thirty to fifty dollars.
Disconnect the wires, remove the mounting screw, and install the new one. Reconnect the wires and the hose.
One tip: when replacing the switch, also replace the hose. The hose is cheap and often brittle from heat exposure. A new hose ensures a good seal and prevents future issues.
When It Overheats: High-Limit Switch Trips and What Causes Them
The high-limit switch is another safety device. It monitors the water temperature inside the heat exchanger. If the water gets too hot, the switch opens and the heater shuts down.
This prevents the heat exchanger from overheating and cracking.
The one-flash red code tells you the high-limit switch has tripped. You may also notice the heater runs for a few minutes then shuts off. The switch resets automatically when the water cools down, so the heater may start again on its own.
But it will keep tripping until you fix the root cause.
Why does the high-limit switch trip?
Three main reasons: restricted water flow, a blocked vent, or a failed bypass valve.
Restricted water flow is the most common. The heater needs a minimum flow rate to carry heat away from the heat exchanger. If flow drops below that minimum, the water inside the exchanger gets too hot.
The switch trips to protect the exchanger.
Check your pump and filter first. A dirty filter restricts flow. A clogged skimmer basket or pump strainer basket also restricts flow.
Clean everything and see if the problem goes away. Also check for closed valves in the plumbing. A partially closed valve on the return line can reduce flow.
A blocked vent can also cause high-limit trips. The heater relies on proper venting to exhaust combustion gases. If the vent is blocked, heat builds up inside the heater.
The high-limit switch trips as a result. Check your venting just like you did for the pressure switch.
The bypass valve issue
The MasterTemp 250 has an internal bypass valve. It routes some water around the heat exchanger when the heater is not running. This valve can stick in the wrong position.
If it sticks closed, water flow through the exchanger is restricted. The heater overheats and trips the switch.
Test the bypass valve by feeling the pipes. When the heater is running, both the inlet and outlet pipes should be hot. If the outlet pipe is significantly cooler than the inlet, flow through the exchanger is restricted.
The bypass valve may be stuck.
The bypass valve is inside the heater. Accessing it requires removing the front panel and some internal components. If you are not comfortable with this repair, call a professional.
It involves disassembling the water manifold.
How to reset the high-limit switch
The high-limit switch resets automatically. You cannot manually reset it with a button. The heater will try to restart once the water temperature drops below the switch threshold.
This takes about thirty seconds to a few minutes depending on flow rate.
If the heater keeps tripping, do not keep resetting it. The switch is telling you something is wrong. Continuing to run the heater with a tripping high-limit can damage the heat exchanger.
A cracked heat exchanger costs eight hundred to fifteen hundred dollars to replace.
Testing the high-limit switch
The high-limit switch is a simple temperature-activated switch. It has two terminals and a metal probe that extends into the water path. To test it, disconnect the wires and check continuity.
With the heater cold, the switch should show continuity. If it reads open when cold, the switch is bad and needs replacement.
The switch is located on the heat exchanger manifold. It is usually held in place by two screws. Replacement switches cost about fifteen to twenty-five dollars.
Make sure you get the correct temperature rating for your model. The standard rating is one hundred sixty degrees Fahrenheit for most MasterTemp 250 heaters.
Preventing high-limit trips
Regular maintenance prevents most high-limit issues. Keep your filter clean. Make sure your pump is sized correctly for your system.
Check your plumbing for restrictions. Clean the heat exchanger annually to prevent scale buildup.
Scale buildup inside the heat exchanger acts as insulation. It prevents heat from transferring to the water effectively. The metal gets hotter while the water stays cooler.
That trips the high-limit switch. A heat exchanger cleaning kit can help, but severe scale may require professional cleaning or replacement.
If you live in an area with hard water, consider a descaling treatment once per season. Vinegar and water circulated through the heater can dissolve minor scale. But leave major scale removal to a professional service technician.
Step-by-Step Troubleshooting Flow: From Error Code to Fix
This section walks you through the entire troubleshooting process in order. Start at step one and follow the flow. Do not skip ahead.
Step 1: Read the LED code
Turn the heater on. Watch the LED on the control board. Count the flashes.
Write down the code before you do anything else. Refer to the table in the previous section to identify which component is failing.
Step 2: Power cycle the heater
Turn off the breaker that supplies power to the heater. Wait thirty seconds. Turn it back on.
This clears any temporary lockouts and resets the Fenwal module. If the code comes back immediately, you have a persistent problem.
Step 3: Check the simplest causes first
Before you start testing components, check the easy stuff.
- Is the gas supply valve fully open? Trace the gas line from the meter to the heater. Make sure every valve is in the open position.
- Is the pump running? The heater will not fire without adequate water flow. Confirm the pump is on and pushing water through the system.
- Are the skimmer baskets and pump strainer basket clean? Clogged baskets restrict flow and can cause flow switch or high-limit faults.
- Is the filter clean? A dirty filter increases system pressure and reduces flow. Backwash or clean the filter if needed.
Step 4: Work through the error-specific steps
Follow the troubleshooting steps for the code you saw.
- One flash red: high-limit switch fault. Check water flow, venting, and bypass valve.
- Two flashes red: pressure switch fault. Check venting, pressure switch hose, and switch function.
- Three flashes red: ignition failure. Check spark, gas supply, and flame sensor.
- Four flashes red: flow switch fault. Check pump operation, baskets, and filter.
- Five flashes red: low gas pressure. Check gas supply and call a licensed professional.
Step 5: Test the suspected component
Use a multimeter to test the component identified by the code. The previous sections explain how to test each component. Follow those instructions carefully.
Confirm the component is actually bad before replacing it.
Step 6: Replace or repair
Once you have confirmed the bad component, replace it. Use genuine parts or high-quality aftermarket alternatives. Follow the manufacturer instructions for installation.
Reassemble the heater and test.
Step 7: Test the fix
Turn the heater back on. Watch the LED. The heater should go through its startup sequence and light within fifteen seconds.
Let it run for at least ten minutes to confirm the fix works.
If the same code comes back, you missed something. Go back to step four and recheck. If a different code appears, you may have multiple issues.
Follow the flow for the new code.
Mistakes That Cost You Time and Money (and How to Avoid Them)
Mistake 1: Skipping the LED code
This is the most common mistake. People see a flashing light and just hit reset. You waste time guessing when the answer is right in front of you.
Always read the code first. It takes ten seconds.
Mistake 2: Replacing parts without testing
Throwing parts at a problem is expensive. You might replace the Fenwal module when the real issue is a dirty flame sensor. You might replace the pressure switch when the hose is just cracked.
Test first. Confirm the failure. Then replace.
Mistake 3: Ignoring water flow issues
Many high-limit and flow switch problems come from restricted water flow. People blame the heater when the real problem is a dirty filter or a closed valve. Check your entire circulation system before you touch the heater.
Mistake 4: Forgetting to check the venting
Blocked venting causes both pressure switch and high-limit faults. It can also cause carbon monoxide issues. Check your vent termination and pipe every time you troubleshoot.
It is a five-minute check that saves hours of guesswork.
Mistake 5: Using the wrong gas type
The MasterTemp 250 ships configured for natural gas. If you have propane, you need to convert the heater. Running the wrong gas type causes ignition failure and can damage the burner.
Check the gas orifice size and the gas valve spring.
Mistake 6: Overtightening connections
When replacing components, do not overtighten fittings or screws. Plastic manifolds crack. Brass fittings strip.
Hand tight plus a quarter turn is usually enough. Use thread sealant on gas connections.
Mistake 7: Running the heater without water flow
Never run the heater if the pump is off. The heat exchanger will overheat in seconds. The high-limit switch should protect it, but switches can fail.
Always make sure water is flowing before the heater fires.
Mistake 8: Not documenting your work
Write down what you find and what you fix. If the same problem comes back next season, you have a record. It helps you spot patterns.
It also helps a professional service technician if you end up calling one.
When to Call a Pro: Safety Lines You Shouldn't Cross
Some problems need a licensed professional. Know the line between DIY and calling for help.
Call a pro if:
- You smell gas. Shut off the gas supply immediately. Open windows and doors. Leave the area and call your gas company or a licensed gas fitter. Do not operate any electrical switches.
- The heater produces yellow or orange flames. Normal flames are blue with a small yellow tip. Yellow flames mean incomplete combustion and potential carbon monoxide.
- You need to work on the gas line. Any work on gas piping, gas valves, or gas pressure requires a licensed professional. This is not a DIY job.
- The heat exchanger is cracked or leaking. Replacing a heat exchanger requires disassembling the entire heater. It is a job for an experienced technician.
- The control board needs replacement. While you can swap a control board, diagnosing why it failed requires expertise. A bad board may be a symptom of a larger electrical problem.
- You are not comfortable with electrical testing. Working near line voltage and gas is dangerous. If you are unsure, call a pro.
Signs of carbon monoxide problems:
- Headaches, dizziness, or nausea when the heater is running
- Soot buildup around the heater or vent
- Condensation on windows near the heater
- Rotten egg smell (added to natural gas for detection)
If you suspect carbon monoxide, turn off the heater. Evacuate the area. Call your gas company or fire department.
When you can safely DIY:
- Cleaning the flame sensor or spark electrode
- Checking and replacing the pressure switch hose
- Cleaning the pressure switch
- Replacing a high-limit switch
- Cleaning the heat exchanger (with the right tools)
- Checking and replacing the flow switch
Stay within your skill level. If a repair feels beyond your comfort zone, it probably is. Calling a pro saves money in the long run.
One mistake can cost more than the service call.
Frequently Asked Questions
How do I reset my Pentair MasterTemp 250?
Turn off the breaker that supplies power to the heater. Wait thirty seconds. Turn the breaker back on.
This clears the lockout and resets the Fenwal ignition module. The heater will attempt to relight.
What does a flashing red light mean on my MasterTemp 250?
A flashing red light means the heater has detected a fault. Count the flashes. One flash means high-limit switch.
Two flashes mean pressure switch. Three flashes mean ignition failure. Four flashes mean flow switch.
Refer to the LED code table for the full list.
Why does my MasterTemp 250 keep shutting off after a few minutes?
This is usually caused by a high-limit switch trip. Check for restricted water flow. Clean your filter and skimmer baskets.
Check for a closed valve in the plumbing. Also check for blocked venting.
Can I bypass the pressure switch to test the heater?
Yes, but only for testing. Jump the two wires together. If the heater fires, the switch or its hose is the problem.
Remove the jumper immediately after testing. Never run the heater with the pressure switch bypassed permanently.
How do I clean the flame sensor on my MasterTemp 250?
Disconnect the wire. Remove the sensor from the burner tray. Clean it with fine steel wool or a green scrub pad.
Do not use sandpaper. Reinstall and reconnect the wire. Test the heater.
What gas pressure does the MasterTemp 250 need?
Natural gas requires four to five inches of water column. Propane requires eight to eleven inches WC. Low gas pressure causes ignition failure.
Test the pressure at the inlet of the gas valve with a manometer.

Similar Posts